Sending Email Messages
Sending Email Messages with the OneSignal Email Composer.
This page explains how to send emails from the OneSignal Dashboard. Other options for sending messages include:
| Option | Details |
|---|---|
| API Create Notification | Use our server-side API to send push, email and sms. We also provide Server Side SDK's for faster implementation. |
| Journeys | Orchestrate push notifications, emails, in-app messages, and SMS through a visual builder with no code required. |
| Automated Messages | Send push notifications and emails automatically when users enter segments. |
| Integrately | Send push notifications, email or SMS using Integrately or push notifications using Zapier. |
Sending Email Notifications from Dashboard
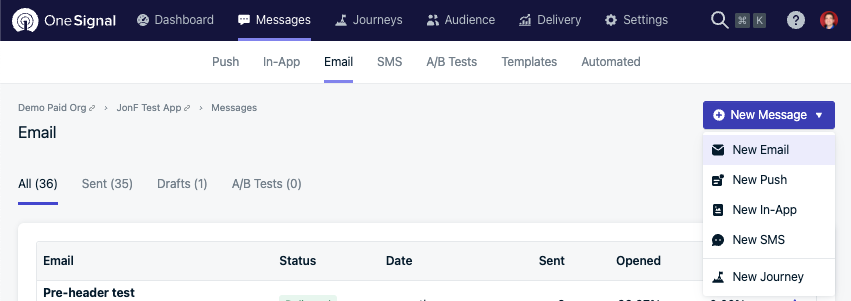
Navigate to Messages > New Message > New Email

Image, showing where button is to create a new email
Optional: Input a Message Name for internal recognition of the message.
Step 1. Audience
The Segments of devices in which you wish to include and exclude from receiving this message.

Image shows being able to select a segment for your users
Segments can be Edited
Any selected segments can be edited and new segments can be created on the fly.
Step 2. Sender
Set the "From Name" and "From Email" to be displayed in your audience's mailbox. Additionally, configure the Reply-To address for customer replies. Default settings for name, email address, and Reply-To can be adjusted in Settings > Email Configuration. However, you can override these settings for individual emails here.
You can also use personalization in the Reply-To email using Liquid syntax based on Tags set on the email subscription.

Image shows setting up sender name, sender email and dynamic reply-to email
Step 3. Message
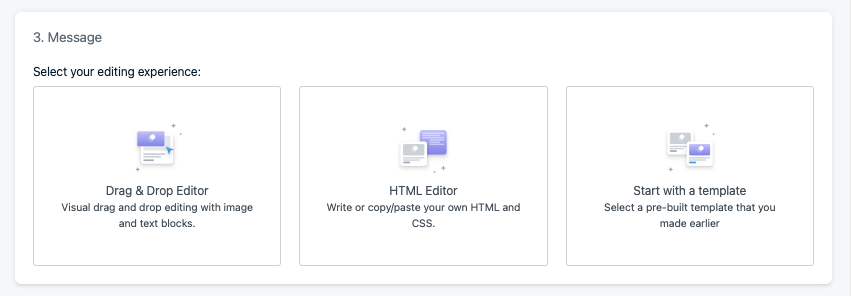
Select how you want to compose your message.

| Option | Detail |
|---|---|
| Drag & Drop Editor | OneSignal's Email Drag and Drop Builder lets you visually design and build your emails just as they'll be seen in your users' inbox. |
| HTML Editor | The HTML editor allows you to create highly stylized and branded emails, allowing you to control every aspect of your email design for both mobile and desktop. |
| Start with a template | Pick up where you left off. Templates are reusable designs for push notifications, emails, and SMS. |

| Field | Details |
|---|---|
| Subject | The email's subject displayed in the inbox. |
| Preheader Text | This preheader will show in the inbox next to the subject. |
| Track link clicks | Enabled by default. The URLs used in emails are changed to support link tracking. It is how the ESP communicates back to OneSignal that the link was clicked so it can be tracked. More details in Email Links and Click Tracking. |
Test Messages
At any time you can test your emails by scrolling to the bottom and clicking Send Test Message. All test messages are sent immediately, regardless of what is set up in Schedule.
Tag Substitution Limitation
Tag Substitution will not work with Send Test Message. You will need to setup a segment to send to yourself to test or use the API.
Step 4. Delivery Schedule
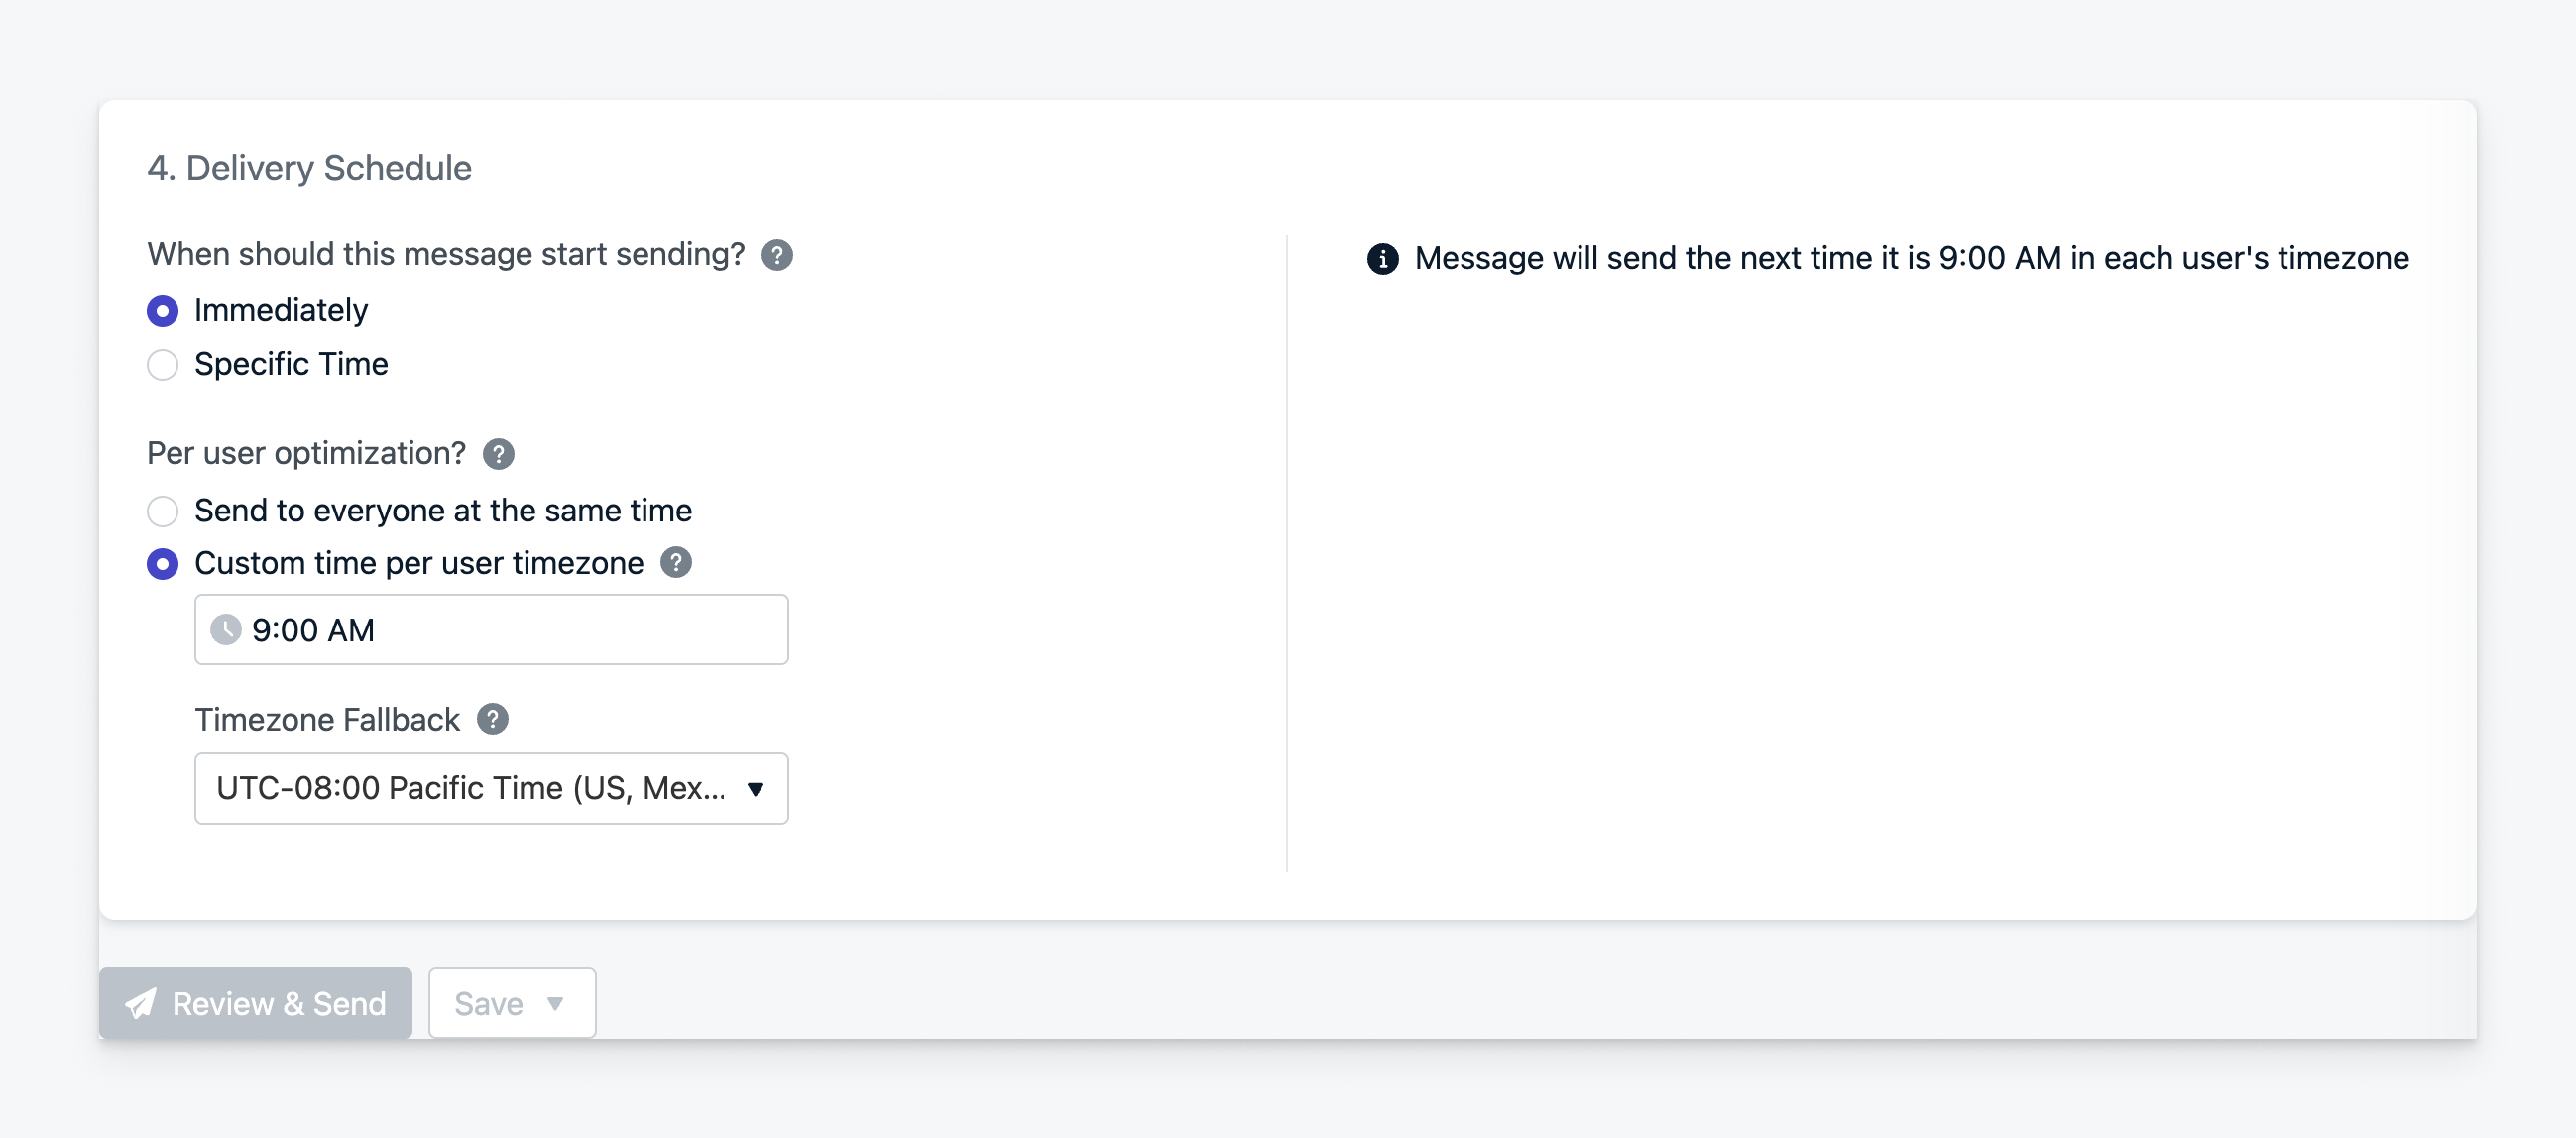
Emails can be sent immediately or scheduled up to 30 days in advance.
Emails can also be set to be sent immediately at a custom time in a user's timezone (i.e., your audience would receive the email at 9AM despite being in different timezones).
If an email is set to start sending after a specific time in a user's timezone, the messages will only start sending after the specified time. (e.g. if you set a message to start sending on Dec 15 at 5PM, at 6PM in each user's timezone, the message will not start sending until December 15 at 5:00 PM and will send when it has reached 6:00PM in the users' timezone.)

Image shows the ability to determine when emails start sending and when users will receive their emails.
When ready, click Review & Send to review your message and Send Message.
If you need more time or help, you can Save as Draft to come back to it later. A Draft is not reusable like a Template.
Done!
You have successfully created and sent an email using OneSignal!
Updated about 1 month ago
