Moving, scaling and rotating with Matrix
In this part, we'll learn how to move, rotate and scale using Matrix and how to manipulate geometry primitives.
First, we'll learn how to manipulate geometry primitives as it's very important for pretty much everything. If you're not familiar with the mathematical notion of a vector, I strongly suggest you study that first.
Every solid game library comes with a set of types that represent geometry primitives, such as vectors, rectangles, and so on. Pixel is no exception. Pixel comes with 3 major geometry primitives:
- Vector, pixel.Vec. Positions, movements (translations), velocities, accelerations, and so on.
- Rectangle, pixel.Rect. Mainly picture frames (portions for sprites) and bounds.
- Matrix, pixel.Matrix. All kinds of linear transformations: movements, rotations, scaling.
Each one of these primitives is implemented to be very flexible, as well as easy to use. Let's take a look at each one of them!
Pixel being a 2D game library, vector in Pixel is a 2D vector with two coordinates: X and Y. It's defined as a simple struct. It used to be defined as complex128 for easy addition and subtraction, but that made all other operations more complicated, so it was dropped and replaced with this struct.
type Vec struct {
	X, Y float64
}
To create a vector, use pixel.V constructor.
u := pixel.V(2.7, 5)
v := pixel.V(10, 3.14)
w := u.Add(v)
fmt.Println(w.X) // 12.7
First two lines construct two vectors with X and Y coordinates (2.7, 5) and (10, 3.14) respectively. The third line adds the two vectors, returning the result. It does not modify either of the vectors. Subtraction is similar.
fmt.Println(w.Sub(v)) // prints Vec(2.7, 5)For multiplying vectors, Pixel provides two methods: Vec.Scaled and Vec.ScaledXY.
u := pixel.V(2, 1)
v := u.Scaled(10)  // (20, 10)
w := u.ScaledXY(v) // (40, 10)
Scaled multiplies by a float64 scalar, ScaledXY multiplies by another vector, component-wise (X with X, Y with Y).
Zero vector is very useful and in order to save typing, Pixel provides pixel.ZV constant, which is the zero vector.
u := pixel.V(0, 0)
v := pixel.ZV
fmt.Println(u == v) // true
Rotating, uniting, doting, crossing and so on is all available too, through more methods.
Rectangles are very simple. The pixel.Rect type is defined like this.
type Rect struct {
	Min, Max Vec
}
It has a Min and a Max component. Min is the position of the lower-left corner of the rectangle and Max is the position of the upper-right corner of the rectangle. The sides of the rectangle are always parallel with the X and Y axes.
To create a rectangle, use pixel.R constructor.
rect := pixel.R(1, 1, 7, 7)Variable rect now contains a rectangle, which is a square with the lower-left corner at (1, 1) and the upper-right corner at (7, 7). The width and height of rect are both 6.
fmt.Println(rect.W(), rect.H()) // 6 6
fmt.Println(rect.Size())        // Vec(6, 6)
To get the center of a rectangle, use rect.Center method. To move a rectangle by a vector, use rect.Moved method.
fmt.Println(rect.Center())             // Vec(4, 4)
fmt.Println(rect.Moved(pixel.V(4, 10)) // Rect(5, 11, 11, 17)
Rectangles also support resizing (implemented kinda cool) and a few other methods. Check out the docs.
Probably the most interesting out of all of the geometry primitives is the matrix. The pixel.Matrix type is defined like this.
type Matrix [6]float64That definition hints the truth, it really is a 2x3 affine algebraic matrix. But don't worry, no algebra here. Working with matrices is very easy and convenient in Pixel. But, why learn it all by listing a bunch of methods and describing them? Let's code and see for ourselves!
We'll continue where we left off in the previous part.
package main

import (
	"image"
	"os"

	_ "image/png"

	"github.com/faiface/pixel"
	"github.com/faiface/pixel/pixelgl"
	"golang.org/x/image/colornames"
)

func loadPicture(path string) (pixel.Picture, error) {
	file, err := os.Open(path)
	if err != nil {
		return nil, err
	}
	defer file.Close()
	img, _, err := image.Decode(file)
	if err != nil {
		return nil, err
	}
	return pixel.PictureDataFromImage(img), nil
}

func run() {
	cfg := pixelgl.WindowConfig{
		Title:  "Pixel Rocks!",
		Bounds: pixel.R(0, 0, 1024, 768),
		VSync:  true,
	}
	win, err := pixelgl.NewWindow(cfg)
	if err != nil {
		panic(err)
	}

	pic, err := loadPicture("hiking.png")
	if err != nil {
		panic(err)
	}

	sprite := pixel.NewSprite(pic, pic.Bounds())

	win.Clear(colornames.Greenyellow)

	sprite.Draw(win, pixel.IM.Moved(win.Bounds().Center()))

	for !win.Closed() {
		win.Update()
	}
}

func main() {
	pixelgl.Run(run)
}
Now, let's take a deep look at this line.
sprite.Draw(win, pixel.IM.Moved(win.Bounds().Center()))We already know what it does, but let's break it down once again.
pixel.IMAs we've already discovered, pixel.IM is the identity matrix. It does nothing, no transformations. When we construct a matrix, we always start off from here, the identity matrix. Then we construct our desired matrix using successive applications of the matrix methods.
win.Bounds().Center()As you could guess, win.Bounds() returns a rectangle, the bounds of the window. Getting it's center is no surprise.
pixel.IM.Moved(win.Bounds().Center())Here's the first interestinig matrix method, Moved. It only takes one parameter, a delta vector. The matrix will be moved (translated) by this vector.
Now, let's take a look at another useful matrix method, Rotated. It takes two arguments. The first argument is a vector that we'll be rotating everything around. The second argument is an angle in radians. Simple, right?
First, let's split our matrix line into a few lines for clarity. Change this
sprite.Draw(win, pixel.IM.Moved(win.Bounds().Center()))to this
	mat := pixel.IM
	mat = mat.Moved(win.Bounds().Center())
	sprite.Draw(win, mat)
Now, let's go ahead and add a rotation.
	mat := pixel.IM
	mat = mat.Moved(win.Bounds().Center())
	mat = mat.Rotated(win.Bounds().Center(), math.Pi/4)
	sprite.Draw(win, mat)
So, we first moved the sprite to the center of the window, then we rotated it around the center of the window by 45 degrees. Run the code and see for yourself!
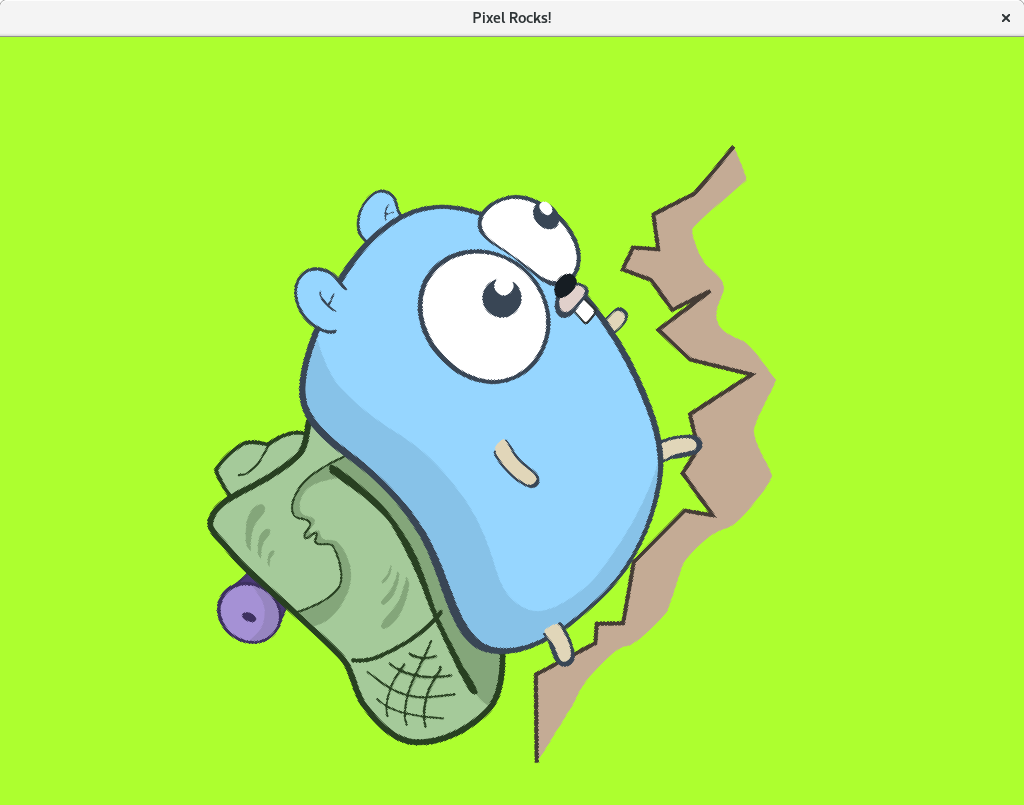
Ugh, what's those pixely artifacts? The picture is no longer as smooth as it was before. That's no good. To fix this, we need to tell the window, that we want our pictures be drawn smoothly and not pixely, this is no pixel art. To do that, add this line.
	win, err := pixelgl.NewWindow(cfg)
	if err != nil {
		panic(err)
	}

	win.SetSmooth(true)
When we run the program now, our picture is perfectly smooth, crisp, beautiful!

Scaling is very similar to rotating. There are two methods for scaling, Scaled and ScaledXY. The first one scales everything around a certain position by a float64 scalar. The second one scales independently in each axis.
Let's add some crazy scaling!
	mat := pixel.IM
	mat = mat.Moved(win.Bounds().Center())
	mat = mat.Rotated(win.Bounds().Center(), math.Pi/4)
	mat = mat.ScaledXY(win.Bounds().Center(), pixel.V(0.5, 2))
	sprite.Draw(win, mat)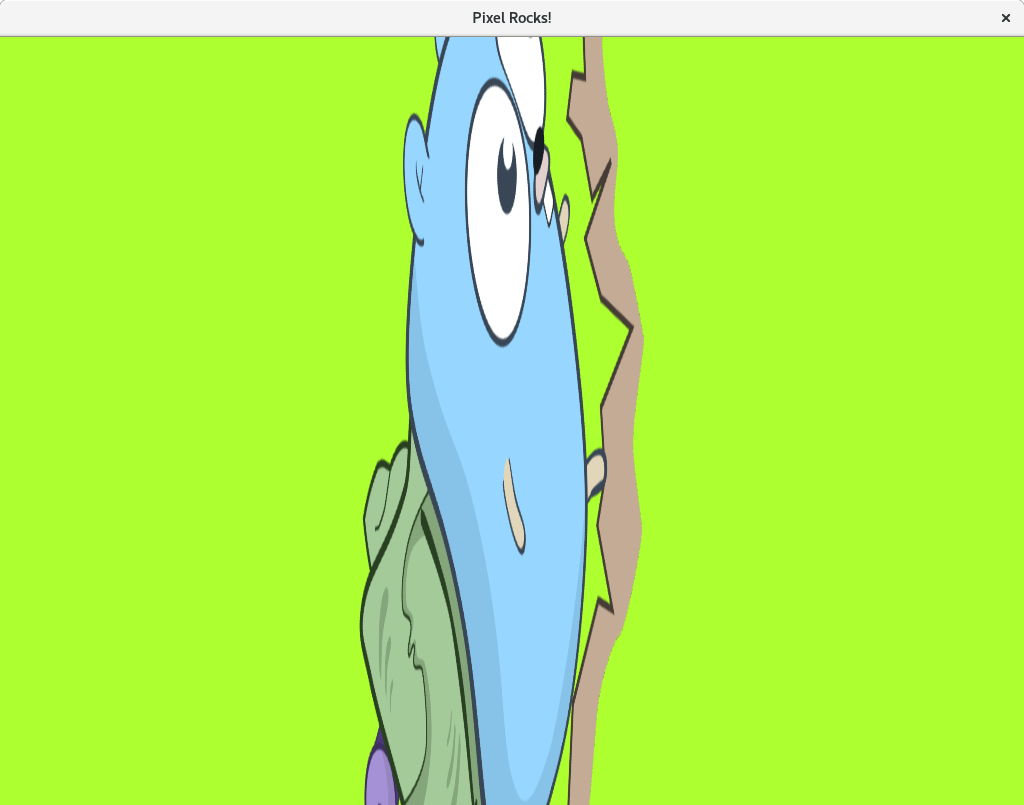
Well, that looks weird. Let's swap the rotation and scaling.
	mat := pixel.IM
	mat = mat.Moved(win.Bounds().Center())
	mat = mat.ScaledXY(win.Bounds().Center(), pixel.V(0.5, 2))
	mat = mat.Rotated(win.Bounds().Center(), math.Pi/4)
	sprite.Draw(win, mat)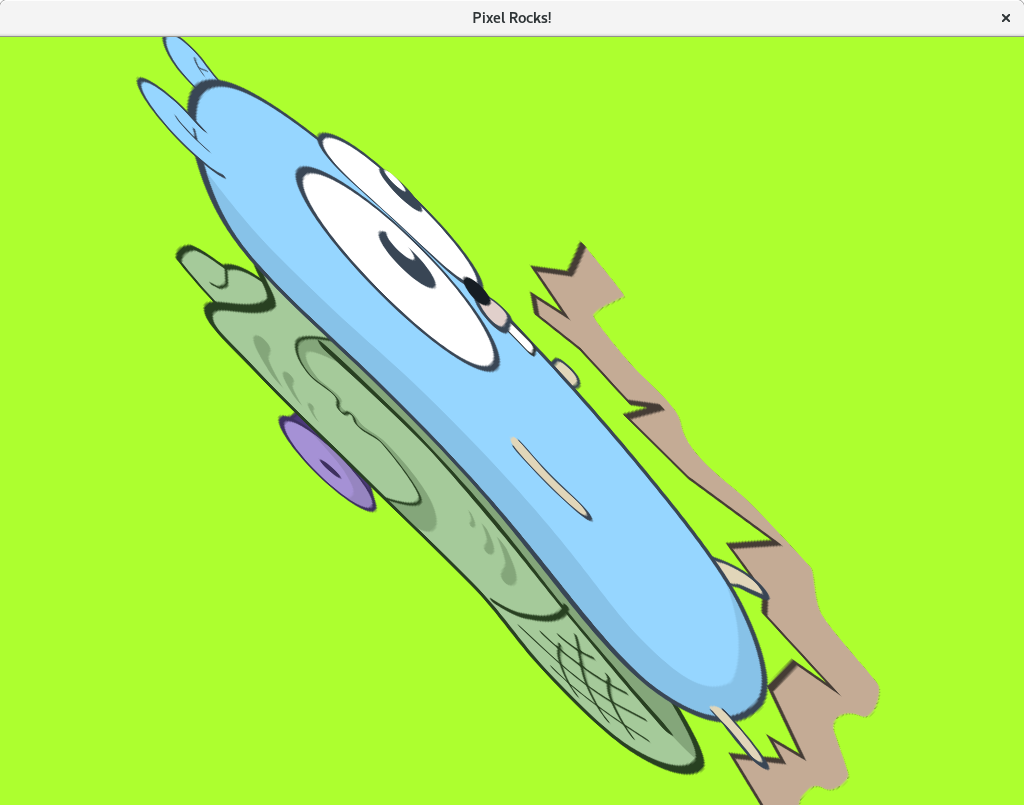
Notice the difference. The order of transformations matters a lot.
In fact, if we didn't call Moved before anything else, we could simplify our code. Remember, without Moved the sprite is located at the position (0, 0). So, if we scale and rotate the sprite around (0, 0) and only then move it, we get the same result.
	mat := pixel.IM
	mat = mat.ScaledXY(pixel.ZV, pixel.V(0.5, 2))
	mat = mat.Rotated(pixel.ZV, math.Pi/4)
	mat = mat.Moved(win.Bounds().Center())
sprite.Draw(win, mat)I think we've got a pretty good understanding of what matrix does. But our screen is still quite static. That sucks! Let's get thing moving!
But first, that background is getting a bit old. Let's change it!
win.Clear(colornames.Firebrick)Up until now, we've done all of our drawing before the main loop. If we want to make things on the screen move, we can't draw them just once. We need to draw them over and over again, every time in a different position. We need to draw them inside the main loop. Let's do that!
	sprite := pixel.NewSprite(pic, pic.Bounds())

	win.Clear(colornames.Firebrick)

	for !win.Closed() {
		mat := pixel.IM
		mat = mat.ScaledXY(pixel.ZV, pixel.V(0.5, 2))
		mat = mat.Rotated(pixel.ZV, math.Pi/4)
		mat = mat.Moved(win.Bounds().Center())
		sprite.Draw(win, mat)

		win.Update()
	}
Also, let's remove that scaling, we won't need it this time.
	sprite := pixel.NewSprite(pic, pic.Bounds())

	win.Clear(colornames.Firebrick)

	for !win.Closed() {
		mat := pixel.IM
		mat = mat.Rotated(pixel.ZV, math.Pi/4)
		mat = mat.Moved(win.Bounds().Center())
		sprite.Draw(win, mat)

		win.Update()
	}
Now, we're going to make our gopher rotate round the clock. To accomplish that, in each frame, our sprite has to be rotated a little more than it was in the previous frame. For that, we'll introduce a new variable called angle, that will carry the angle of rotation.
	angle := 0.0

	for !win.Closed() {
		angle += 0.05

		mat := pixel.IM
		mat = mat.Rotated(pixel.ZV, angle)
		mat = mat.Moved(win.Bounds().Center())
		sprite.Draw(win, mat)

		win.Update()
	}
At the beginning, the angle will be 0, no rotation. In each frame, we increase the angle by 0.05 radians and draw the rotated sprite, easy. Let's run the code!
![]()
Oh, that's surprisingly beautiful! Not what we wanted though. The problem is, that we successively draw the sprite, but only clear the window once, before the main loop. We need to clear it before every frame this time.
	sprite := pixel.NewSprite(pic, pic.Bounds())

	angle := 0.0

	for !win.Closed() {
		angle += 0.05

		win.Clear(colornames.Firebrick)

		mat := pixel.IM
		mat = mat.Rotated(pixel.ZV, angle)
		mat = mat.Moved(win.Bounds().Center())
		sprite.Draw(win, mat)

		win.Update()
	}
Now everything works as expected.
![]()
There's one little technical problem with our rotation. The observable speed of the rotation might not be consistent. Why is that? In each frame, we increment the angle by 0.05. This would be fine if each frame took the exact same amount of time. However, that might not be true. For example, try disabling VSync. It becomes really inconsistent.
How to fix that? If we knew how long a particular frame took, we could adjust our rotation speed to that time. That time is a video game development concept called "delta time" or dt. Calculating it in Go is very easy, just add these lines.
	last := time.Now()
	for !win.Closed() {
		dt := time.Since(last).Seconds()
		last = time.Now()

		angle += 0.05

		win.Clear(colornames.Firebrick)
We introduce a new variable called last. It contains the time of the start of the previous frame. When we at the beginning of a new frame subtract the current time and the last time, we actually get time that the previous frame took. Now, we can use this time to adjust the speed of the rotation.
	last := time.Now()
	for !win.Closed() {
		dt := time.Since(last).Seconds()
		last = time.Now()

		angle += 3 * dt
Now, the speed of the rotation is consistent, no matter how long the frames take.
Here's the whole code of the program we created in this part.
package main

import (
	"image"
	"os"
	"time"

	_ "image/png"

	"github.com/faiface/pixel"
	"github.com/faiface/pixel/pixelgl"
	"golang.org/x/image/colornames"
)

func loadPicture(path string) (pixel.Picture, error) {
	file, err := os.Open(path)
	if err != nil {
		return nil, err
	}
	defer file.Close()
	img, _, err := image.Decode(file)
	if err != nil {
		return nil, err
	}
	return pixel.PictureDataFromImage(img), nil
}

func run() {
	cfg := pixelgl.WindowConfig{
		Title:  "Pixel Rocks!",
		Bounds: pixel.R(0, 0, 1024, 768),
		VSync:  true,
	}
	win, err := pixelgl.NewWindow(cfg)
	if err != nil {
		panic(err)
	}

	win.SetSmooth(true)

	pic, err := loadPicture("hiking.png")
	if err != nil {
		panic(err)
	}

	sprite := pixel.NewSprite(pic, pic.Bounds())

	angle := 0.0

	last := time.Now()
	for !win.Closed() {
		dt := time.Since(last).Seconds()
		last = time.Now()

		angle += 3 * dt

		win.Clear(colornames.Firebrick)

		mat := pixel.IM
		mat = mat.Rotated(pixel.ZV, angle)
		mat = mat.Moved(win.Bounds().Center())
		sprite.Draw(win, mat)

		win.Update()
	}
}

func main() {
	pixelgl.Run(run)
}