Radarr
Table of Contents
- Intro
- Access Information
- PTS YouTube
- Library Location
- General Configuration
- Configuration /w NewsGroups
- Configuration /w Torrents
- Plex/Emby/Jellyfin autoscan
- Summary
Radarr is one of the most recognized programs utilized in order to obtain, maintain, and uPTSrade a user's movie quality content. Radarr operates in a hasty and efficient manner and provides a high degree of confidence in organizing and renaming files to be recognized both by Plex & Emby. For USENet, Radarr works both with NZBGET & SABNZBD.
Radarr is a PVR for USENet and BitTorrent users. It can monitor multiple RSS feeds for new movies and will grab, sort and rename them. It can also be configured to automatically uPTSrade the quality of files already downloaded when a better quality format becomes available.
| Protocol | Address | Notes |
|---|---|---|
| traefik** | radarr:7878 | Only for Internal App-to-App Communication |
| https | radarr.domain.com | Traefik must be Deployed; Remote Servers |
| http | domain.com:7878 | Poor Security Practice - Stop with PTS Port Guard |
| http | ipv4:7878 | Ideal Only for Local Servers |
** Ideal for Apps to communicate between with one another. Click Here for more info!

This is where the renamed/organized files are for playing on plex and where radarr will look your library.
/mnt/unionfs/movies
Important! Ensure you setup the required Downloader Path mappings for hardlinking, super fast importing to work! See here
Start off by ensuring that the advanced view is turned on and is on when making any changes! Certain things will be hidden if you fail to do so!


Next, select media management. From here, scroll down until you see Episode Naming. Make sure to turn that on. If not, file names will be stored as-is and may complicate the setup with Plex and/or Emby
- Rename Movies: Yes
- Colon Replacement Format: Yes
- Standard Move Format: Optional - Copy & Paste Below
{Movie Title} ({Release Year}) [{MediaInfo VideoCodec}-{Quality Full} {MediaInfo Audio-}{MediaInfo AudioChannels}]

Disable: Create Empty Folders Enable: Skip Free Space Check Enable: Use hardlinks instead of Copy

Next, scroll down to file management and [TURN OFF] analyse video files. If left on, it will ring up the API usage for G-Suite and result in slower scans being conducted by Radarr.

After making the following changes, it's recommended to save the changes before moving on to anything else.
I wrote this quickly in response to the issue: Radarr/#2273
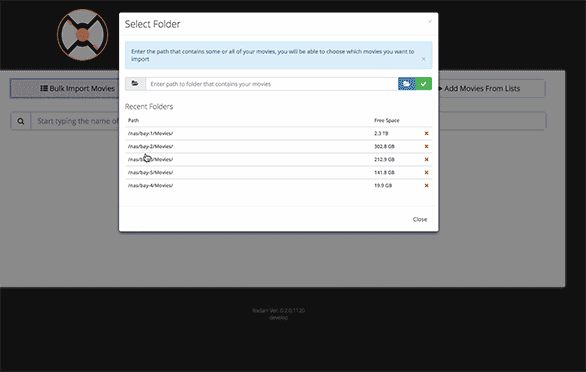
If you're like me and trying to import thousands of pre-downloaded movies (around 4,000+ movies) into Radarr, you're not going to want to click through the web-ui manually and add them all...
Here's a quick javascript hack you can run in your browser's developer tools (i.e. Chrome DevTools Console), then go grab a beer:
NB ONLY TESTED ON: Radarr Ver. 0.2.0.1120
function addMovies() {
    var rowCount = $('#x-movies-bulk >table >tbody >tr').length;
    if(rowCount => 10) {
        $('#x-movies-bulk > table > thead > tr > th.select-all-header-cell.renderable > input[type="checkbox"]').trigger('click');
        $('#x-toolbar > div > div.page-toolbar.pull-left.pull-none-xs.x-toolbar-left > div > div > div').trigger('click');

        setTimeout(function(){
            // Go to the next page...
            $('#x-movies-bulk-pager > div > ul > li:nth-child(4) > i').trigger('click');
        }, 1000 * 15);

    }
}

addMovies();
setInterval(addMovies, 1000 * 30)
Be sure to leave the default "list size" to 15 (the smallest) -- The script will just select all the select boxes, click add selected, wait a few moments, and repeat until you're done...
Screenshot:
credits goes to ultimate-pms/ultimate-media-server-core
NOTE: Ensure that you followed the steps in Step 4 - General Configuration First
Note that you setup your indexers in two ways. A user can post their indexers here directly, or setup NZBHydra which will sort and attempt to utilize the best nzb to download user connect. NZBHydra is completely optional.
News Group indexer information is generally easy to setup. The great thing about Radarr is that there is a prebuilt list of indexers to select from (meaning you do not have to discover them on your own). Select the [+] symbol in order to add an indexer.

Next, you will see custom and presets. Custom should only be selected if the indexer that's being utilized is not on the preset list. If on the preset list, select it.

After selecting the indexer, the only thing that has to be done is to add the API Key. Indexers provide API keys outright or buried within the settings of their website. Ensure that the key is not known or shared with others. Some indexers may ban the use of your key if excessive IP address is detected.
Warning: NZBGeek even though advertising unlimited usage; they truly are not. If utilizing PlexGuide to search 100's of items daily, NZBGeek will accuse you of scrapping their website. You have been warned!

Once done, conduct a test to ensure that the Indexer is working. Click save and repeat again if required.
Before proceeding onward, you must have NZBHydra deployed with at least one working indexer configured. Failing to had have an indexer setup will result in being unable to connect to NZBHydra.
To Setup, go to the Indexers Tab and click the [Custom] button!

Next, setup the following:
- Name: Anything You Want (NZBHydra Recommended)
- URL:
http:https://nzbhydra:5076 - API: Obtained from NZBHydra

When Finished, select [Save] in the upper right corner.
It is recommended to have NZBGET or SABNZBD deployed before moving on to ensure that connection is working when testing. First, start by selecting download clients and then selecting the [+] symbol. For Google GCE, it is recommended to use NZBGET due to its ability to keep up with mass downloads!

You only have two choices primarily to choose from. Select either NZBGET or SABNZBD and then follow the instructions below based on your choice.

Prior to setting up, ensure to have NZBGET deployed first!
- Type in the Name
nzbget - For host, type in
nzbget(not localhost or the ip address) - Ensure that port is
6789 - Put the username and password of NZBGET (if one was set)
- Must be
movies(all lowercase) - Test the connection
- Select [Save]

Once complete, exit!
Prior to setting up, ensure to have SABNZBD deployed first!
- Type in the Name
sabnzbd - For host, type in
sabnzbd(not localhost or the IP address) - Ensure that port is
8080 - Paste your API key from SABNZBD
- Put the username and password of NZBGET (if one was set)
- Must be
movies(all lowercase) - Test the connection
- Select [Save]

Once complete, exit!
Ensure that advanced settings are turned on. You will fail to see the remote mappings if you fail to do so!
By default, nothing has to change as shown in the picture below. The remove options are optional; if you wish to change them.

For each downloader you use, you need to setup a "mapping" per downloader. A mapping is required per downloader for hardlinking to work. This is required for the best performance. For more information, read Sonarr, Radarr, Lidarr Remote Path Mappings
| Host | Remote Path | Local Path |
|---|---|---|
| sabnzbd | /mnt/downloads/nzb/ | /mnt/unionfs/nzb/ |
| nzbget | /mnt/downloads/nzb/ | /mnt/unionfs/nzb/ |
| qbittorrent | /mnt/downloads/qbittorrent/ | /mnt/unionfs/qbittorrent/ |
| rutorrent | /mnt/downloads/torrent/ | /mnt/unionfs/torrent/ |
| deluge | /mnt/downloads/deluge/ | /mnt/unionfs/deluge/ |

NOTE: Ensure that you followed the steps in Step 4 - General Configuration First
You can set up Radarr to use all of the indexers set up in Jackett or just a specific one
- Paste in the following URL:
http:https://jackett:9117/torznab/all/api - Paste in your Jackett API key
- Select Save
- Visit the Jackett Wiki to obtain the URL & API for the indexer you wish to use within Jackett.
- Paste in the URL, but once you're done; change the address to match http:https://jackett:9117 as shown below.
- Paste in your API key
- Select Save

It is recommended to have your torrent client deployed prior to configuration!
Now select a torrent program as shown below.

Next, enter the following information!
- Name: rutorrent
- Enable: Yes
- Host: rutorrent
- Port: 80
- Url Path: RPC2
- Username & Password: Add if one applies
- Category: movies
- Recent Priority: High | Older Priority: Normal

Next, enter the following information!
- Name: qbittorrent
- Enable: Yes
- Host: qbittorrent
- Port: 8080
- Username & Password: Add if one applies
- Category: movies
- Recent Priority: High | Older Priority: Normal
Next, enter the following information!
- Name: deluge
- Enable: Yes
- Host: deluge
- Port: 8112
- Username & Password: Add if one applies
- Category: movies
- Recent Priority: High | Older Priority: Normal
Once complete, exit!
Ensure that advanced settings are turned on. You will fail to see the remote mappings if you fail to do so!
By default, nothing has to change as shown in the picture below. The remove options are optional; if you wish to change them.
This step is required. Click Here for instructions! Failing to do so will result in things not uploading.
we prefer PlexAutoScan, this part unfortunately uses too many Api requests, and is no longer needed after the implementation of Plex_autoscan.
Radarr has improved its plex autoscan capabilities. It no longer scans the entire movie directory. This has eliminated the need for third-party scripts. For this functionality to work, you need to connect sonarr to plex/emby/jellyfin. You also need to disable library autoscanning inside plex/emby/jellyfin server settings. For plex, you want to keep partial scans enabled. See their wikis for more info. Note: If you are using the legacy path /unionfs instead of /mnt/unionfs for your media, you will have scanning issues until you update your library paths to /mnt/unionfs
Settings page: Radarr >> Settings >> Connect >> +
On Import: Checked
On UPTSrade: Checked
On Rename: Checked
Host: `plex`
Port: `32400`
Use SSL: Unchecked
Update Library: Checked
On Import: Checked
On UPTSrade: Checked
On Rename: Checked
Host: `emby` or `jellyfin`
Port: `8096`
Use SSL: Unchecked
Send Notifications: Optional
Update Library: Checked
Radarr is a very easy program to utilize. As long as you follow the basic information, any user should be good to go.