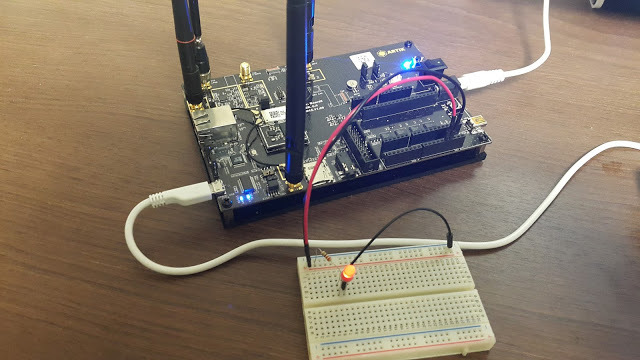
NRF24L01 2.4Ghz Wireless Module (NRF24L01) [S275]


https://www.youtube.com/watch?v=CVfX8fmW6Bk


GitHub : https://github.com/rdiot/rdiot-s275.git


* Specs

nRF24L01 is a single chip radio transceiver for the world wide 2.4 - 2.5 GHz ISM band. 

The transceiver consists of a fully integrated frequency synthesizer, a power amplifier, a crystal oscillator, a demodulator, modulator and Enhanced ShockBurst? protocol engine. 

Output power, frequency channels, and protocol setup are easily. 

programmable through a SPI interface. 

Current consumption is very low, only 9.0mA at an output power of -6dBm and 12.3mA in RX mode. 

Built-in Power Down and Standby modes makes power saving easily realizable. 

Maximum operating speeds up to 2Mbps, GFSK modulation efficiency, Anti-interference ability, Particularly suitable for industrial control applications. 

125 Communications channels, Multi-point communication and frequency hopping to meet the communication needs. 

Built-in hardware CRC error detection, Multipoint communication address control. 

Low-power 1.9 ~ 3.6V, only 1uA on Power down mode. 

Built-in 2.4Ghz antenna. 

Available software to set the address, only received local Address when output data(Provide interrupt instruction), can be directly connected to a variety of microcontrollers, Software programming is very convenient. 

Support 6 Data channels of data reception. 

Standard DIP Pitch Interface for embedded applications. 


* Contents

- Connect 


VCC - 3.3V

CSN - D8

MOSI - D11

IRQ - NONE

GND - GND

CE - D7

SCK - D13

MISO - D12


- parts

Rotary Encoder Module (KY-040) [S120]


- Library : https://github.com/nRF24/RF24

- Tested Library Download : RF24-master.zip


- Key Code

- RF24_TX : https://github.com/rdiot/rdiot-s275/blob/master/RF24_TX.ino

#include <Wire.h> 

#include <LiquidCrystal_I2C.h>

#include <SPI.h>

#include <nRF24L01.h>

#include <RF24.h>


LiquidCrystal_I2C lcd(0x27,16,2);  // set the LCD address to 0x20 for a 16 chars and 2 line display


RF24 radio(7, 8); // SPI Bus CE, CSN 

const byte address[6] = "00001"; // RX = TX same address

int pin = A0; // Rotary Encoder Module (KY-040) [S120] : https://rdiot.tistory.com/126 [RDIoT Demo]


void setup() {

  pinMode(pin, INPUT);


  Serial.begin(9600);


  radio.begin();

  radio.openWritingPipe(address);

  radio.setPALevel(RF24_PA_MIN); // Power Level : accoding to distance : RF24_PA_MIN / RF24_PA_LOW / RF24_PA_HIGH / RF24_PA_MAX


  radio.stopListening();  // TX 


  lcd.init(); // initialize the lcd 

  lcd.backlight();

  lcd.print("start LCD1602");

  delay(1000);

  lcd.clear();


}


void loop() {

  lcd.setCursor(0,0);

  lcd.print("S275:RF24L01 TX");


  int readVal = analogRead(pin);

  readVal = map(readVal, 0, 1023, 0, 179);

  Serial.println(readVal);


  lcd.setCursor(0, 1);

  lcd.print("msg=>" + String(readVal) + "  ");


  char buf[4];

  itoa(readVal, buf, 10);


  radio.write(&buf, sizeof(buf)); //send messages to RX 

  delay(10);


}


- RX24_RX : https://github.com/rdiot/rdiot-s275/blob/master/RF24_RX.ino

#include <Wire.h> 

#include <LiquidCrystal_I2C.h>

#include <SPI.h> 

#include <nRF24L01.h>

#include <RF24.h>

#include <Servo.h> 


LiquidCrystal_I2C lcd(0x27,16,2);  // set the LCD address to 0x20 for a 16 chars and 2 line display


RF24 radio(7, 8); // SPI Bus CE, CSN 

const byte address[6] = "00001"; // TX = RX same address


Servo myservo; 

int servoPin = 4; 


void setup() {


  Serial.begin(9600);


  radio.begin();

  radio.openReadingPipe(0, address);

  radio.setPALevel(RF24_PA_MIN); // Power Level : accoding to distance : RF24_PA_MIN / RF24_PA_LOW / RF24_PA_HIGH / RF24_PA_MAX


  radio.startListening(); // RX


  myservo.attach(servoPin); 


  lcd.init(); // initialize the lcd 

  lcd.backlight();

  lcd.print("start LCD1602");

  delay(1000);

  lcd.clear();


}


void loop() {

  lcd.setCursor(0,0);

  lcd.print("S275:RF24L01 RX");


  lcd.setCursor(0, 1);

  if (radio.available()) {    

    char text[4] = "";


    radio.read(&text, sizeof(text));

    Serial.println(text);


    lcd.print("rcv=>" + String(text) + "     ");


    int value = atoi(text);

     myservo.write(180-value);

  }


  delay(10);


}


- how to debug radio details 

#include <printf.h>


  printf_begin();

  radio.printDetails();


Posted by RDIoT
|

UVC Camera Servo Motor Control [P006.1]


https://www.youtube.com/watch?v=pAshFXld2N0


*GitHubhttps://github.com/rdiot/rdiot-p006.1.git


* Parts

- Arduino Yun (ARDUINO-YUN) [B015]

- Logitech HD WebCam C310 (C310) [S084]

- SG90 Camera Mount [B051]

- Tower Pro SG90 Micro Servo (SG90) [D018]  


Contents

- Control Interface 


- Source

#include <Bridge.h>
#include <YunServer.h>
#include <YunClient.h>
#include <Servo.h> 
 
YunServer server;

Servo myservo1;
Servo myservo2;

int servoPin_leftright = 9; 
int servoPin_updown = 10; 

int pos_updown_min = 100; 
int pos_updown_max = 150;

int pos_leftright_min = 0;
int pos_leftright_max = 90;

int pos_updown;
int pos_leftright;
int pos_cnt = 5;

void setup() {
  Serial.begin(9600);
  pinMode(13,OUTPUT);
  
  digitalWrite(13, LOW);
  Bridge.begin();
  digitalWrite(13, HIGH);
  
  server.listenOnLocalhost();
  server.begin();

  myservo1.attach(servoPin_leftright); 
  myservo2.attach(servoPin_updown); 

  for(int pos = 0; pos < 65; pos += 1) 
  { 
    myservo1.write(pos);
    pos_leftright = pos;

    delay(100); 
  }

  for(int pos = 150; pos>=100; pos-=1)
  { 
    myservo2.write(pos); 
    pos_updown = pos;
    delay(100); 
  } 
}

void loop() {
  YunClient client = server.accept();
 
  if (client) {
    process(client);
    client.stop();
  }
  delay(50); 
}

void process(YunClient client) {
  String command = client.readStringUntil('/');
 
  if (command == "control") {
    controlCommand(client);
  }
}
 
void digitalCommand(YunClient client) {
  int pin, value;
pin = client.parseInt();
 
  if (client.read() == '/') {
    value = client.parseInt();
    digitalWrite(pin, value);
  } 
  else {
    value = digitalRead(pin);
  }
  client.print(F("Pin D"));
  client.print(pin);
  client.print(F(" set to "));
  client.println(value);
 
  String key = "D";
  key += pin;
  Bridge.put(key, String(value));

}

void controlCommand(YunClient client) {
  String mode = client.readStringUntil('/');
  
  if(mode == "up")
  {
    int temp = pos_updown + pos_cnt;
    if(temp < pos_updown_max)
    {
      myservo2.write(temp); 
      pos_updown = temp;
    }
  }

  if(mode == "down")
  {
   int temp = pos_updown - pos_cnt;
    if(temp > pos_updown_min)
    {
      myservo2.write(temp); 
      pos_updown = temp;
    } 
  }

  if(mode == "right")
  {    
   int temp = pos_leftright - pos_cnt;
    if(temp > pos_leftright_min)
    {
      myservo1.write(temp); 
      pos_leftright = temp;
    }  
  }

  if(mode == "left")
  {
   int temp = pos_leftright + pos_cnt;
    if(temp < pos_leftright_max)
    {
      myservo1.write(temp); 
      pos_leftright = temp;
    }

  }

  client.print(F("Camera "));
  client.print(mode);
  client.print(F(" Current Point X = "));
  client.print(pos_leftright);
  client.print(F(", Current Point Y = "));
  client.print(pos_updown);
}


Posted by RDIoT
|

SG90 Camera Mount [B051]


https://www.youtube.com/watch?v=gk7Mg69mgq4


* GitHub https://github.com/rdiot/rdiot-b051.git


* Specs

Weight : 0.050kg (0.11lb.)

Size : 13cm x 9cm x 8cm (5.12in x 3.54in x 3.15in)


* Contents

- Connect

Top ----- D12

Bottom ----- D11


- Key Code

#include <Wire.h> 

#include <LiquidCrystal_I2C.h>

#include <Servo.h> 


LiquidCrystal_I2C lcd(0x27,20,4);

Servo myservo1;

Servo myservo2;


int servoPin_updown = 12;

int servoPin_leftright = 11;


int pos_updown = 0;

int pos_leftright = 0;


void setup()

{

  lcd.init();  // initialize the lcd 

  lcd.backlight();

  lcd.print("start LCD2004");


  myservo1.attach(servoPin_updown); 

  myservo2.attach(servoPin_leftright); 

  delay(1000);


  lcd.clear();

}


void loop()

{


  lcd.setCursor(0,0);

  lcd.print("B051:SG90 Mount");


  for(pos_leftright = 0; pos_leftright < 180; pos_leftright += 1) 

  { 

    myservo2.write(pos_leftright);

    //lcd.setCursor(0,1);

    //lcd.print("pos0~179=" + (String)pos + "  " );


    delay(10); 

  }


  for(pos_leftright = 180; pos_leftright>=0; pos_leftright-=1)

  { 

    myservo2.write(pos_leftright); 

    //lcd.setCursor(0,2);

    //lcd.print("pos180~1=" + (String)pos + "  " );

    delay(10); 

  } 


  for(pos_updown = 80; pos_updown < 180; pos_updown += 1) 

  { 

    myservo1.write(pos_updown);

    //lcd.setCursor(0,1);

    //lcd.print("pos0~179=" + (String)pos + "  " );


    delay(10); 

  }


  for(pos_updown = 180; pos_updown>=80; pos_updown-=1)

  { 

    myservo1.write(pos_updown); 

    //lcd.setCursor(0,2);

    //lcd.print("pos180~1=" + (String)pos + "  " );

    delay(10); 

  } 


}

Posted by RDIoT
|

Tower Pro SG90 Micro Servo (SG90) [D018]


https://www.youtube.com/watch?v=qdUgJtBClZ4


* GitHubhttps://github.com/rdiot/rdiot-d018.git


* Specs

Speed: 0.12 second / 60 degrees rotation

Torque: 1.2-1.4kg @ 4.8V~6V power

Comes with full ranged connectivity accessories and mounting screws

Working temperature: -30 to +60 degrees Celsius

Dead band setting: 7 microseconds


* Contents

- Connect

Brown - GND

Red - 5V

Orange - D12


- Key Code

#include <Wire.h> 

#include <LiquidCrystal_I2C.h>

#include <Servo.h> 


LiquidCrystal_I2C lcd(0x27,20,4);  // LCD2004

Servo myservo; 

int servoPin = 12;

int pos = 0; 


void setup()

{

  lcd.init();  // initialize the lcd 

  lcd.backlight();

  lcd.print("start LCD2004");


  myservo.attach(servoPin); 

  delay(1000);


  lcd.clear();

}


void loop()

{


  lcd.setCursor(0,0);

  lcd.print("D018:SG90 Servo");


  for(pos = 0; pos < 180; pos += 1) 

  { 

    myservo.write(pos);

    lcd.setCursor(0,1);

    lcd.print("pos0~179=" + (String)pos + "  " );


    delay(0); // Control Speed by delay time.

  }


  for(pos = 180; pos>=1; pos-=1)

  { 

    myservo.write(pos); 

    lcd.setCursor(0,2);

    lcd.print("pos180~1=" + (String)pos + "  " );

    delay(0); 

  } 

}


Posted by RDIoT
|

Amp Pot B5K (B5K) [S027]


https://www.youtube.com/watch?v=7J1AMx28ROs


* Specs

5k

2W @ 70°C ambient

Non-rotational key

Temp. range: -55°C to +120°C

Shaft length: 0.875" 

Shaft dia.: 0.25"

Mounting hole: 0.375" 

Max. panel thickness: 0.25"


* Contents

- Connect

Potentiometer

LEFT - 5V

MIDDLE - A0 (OUT)

RIGHT - GND


Servo

Black - GND

Red - 5V

Red -  D12


- Key Code

#include <Wire.h> 

#include <LiquidCrystal_I2C.h>

#include <Servo.h> 


LiquidCrystal_I2C lcd(0x27,20,4);  // LCD2004

Servo myservo; 

int servoPin = 12;

int potPin = A0;

int val;


void setup()

{

  lcd.init();  // initialize the lcd 

  lcd.backlight();

  lcd.print("start LCD2004");


  myservo.attach(servoPin); 

  delay(1000);


  lcd.clear();

}


void loop()

{


  val = analogRead(potPin);

  val = map(val, 0, 1023, 0, 179);


  lcd.setCursor(0,0);

  lcd.print("S027:B5K");


  myservo.write(val);

  lcd.setCursor(0,1);

  lcd.print("pos0~179=" + (String)val + "  " );


  delay(10); 

}

Posted by RDIoT
|