USB Microphone [S281]


https://www.youtube.com/watch?v=ChITet6OuxM


* Specs

Product parameters:

The sensitivity: - 47 db + 4 db

Lower sensitivity: - 3 db at 1.5 V

Working voltage: 4.5 V

The frequency response: 100 to 16 KHZ

SNR: wining - 67 db

Line length: 0.7 to 0.9 M


* Contents

- Check Device

$ lsusb

$ dmesg


- Setup 

$ sudo vi /usr/share/alsa/alsa.conf


defaults.ctl.card 0 => 1

defaults,pcm, card 0 => 1


- Setup Volume

$ alsamixer 


- Recording

$ arecord -D plughw:1,0 -c 1 -f S16_LE -r 44100 test.wav


- Play 

$ aplay test.wav


Posted by RDIoT
|

USB 2.0 Microphone Speech MIC Audio Adapter Driver [S278]


https://www.youtube.com/watch?v=Zw0uAvTD8n0


* Specs

Brand Name: ANBES

Set Type: Single Microphone

Communication: Wireless

Transducer: Condenser Microphone

Use: Computer Microphone

Model Number: USB Microphone

Polar Patterns: Omnidirectional

Package: No

Style: Computer Microphone

Item Name: Computer Microphone


* Contents

- Check Device

$ lsusb

$ dmesg


- Setup 

$ sudo vi /usr/share/alsa/alsa.conf


defaults.ctl.card 0 => 1

defaults,pcm, card 0 => 1


- Setup Volume

$ alsamixer 


- Recording

$ arecord -D plughw:1,0 -c 1 -f S16_LE -r 44100 test.wav


- Play 

$ aplay test.wav


Posted by RDIoT
|

Sound recordable module 10sec [S191]


https://www.youtube.com/watch?v=67x7TpmRhlQ


* Specs

Features:

With speaker, microphone and button

Record your own message

Great for greeting cards

Convenient

Designed for cardmaking and other similar projects.

Allows you to add sound to custom made cards using your own papers and decorations.

Can also be used in printed card projects.

Mounted on a crystal clear backing for a cleaner, more look.

The built-in voice recorder allows you to record up to a 120 second message. If you make a mistake you can re-record your message


Specifications:

Play Life: 200 plays

Shelf Life: 2 years

Power: 2 button batteries (included)

Recording time: 10 seconds

Speaker diameter: 4cm

Color: Black

Material: Plastic + Metal

Net Weight: 17.6g


* Contents

- Connect

Mic

Recoding LED

Record Start/Stop

Play Start/Stop

0.5W 8Ohm Speaker

Posted by RDIoT
|

Sound Control LED Lamp Module [S175]


https://www.youtube.com/watch?v=I08YWqnpbPY


* Specs

Size: 52mm*75mm

Installing Hole: Φ3

Power Supply: Powered By USB (The input cannot exceed 12V)

Power Consumption: Max. 2W (Output: 5V, All LEDs are on.)


* Contents

- Connect

USB connect

Posted by RDIoT
|

ISD 1820 Voice Recording Module (ISD1820) [S082]


https://www.youtube.com/watch?v=cj9h0Bzwcok


*GitHub : 


* Specs

ISD1820 Voice Recording Module is another very interesting stuff. You don't need to prepare a speaker and a mic - both are included in this module! After connecting to the power, you can press REC to record a 10 second voice. Press PLAYE to play the complete voice once. Press and hold PLAYL it will play the voice and it stop when the button is released. It can also be controlled by Arduino. Combined with Laser Detector and Laser Module, you can make a doorbell, security system, and power-saving light along corridor for instance.


* Contents

- Connect

VCC ----- 5V

GND ----- GND

P-E ----- D13

REC ----- D11


- Key Code

#include <Wire.h> 

#include <LiquidCrystal_I2C.h>


LiquidCrystal_I2C lcd(0x27,20,4);  // LCD2004


int Rec = 11;

int Play = 13;


void setup()

  pinMode(Rec, OUTPUT); 

  pinMode(Play, OUTPUT);


  lcd.init();  // initialize the lcd 

  lcd.backlight();

  lcd.print("start LCD2004");


  delay(1000);


  lcd.clear();

}


void loop()

{

  lcd.setCursor(0,0);

  lcd.print("S082:ISD1820 Module");


  digitalWrite(Rec, HIGH); // record 10sec

  lcd.setCursor(0,1);

  lcd.print("Rec: HIGH ");


  delay(10000);

  digitalWrite(Rec, LOW); // end record 

  lcd.setCursor(0,1);

  lcd.print("Rec: LOW  ");

  delay(5000);


  digitalWrite(Play, HIGH); // play 

  lcd.setCursor(0,1);

  lcd.print("Play: HIGH");

  delay(100);


  digitalWrite(Play, LOW); // stop play

  lcd.setCursor(0,1);

  delay(10000);

  lcd.print("Play: LOW ");      

}

Posted by RDIoT
|

Small Sound Detection Module (KY-038) [S053]


https://www.youtube.com/watch?v=WFB0QkhGm20


* GitHub : https://github.com/rdiot/rdiot-s053.git


* Specs

Dimensions: 1.38 in x 0.59 in x 0.51 in (3.5 cm x 1.5 cm x 1.3 cm)

Weight: 0.11 oz (3 g)

Main chip: LM393

Electret condenser microphone

Working voltage: DC 4-6V

Interface definition:

AO: analog output sensor

GND: ground

VCC: Power supply input range: 3V-24V.

DO: Digital Output (comparator output)

Two red LED indication: POWER and SENSOR. POWER: Power is off.

SENSOR: When the microphone senses sound reaches a certain value, this LED light.


Single channel signal output

Low level output signal used for sound control light

Great module for sound alarm system

LM393 main chip

Electric condenser microphone


* Contents

- Connect

A0 ----- A0

G ----- GND

+ ----- 5V

D0 ----- X


- Key Code

#include <Wire.h> 

#include <LiquidCrystal_I2C.h>


LiquidCrystal_I2C lcd(0x27,20,4);  // LCD2004


int threshold = 30; 


int led1 = 2;

int led2 = 3;

int led3 = 4;

int led4 = 5;

int led5 = 6;


int pin = A0;


void setup()

{

  lcd.init();  // initialize the lcd 

  lcd.backlight();

  lcd.print("start LCD2004");


  pinMode(pin,INPUT);


  pinMode(led1,OUTPUT);

  pinMode(led2,OUTPUT);

  pinMode(led3,OUTPUT);

  pinMode(led4,OUTPUT);

  pinMode(led5,OUTPUT);


  delay(1000);


  lcd.clear();

}


void loop()

{


  lcd.setCursor(0,0);

  lcd.print("S052:SoundDetect");


  int val = analogRead(pin);


  lcd.setCursor(0,1);

  lcd.print("val=" + (String)val + "  ");


  if(val <= threshold)

  { 

    lcd.setCursor(0,2);

    lcd.print("                    ");

  }

  else

  {

    lcd.setCursor(0,2);

    lcd.print("Small Sound Detected");

    delay(100);  

  }


  digitalWrite(led1, LOW); 

  digitalWrite(led2, LOW); 

  digitalWrite(led3, LOW); 

  digitalWrite(led4, LOW); 

  digitalWrite(led5, LOW); 


  if(val > 30) { digitalWrite(led1, HIGH); }

  if(val > 31) { digitalWrite(led2, HIGH); }

  if(val > 32) { digitalWrite(led3, HIGH); }

  if(val > 35) { digitalWrite(led4, HIGH); }

  if(val > 40) { digitalWrite(led5, HIGH); }


  delay(50);

}

Posted by RDIoT
|

Big Sound Detection Module (KY-037) [S052]


https://www.youtube.com/watch?v=jjT-qJG5OhY


* Specs

For sound detection module has two outputs: 

1. AO, analog output, real-time output voltage signal of the microphone 

2. DO, when the sound intensity reaches a certain threshold, the output high and low signal 


Module features: 

1. there is a mounting screw hole 3mm 

2. the use 5v DC power supply 

3. with analog output 

4. there are threshold level output flip 

5. high sensitive microphone and high sensitivity. 

6. a power indicator light 

7. the comparator output is light


* Contents

- Connect

A0 ----- A0

G ----- GND

+ ----- 5V

D0 ----- X 


- Key Code

#include <Wire.h> 

#include <LiquidCrystal_I2C.h>


LiquidCrystal_I2C lcd(0x27,20,4);  // LCD2004


int threshold = 600; 


int led1 = 2;

int led2 = 3;

int led3 = 4;

int led4 = 5;

int led5 = 6;


int pin = A0;


void setup()

{

  lcd.init();  // initialize the lcd 

  lcd.backlight();

  lcd.print("start LCD2004");


  pinMode(pin,INPUT);


  pinMode(led1,OUTPUT);

  pinMode(led2,OUTPUT);

  pinMode(led3,OUTPUT);

  pinMode(led4,OUTPUT);

  pinMode(led5,OUTPUT);


  delay(1000);


  lcd.clear();

}


void loop()

{


  lcd.setCursor(0,0);

  lcd.print("S052:SoundDetect");


  int val = analogRead(pin);


  lcd.setCursor(0,1);

  lcd.print("val=" + (String)val + "  ");


  if(val <= threshold)

  { 

    lcd.setCursor(0,2);

    lcd.print("                  ");

  }

  else

  {

    lcd.setCursor(0,2);

    lcd.print("Big Sound Detected");

    delay(100);  

  }


  digitalWrite(led1, LOW); 

  digitalWrite(led2, LOW); 

  digitalWrite(led3, LOW); 

  digitalWrite(led4, LOW); 

  digitalWrite(led5, LOW); 


  if(val > 600) { digitalWrite(led1, HIGH); }

  if(val > 605) { digitalWrite(led2, HIGH); }

  if(val > 610) { digitalWrite(led3, HIGH); }

  if(val > 615) { digitalWrite(led4, HIGH); }

  if(val > 620) { digitalWrite(led5, HIGH); }


  delay(50);


}

Posted by RDIoT
|

Voice Recognition Module V3 [S134]


https://www.youtube.com/watch?v=rmGwZXN5a2o


*GitHub https://github.com/rdiot/rdiot-s134.git


* Specs

ELECHOUSE Voice Recognition Module is a compact and easy-control speaking recognition board.

This product is a speaker-dependent voice recognition module. It supports up to 80 voice commands in all. Max 7 voice commands could work at the same time. Any sound could be trained as command. Users need to train the module first before let it recognizing any voice command.

This board has 2 controlling ways: Serial Port (full function), General Input Pins (part of function). General Output Pins on the board could generate several kinds of waves while corresponding voice command was recognized.

What's new?

We already have Voice Recognition module V2. It supports 15 commands in all and only 5 commands at the same time.

On V2, voice commands are separated into 3 groups while you training it. And only one group (5 commands) could to be imported into Recognizer. It means only 5 voice commands are effective at the same time.

On V3, voice commands are stored in one large group like a library. Any 7 voice commands in the library could be imported into recognizer. It means 7 commands are effective at the same time.

aeProduct.getSubject()

Parameter

Voltage: 4.5-5.5V

Current: <40mA

Digital Interface: 5V TTL level for UART interface and GPIO

Analog Interface: 3.5mm mono-channel microphone connector +  microphone pin interface

Size: 31mm x 50mm

Recognition accuracy: 99% (under ideal environment)

Feature

Support maximum 80 voice commands, with each voice 1500ms (one or two words speaking)

Maximum 7 voice commands effective at same time

for  library is supplied

Easy Control: UART/GPIO

User-control General Pin Output

Document

Manual

Library 

Video Instruction

How to play VR3 with VR3


* Content

- Libary : https://github.com/elechouse/VoiceRecognitionV3/archive/master.zip

- GitHub : https://github.com/elechouse/VoiceRecognitionV3


- Connect

GND - GND

VCC - 5V

RXD - D3

TXD - D2


LED - D13


- Order

1. train -- let VoiceRecognitionModule record your voice command

new line 115200 band


2. Send command settings(case insensitive) to check Voice Recognition Module settings.

settings


3. Send sigtrain 0 On command to train record 0 with signature "On"

sigtrain 0

-> Success: 1, Record 0 Trained, SIG: On


4. Train another record. Send sigtrain 1 Off command to train record 1 with signature "Off".

sigtrain 1

-> Success: 1, Record 1 Trained, SIG: Off


5. Send load 0 1 command to load voice. 

Load 0 1

-> Load sucess: 2


6. Other Command

https://github.com/elechouse/VoiceRecognitionV3/blob/master/image/train_command.jpg


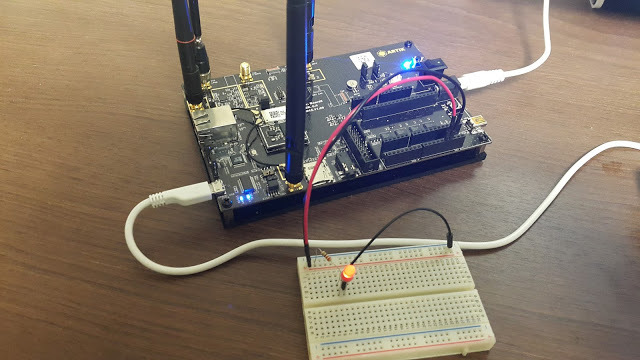
7. Control LED Sample

File -> Examples -> VoiceRecognitionV3 -> vr_sample_control_led


Posted by RDIoT
|