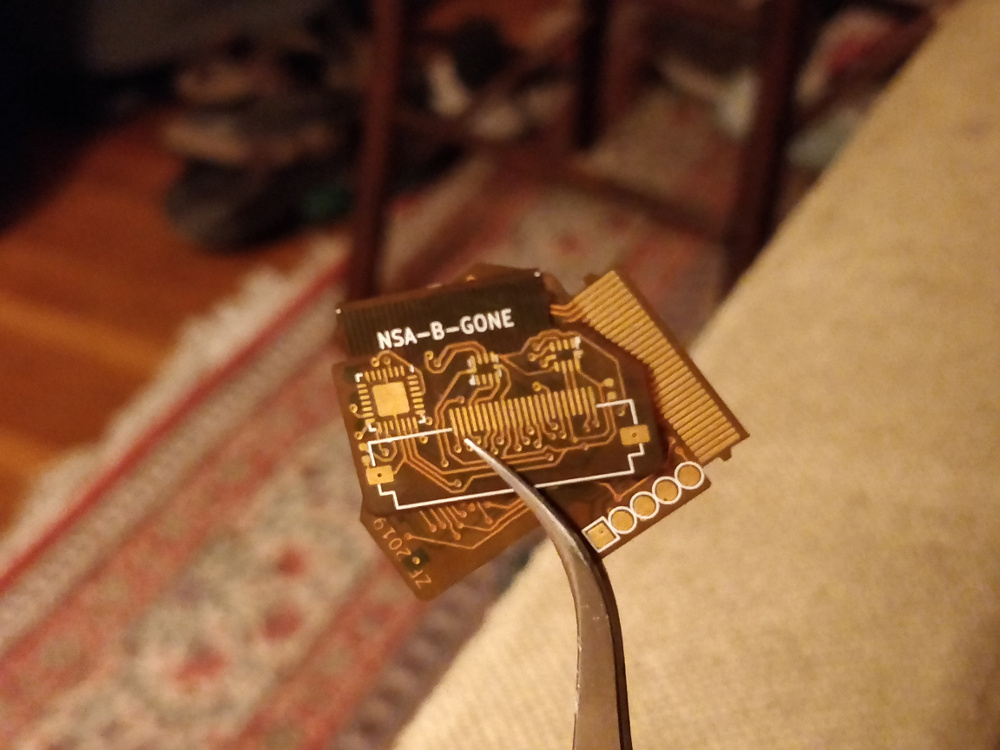
A hardware security doohickey for your trusty X220.
The NSA-B-GONE sits between your X220's motherboard and the 30-pin flat flex connector that provides power and data to the webcam, microphones, ThinkLight, and screen-mounted indicator lights. The onboard ATtiny88 microcontroller monitors the switched ThinkLight wire, and when it sees the user flash the light twice in quick succession it disables a pair of tiny USB data switches, physically cutting off access to the webcam and microphones.
A word of caution: this board, along with the other custom PCBs I've designed and shared that fit in an X220, could destroy your laptop if you don't know what you're doing. I installed, programmed, and debugged this device while my computer was powered up, but that doesn't make such behavior a good idea. If you make an NSA-B-GONE, be sure to carefully inspect your solder joints, program it outside the computer, and only install it when the computer is off, disconnected from AC power, and missing its battery.
The NSA-B-GONE works as intended, but it has a few issues that should be sorted out. I probably won't be the one to do this, but I will tell you what needs to be done (if you're so inclined), or how you can make the existing design work.
To build an NSA-B-GONE, you'll need a set of PCBs. You can find the original KiCad design files in the HARDWARE directory; either submit the project file directly to a manufacturer of your choice, or generate a set of Gerbers and send those in.
I used Osh Park for my boards. While they provide exceptional service, they may not be the perfect choice here as their standard flex substrate is a bit thin compared to the original flat flex cable, so it doesn't sit reliably in the connector. I 'fixed' this by shimming it with a few layers of Kapton tape, but your mileage may vary. Best practices suggest you should measure the existing cable and find a manufacturer that can match that.
There aren't too many parts to gather beyond the PCBs. You'll need a QFN version of the ATtiny88, two 0402 0u1 bypass capacitors, a pair of Diodes Inc PI3USB221AZUAEX USB switches, and a Molex 30-pin flat flex connector, part number 5051103091. As you can see from the PCB image above, the design takes advantage of the fact that eight of the pins aren't used on this connector; to make room for the ATtiny88, you'll need to shear them off using a sharp razor and a cutting mat.
I soldered my board by hand (as you can probably tell in the first picture; apparently flat flex hides no soldering crimes), but you could use a stencil and reflow if you like. In any case, the ATtiny88's Pin 1 is directly below the 'A' in 'NSA', and the two USB switches are oriented opposite one another and their Pin 1 stickers are somewhat visible on the silkscreen. Use plenty of flux, watch alignment, and don't worry about the microcontroller's ground pad.
To program the NSA-B-GONE, solder fine pitched wire to the programming pads as shown in the image above. From left to right, the pads are GND (the square one); SCK; MISO; MOSI; and RST. Despite my earlier warnings, I programmed the device while installed with the computer on, so I didn't break out power; you can do the same, or pick up a VCC line off the flat flex pads (refer to the schematic and PCB files to find it). Once you've landed the programming cables, hook them up to a suitable AVR programmer and run make install fuse in the FIRMWARE directory to flash the board.
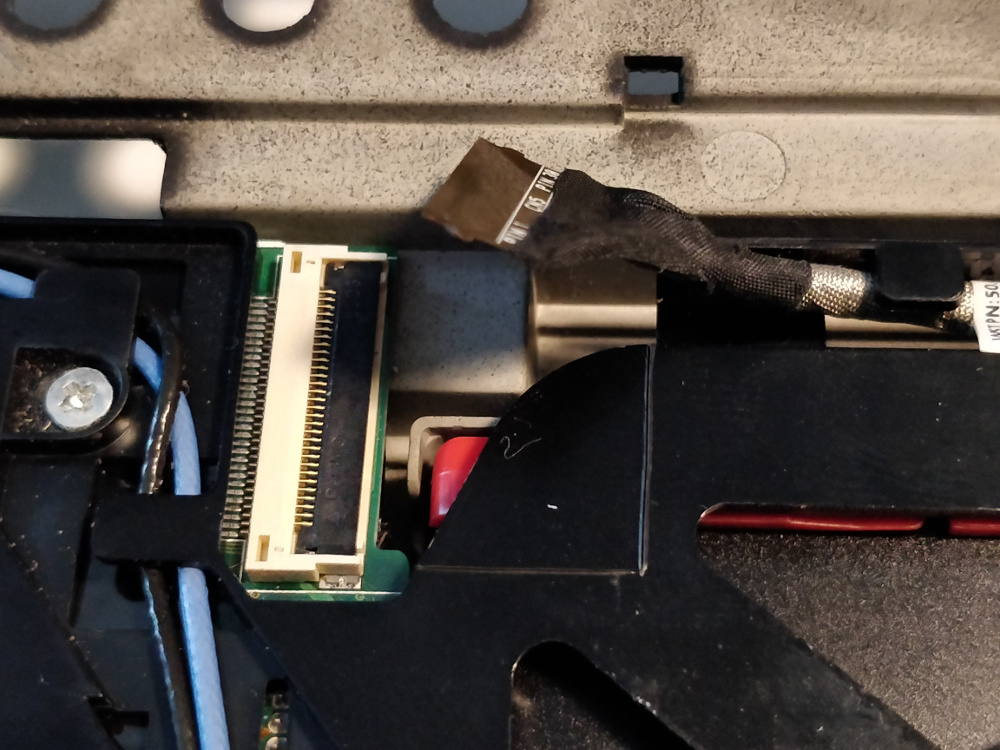
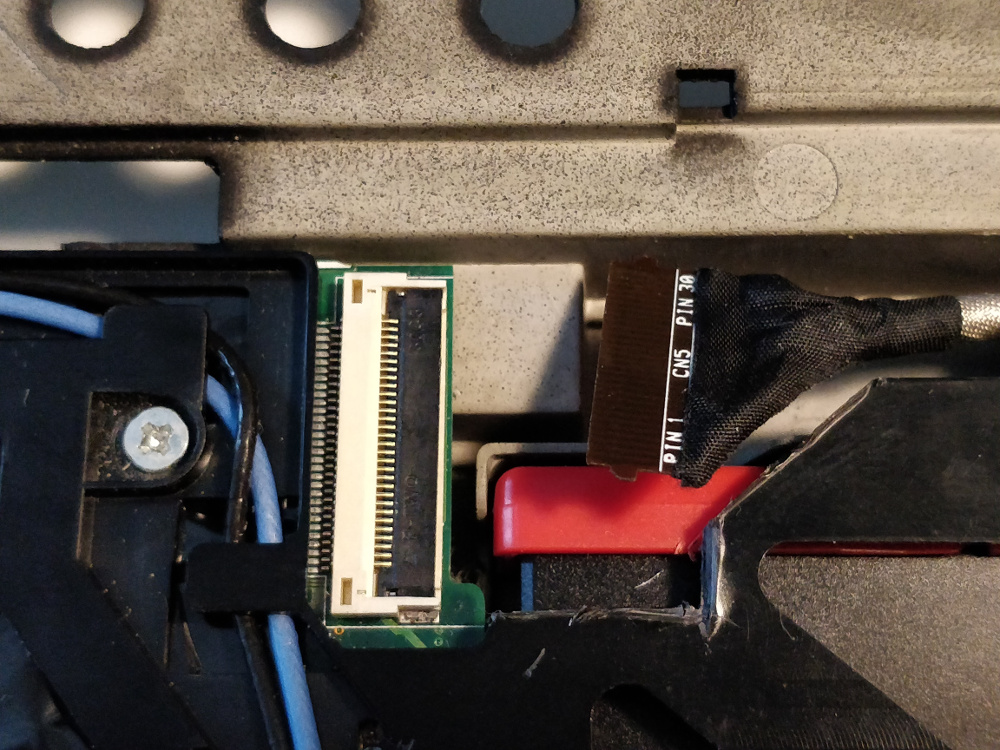
Installation is a simple matter of removing your X220's keyboard by unscrewing the two keyboard screws on the back and popping it out; removing the existing 30-pin flat flex from the motherboard; and installing the NSA-B-GONE between the cable and the plug. You will need to trim a bit of plastic away from the hard drive tray, as shown here:
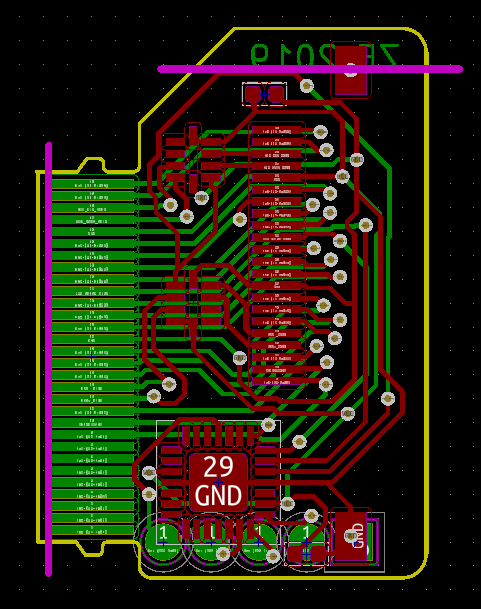
You may have also noticed that the PCB in the cover shot looks a bit .. shorter than the bare boards shown later. That's because I measured the available space wrong, so you'll need to cut off a bit of the board prior to installation (including one of the Molex connector's mounting lugs). You should also trim the tip of the flat flex connector off so the pads are flush. Both cuts are shown here in pink:
Hit me up on Twitter, or submit an Issue to this repo. Actually do this regardless of any issues that come up. I would love to hear that someone else actually built one of these devices.


