This project is intended to visualize the intermediate results from a computer vision pipeline. It is able to handle SVO dataset files from ZED camera as well as KITTI dataset. Currently, this is very unstable and need further devlopment to be completely utilised in any computer vision project.
To build this python package, follow the steps
- Create a python environment
cd /path/to/folder/ python -m venv cv_gui_venv source /path/to/folder/bin/activate - Download the package
cd /path/to/folder/ git clone https://github.com/vipulgarg1998/cv_gui.git cd cv_gui - Install the Pyzed for ZED SDK
python3 /usr/local/zed/get_python_api.py - Install the requirements
Ignore the Error: ERROR: Failed building wheel for image
pip install -r requirements.txt
I have provided one sample file for the zed camera called zed_sample that can be used to interfaced with the GUI. There are a lot of functions that the GUI provide and can be interfaced with the handling script but for the dataset creation purpose, I will be focusing on the following
-
Toggle between rectified and unrectified images: ZED sample uses a ZED camera object to handle the svo files and interface it with the GUI. The arguement
use_rectified : boolcan be passed to this class while creating the camera object. -
File name: The GUI request the handling script to the return the image to be displaced. Along with the image, a name can be passed as well. This name will be used to save the images in auto_record mode. Function
return_left_imageandreturn_right_imagecan be used to modify the file names in the zed_sample
This functionality is fully tested and working if the steps are followed in the given sequence only. If the steps are followed exactly, you will have all the left and right images in a folder. The following sample takes left and right rectified images from the zed camera and display it in the GUI.
-
Change the directory to where the cv_gui package is installed and not inside the package itself.
cd /path/to/folder -
Run the application
python3 -m cv_gui.samples.zed_sample -
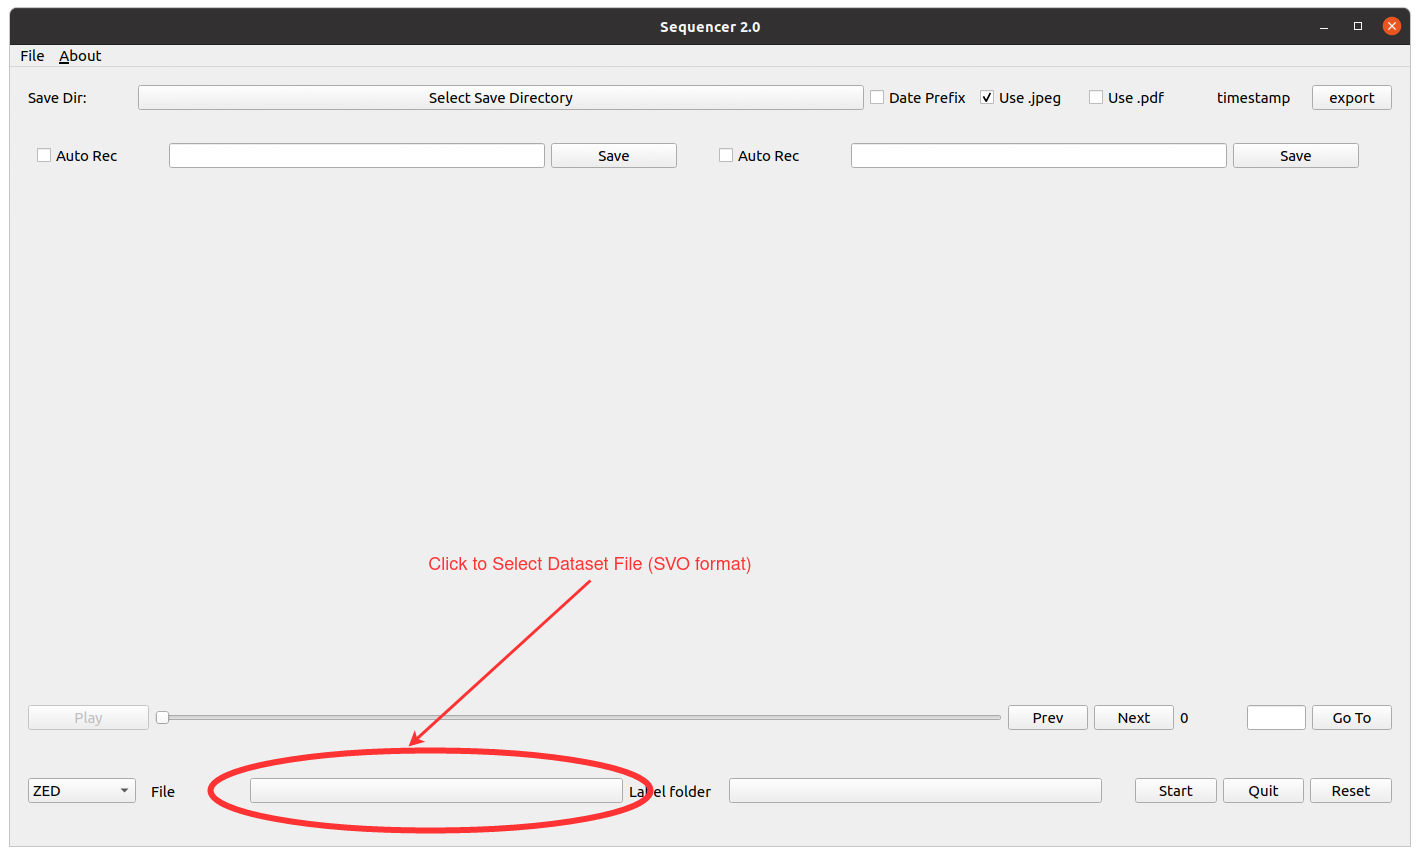
Select the SVO filepath.
-
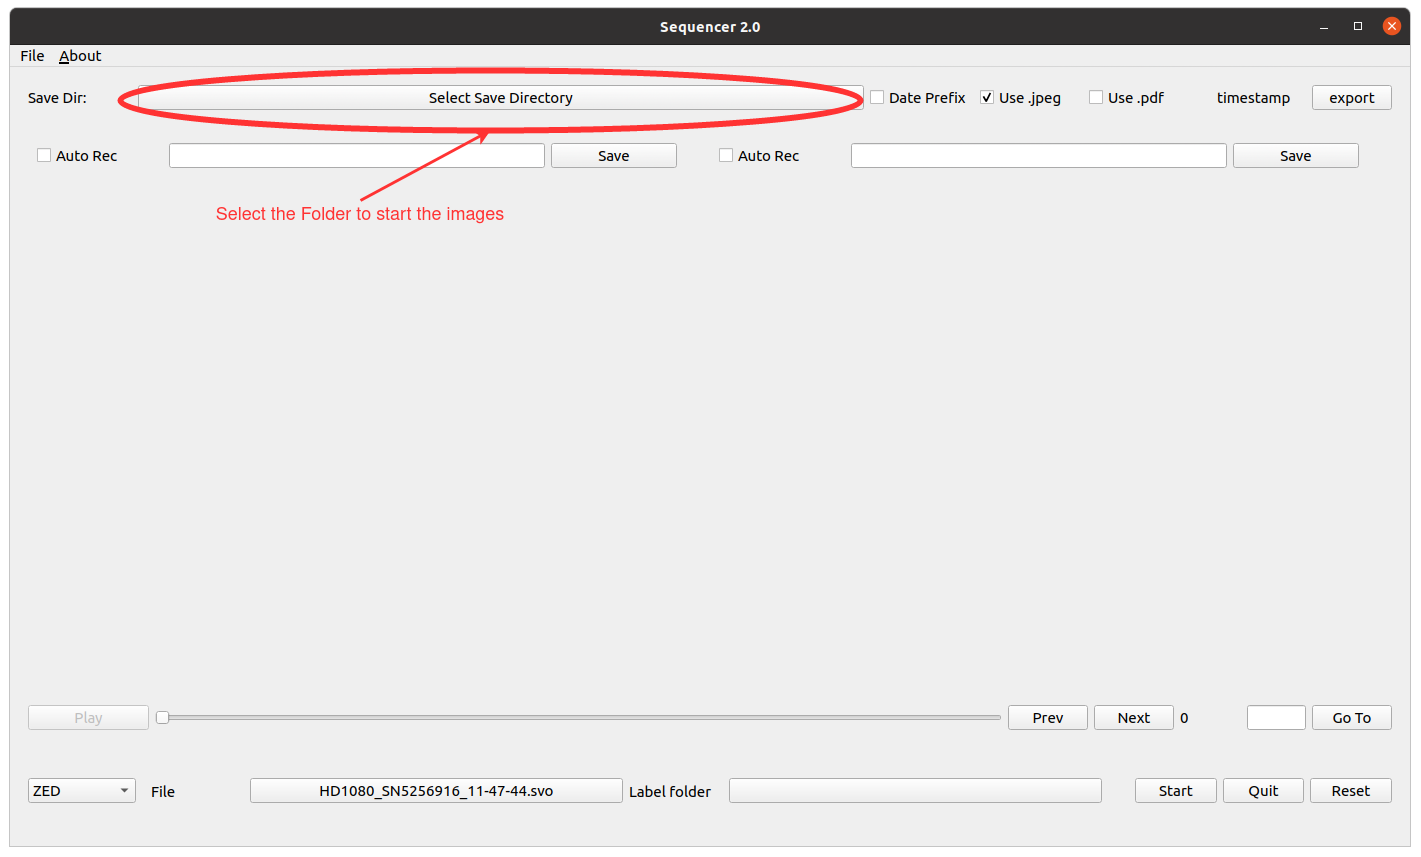
Select the directory in which the images will be saved.
-
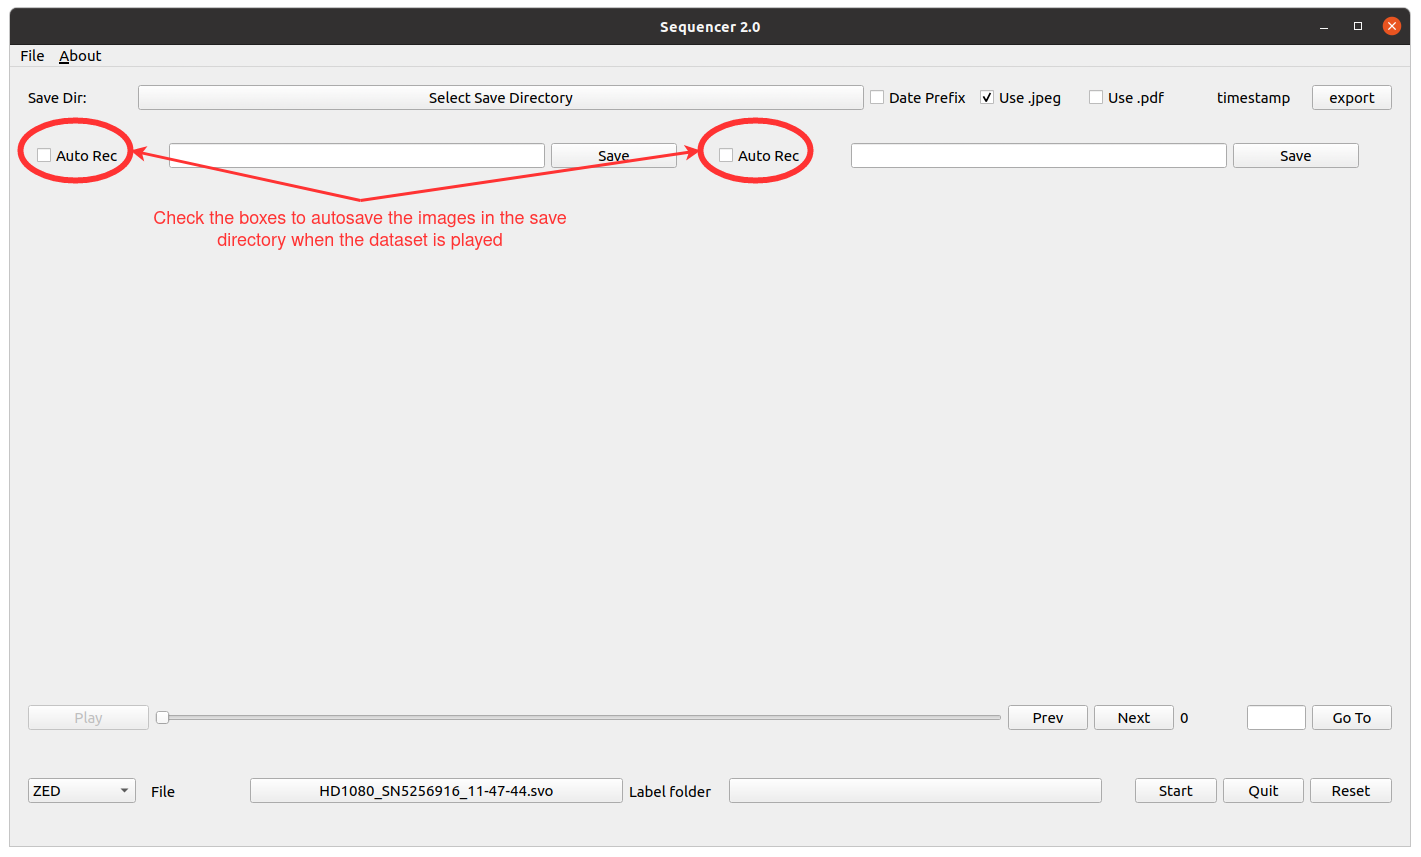
Enable the auto recording of the images while playing.
-
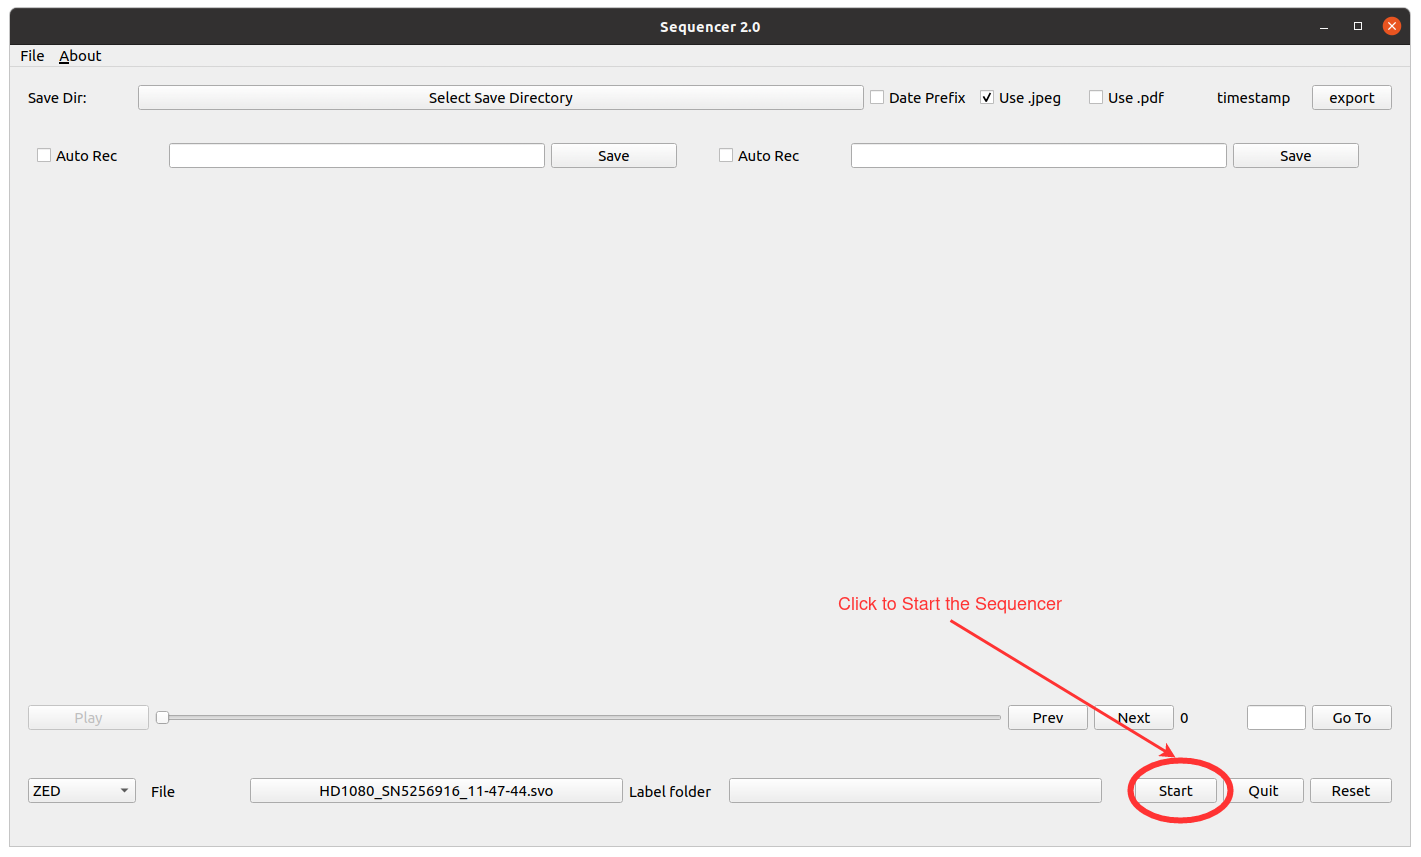
Start the Player.
-
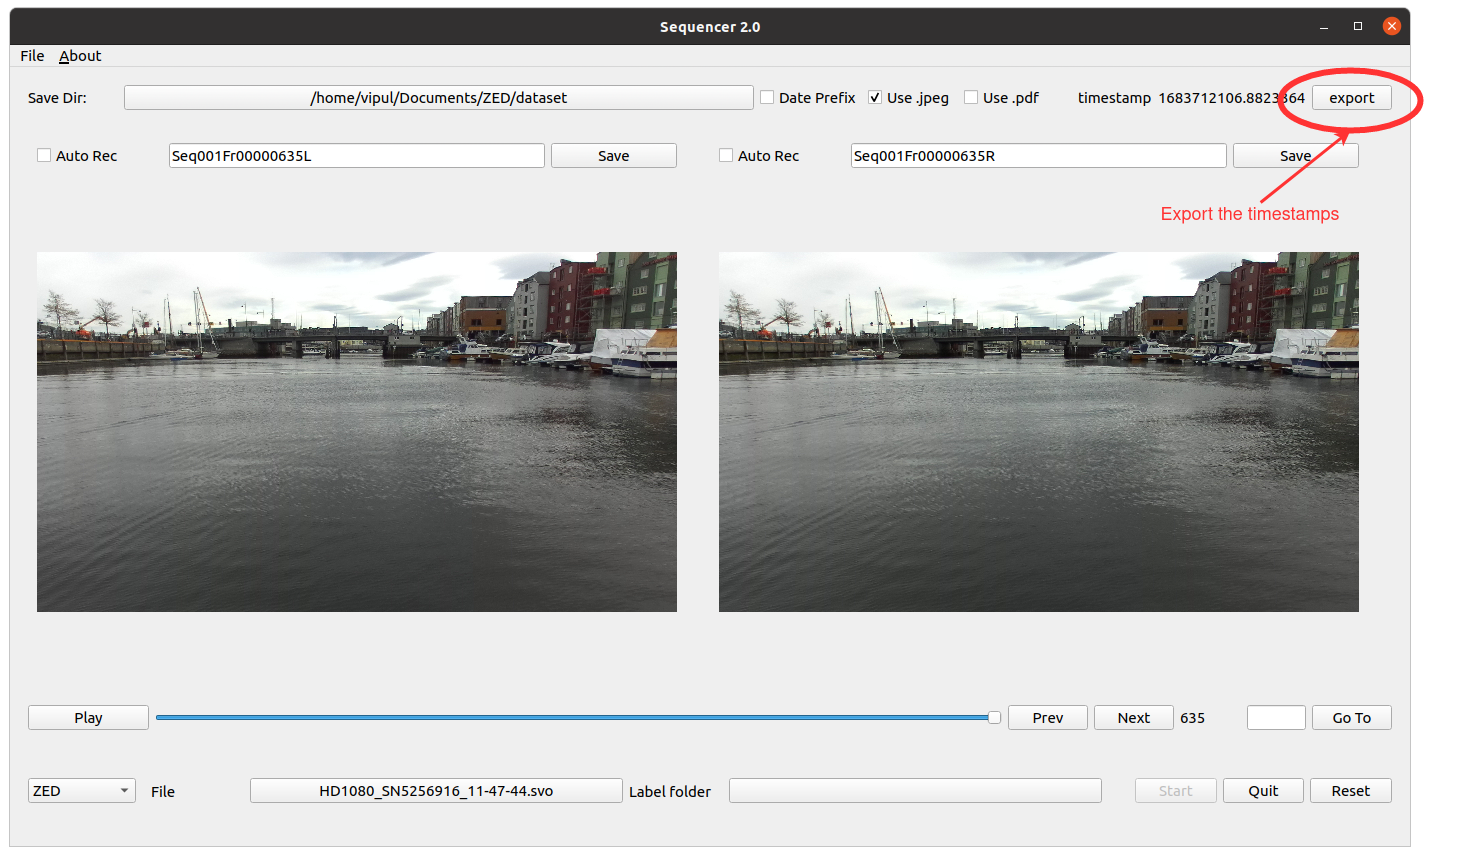
Play the Sequencer. Play button will automatically be toggle to Pause. Do not touch anything until the file is fully played.

-
Export the timestamps when the file reached to the end. Pause button will automatically be toggle to Play again
-
Quit the GUI and launch it again to prepare new dataset. Button Reset doesn't work properly at this moment.

This package is not stable and can throw warnings in some cases.
If the application is hanged for some reason, then the app can be closed by pressing the x button in the upper right corner. If this still doesn't close it, then in a few seconds Force Quit will appear and that can be used to close the application.