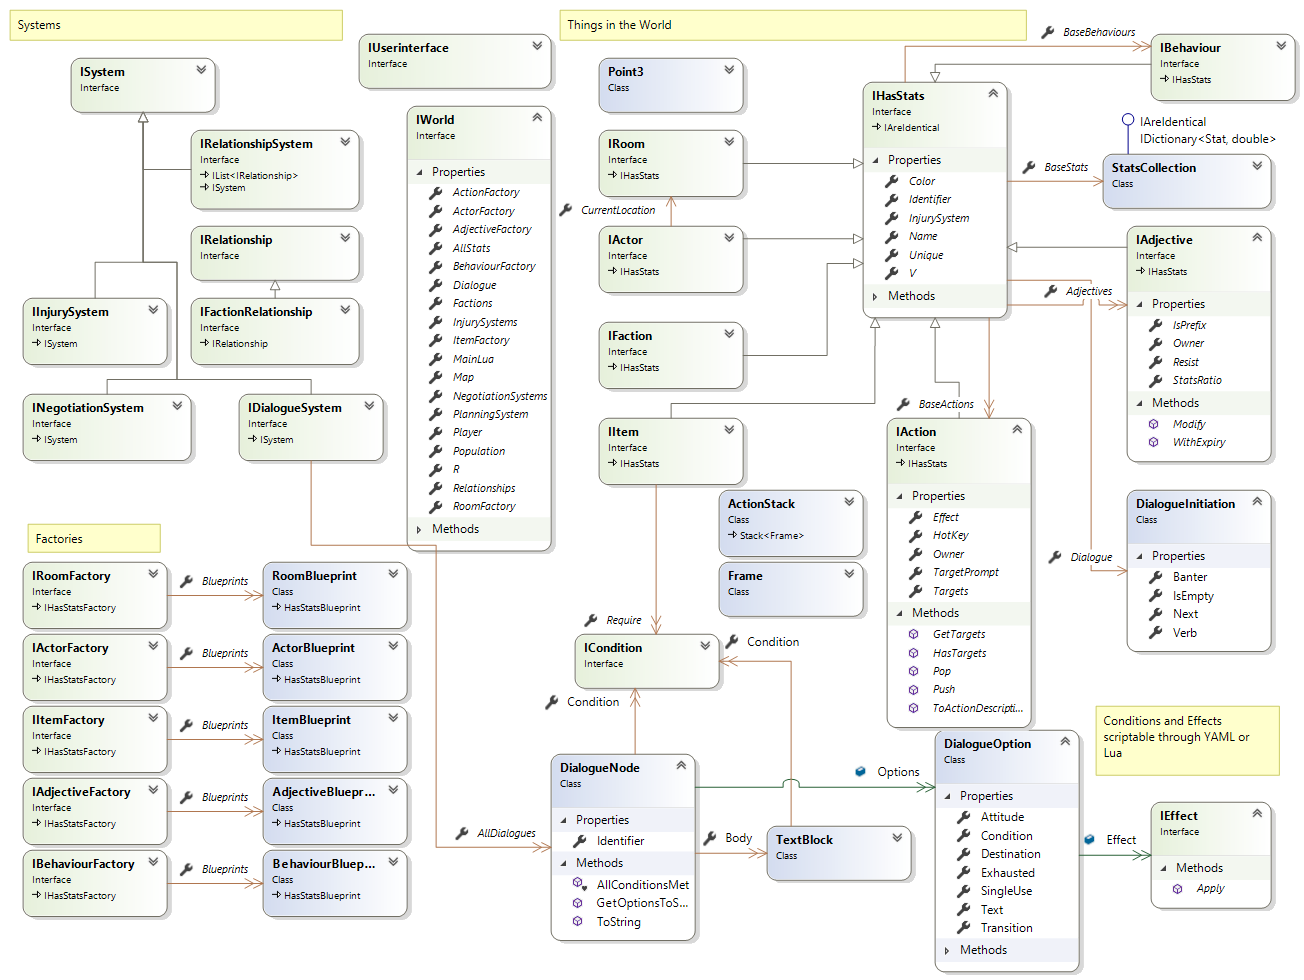
Wanderer is a game engine for developing dialogue rich scene based exploration games. Games can be created using only YAML.
- Simple YAML game files (See Cookbook)
- Basic systems/triggers/effects in YAML
- Advanced systems/triggers/effects in lua
- Support for developing new systems in C#
- Complete separation between engine and user interface
- Console user interface available as a nuget package
- Super thin interface layer for new implementations
- Maximum Test coverage
- All the systems (with simple class interfaces to replace / inject your own)
- Injury systems (model fire, hunger, slashing / piercing etc all directly from yaml)
- Negotiation system (coerce npcs to do perform actions)
- Relationship system (build love/hate with npc based on actions/dialogue)
- Factions
- Planning system (player influenced AI e.g. with leadership actions)
If you have trouble with this section you can refer to the Wanderer Template Repository which was produced by following this tutorial.
Create a new C# console application (requires dotnet 3.1 sdk):
dotnet new console
dotnet add package Wanderer
dotnet add package Wanderer.TerminalGui
Open Program.cs and add the following to main:
using Terminal.Gui;
using Wanderer.Factories;
using Wanderer.TerminalGui;

namespace TestWandererInstructions
{
    class Program
    {
        static void Main(string[] args)
        {
            var worldFactory = new WorldFactory();

            Application.Init();

            var ui = new MainWindow(worldFactory);
            Application.Top.Add(ui);
            Application.Run();
        }
    }
}
Run the game (Use the dll name of your project):
dotnet build
dotnet ./bin/Debug/netcoreapp3.1/TestWandererInstructions.dll
At this point starting a new game should give an error about a missing Resources directory. Edit your csproj file and add the following (this will mark all files under Resources as copy to bin directory).
  <ItemGroup>
    <Content Include="Resources\**\*">
      <CopyToOutputDirectory>PreserveNewest</CopyToOutputDirectory>
    </Content>
  </ItemGroup>
Now create a Resources folder in your project directory and add a new file "rooms.yaml". Add exactly the following (including hyphens and whitespace):
- Name: Endless Plains
  MandatoryActors:
    - Name: Girafe
To talk to the Girafe we can create some dialogue. Create a file in the Resources directory called dialogue.yaml.
Fill it with some dialogue using the online dialogue editor or just use the following:
- Identifier: b270c715-84e1-49b6-90df-91ea9e34075c
  Body:
  - Text: Hello there
  Options:
  - Text: hello yourself
    Destination: 8cd356a8-13e4-4ebe-9fb5-0f8d9899ff26
  - Text: that's enough of that!
- Identifier: 8cd356a8-13e4-4ebe-9fb5-0f8d9899ff26
  Body:
  - Text: How are you this fine morning?
  Options:
  - Text: Good
    Destination: 88d3f46a-69ef-4fd5-b7a6-98486d8cacea
  - Text: Bad
    Destination: 1101116d-34c4-48c5-a76b-353aa138dafa
- Identifier: 88d3f46a-69ef-4fd5-b7a6-98486d8cacea
  Body:
  - Text: Me too
- Identifier: 1101116d-34c4-48c5-a76b-353aa138dafa
  Body:
  - Text: Sorry to hear that
Finally update rooms.yaml to associate the dialogue with the Girafe
- Name: Endless Plains
  MandatoryActors:
    - Name: Girafe
      Dialogue:
         Next: b270c715-84e1-49b6-90df-91ea9e34075c
Add more content by following the recipes in the Cookbook.
The above example uses the Wanderer.TerminalGui package (and MainWindow class) for the game user interface. The engine itself is written in dotnet standard so is not tied to the Console. It can run as a Blazor web app, WinForms, ETO etc.
IUserInterface is a very simple interface to implement so building a more advanced user interface is easy. The best way to start is to run the game with the bare bones ExampleUserInterface (see below) then swap in your own implementation of IUserInterface.
var factory = new WorldFactory(Environment.CurrentDirectory);
var world = factory.Create();
var ui = new ExampleUserInterface();

while (!world.Player.Dead)
{
    // get user to pick an action
    ui.GetChoice("Pick Action", null, out IAction chosen, world.Player.GetFinalActions().ToArray());
    Console.Clear();

    // run the chosen action in the world
    world.RunRound(ui,chosen);

    // tell player what happened
    ui.ShowMessage("Results", string.Join(Environment.NewLine,ui.Log.RoundResults));
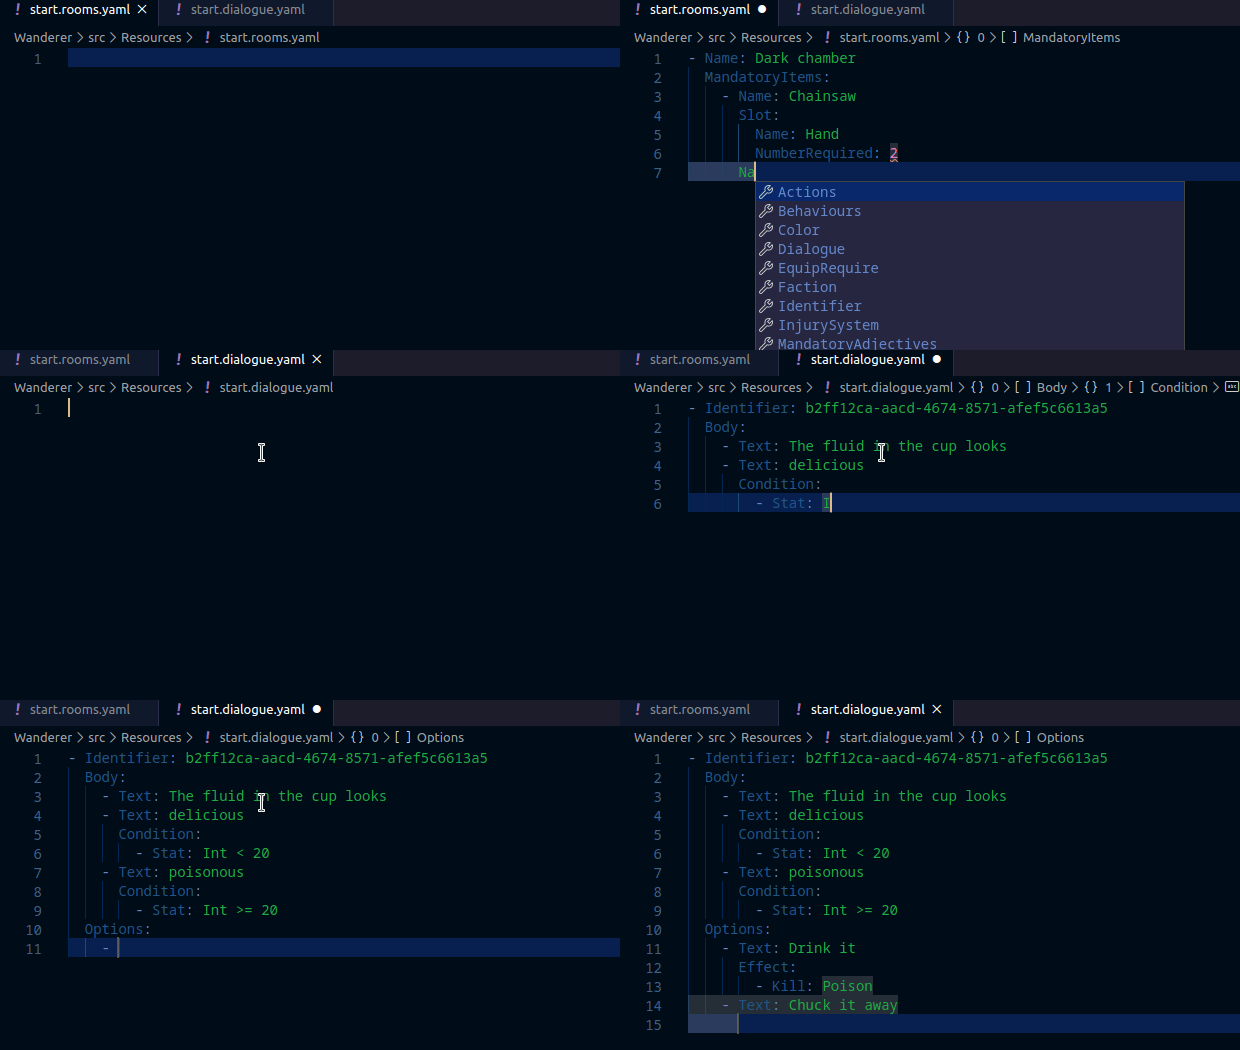
}Yaml autocomplete is supported via schemas. The easiest way to get this working is to use Visual Studio Code and install the Redhat YAML plugin. Download the latest schemas and reference them from your workspace.
"settings": {

		"yaml.schemas": {
			"./src/Resources/Schemas/injury.schema.json": [ "/**/*injury.yaml" ],
			"./src/Resources/Schemas/dialogue.schema.json": [ "/**/*dialogue.yaml" ],
			"./src/Resources/Schemas/adjectives.schema.json": [ "/**/*adjectives.yaml" ],
			"./src/Resources/Schemas/actions.schema.json": [ "/**/*actions.yaml" ],
			"./src/Resources/Schemas/items.schema.json": [ "/**/*items.yaml" ],
			"./src/Resources/Schemas/rooms.schema.json": [ "/**/*rooms.yaml" ],
			"./src/Resources/Schemas/actors.schema.json": [ "/**/*actors.yaml" ],
			"./src/Resources/Schemas/faction.schema.json": [ "/**/*faction.yaml" ],
			"./src/Resources/Schemas/plans.schema.json": [ "/**/*plans.yaml" ]
		}
}You can validate your resource files using the WorldValidator class. This tests not only that the yaml files can be deserialized but also that there are no missing references (e.g. dialogue) and that conditions, effects and behaviours have valid Lua code which can be executed.
For example:
var worldFactory = new WorldFactory();

var validator = new WorldValidator();
validator.IncludeStackTraces = true;
validator.Validate(worldFactory);

if(validator.Warnings.Length > 0)
{
    Console.WriteLine("WARNINGS:");
    Console.WriteLine(validator.Warnings);
}

if(validator.Errors.Length > 0)
{
    Console.WriteLine("ERRORS:");
    Console.WriteLine(validator.Errors);
}

Console.WriteLine("Finished Validation:");
Console.WriteLine(validator.ErrorCount + " Errors");
Console.WriteLine(validator.WarningCount + " Warnings");Build and publish with the dotnet command (requires installing Dot Net 3.1 SDK)
dotnet build
dotnet test
