This is the first in a series of posts about how to build your Azure DevOps Pipeline using YAML. The other posts in this Series can be found below.
Day 35 - Practical Guide for YAML Build Pipelines in Azure DevOps - Part 1
Day 38 - Practical Guide for YAML Build Pipelines in Azure DevOps - Part 2
Today, we are going to take you through the process of setting up a Build Pipeline as Code using YAML in Azure DevOps. In future installments, we will continue to build on the content used in this article.
In this article:
Creating a Service Principal for the Build Pipeline
Create a new Service Connection for the Service Principal
Create a Repo in Azure DevOps for the Build Pipeline
Create a YAML File for the Build Pipeline
Explanation of the Build Pipeline YAML File
Create a new Build Pipeline
Conclusion
SPONSOR: Need to stop and start your development VMs on a schedule? The Azure Resource Scheduler let's you schedule up to 10 Azure VMs for FREE! Learn more HERE
On your Linux Host (with Azure CLI installed), open up a bash prompt and run the following command to retrieve your Azure Subscription ID.
AZURE_SUB_ID=$(az account show --query id --output tsv)If the above command doesn't work, manually add your Azure Subscription ID to the variable.
AZURE_SUB_ID="00000000-0000-0000-0000-000000000000"On your Linux Host (with Azure CLI installed), open up a bash prompt and run the following command to create a new Service Principal.
AZURE_BUILD_PIPE_SP=$(az ad sp create-for-rbac \
--role "Owner" \
--name "sp-az-build-pipeline-creds" \
--scope "/subscriptions/$AZURE_SUB_ID" \
--years 1)
You should get back a result similar to what is shown below. You'll notice that the Owner right assignment is scoped to the Azure Subscription.
Changing "sp-az-build-pipeline-creds" to a valid URI of "http:https://sp-az-build-pipeline-creds", which is the required format used for service principal names
Creating a role assignment under the scope of "/subscriptions/00000000-0000-0000-0000-000000000000"
  Retrying role assignment creation: 1/36
  Retrying role assignment creation: 2/36
Retrieve the appId from the Azure Service Principal.
echo $AZURE_BUILD_PIPE_SP | jq .appId | tr -d '"'You should get back the appId which should look similar to what is shown below, make a note of it.
3dbd4149-13a9-4d97-95bd-fafd668da7a6Retrieve the password from the Azure Service Principal.
echo $AZURE_BUILD_PIPE_SP | jq .password | tr -d '"'You should get back the password which should look similar to what is shown below, make a note of it.
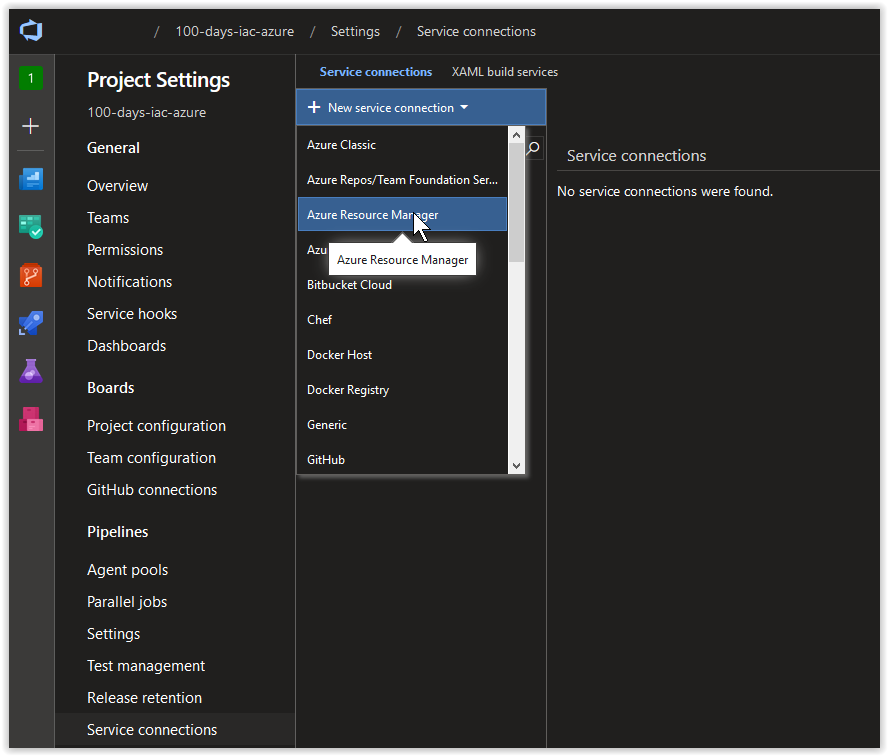
30d7efe8-372d-420d-b84b-b25d2a2b32c6In your Azure DevOps Project, click on the Project Settings blade and then click on Service Connections. Next, click on + New service connection and then on Azure Resource Manager.
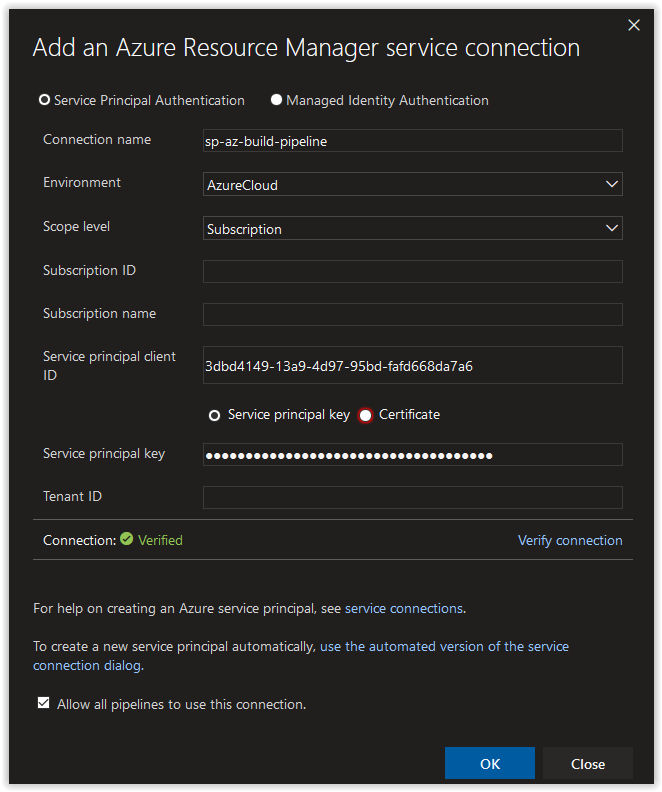
Next, in the Add an Azure Resource Manager service connection window, click on the link use the full version of the service connection dialog.
Next, in the Add an Azure Resource Manager service connection window, set the Connection name field to sp-az-build-pipeline. Paste in the appId value from earlier in the Service principal client ID field and the password value in the Service principal key field. Afterwards, click on the Verify connection button. Once the connection is verified, click on the OK button.
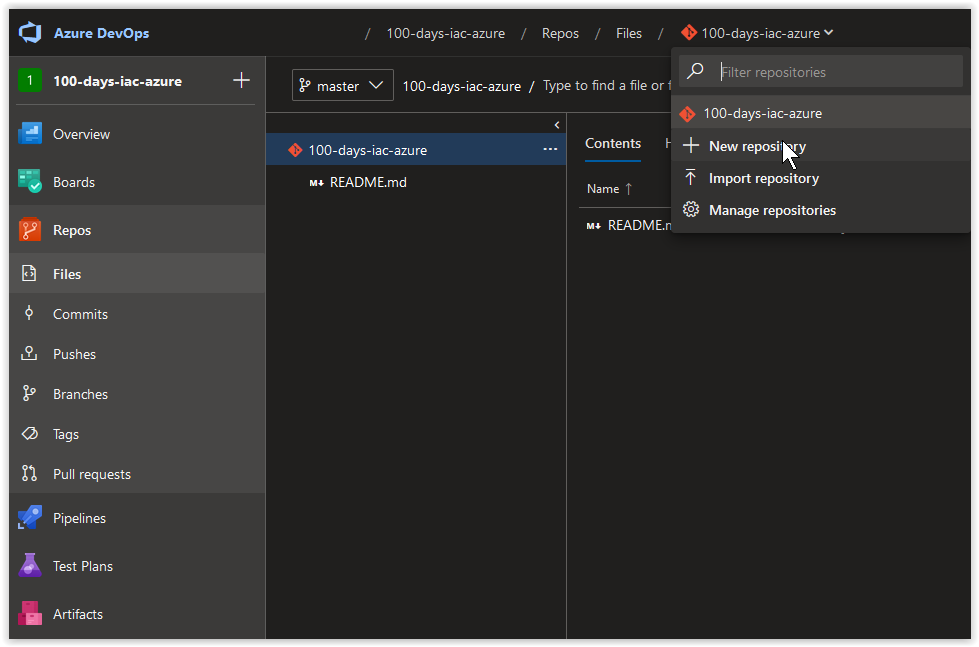
In your Azure DevOps Project, click on the Repos blade and then click on + New Repository.
Next, create a Git repository called practical-yaml-build-pipe, put a checkmark in the Add a README to describe your repository box and then click on Create.
Next, in the practical-yaml-build-pipe Repo, create a new file.
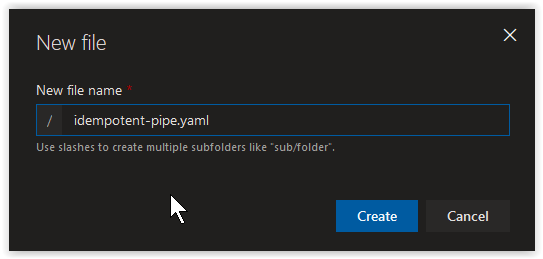
Name the file idempotent-pipe.yaml and click on Create.
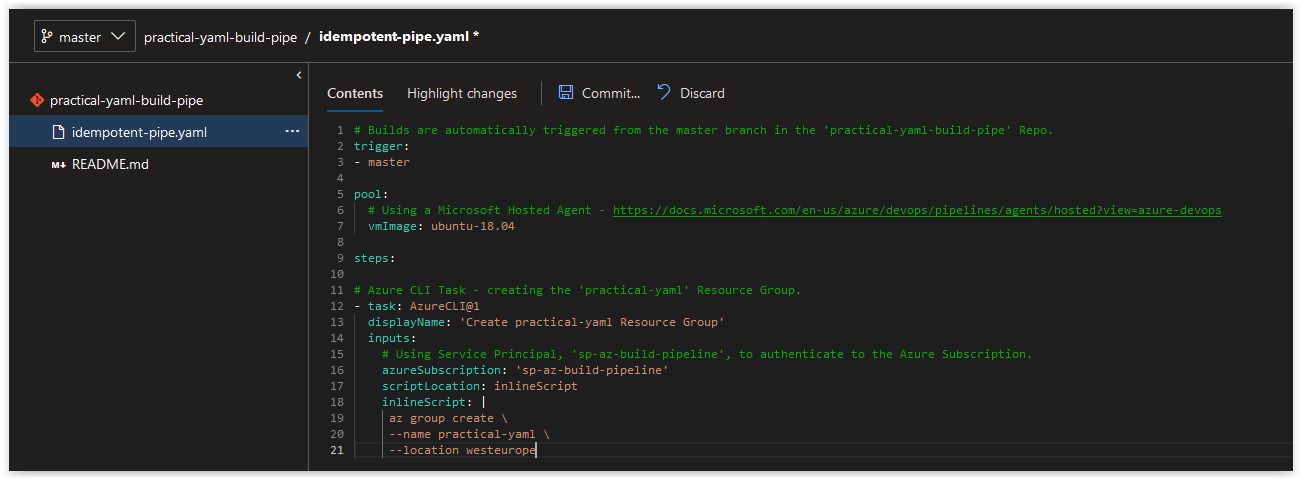
Next, paste in the contents below into idempotent-pipe.yaml and click on Commit... to save the file.
# Builds are automatically triggered from the master branch in the 'practical-yaml-build-pipe' Repo.
trigger:
- master

pool:
  # Using a Microsoft Hosted Agent - https://docs.microsoft.com/en-us/azure/devops/pipelines/agents/hosted?view=azure-devops
  vmImage: ubuntu-18.04

steps:

# Azure CLI Task - creating the 'practical-yaml' Resource Group.
- task: AzureCLI@1
  displayName: 'Create practical-yaml Resource Group'
  inputs:
    # Using Service Principal, 'sp-az-build-pipeline', to authenticate to the Azure Subscription.
    azureSubscription: 'sp-az-build-pipeline'
    scriptLocation: inlineScript
    inlineScript: |
     az group create \
     --name practical-yaml \
--location westeuropeThe first section of our YAML file lets the Azure Build Pipeline that we are triggering builds from the master branch in the practical-yaml-build-pipe repository.
trigger:
- master
The next section below describes the Microsoft Hosted Agent we are using in the Build. As you can see below, we are using the latest Ubuntu Agent available at the time of this writing. Additional Agent Builds options are described here.
pool:
  vmImage: ubuntu-18.04
The final section of our YAML file describes the tasks to execute at runtime during the Build. Our first step that we are implementing is an Azure CLI task that creates a Resource Group called practical-yaml in our Azure Subscription using an inline bash script. The credentials we are using to authenticate to the Azure Subscription is given in the azureSubscription field which tells the build to use the sp-az-build-pipeline service connection that we created earlier.
steps:

- task: AzureCLI@1
  displayName: 'Create practical-yaml Resource Group'
  inputs:
    azureSubscription: 'sp-az-build-pipeline'
    scriptLocation: inlineScript
    inlineScript: |
     az group create \
     --name practical-yaml \
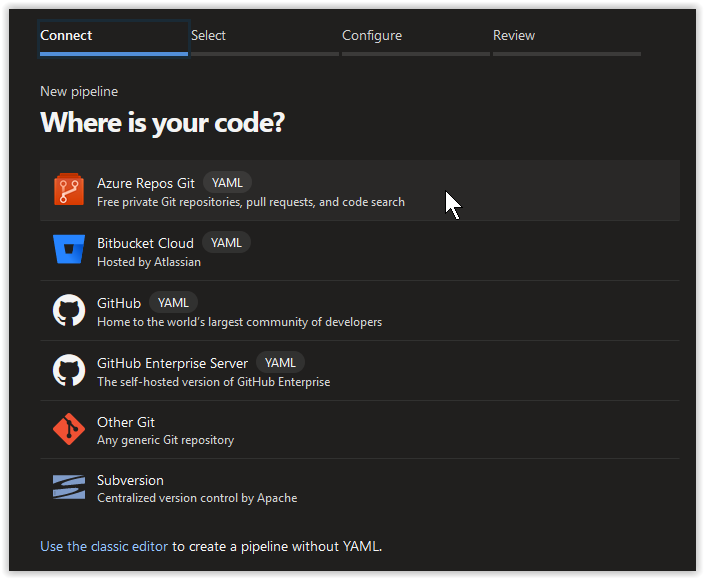
--location westeuropeNext, in Azure DevOps click on Pipelines and create a new Pipeline. On the Where is your code? dialog page, choose Azure Repos Git (YAML).
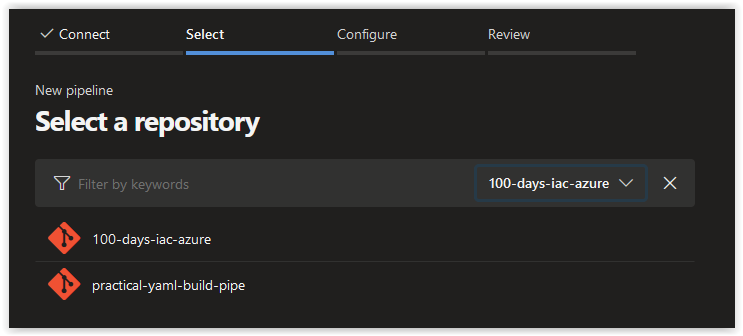
Next, select the practical-yaml-build-pipeline repository.
Next, choose Existing Azure Pipelines YAML file.
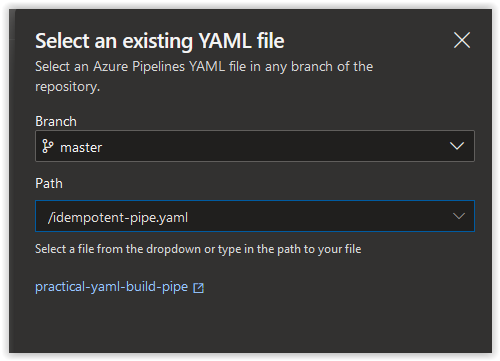
Next, click on the Path drop-down menu and select the idempotent-pipe.yaml file. Afterwards, click on Continue at the bottom right hand side of the page.
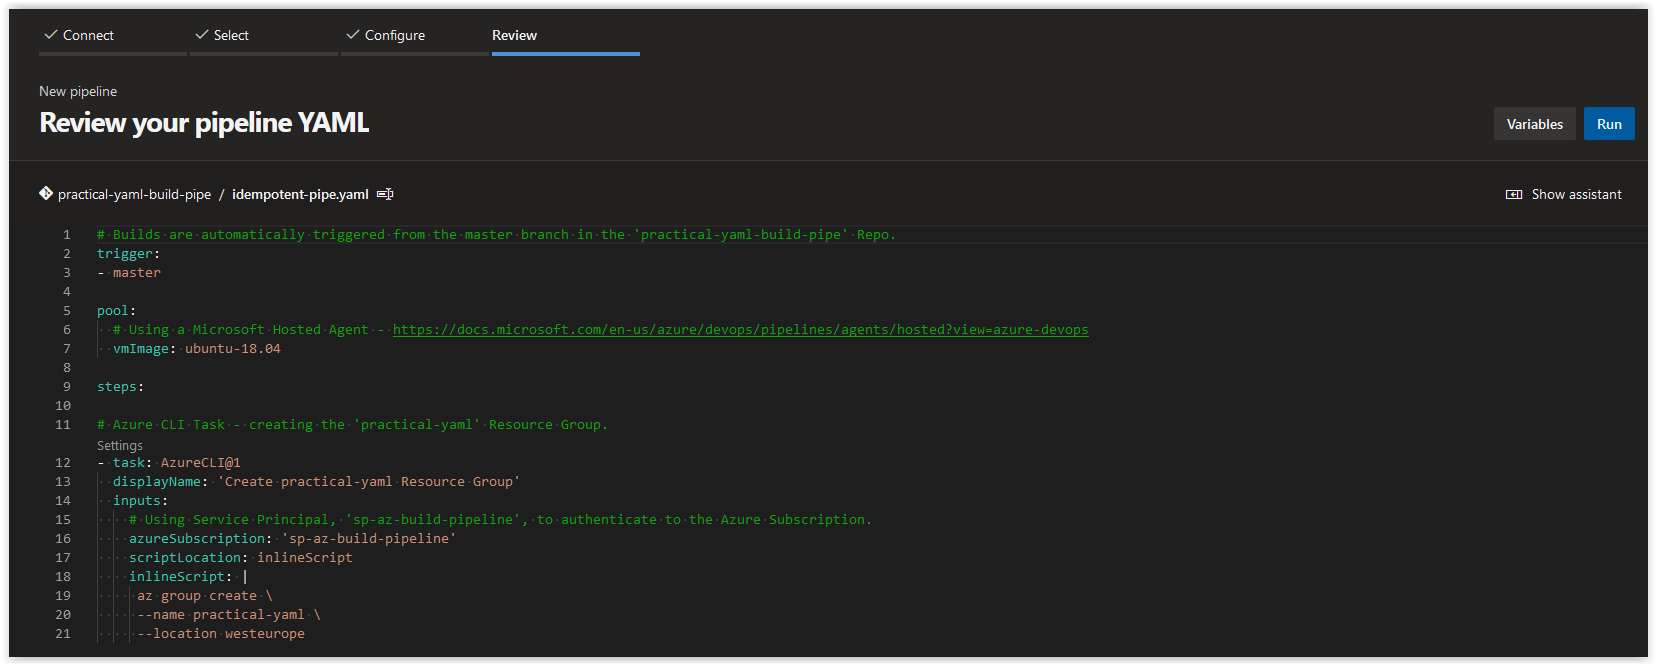
Next, look over the content on the Review your pipeline YAML page and click on Run.
Finally, wait for the Status of the Job to change from Queued to Running to Success. The job should take less than 30 seconds to run. Afterwards you can review the logs of the Job manually and/or verify its veracity by seeing if the practical-yaml Resource Group exists in your Azure Subscription.
In today's article, we created a Build Pipeline as Code using YAML in Azure DevOps that created an empty Resource Group that we will deploy resources to in future installments of this series of blog posts. If there's a specific scenario that you wish to be covered in future articles, please create a New Issue in the starkfell/100DaysOfIaC GitHub repository.
