
Installation • Usage • Documentation
An implementation of the party.js library for the Obsidian.
- Create confetti and sparkles effects

- Add effects to checkboxes (also supports dataview tasks and a tasks plugin)


- A lot of customization options
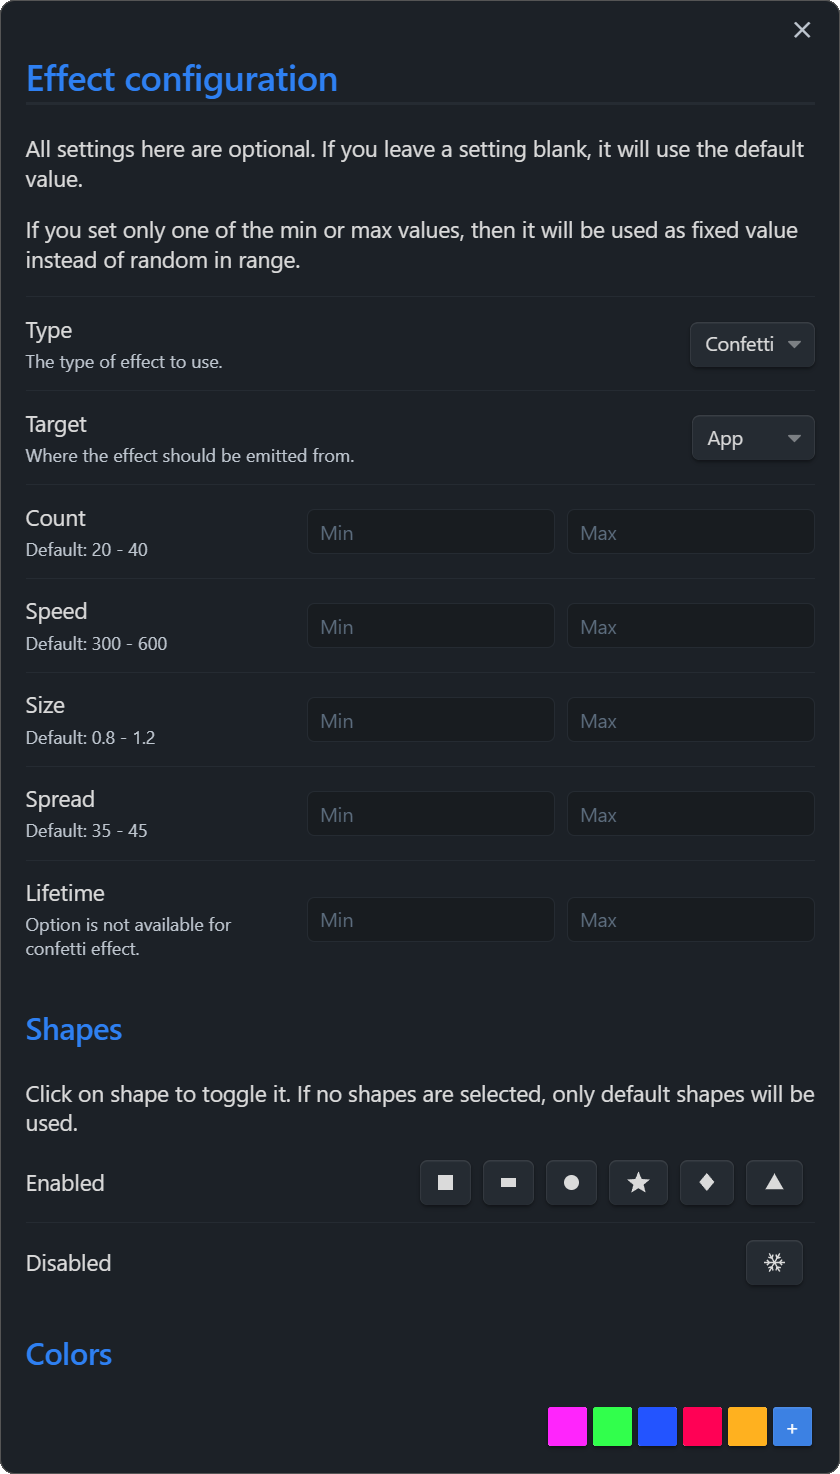
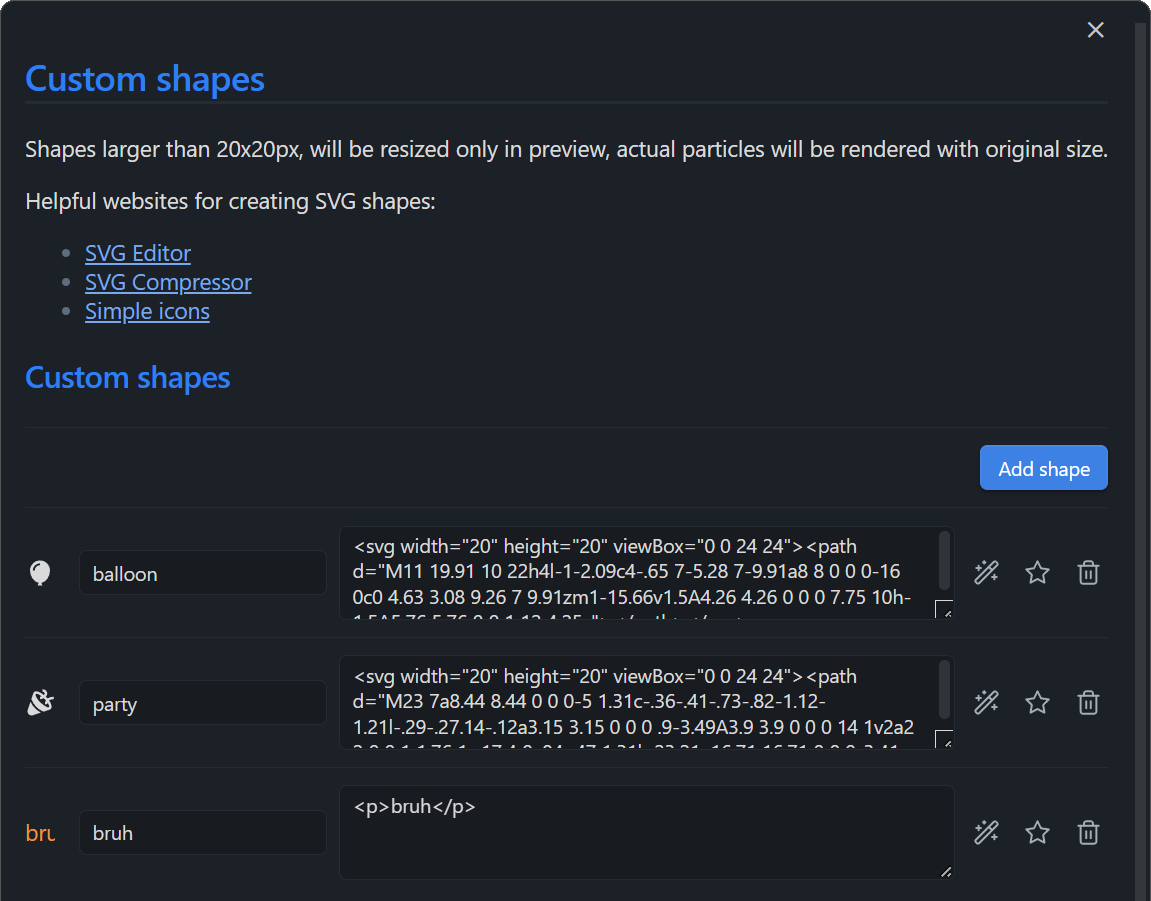
- Custom shapes
-
Kanban compatibility
-
What else do you want? (I'm open to suggestions!)
Search for the "Party🎉" in the Obsidian plugin list.
- Go to Releases and download the latest release
- Enable plugins in the Obsidian settings
- Extract the contents of the zip file to obsidian plugins folder
- You should have a folder named "obsidian-party", containing "main.js" and "manifest.json" files
- Restart Obsidian and enable the plugin in the plugin list
- Clone the repository
- Run
npm ioryarnto install dependencies npm run devto build the plugin
- Open plugin settings
- Select effect type
- Enjoy!
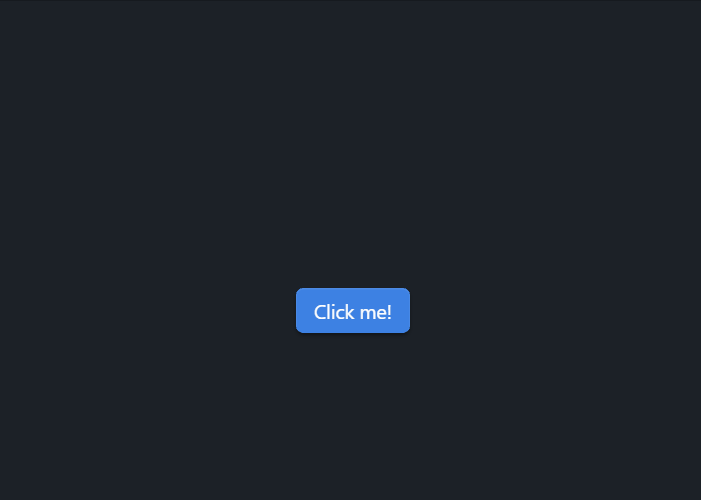
Either add a confetti or sparkles class for an element, or make use of all features of the party module, which can be accessed through window.party!
Also, you'd better to not spam particles, because it can cause performance issues.
<button class="confetti">Click me!</button>Click me! (This button will launch confetti on click if you have this plugin enabled)
```dataviewjs
const buttonMaker = (text) => {
  const btn = this.container.createEl('button', {"text": text});
  btn.addEventListener('click', async (evt) => {
    evt.preventDefault();
    party.confetti(evt); // <---- creating confetti
    party.sparkles(evt); // <---- creating sparkles
  });
  return btn;
}

dv.table(["File", "Button"],
	dv.pages('"Dataview"')
    .map(t => [
      t.file.link,
      buttonMaker("Let's start the party!")
    ]
  )
)
```
Any HTML code can be used as a shape. For example, you can use an SVG image as a shape.
<svg viewBox="0 0 2 2" width="10" height="10"><circle cx="1" cy="1" r="1"/></svg>Put the code in the "Shape HTML" field in the custom shapes section of the plugin settings, give it a name and you're good to go! Now you can select custom shapes in the "Shapes" field of the effect settings.