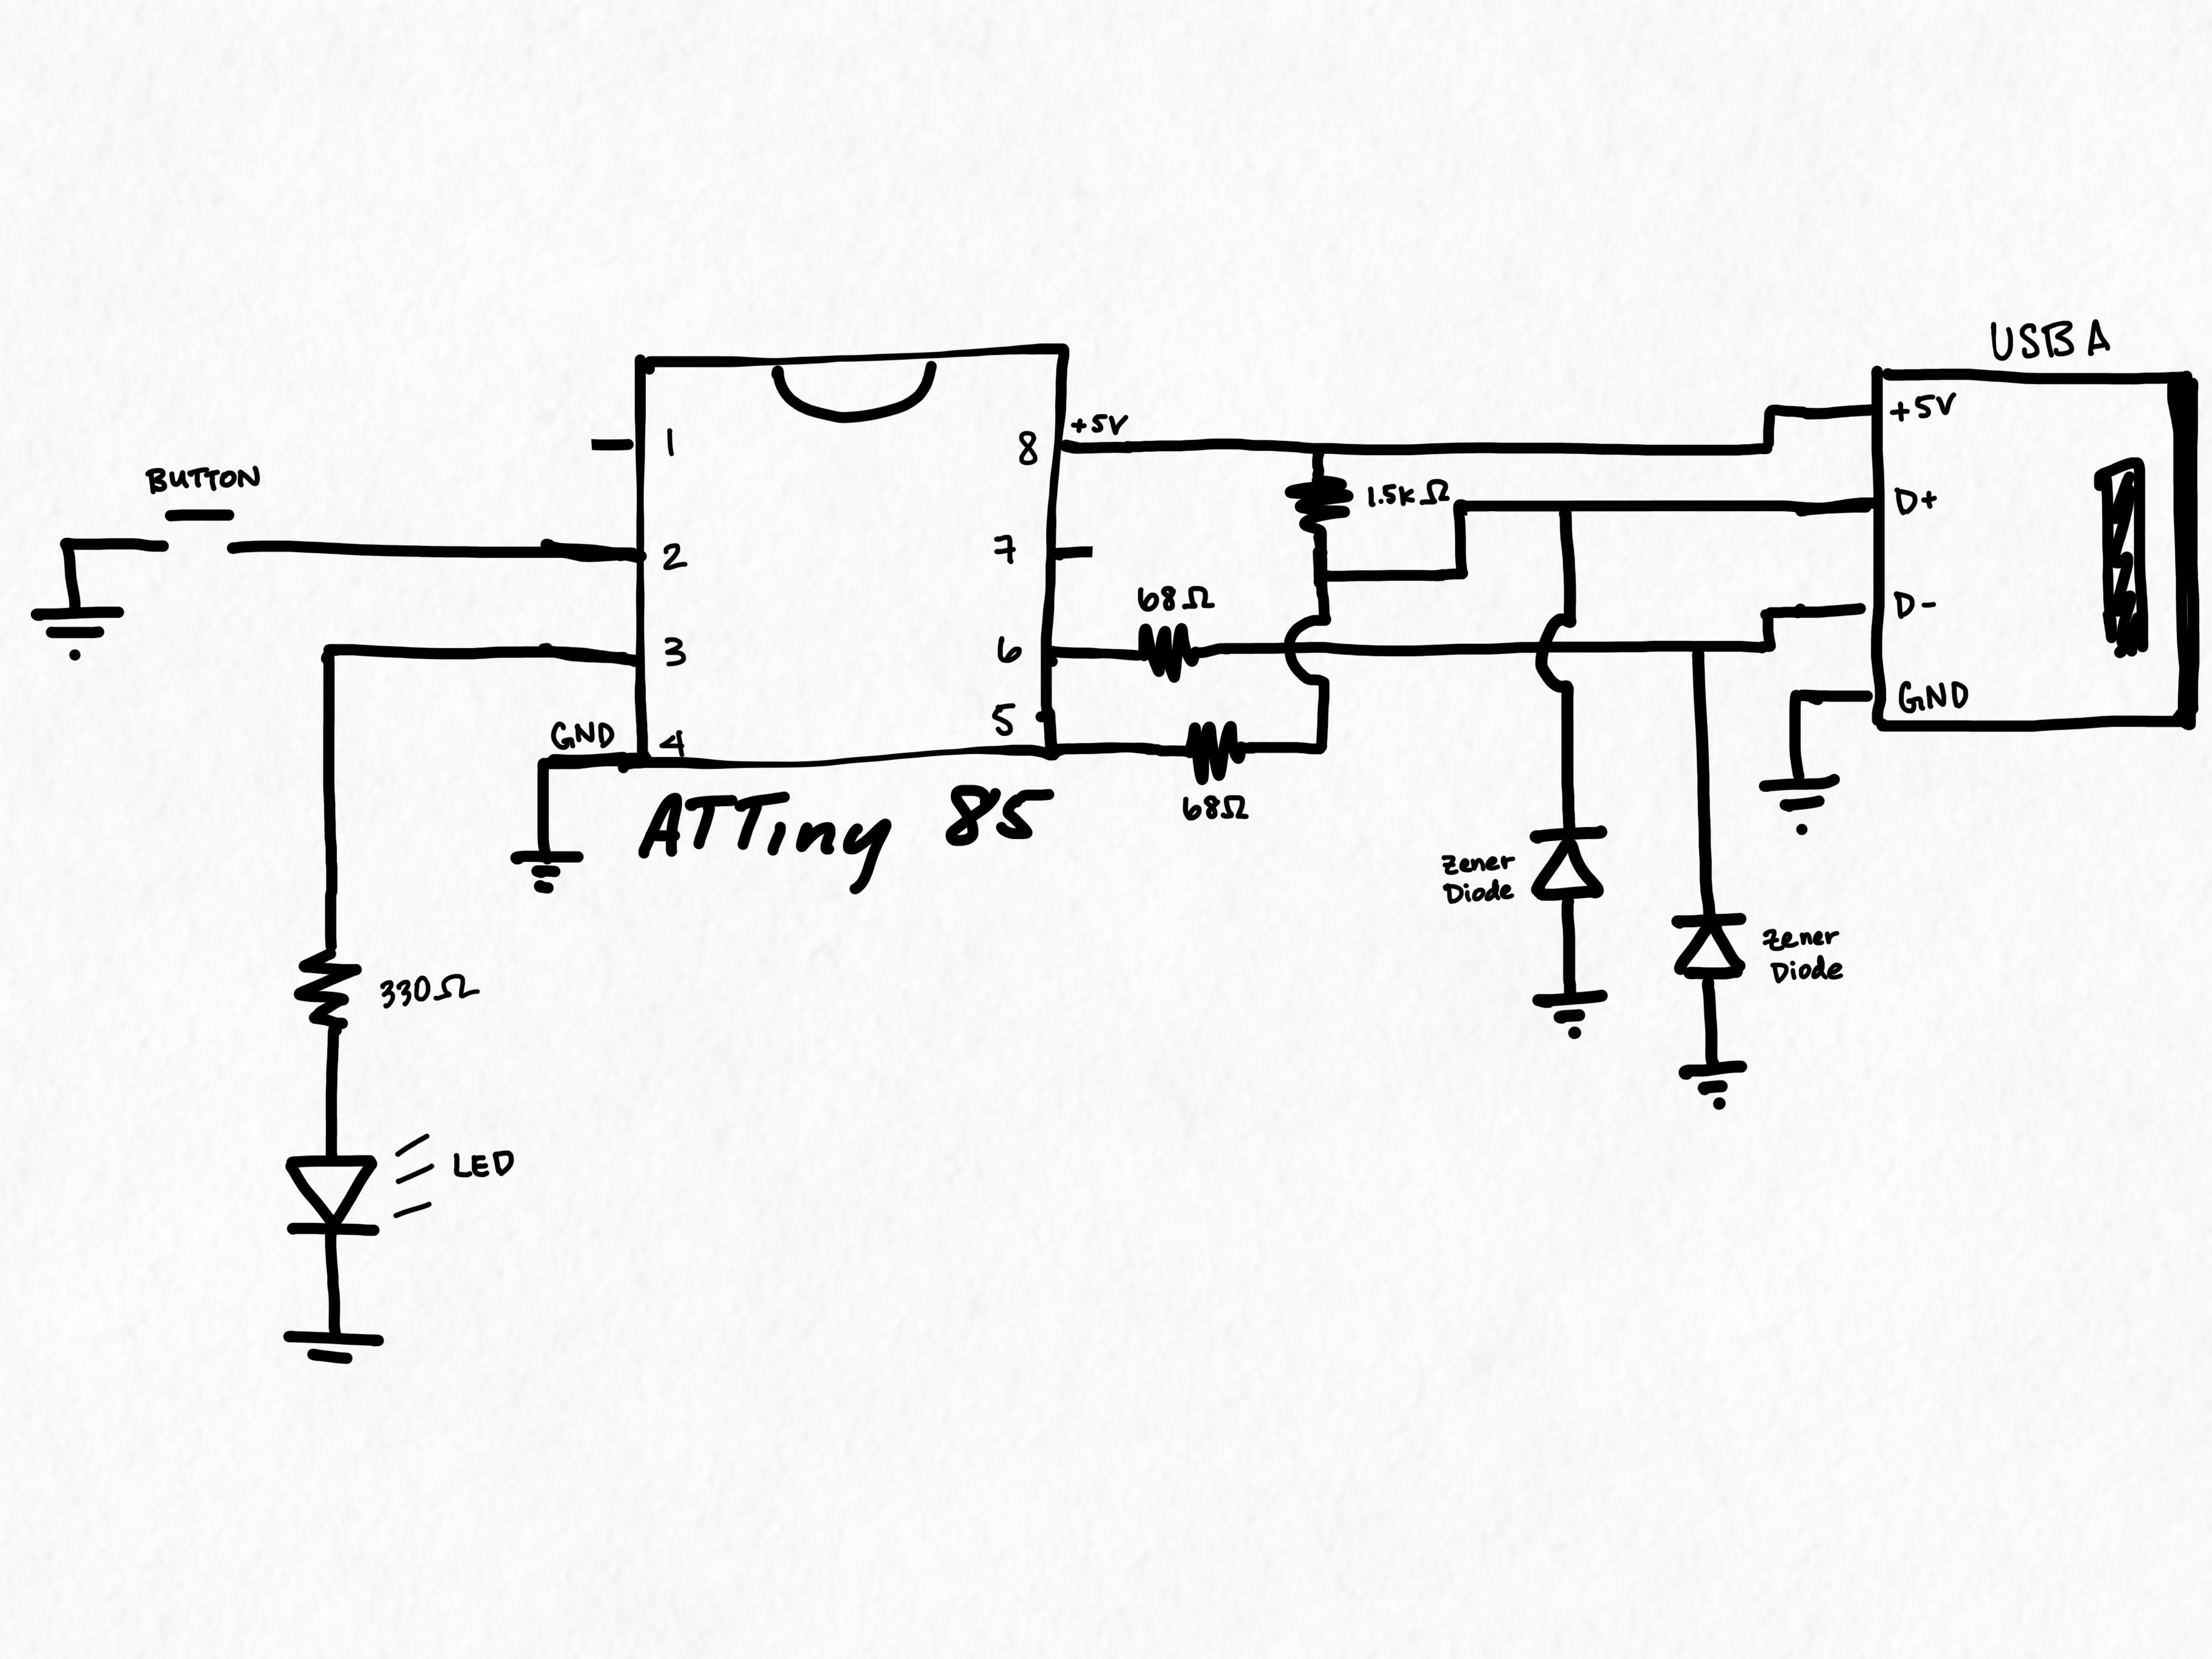
The DIYkey a hardware token that stores one static password. This repo will contain all the information you need if you want to build your own token.
One of our goals is to keep the cost of materials low. Initially we created the first prototype with around 7 USD but the goal was to make large batch assembly cost as close to $1 as possible.
You will need:
- 1 Breadboard or a protoboard and a soldering station if you feel comfortable with the assembly: Option 1 or Option 2
- 1 ATTiny85
- 2 Resistors 68 Ohms
- 1 Resistor 1500 Ohms (1200 Ohms works)
- 1 Resistor 330 Ohms
- 2 Zener Diodes
- 1 LED
- 1 Male USB Type A connector
- Some Connecting Wire (if needed)
WARNING

You should not solder the ATTiny85 to a permaproto board before programming it
unless you have clips to easily help you install software once it has been
placed.
Use the below image to connect the hardware materials. Double check that the diode polarity is correct.
- Install the following dependencies:
- Arduino with the DigisparkKeyboard libraries
- avrdude
- make autotools
- Pull this repository
- Run
make deps cd micronucleus/firmware/make- Return to the main DIYkey directory
- Connect your DIYkey to a Attiny85 programmer and run
make bootflash cd micronucleus/commandline/make- Install avrdude for your operating system
- Search through your system for the arduino DigisparkKeyboard directory
find / -name DigisparkKeyboard 2>/dev/null
- Open the usbconfig.h file in that directory
- Change the usbconfig.h file in DigiKeyboard folder for Ardunio
- Change the value for ATTiny85 USB_CFG_DMINUS_BIT from 3 to 0
- Change the value for ATTiny85 USB_CFG_DPLUS_BIT from 4 to 1
- Open the
arduino\_code/DIYkey/DIYkey programin Arduino - Edit the preferences of Arduino to show verbose compilation output
- Compile the program and record where the .hex file for this program is stored
- Put the path to the .hex file in the main Makefile under the programflash command
- Plug the DIYkey into one of your USB ports and run
make programflash
