Hello code jam participants! We've put together this repository template for you to use in our code jams or even other Python events!
This document contains the following information:
- What does this template contain?
- How do I use this template?
- How do I adapt this template to my project?
Tip
You can also look at our style guide to get more information about what we consider a maintainable code style.
Here is a quick rundown of what each file in this repository contains:
LICENSE.txt: The MIT License, an OSS approved license which grants rights to everyone to use and modify your project, and limits your liability. We highly recommend you to read the license..gitignore: A list of files and directories that will be ignored by Git. Most of them are auto-generated or contain data that you wouldn't want to share publicly.requirements-dev.txt: Every PyPI package used for the project's development, to ensure a common development environment. More on that below.pyproject.toml: Configuration and metadata for the project, as well as the linting tool Ruff. If you're interested, you can read more aboutpyproject.tomlin the Python Packaging documentation..pre-commit-config.yaml: The configuration of the pre-commit tool..github/workflows/lint.yaml: A GitHub Actions workflow, a set of actions run by GitHub on their server after each push, to ensure the style requirements are met.
Each of these files have comments for you to understand easily, and modify to fit your needs.
Our first tool is Ruff. It will check your codebase and warn you about any non-conforming lines.
It is run with the command ruff check in the project root.
Here is a sample output:
$ ruff check
app.py:1:5: N802 Function name `helloWorld` should be lowercase
app.py:1:5: ANN201 Missing return type annotation for public function `helloWorld`
app.py:2:5: D400 First line should end with a period
app.py:2:5: D403 First word of the first line should be capitalized: `docstring` -> `Docstring`
app.py:3:15: W292 No newline at end of file
Found 5 errors.
Each line corresponds to an error. The first part is the file path, then the line number, and the column index. Then comes the error code, a unique identifier of the error, and then a human-readable message.
If, for any reason, you do not wish to comply with this specific error on a specific line, you can add # noqa: CODE at the end of the line.
For example:
def helloWorld():  # noqa: N802
    ...
This will ignore the function naming issue and pass linting.
Warning
We do not recommend ignoring errors unless you have a good reason to do so.
Ruff also comes with a formatter, which can be run with the command ruff format.
It follows the same code style enforced by Black, so there's no need to pick between them.
The second tool doesn't check your code, but rather makes sure that you actually do check it.
It makes use of a feature called Git hooks which allow you to run a piece of code before running git commit.
The good thing about it is that it will cancel your commit if the lint doesn't pass. You won't have to wait for GitHub Actions to report issues and have a second fix commit.
It is installed by running pre-commit install and can be run manually by calling only pre-commit.
check-toml: Lints and corrects your TOML files.check-yaml: Lints and corrects your YAML files.end-of-file-fixer: Makes sure you always have an empty line at the end of your file.trailing-whitespace: Removes whitespaces at the end of each line.ruff: Runs the Ruff linter.ruff-format: Runs the Ruff formatter.
One person in the team, preferably the leader, will have to create the repository and add other members as collaborators.
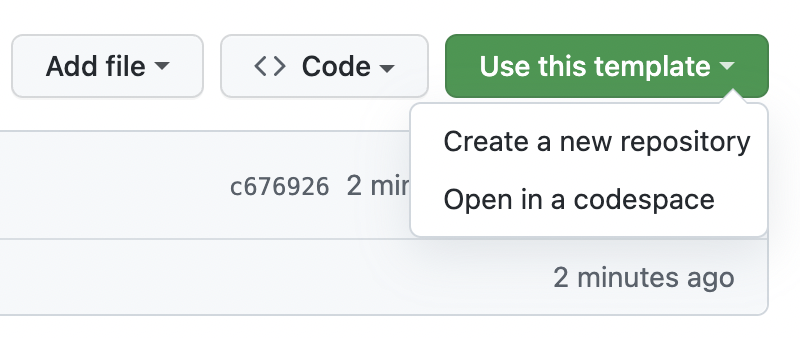
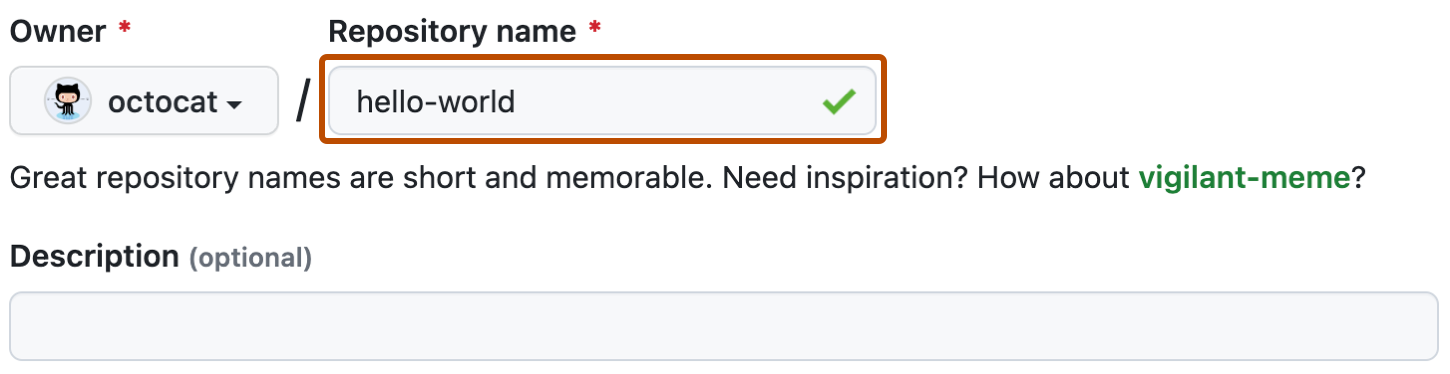
- In the top right corner of your screen, where Clone usually is, you have a Use this template button to click.
- Give the repository a name and a description.
- Click Create repository from template.
- Click Settings in your newly created repository.
- In the "Access" section of the sidebar, click Collaborators.

- Click Add people.
- Insert the names of each of your teammates, and invite them. Once they have accepted the invitation in their email, they will have write access to the repository.

You are now ready to go! Sit down, relax, and wait for the kickstart!
Important
Don't forget to swap "Python Discord" in the LICENSE.txt file for the name of each of your team members or the name of your team after the start of the code jam.
Our default setup includes a bare requirements file to be used with a virtual environment. We recommend this if you have never used any other dependency manager, although if you have, feel free to switch to it. More on that below.
Create a virtual environment in the folder .venv.
python -m venv .venvIt will change based on your operating system and shell.
# Linux, Bash
$ source .venv/bin/activate
# Linux, Fish
$ source .venv/bin/activate.fish
# Linux, Csh
$ source .venv/bin/activate.csh
# Linux, PowerShell Core
$ .venv/bin/Activate.ps1
# Windows, cmd.exe
> .venv\Scripts\activate.bat
# Windows, PowerShell
> .venv\Scripts\Activate.ps1Once the environment is created and activated, use this command to install the development dependencies.
pip install -r requirements-dev.txtInterestingly enough, it is the same for every platform.
deactivateOnce the environment is activated, all the commands listed previously should work.
Important
We highly recommend that you run pre-commit install as soon as possible.
If you wish to use Pipenv or Poetry, you will have to move the dependencies in requirements-dev.txt to the development dependencies of your tool.
We've included a porting of requirements-dev.txt to both Poetry and Pipenv in the samples folder.
If you use the Poetry setup, make sure to change the project name, description, and authors at the top of the file.
Also note that the Poetry pyproject.toml file does not include the Ruff configuration, so if you simply replace the file then the Ruff configuration will be lost.
When installing new dependencies, don't forget to pin them by adding a version tag at the end.
For example, if I wish to install Click, a quick look at PyPI tells me that 8.1.7 is the latest version.
I will then add click~=8.1, without the last number, to my requirements file or dependency manager.
Important
A code jam project is left unmaintained after the end of the event. If the dependencies aren't pinned, the project will break after any major change in an API.
Important
Don't forget to replace this README with an actual description of your project! Images are also welcome!
We hope this template will be helpful. Good luck in the jam!