P20 Macropad
Pabile 20-key or P20 was initially designed for ALPS switches and rotary encoder. You can find more details of this version here and PCB fabrication files here.
P17 was released together with P20v8 version. Both uses RP2040 Pico micro-controller. A supposedly minor adjustment on P20v8iii went chaotic that a separate configuration is needed to make a firmware fully functional. Take note of version numbers at back of PCB when choosing firmware - P20v8 is not interchangeable with P20v8iii and vice versa.
As of 20221026, ver6 and ver7 are available and out in the market. ver6 PCBs supports multiple layouts but will require switches to be soldered. ver7 on the other hand, have limited layout options but supports hot swap switches. More photos here.
| Version | Encoder | Hot swap | RGB Backlight | ALPS Switch Support | Layout |
|---|---|---|---|---|---|
| P17 | Up to 4 | Yes | Yes | No | Fixed Numpad |
| P20v8 | Up to 4 | Yes | Yes | No | Fixed Grid |
| P20v7 | At least 1, up to 4 | Yes | Yes | No | Fixed |
| P20v6 | Up to 4 | No | Yes | Yes | Grid / Numpad |
| P20v5 | Up to 4 | No | No | Yes | Grid / Numpad |
| P20v1 | 2 | No | No | Yes | Grid / Numpad |
This guide is intended for P20 with PCB version 6. Older versions may follow this guide.
| Qty | Description |
|---|---|
| 1 | P20 PCB |
| 1 | P20 Top Plate |
| 1 | Pro Micro with pin headers |
| 1 | Tact switch |
| 20 | Diodes (either THT or SOD-123 package) |
| 16 | SK6812 RGB LEDs |
| up to 20 | MX compatible switches |
| up to 4 | EC11 Rotary Encoders |
| up to 3 | Set of 2u PCB mount stabilizer |
| 1 set | Compatible keycaps and knobs |
Additional component for P20v7 PCB
| Qty | Description |
|---|---|
| up to 19 | Kailh CPG151101S11 or compatible sockets |
P20v7 is fixed with its full grid layout. Stabilizers are not required for P20v7.
- Solder iron and solder wire
- Flush cutter
- Electrical tape
- Tweezers
There are at least 24 layouts that can be set for P20v6 PCB. It is important that the final layout be decided since all components are soldered. Changing the layout afterwards will require removable/desolder of Pro Micro and other components.
- Seat and solder diodes to PCB
- Seat and solder RGB LEDs to PCB. GND is position on the top right most pad for P20v6. For P20v7, GND position is marked with a dot.
- For P20v7, seat and solder switch sockets to PCB. Hard press may be required to properly seat these sockets - lay the PCB on a flat and stable surface before pressing to avoid damaged on the PCB. Ignore this step for older PCB versions.
- Seat and solder pin headers to PCB.
- Seat and solder EC11 encoders to the PCB. For the encoder that seats on the side of the Pro Micro, it is advisable to trim its pins by at least 1mm so that it will not protrude and cause short circuit with the Pro Micro USB port. For P20v7, jump to step 8.
- If using stabilizers, seat stabilizers to its position/s.
- Seat switches to the top plate. Then seat/position on to the PCB. Firm but gentle press may be required to properly seat the switches' pins to the PCB.
- Solder switches
- Apply tape on the exposed pins on the Pro Micro area to prevent short circuit.
- Seat and solder Pro Micro. Trim excess pins on the bottom of the Pro Micro.
QMK Firmware files shared here are VIAL compatible. Use below guide when choosing firmware on your P20:
- pabile_p20_ver1_vial.hex - for PCB version 1
- pabile_p20_ver2_vial.hex - for PCB version 2 with mono color LED. Actual PCB version ranges from 2 to 4 (iirc).
- pabile_p20_ver2_vial_rgb.hex - for PCB version 2 with RGB LED. Actual PCB version ranges from 5 to 6 (iirc).
- pabile_p20_ver2_p20v7.hex - for PCB version 7
3D design files for PCB v6 and older are available in the _casings folder. Each 3D printed casings will require at least 4pcs M2x6mm screws.
Stacked acrylic casings will require M2 bolts and stand offs. There are also two versions of the top most sheet: one for those with 4 encoders; and, open top version for all others.

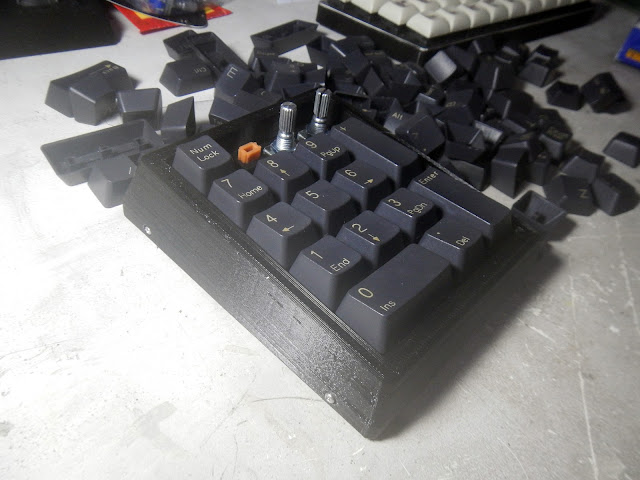
Shown below are set of P20s. First two on the left are P20v6 - one in 3D printed casing and the other in stacked acrylic. Right most one is a P20v7 in stacked acrylic with a ~7 degree angle.

P20v7 DIY kits comes with a bottom cover to make a skeleton kit. Drawings for the stacked acrylic casing to be uploaded.
