
Visualizes the signal from a high-channel-count linear probe as a heatmap (time x channels). Can be configured to display RMS signal, spike rate, or power in different frequency bands.
This plugin can be added via the Open Ephys GUI Plugin Installer. To access the Plugin Installer, press ctrl-P or ⌘P from inside the GUI. Once the installer is loaded, browse to the "Probe Viewer" plugin and click "Install."
Displayed Stream controls the currently selected stream to be viewed. The selected stream can be changed while acquisition is active.
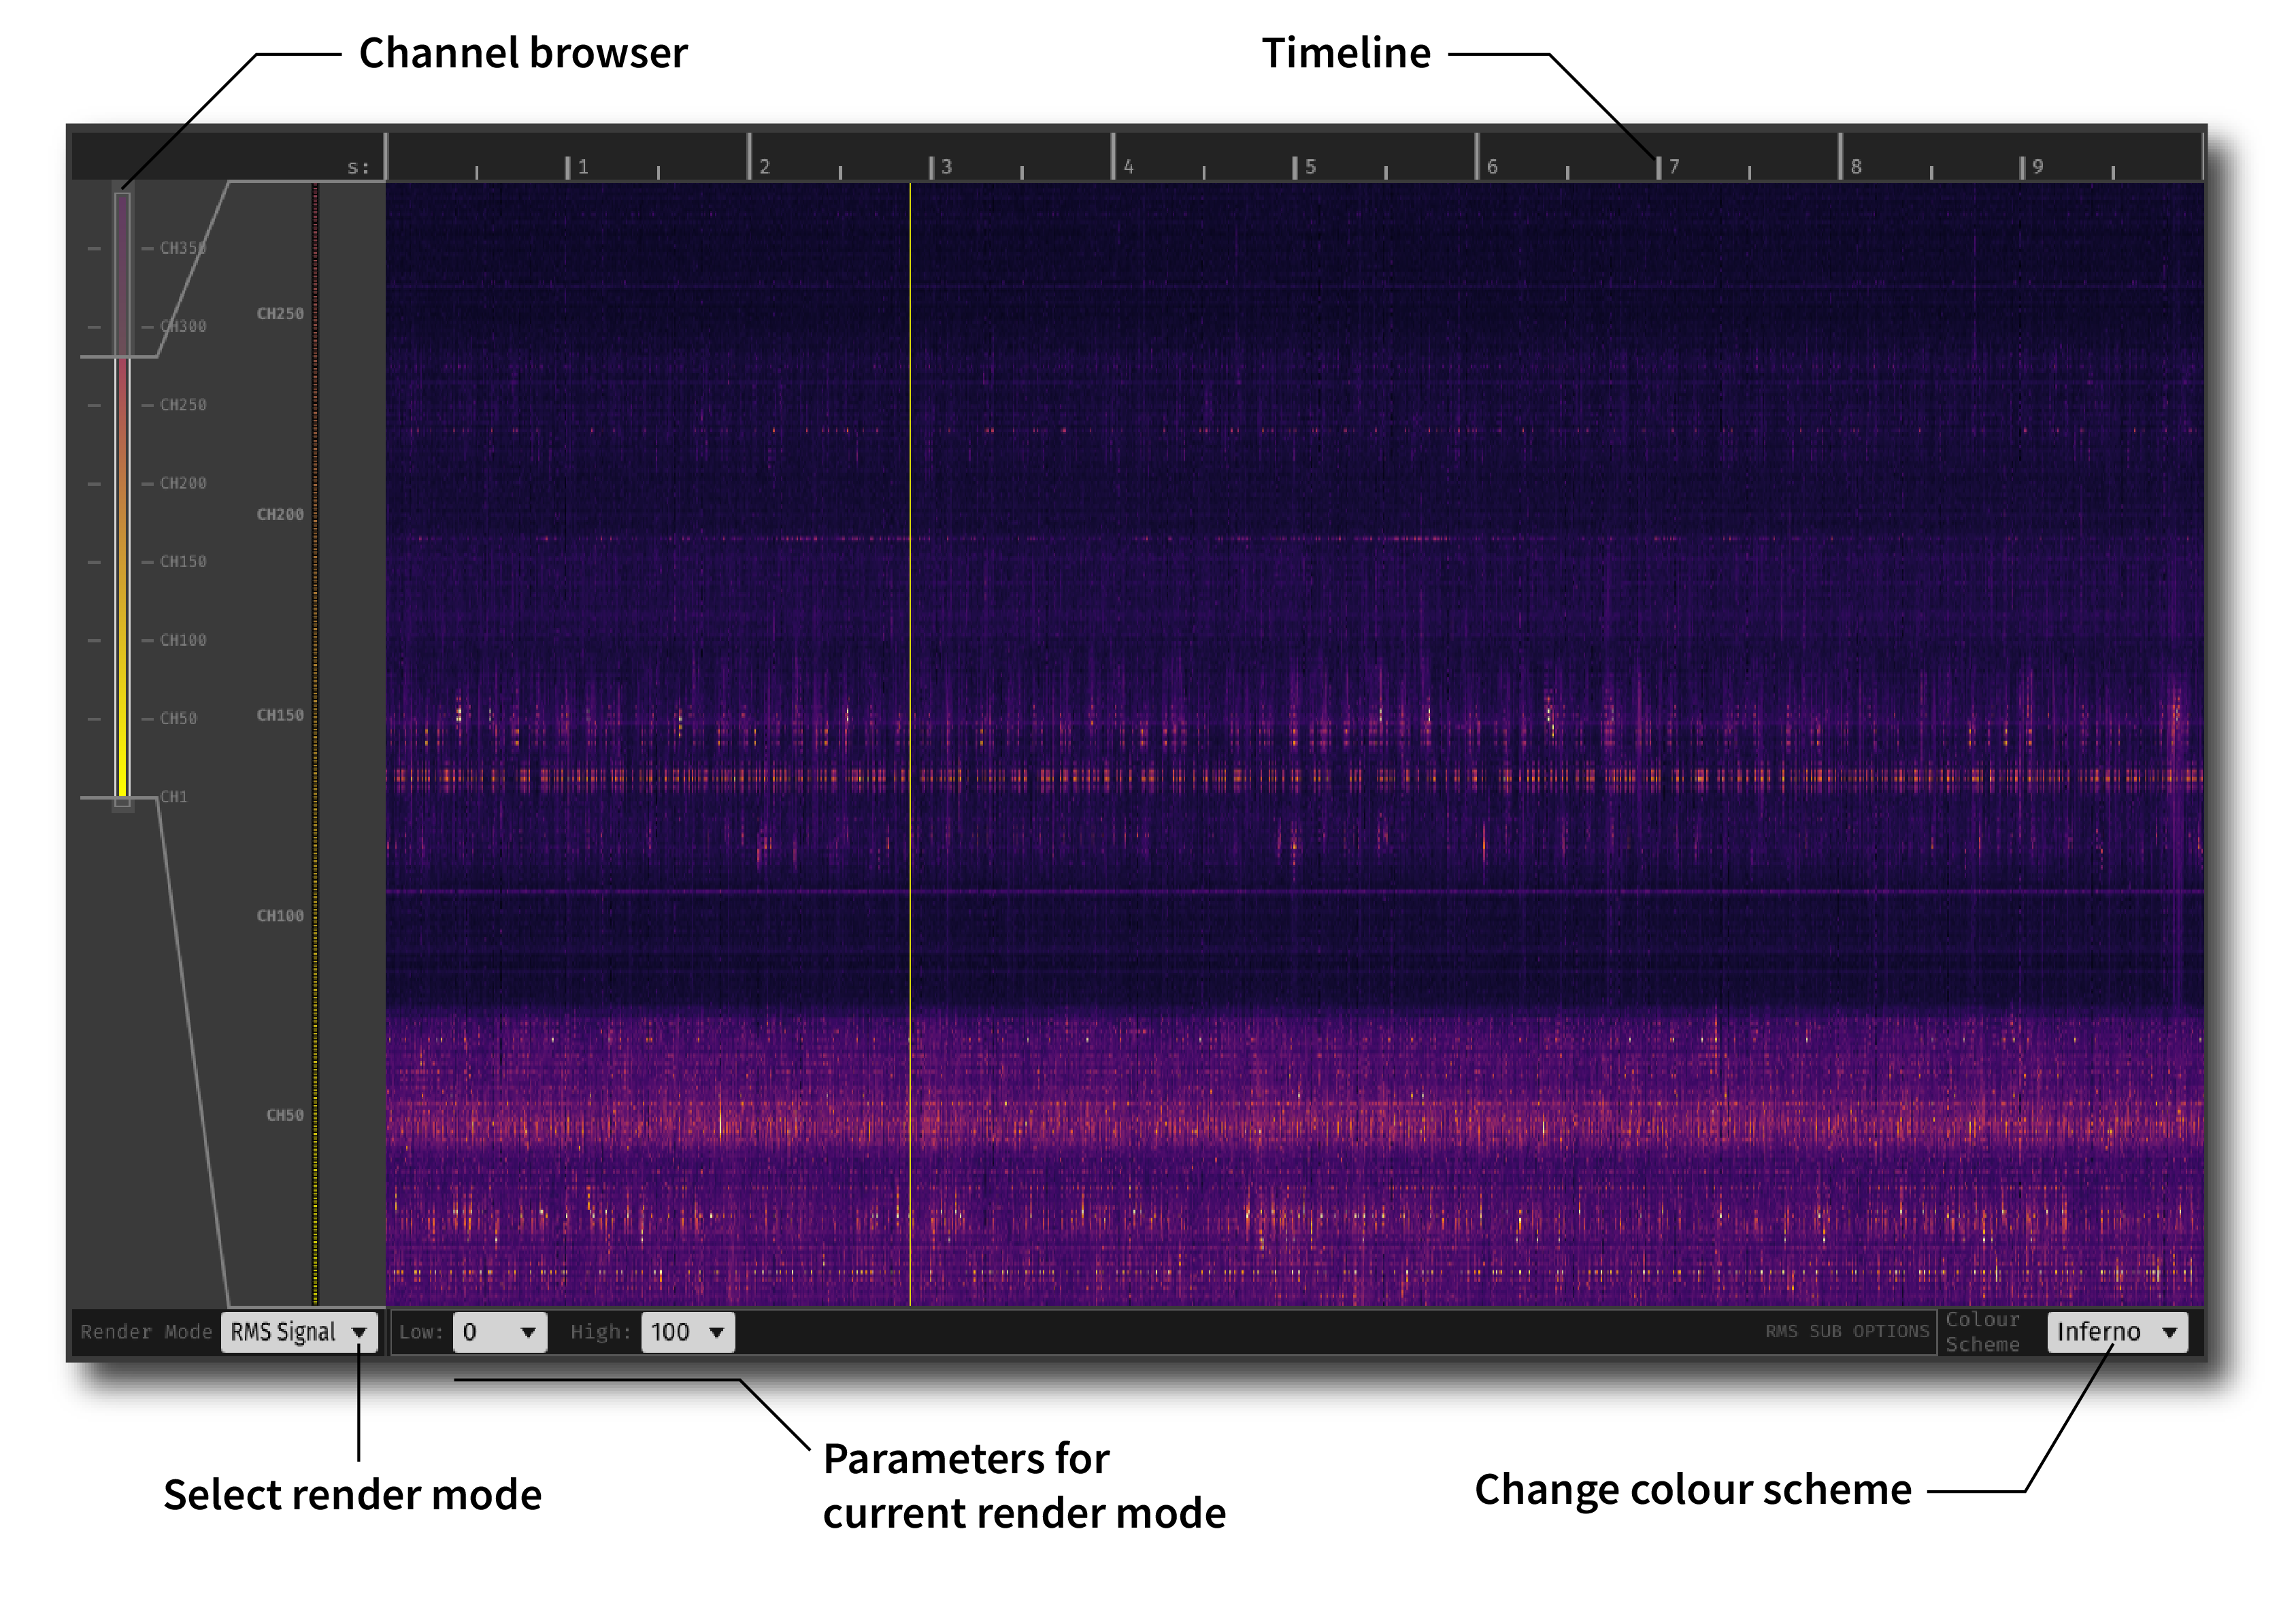
Used to select a region of the probe to view.
- Render Mode - RMS amplitude, Frequency Band Power, or Spike Rate.
- Colour Scheme - Inferno, Plasma, Magma, Viridis, Jet
First, follow the instructions on this page to build the Open Ephys GUI.
Important: This plugin is intended for use with the latest version of the GUI (0.6.0 and higher). The GUI should be compiled from the main branch, rather than the former master branch.
Then, clone this repository into a directory at the same level as the plugin-GUI, e.g.:
Code
├── plugin-GUI
│   ├── Build
│   ├── Source
│   └── ...
├── OEPlugins
│   └── probe-viewer
│       ├── Build
│       ├── Source
│       └── ...
Requirements: Visual Studio and CMake
From the Build directory, enter:
cmake -G "Visual Studio 17 2022" -A x64 ..Next, launch Visual Studio and open the OE_PLUGIN_probe-viewer.sln file that was just created. Select the appropriate configuration (Debug/Release) and build the solution.
Selecting the INSTALL project and manually building it will copy the .dll and any other required files into the GUI's plugins directory. The next time you launch the GUI from Visual Studio, the Probe Viewer plugin should be available.
Requirements: CMake
From the Build directory, enter:
cmake -G "Unix Makefiles" ..
cd Debug
make -j
make install
This will build the plugin and copy the .so file into the GUI's plugins directory. The next time you launch the compiled version of the GUI, the Probe Viewer plugin should be available.
From the Build directory, enter:
cmake -G "Xcode" ..Next, launch Xcode and open the probe-viewer.xcodeproj file that now lives in the “Build” directory.
Running the ALL_BUILD scheme will compile the plugin; running the INSTALL scheme will install the .bundle file to /Users/<username>/Library/Application Support/open-ephys/plugins-api. The Probe Viewer plugin should be available the next time you launch the GUI from Xcode.