Welcome to Mad Libs Coding Night! Here are the steps to code your own mini Mad Libs app! If you get confused, feel free to ask questions.
A code editor will make it easier for you to look at and edit the code for your mad libs app.
Here are some great open source code editor that is compatible with Windows, Mac, and Linux:
- Visual Studio Code: Microsoft's code editor with a super sleek user interface and terminal integration.
- [Sublime Text]: (https://www.sublimetext.com/)
- [Atom]: (https://atom.io/) There are lots of other code editors out there if you'd prefer something different, but Visual Studio Code is the code editor we'll be using during our demos.
Got it all downloaded? Great!
Navigate to this repository again: https://bit.ly/mad-libs-nuwit
Press this button and select Download ZIP

Make sure you save the folder somewhere you can remember! Then, use your file explorer to navigate to the saved zip. Unzip the folder. Feel free to delete the zip and keep the unzipped files.
If you'd like to test the starter code (and test your changes throughout) double click index.html. Refresh the page to view changes as you make them.
For atom or sublime this might look a little different, but use this option to open the mad-libs folder wherever you saved it:

VSCode should display the files in the folder like this:
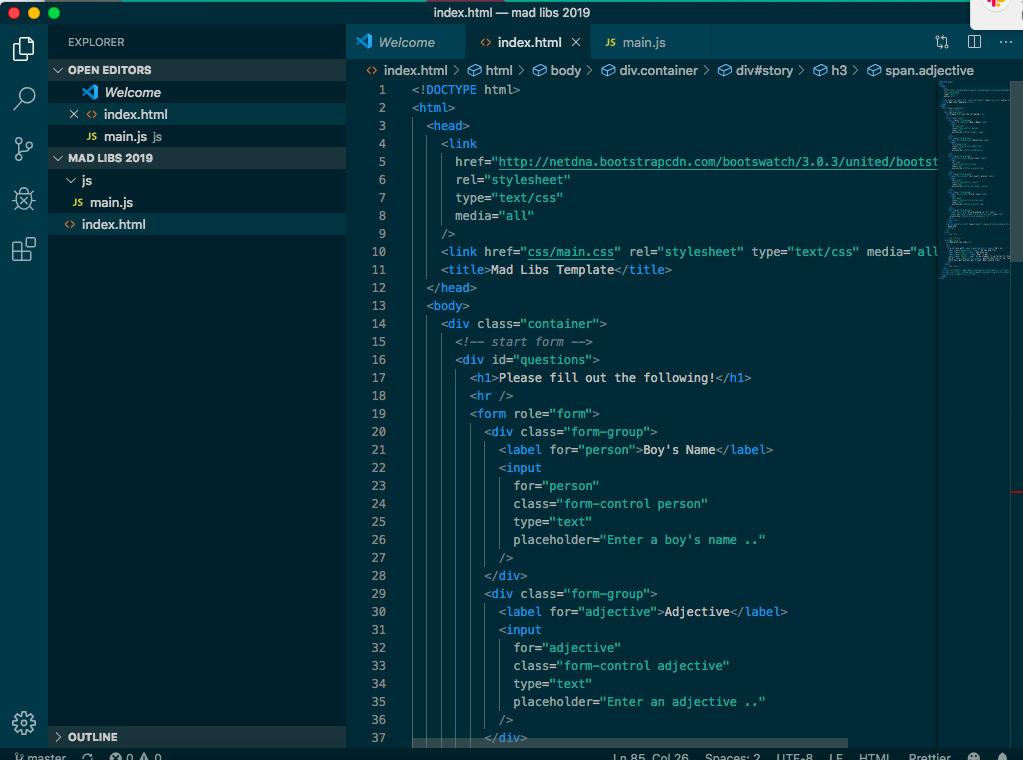
You'll see one file called index.html and folder called js. index.html is the file that constitutes the homepage of the website. The js folder is where all Javascript files will be kept. As of now, we only have one Javascript file, main.js, which is our main script for the website.
Open up index.html and scroll down to line 80 where it says <div id="story">.
This is the story you're going to edit. Inside this story is some plaintext, which the user won't be editing—just like in real Mad Libs. But there's also some words that the user will be deciding for themselves. Blanks in the text, if you will.
First, write down a quick story that you'd like to use for Mad Libs. Then, select some words to turn into blanks. Replace them with descriptors (i.e. "person", "animal", "adjective", "color", etc) inside brackets. For example:
There once was a man from [country] who dreamed he was eating his [noun]...
Paste your story between <h3> (line 83) and </h3> line 91.
<h3>...</h3> are HTML tags. HTML is essentially a big tree of information. Everything between a starting (<h3>) and a closing (</h3>) tag constitutes an HTML node, commonly known as an element. Everything within that element can be formatted and styled a certain way. h3, in particular, is a heading element of the third biggest size (h1 would be a very large, very bold heading, h2 would be the next biggest heading).
A node can also contain other nodes within it (see the <span class="person></span> node between the two h3?).
For every blank in your story, create a <span> to replace it. A <span> is an inline element. This means it will be formatted just like everything else in the paragraph.
For every span you add, you should give it a unique class (or class attribute). This class should be the label you chose for the blank you're replacing. If you're confused, here's how this looks:
There once was a man from <span class="country"></span> who dreamed he was eating his <span class="noun"></span>...
If you have two identical labels (for example, two nouns), just increment them:
There once was a man from <span class="country"></span> who dreamed he was eating his <span class="noun"></span>. He woke up one <span class="noun2"></span>...
Make sure you replace all your blanks with <span> tags. No two of your blanks' class attributes should be the same (unless the blank repeats).
Scroll up to line 19 (<form role="form">).
IMPORTANT!!! Delete everything between line 29 and line 69. These lines were included only for demonstration. By the time this is done, there should only be one <div class="form-group">...</div>.
For every blank in your story, you are going to need to create an form-group for your user. This form-group will contain an input that will allow users to "fill in" the blank.
You'll want to edit the remaining form-group element to match your first blank's id and overall concept. Between line 20 and 27, switch over everything having to do with person or name to your first blank's info.
For our "Man From Peru" example, our first form-group should change from this:
<div class="form-group">
  <label for="person">Boy's Name</label>
  <input
    for="person"
    class="form-control person"
    type="text"
    placeholder="Enter a boy's name .."
  />
</div>
to this:
<div class="form-group">
  <label for="country">Country</label>
  <input
    for="country"
    class="form-control country"
    type="text"
    placeholder="Enter a country..."
  />
</div>
Note:
<label for="person">Boy's Name</label>became<label for="country">Country</label>- the input's
for="person"attribute becamefor="country" - the input's
class="form-control person"becameclass="form-control country" - the input's
placeholder="Enter a boy's name .."becameplaceholder="Enter a country..."
Changing these attributes will associate the input with the blank you made in your story. Make sure you're editing for YOUR first blank, though (NOT country or person, like our examples)!
Copy and paste the form-group for every blank in your story and edit the attributes accordingly. The form-group elements you duplicate should be adjacent, not within each other. For our example, this would look like:
<div class="form-group">
  <label for="country">Country</label>
  <input
    for="country"
    class="form-control country"
    type="text"
    placeholder="Enter a country..."
  />
</div>
<div class="form-group">
  <label for="noun">Noun</label>
  <input
    for="noun"
    class="form-control noun"
    type="text"
    placeholder="Enter a noun..."
  />
</div>
<div class="form-group">
  <label for="noun2">Noun</label>
  <input
    for="noun2"
    class="form-control noun2"
    type="text"
    placeholder="Enter a noun..."
  />
</div>
Once you have a form-group for every blank, the form should be done!
You can now open up/refresh index.html in a browser by clicking the file in your file explorer. You should see YOUR blanks as the new inputs.
However, if you fill in the appropriate info and press Generate, the values you're looking for will be missing from the story! We still need to edit the Javascript!
Open up js/main.js in your coding editor.
IMPORTANT!!! Delete everything between line 10 and line 14. These lines were included only for demonstration..
What you're seeing in this file is JQuery, a Javascript library that allows easy traversal and manipulation of HTML files. We use it to easily grab, change, and replace HTML elements. JQuery is extremely popular across the web for this exact purpose.
See line 9:
$(".person").empty().append($("input.person").val());
Let's break down what this line is doing:
$(".person")finds an element with a classclass="person"attribute. Namely,<span class="person"></span>.class="person"in HTML and.personin CSS and Javascript both indicate element(s) of that particular class.$(".person").empty()clears the contents of that element$("input.person").val()retrieves the value recorded by the form that also shares thepersonclass$(".person").empty().append($("input.person").val());takes the<span class="person></span>element, empties it (in case something got accidentaly placed in thespan), then fills it with whatever the user entered for the "person" field.
We want to change this line to match OUR blanks, rather than the starter code. I would thus change this line to match my example:
$(".country").empty().append($("input.country").val());
...with all person classes switched to country
And then, I would duplicate and edit this line of javascript for every blank in my story:
$(".country").empty().append($("input.country").val());
$(".noun").empty().append($("input.noun").val());
$(".noun2").empty().append($("input.noun2").val());
Once you have a line of javascript for every blank, you're done!!! Save your files, open up index.html in a browser, and test out your Mad Libs!
Now, there's a lot we won't have time to explain here. If you want a full HTML, CSS, JS tutorial make sure to attend our Personal Website Hack Day in the spring!