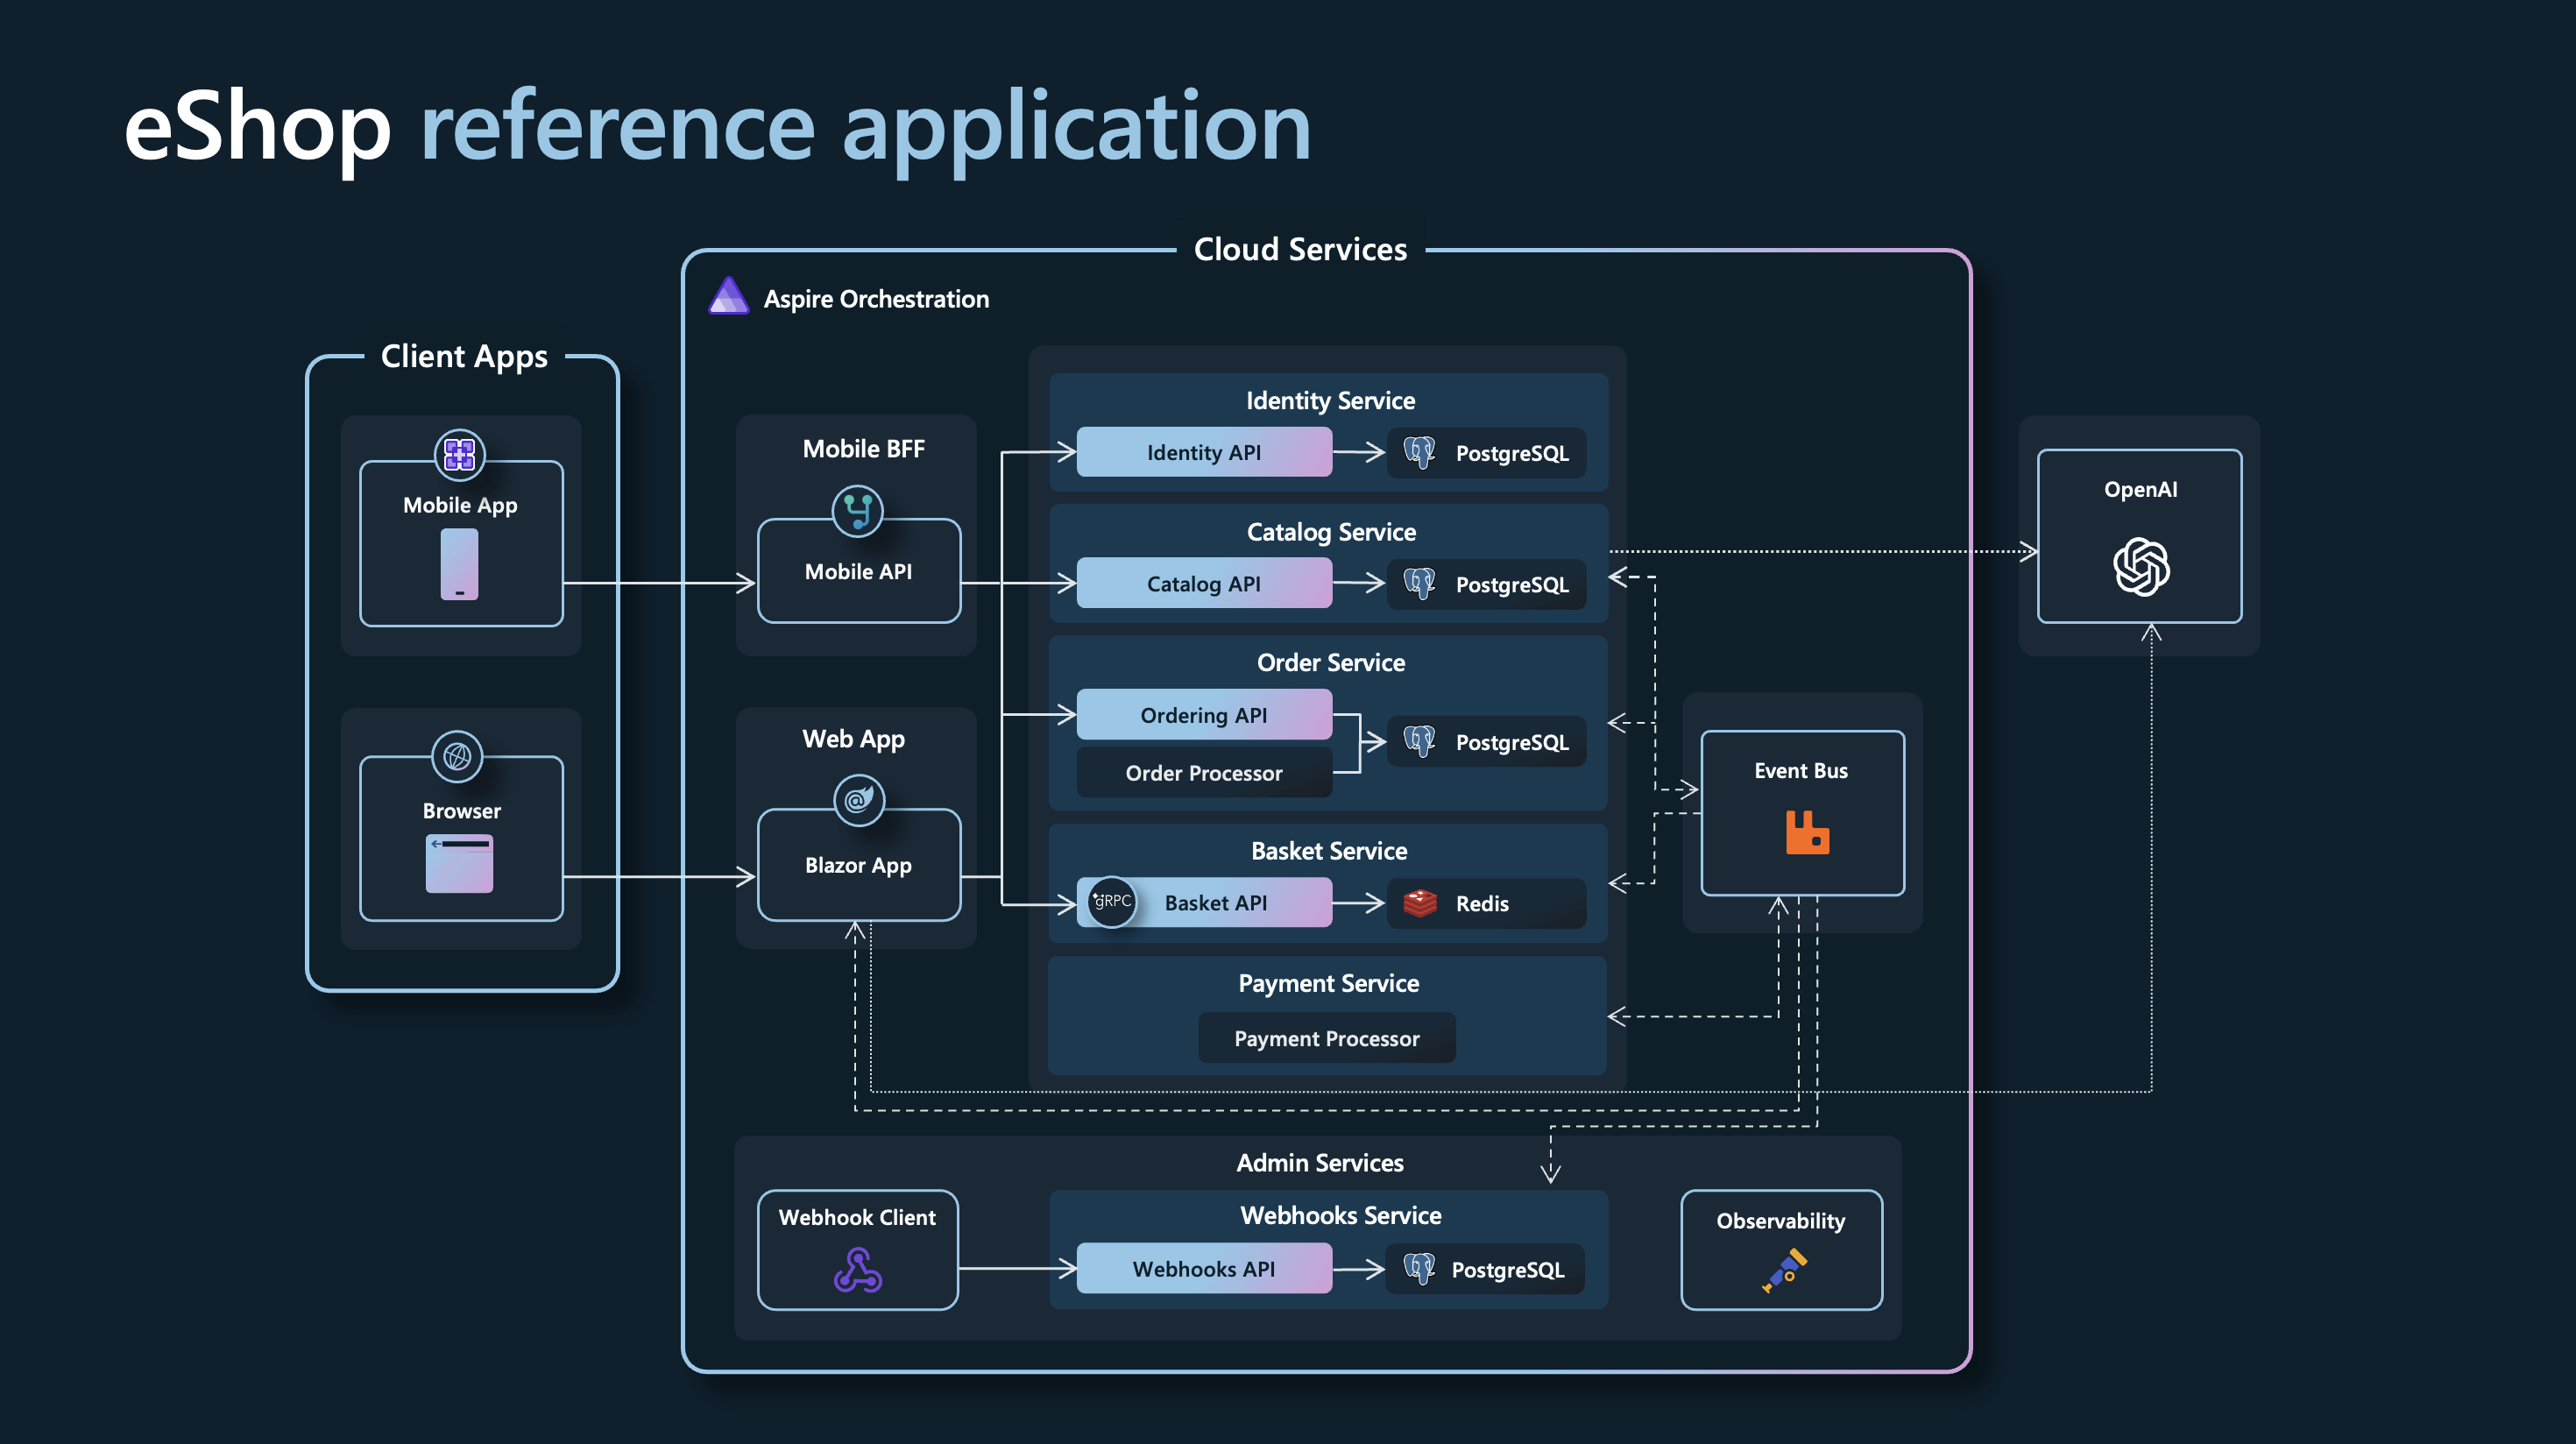
A reference .NET application implementing an eCommerce web site using a services-based architecture.
- Clone the eShop repository: https://github.com/dotnet/eshop
- (Windows only) Install Visual Studio. Visual Studio contains tooling support for .NET Aspire that you will want to have. Visual Studio 2022 version 17.10 Preview.
- During installation, ensure that the following are selected:
ASP.NET and web developmentworkload..NET Aspire SDKcomponent inIndividual components.
- During installation, ensure that the following are selected:
- Install the latest .NET 8 SDK
- On Mac/Linux (or if not using Visual Studio), install the Aspire workload with the following commands:
dotnet workload update
dotnet workload install aspire
dotnet restore eShop.Web.slnf- Install & start Docker Desktop: https://docs.docker.com/engine/install/
Warning
Remember to ensure that Docker is started
- (Windows only) Run the application from Visual Studio:
- Open the
eShop.Web.slnffile in Visual Studio - Ensure that
eShop.AppHost.csprojis your startup project - Hit Ctrl-F5 to launch Aspire
- Or run the application from your terminal:
dotnet run --project src/eShop.AppHost/eShop.AppHost.csprojthen look for lines like this in the console output in order to find the URL to open the Aspire dashboard:
Now listening on: https://localhost:18848The sample catalog data is defined in catalog.json. Those product names, descriptions, and brand names are fictional and were generated using GPT-35-Turbo, and the corresponding product images were generated using DALL·E 3.
You can use the Azure Developer CLI to run this project on Azure with only a few commands. Follow the next instructions:
- Install azd.
- Log in
azd(if you haven't done it before) to your Azure account:
azd auth login- Initialize
azdfrom the root of the repo.
azd init-
During init:
- Select
Use code in the current directory. Azd will automatically detect the Dotnet Aspire project. - Confirm
.Net (Aspire)and continue. - Select which services to expose to the Internet (exposing
webappis enough to test the sample). - Finalize the initialization by giving a name to your environment.
- Select
-
Create Azure resources and deploy the sample by running:
azd upNotes:
- The operation takes a few minutes the first time it is ever run for an environment.
- At the end of the process,
azdwill display theurlfor the webapp. Follow that link to test the sample. - You can run
azd upafter saving changes to the sample to re-deploy and update the sample. - Report any issues to azure-dev repo.
- FAQ and troubleshoot for azd.
For more information on contributing to this repo, please read the contribution documentation and the Code of Conduct.
For a version of this app configured for deployment on Azure, please view the eShop on Azure repo.

