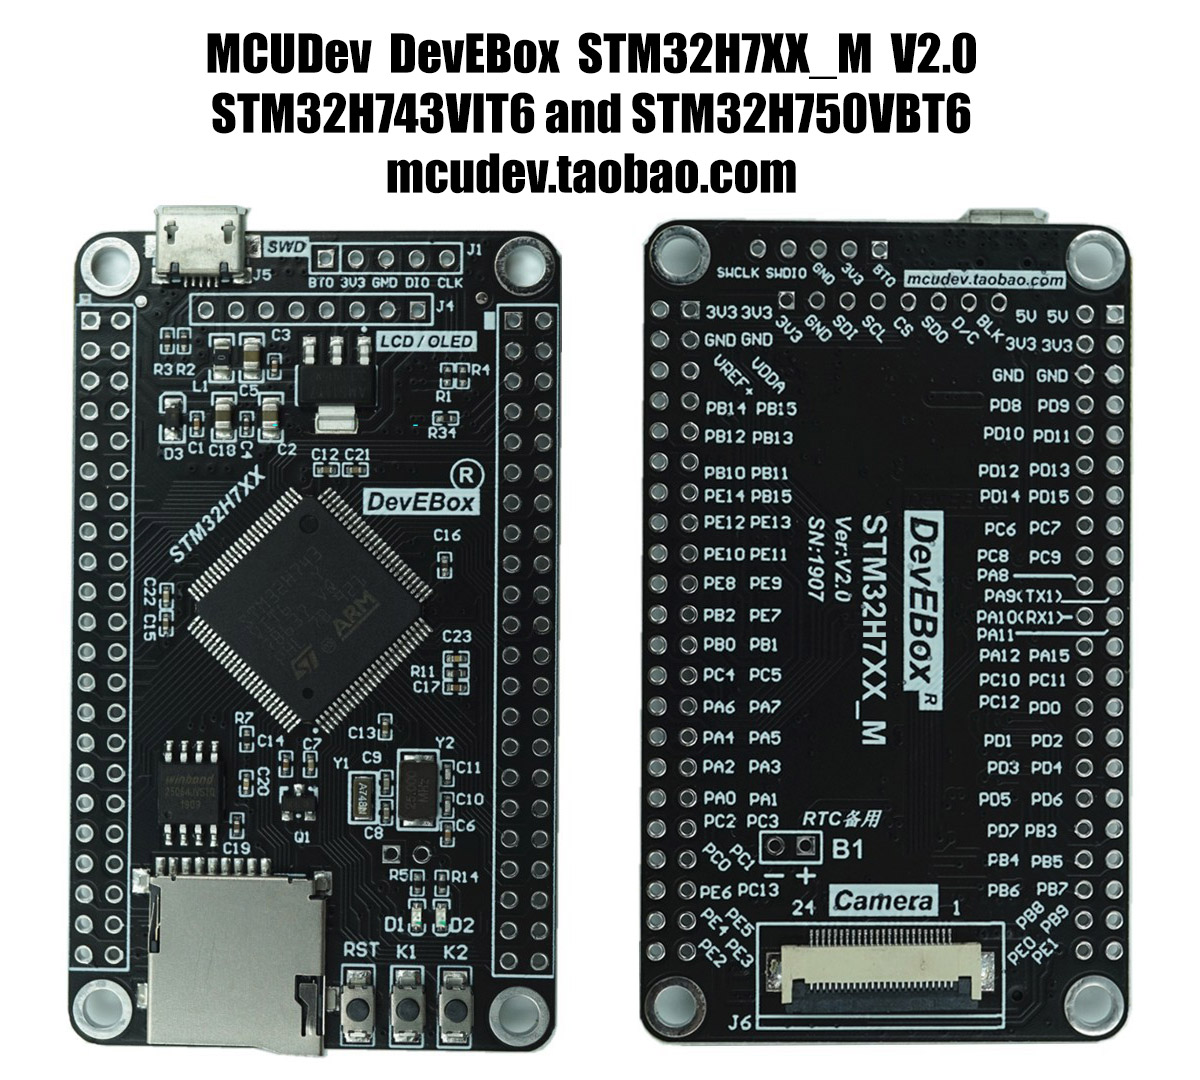
A bare metal implementation of a UART example for the stm32h743 with a simple makefile and without using HAL libraries.
This example shows how to establish a serial communication between the stm32h743 microcontroller and a laptop using the UART peripherals. To demonstrate the connection, the user can use the serial communication program minicom to interact with the board and command the blinking pattern of the LED.
This project does not rely on HAL libraries and the code can be built and flashed using GNU make (so that you do not need any IDE such as STM32CubeIDE) and the GNU ARM Embedded Toolchain. The code was tested with the stm32h743vit6 development board from DevEBox but could be easily adapted for any configuration. The board can be purchased on Banggood.
The program configures the PA1 pin as a LED (ouput push-pull) and the PB12, PB13 pins for UART5.
The UART protocole is kept in the default configuration (8N1) and the baud rate is set to 38400.
The system clock frequency is set to 480MHz, assuming the presence of a 25MHz high speed external (HSE) crystal. If you do not use a HSE or if you have an older version of the chip* you might have to modify the clock configuration function or rely on the default internal oscillator (64MHz). In that case you will have to change the baud rate register (e.g. with the internal oscillator at 64MHz, baud rate of 38400, the BRR should be modified with: uint16_t uartdiv = 64000000 / 38400;)
The program allows a user to interact with the microcontroller to flash the PA1 LED (D2) a given number of times (between 0 and 9). The program then returns an echo message.
*Note that stmicroelectronics recently introduced a new version of their chip (version V) able to operate at up to 480MHz.
You need to install the following:
- GNU make
- git
- st-link
- GNU ARM toolchain
- minicom or PuTTY
- Clone the repo
git clone https://github.com/martindoff/bare-metal-stm32h7-uart.git
- Go to directory
cd bare-metal-stm32h7-uart - Build
make
- Flash the board (connect via st-link V2 debugger)
make flash
- Disconnect the st-link V2 debugger and connect the board to a development computer with a USB TTL serial adapter according to the following schematics:
- Find the name of the COM port. In macOS, this can be found in the /dev directory and starts by the prefix
/dev/cu. - Configure the COM port. For example, using
minicom:
minicom -sThe configuration can be done as follows:
- Select the "Serial Port Setup" entry and press Enter.
- Modify the path name to match the name of the COM port found previously (press 'A').
- Disable flow control ('F' and 'G').
- Change the port settings by typing 'E': set the baud rate to
38400('D') and configure the port to8N1('Q'). - Type Enter twice to go back to the main menu and choose the option "Save setup as..." to give a name to the configuration, e.g.
config.
If you exit minicom, you can retrieve your configuration as explained in step 7. Otherwise go to step 8 directly.
- To open
minicomand retrieve the saved setting inconfig:
minicom config- In the active
minicomterminal, interact with the stm32h743 by typing a digit between 0 and 9 (any entry out of this range will be converted to 0 by the program running on the microcontroller). Observe the LED blink as much time as prompted (laptop -> stm32h743) and notice the message returned by the microcontroller (stm32h743 -> laptop).
Starting from this simple bidirectional UART communication example, more complex projects will be built. For example, hardware-in-the-loop simulations can be enabled by exchanging data via the UART protocol between the microcontroller and a development computer.
Contributions are what make the open source community such an amazing place to be learn, inspire, and create. Any contributions you make are greatly appreciated.
- Fork the Project
- Create your Feature Branch (
git checkout -b feature/AmazingFeature) - Commit your Changes (
git commit -m 'Add some AmazingFeature') - Push to the Branch (
git push origin feature/AmazingFeature) - Open a Pull Request
Distributed under the MIT License. See LICENSE for more information.
Martin Doff-Sotta - [email protected]
Linkedin: https://www.linkedin.com/in/mdoffsotta/

