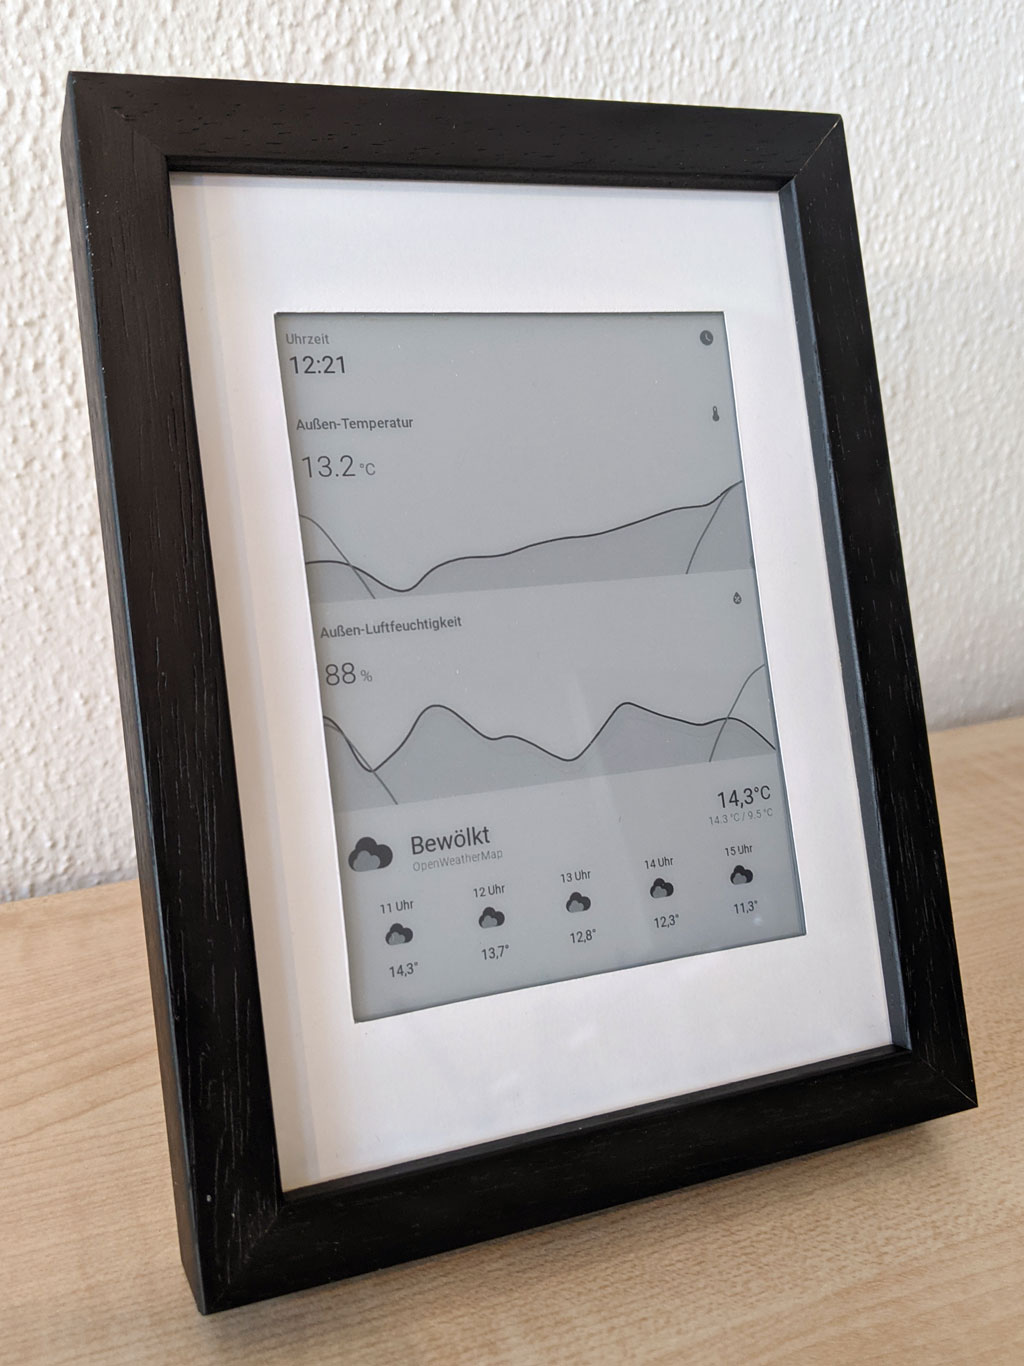
This repository gives details about how I built my own Home Assistant dashboard using an old Kindle 4.
A lovelace UI panel of your Home Assistant instance is rendered to an image and polled from a jailbroken Kindle 4 on a regular basis.
I keep this short as I think this should be pretty straight forward.
- Set up Home Assistant on the platform of your choice.
- Set up the rendering software i.e. using docker, see my hass-screenshot repository.
Hints:
- there's an
einkHA theme inside the rendering software repository which you can configure for your newly created panel. - I recommend installing this kiosk mode extension (i.e. via HACS) to remove the UI app header bar.
Finally, You should end up with a URL pointing to the exposed port of the rendering docker container to configure this on your kindle as described in the following section.
While the software part should be the same for other Kindle models like the newer Paperwhites, the following section specifically addresses the Kindle 4 non touch. I've also primarily built it for an always powered device, but I assume it might be easily adapted to a battery powered use. PRs are welcome!
If you're using a Paperwhite, it's probably better to use the online screensaver extension. It uses features like rtcwake and upscript which are not available on the Kindle 4 NT out of the box.
Thus, a bit more work was necessary to get a reliable solution for a good Kindle 4 experience.
- Jailbreak your Kindle 4 as described here. (copies of the needed files can be found in the
hacksdirectory of this repository) - Install USBNetwork so that you can SSH into your device. See download including instructions here.
- Install Mobileread Kindle Kit (MKK) so that KUAL can be used. See download including instructions here.
- Copy KUAL v1 azw file into
/mnt/us/documentsas described here. - Install kite so that we can start our script on each boot. See download including instructions here - you can simply use this prebuilt package for K4 OR SSH into your device and run the
kite.shfrom thekite.gzdownload. - Clone this repository. Important for Windows users: ensure that the
*.shfiles have LF line endings and NOT CRLF. - Set the variables at the top of this repository's
extensions/homeassistant/script.sh.- If you want to run the device on battery, I recommend increasing the
INTERVAL(so that it suspends longer) and decreaseDELAY_BEFORE_SUSPENDso that the (artificial) delay between drawing the image and suspending is as low as possible. But please keep in mind that this wasn't what I've built the script for. E.g. the online screensaver extension supports configuring a scheduler to run less frequent at night and save battery.
- If you want to run the device on battery, I recommend increasing the
- Copy
homeassistantandkitefolders from this repository into/mnt/us/on the device. - Reboot your device and the script should run 2 minutes after booting up via kite. That's it.
There are two possibilities to SSH into your Kindle to change your config or debug if something didn't work as expected.
- The
extensions/homeassistant/startup.shsleeps 2 minutes until it starts the daemon on boot. On boot, you have time to SSH into your kindle. - After drawing the image, the
extensions/homeassistant/script.shsleeps a short time until it suspends - see theDELAY_BEFORE_SUSPENDconfig option. This gives you time to SSH into your device and stop the daemon usingsh /mnt/us/extensions/homeassistant/daemon.sh stop.
For debugging purposes, LOGGING can be configured to 1 so that an extended log is written to extensions/homeassistant/homeassistant.log.
The included notes.md file included information on the connect.sh script which can automate a lot of this and also supports pushing updates.
Similarly to this project, I've bought a 13x18 cm photo frame from an online store over here in Germany.
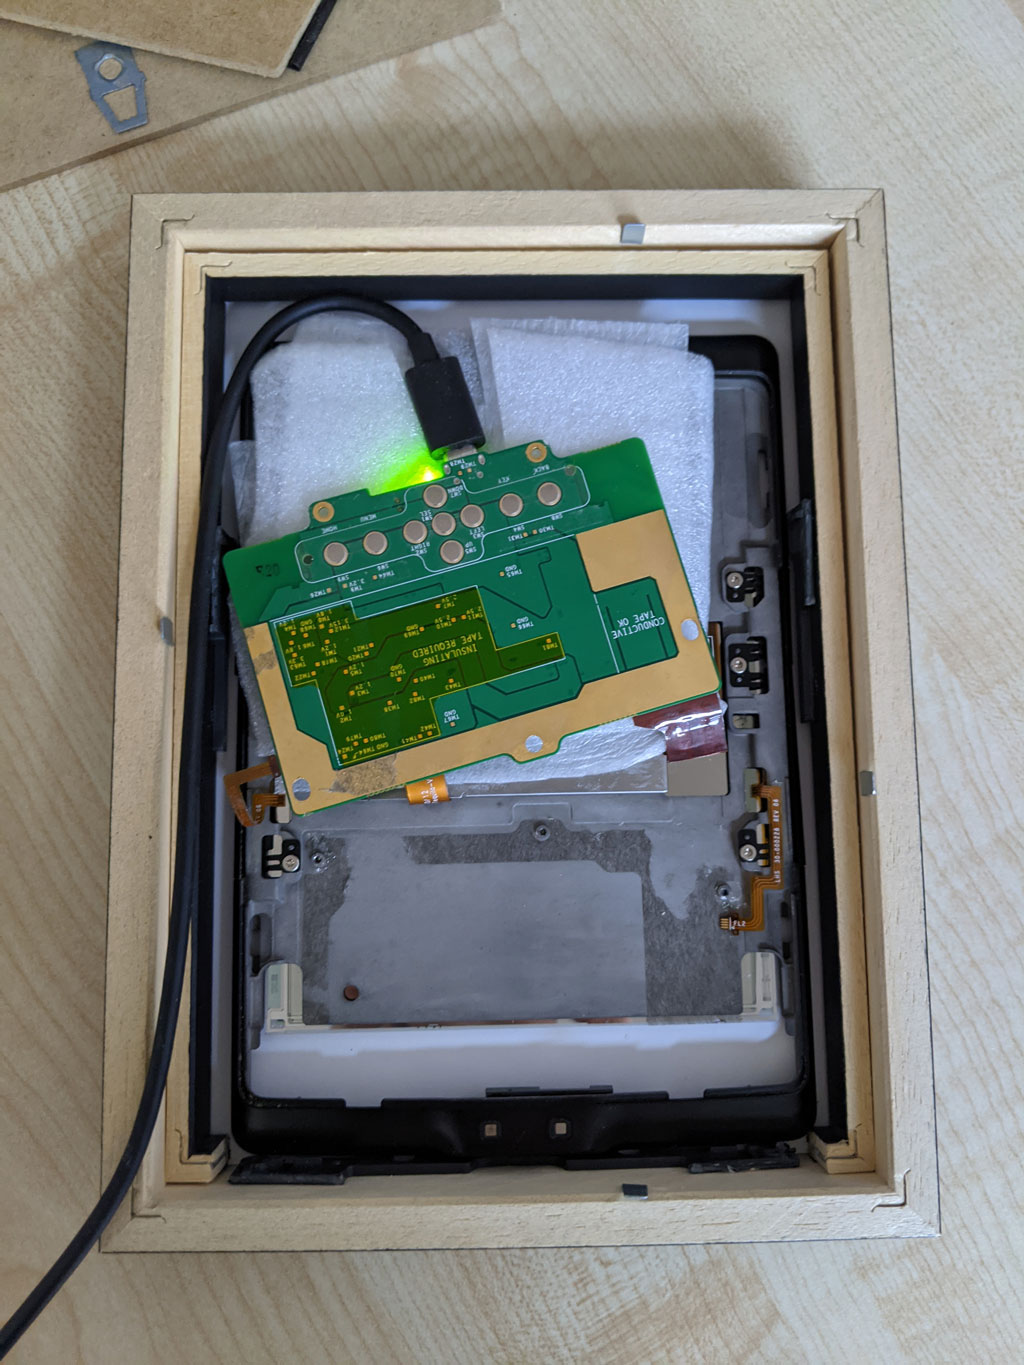
My wife and I removed the front cover of the Kindle 4 and also decided to remove the main board from the frame as there wasn't enough space to plug a Micro USB cable into the device's bottom while keeping it centered. A 90 degree adapter might be a better choice, also depending on the exact size of the frame.
The following photo should demonstrate it. The connectors between the battery and screen are the most important, the ones of the side buttons are not required. Of course, the photo also clearly indicates that we're both software developers...
- The rtcwake binary inside
extensions/homeassistantwas taken from this post from Stefan Strobel. - nicoh88's kindle-kt3_weatherdisplay_battery-optimized is the origin of most code and the images.
- Mario's adaptations, which is based on nicoh88's repository.
- Even for non-Germans I recommend scrolling through the article as it also shows a different approach to the photo frame.
The following two projects were my inspiration and I've also used them for quite some time. However, manually rebooting or charging the device was necessary too often and would've never gotten an approval by my parents.