vue create vue-openlayers- 移除vue 初始创建的一些不用的文件,如
assets,views和components等目录下的文件 src/views/MainMap.vue和assets/style.styl样式准备, 当然main.js中要引入样式import './assets/css/style.styl'
<template>
    <div class="map">
        我是地图主页
    </div>
</template>

<script>
    export default {

    }
</script>

<style scoped lang="stylus">
.map {
    height: 100%;
}
</style>
yarn add -D stylus stylus-loader(因为使用了stylus)
- openlayers官方网址
- openlayers的几个主要概念
- Map(ol/Map) 是openlayers是主要组成,由一个页面元素承载
- View(ol/View) 视图,通常是指页面上的视图元素,如中心点,缩放级别,使用的坐标系等
- openlayers默认使用的坐标系是(EPSG:3857),我们经常会需要自己指定坐标系(使用较普遍的是EPSG:4326)
- Source(ol/source/Source)
- Layers 图层 显示上面source的数据 主要有4个基本类型的图层
ol/layer/Tile瓦片图层ol/layer/Imageol/layer/Vectorol/layer/VectorTile组合在一起
import Map from 'ol/Map';
import View from 'ol/View';
import OSM from 'ol/source/OSM';
import TileLayer from 'ol/source/Tile';

new Map({
layers: [
    new TileLayer({source: new OSM()})
],
view: new View({
    center: [0, 0],
    zoom: 2
}),
target: 'map'
});
- 安装
openlayers包-yarn add ol - 修改
MainMap.vue组件,构建出最基本的地图
<template>
    <div class="map-container">
        <div class="map" ref="map"></div>
    </div>
</template>

<script>
import 'ol/ol.css'
import {Map,View} from 'ol'
import TitleLayer from 'ol/layer/Tile'
import OSM from 'ol/source/OSM'
export default {
    data() {
        return {
            map: null
        }
    },
    mounted() {
        this.initMap()
    },
    methods: {
        initMap() {
            const map = new Map({
                target: this.$refs.map,
                layers: [
                    new TitleLayer({
                        source: new OSM()
                    })
                ],
                view: new View({
                    center: [0,0],
                    zoom: 5
                })
            })
            this.map = map
        }
    }
}
</script>

<style scoped lang="stylus">
.map-container, .map {
    height: 100%;
}
.ol-attribution {
    display: none;
}
</style>- 隐藏掉右下角类似版权的
>>>.ol-attribution {
    display: none;
}- 将 view也提取到data中
data() {
    return {
        map: null,
        view: new View({
            projection: 'EPSG:4326',
            center: [118.786839, 37.414662],
            zoom: 12
        })
    }
},var streetmaponline = 'https://cache1.arcgisonline.cn/arcgis/rest/services/ChinaOnlineCommunity/MapServer', //在线街景
imagemaponline = 'https://services.arcgisonline.com/ArcGIS/rest/services/World_Imagery/MapServer', //在线影像
streetmapoffline = 'https://192.168.4.183/yangzhoustreet/{z}/{x}/{-y}.png', //离线街景
imagemapoffline = 'https://192.168.4.183/yangzhouimage/{z}/{x}/{-y}.png', //离线影像
mapmode = 1, //0表示离线,1表示在线
projection = 'EPSG:4326', //地图坐标系
centerx = 116.399,
centery = 36.3945,
zoom = 8,
minzoom = 8,
maxzoom = 19,
linecolor = '#009cfe', //轨迹线颜色
linewidth = 3;
const streetmapurl = mapmode === 1? streetmaponline: streetmapoffline //街景瓦片服务地址(根据是在线还是离线使用不同的地址)
const imagemapurl = mapmode ===1? imagemaponline: imagemapoffline //影像瓦片服务地址
export {
streetmapurl,
imagemapurl,
mapmode,
projection,
centerx,
centery,
zoom,
minzoom,
maxzoom,
linecolor,
linewidth
}MainMap.vue中引入并使用配置文件
import { projection, centerx, centery, zoom, mapmode } from '../mapconfig'

data() {
    return {
        map: null,
        view: new View({
            projection,
            center: [centerx, centery],
            zoom
        })
    }
},- 修改
MainMap.vue
import { projection, centerx, centery, zoom, streetmapurl, imagemapurl, mapmode } from '../mapconfig'

data() {
    return {
        basemap:null
    }
},
initMap() {
    if (mapmode == 0) {  //如果是离线
        this.basemap = new TileLayer({
            source: new XYZ({
                projection: 'EPSG:3857',
                url: streetmapurl
            })
        })
    } else {
        this.basemap = new TileLayer({
            source: new TileArcGISRest({
                url: streetmapurl
            })
        })
    }
    const map = new Map({
        target: this.$refs.map,
        layers: [ this.basemap ],
        view: this.view
    })
    this.map = map
}changemap() { //切换街景和影像地图
var mapname = this.$refs.maptypetext.innerHTML
this.map.removeLayer(this.basemap)
if (mapname == '街景') {
if(mapmode === 0) { //如果是离线
this.basemap = new TileLayer({
source: new XYZ({
tileSize: 256,
projection: 'EPSG:3857',
url: imagemapurl
})
})
} else {
this.basemap = new TileLayer({
source: new TileArcGISRest({
url: imagemapurl
})
})
}
this.$refs.maptypetext.innerHTML='影像'
this.$refs.maptype.style.backgroundPosition = "0 -60px";
} else if (mapname == '影像') {
if(mapmode === 0) { //如果是离线
this.basemap = new TileLayer({
source: new XYZ({
tileSize: 256,
projection: 'EPSG:3857',
url: streetmapurl
})
})
} else {
this.basemap = new TileLayer({
source: new TileArcGISRest({
url: streetmapurl
})
})
}
this.$refs.maptypetext.innerHTML='街景'
this.$refs.maptype.style.backgroundPosition = "0 0";
}
this.map.addLayer(this.basemap)
}- 五中的方式每次都要删除然后再增加新图层,性能上可能不是特别好,预加载,显示和隐藏的方式好点
methods: {
    initMap() {  //初始化地图
        if (mapmode == 0) {  //如果是离线
            this.streetmapLayer = new TileLayer({
                preload: Infinity,
                source: new XYZ({
                    projection: 'EPSG:3857',
                    url: streetmapurl
                })
            })
            this.imagemapLayer = new TileLayer({
                visible: false,
                preload: Infinity,
                source: new XYZ({
                    projection: 'EPSG:3857',
                    url: imagemapurl
                })
            })
        } else {  //如果是在线使用ArcGIS的在线地图服务
            this.streetmapLayer = new TileLayer({
                preload: Infinity,
                source: new TileArcGISRest({
                    url: streetmapurl
                })
            })
            this.imagemapLayer = new TileLayer({
                visible: false,
                preload: Infinity,
                source: new TileArcGISRest({
                    url: imagemapurl
                })
            })
        }
        const map = new Map({
            target: this.$refs.map,
            layers: [ this.streetmapLayer,this.imagemapLayer ],
            view: this.view
        })
        this.map = map
    },
    changemap() { //切换街景和影像地图
        var mapname = this.$refs.maptypetext.innerHTML
        if (mapname == '街景') {
            this.imagemapLayer.setVisible(true)
            this.streetmapLayer.setVisible(false)
            this.$refs.maptypetext.innerHTML='影像'
            this.$refs.maptype.style.backgroundPosition = "0 -60px";
        } else if (mapname == '影像') {
            this.streetmapLayer.setVisible(true)
            this.imagemapLayer.setVisible(false)
            this.$refs.maptypetext.innerHTML='街景'
            this.$refs.maptype.style.backgroundPosition = "0 0";
        }
    }
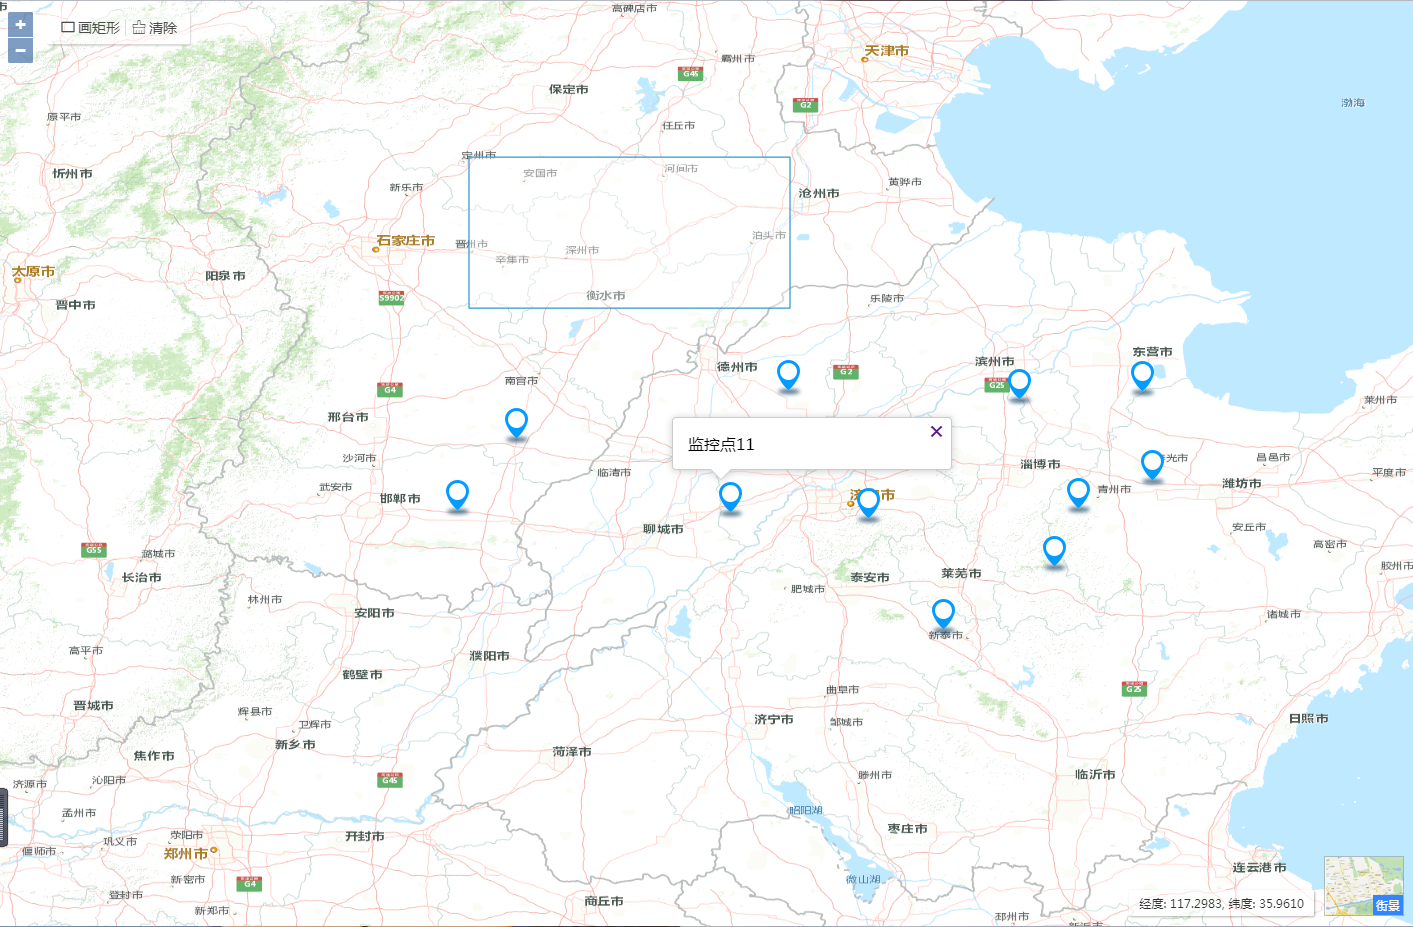
}import VectorLayer from 'ol/layer/Vector'
import { Vector as VectorSource } from 'ol/source'
import Draw, { createBox } from 'ol/interaction/Draw'
methods: {
drawRectangle() {
this.drawSource.clear() //先清除掉原来画的
if(!this.draw) {
const draw = new Draw({
source: this.drawSource,
type: 'Circle',
geometryFunction: createBox()
})
this.draw = draw
let _this = this
this.draw.on('drawend', function(event) {
var feat = event.feature;
var geometry = feat.getGeometry();
var coords = geometry.getCoordinates(); //获取取经纬度坐标点
console.log(coords)
//var smoothened = makeSmooth(coords, parseInt(numIterations.value, 10) || 5);
//geometry.setCoordinates(smoothened);
if (geometry.intersectsCoordinate([119.3978, 32.3955])) { //判断某个坐标点是否处在所画的矩形区域之中
console.log('[119.3978, 32.3955]处在你画的区域之中')
}
_this.map.removeInteraction(_this.draw)
})
}
this.map.addInteraction(this.draw)
},
clearDraw() {
this.drawSource.clear()
}
}yarn add axios qssrc目录下新建一个API目录,用于存放调用数据的apiAPI/http.js主要代码
import Qs from 'qs'
import axios from "axios"

axios.defaults.timeout = 20000;
axios.defaults.withCredentials = true;
axios.defaults.transformRequest = [function (data) {
    data = Qs.stringify(data)
    return data
}]

axios.defaults.transformResponse = [function (data) {
    data = JSON.parse(data)
    return data
}]
export default axios
API/mapapi.js
import axios from "./http"

//获取静态json文件数据
function getvideojson(data, cb, errorCb) {
    axios.get('mapdata/video.json', data).then(cb).catch(errorCb);
}

export default {
    getvideojson
}MainMap.vue中获取数据
import Feature from 'ol/Feature'
import Point from 'ol/geom/Point'
import TileLayer from 'ol/layer/Tile'
import VectorLayer from 'ol/layer/Vector'

import MapApi from '../API/mapapi'

data() {
    return {
        pointIcon: {
            unitpoint: 'images/unit.png',
            unitpoints: 'images/units.png',
            video: 'images/video.png',
            null: ''
        },
        Iconstyle: feature => {
            return [
                new Style({
                    stroke: new Stroke({
                        color: 'red',
                        width: 2
                    }),
                    image: new Icon({
                        offset: [0, 0],
                        opacity: 1.0,
                        rotateWithView: true,
                        rotation: 0.0,
                        scale: 1.0,
                        size: [60, 40],
                        anchor: [0.1, 0],
                        anchorXUnits: 'fraction',
                        anchorYUnits: 'pixels',
                        src: this.pointIcon[feature.get('type')]
                    })
                })
            ]
        },
        vectorSource: new VectorSource(),
        vectorLayer: null
    }
},
methods: {
    addVideo() {
        MapApi.getvideojson({unitid:1},response=> {
            var data = response.data.data
            console.log('data:', data)
            if (data) {
                for (var i = 0; i < data.length; i++) {
                    var code = data[i].code
                    var name = data[i].name
                    var lng = Number(data[i].lng)
                    var lat = Number(data[i].lat)
                    var point = new Point([lng, lat])
                    var feature = new Feature({
                        geometry: point,
                        code: code,
                        name: name,
                        layername: 'videolayer',
                        type: 'video'
                    })
                    feature.setId(code)
                    feature.setStyle(this.Iconstyle(feature))
                    this.vectorSource.addFeature(feature)
                }
            }
        },error=> {
            console.log(error)
        })
    }
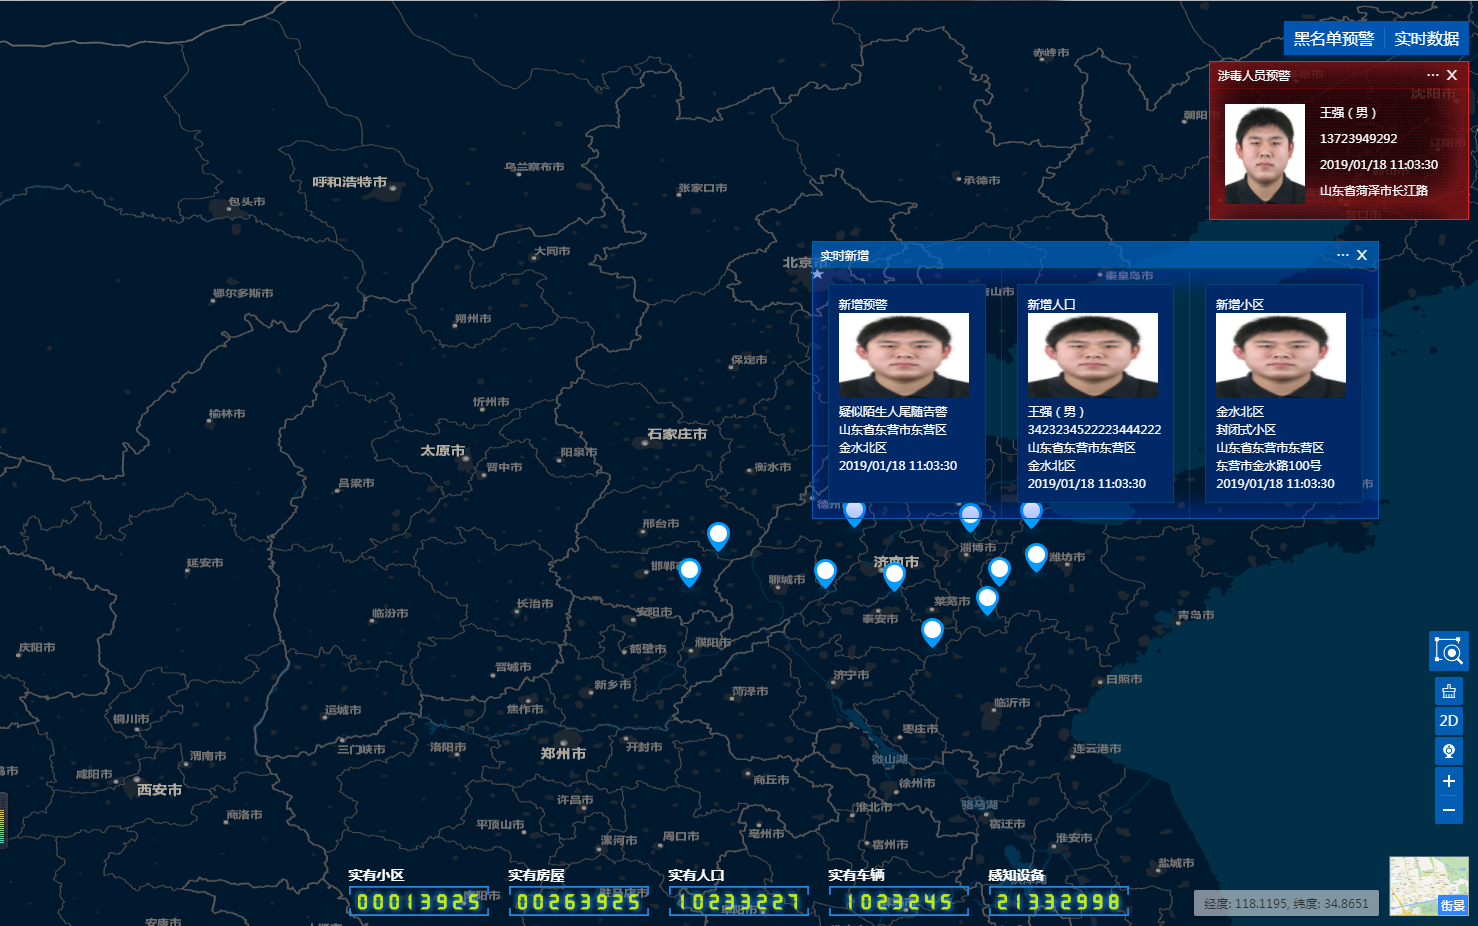
}/*
<div class="mouseposition-box" ref="mouseposition"></div> <!--当前光标位置-->
*/
import MousePosition from 'ol/control/MousePosition' // 当前鼠标位置
import {defaults as defaultControls} from 'ol/control'
import { format } from 'ol/coordinate'
data() {
return {
mousepostionCtrl: null,
}
},
methods: {
initMap() {
...
this.mousepostionCtrl = new MousePosition({
coordinateFormat: function(coordinate) {
return format(coordinate, '经度: {x}, 纬度: {y}', 4)
},
projection: 'EPSG:4326',
className: 'mouseposition',
target: this.$refs.mouseposition,
undefinedHTML: ' '
})
const map = new Map({
controls: defaultControls().extend([this.mousepostionCtrl]),
target: this.$refs.map,
layers: [ this.streetmapLayer,this.imagemapLayer, this.drawLayer, this.vectorLayer ],
view: this.view
})
this.map = map
...
}
}
