A small TypeScript bank implementation that allows the user to:
- create a bank account
- deposit/withdraw from this account
- create a formatted account statement
Using a REPL (eg ts-node).
This was assigned as part of week 10 at Makers Academy. The core focus for the week was on producing the best code possible where there was a minimal time pressure.
We had to work alone, and also had to review our own code to practice reflecting on and improving our own work.
I chose to use TypeScript as I had not used it before starting this week and I wanted to use the solo-work as an opportunity to build knowledge in a new language, having been using JavaScript for the previous few weeks.
To run this project, first clone the repository and run npm install to install the required packages.
npm installNext, run npm start to open the REPL with a BankAccount and BankStatement class already instantiated.
npm start
You can start adding transactions using the BankAccount by either using the shorthand functions created when the REPL initialises (deposit(), withdraw()) or by using the long-hand account.deposit() and account.withdraw() methods.
These methods both take an amount (number) and a date (string with yyyy-mm-dd format) as parameters, however the date is not required and will default to today's date if not specified. It also will not allow negative amounts for withdrawals or deposits, and will not allow the user to withdraw more funds than they have.
In order to get a formatted statement of the account, you can either call the short-hand print() method defined in the startRepl method, or the full account.printStatement(statement) will return a string with the formatted statement.
Example usage with REPL commands shown below:
You can also instantiate new instances of these classes and add transactions as you wish. See example usage below.
const bankAccount = new BankAccount();
const bankStatement = new BankStatement();

bankAccount.deposit(1000);
bankAccount.deposit(2000);
bankAccount.withdraw(500);

bankAccount.printStatement(bankStatement);

// Output:

"Date        ||Credit      ||Debit       ||Balance"
"2023-02-21  ||            ||500.00      ||2500.00"
"2023-02-21  ||2000.00     ||            ||3000.00"
"2023-02-21 ||1000.00 || ||1000.00"The main account logic is contained in the BankAccount class, along with the Transaction type located in the types.ts file.
Internally, this class stores the transactions inside an array.
Each transaction is represented as an object of type Transaction, which contains the amount, the date, and the type (deposit | withdrawal) of transaction. Current data of the account Transactions are stored privately, and are not accessible outside of the BankAccount class. The BankStatement class is passed to the printStatement method of the BankAccount in order to output formatted string data, rather than passing the sensitive data to the BankStatement class.
This class also ensures that we are not withdrawing too much money from an account and won't allow a negative number to be used for withdrawal or deposit.
The BankStatement class is responsible for generating a formatted account statement. It includes private methods to handle individual transaction formatting, and combines these into a single string with a header.
To run the tests for this project, run the below from the home directory.
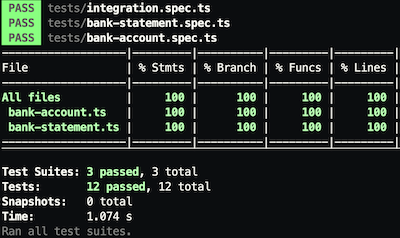
npm run testTests included unit tests for the BankAccount and BankStatement classes, as well as integration tests covering both classes and the Transaction type.
100% test coverage was achieved. I found TypeScript particularly enjoyable and robust to use for this project as it allows for typed parameters and function outputs. The explicit nature of the typed language lends itself well to sensitive functionality such as that used within a bank system.
- Use a database instead or a file system to keep track of multiple accounts centrally.
- Create a command-line interface or web app to allow the user to easily add transactions to their account.
- Allow the user to perform more complex actions, such as transfers and standing orders.
- Add user info in order to differentiate between accounts and settings to allow for more customization.

