Home
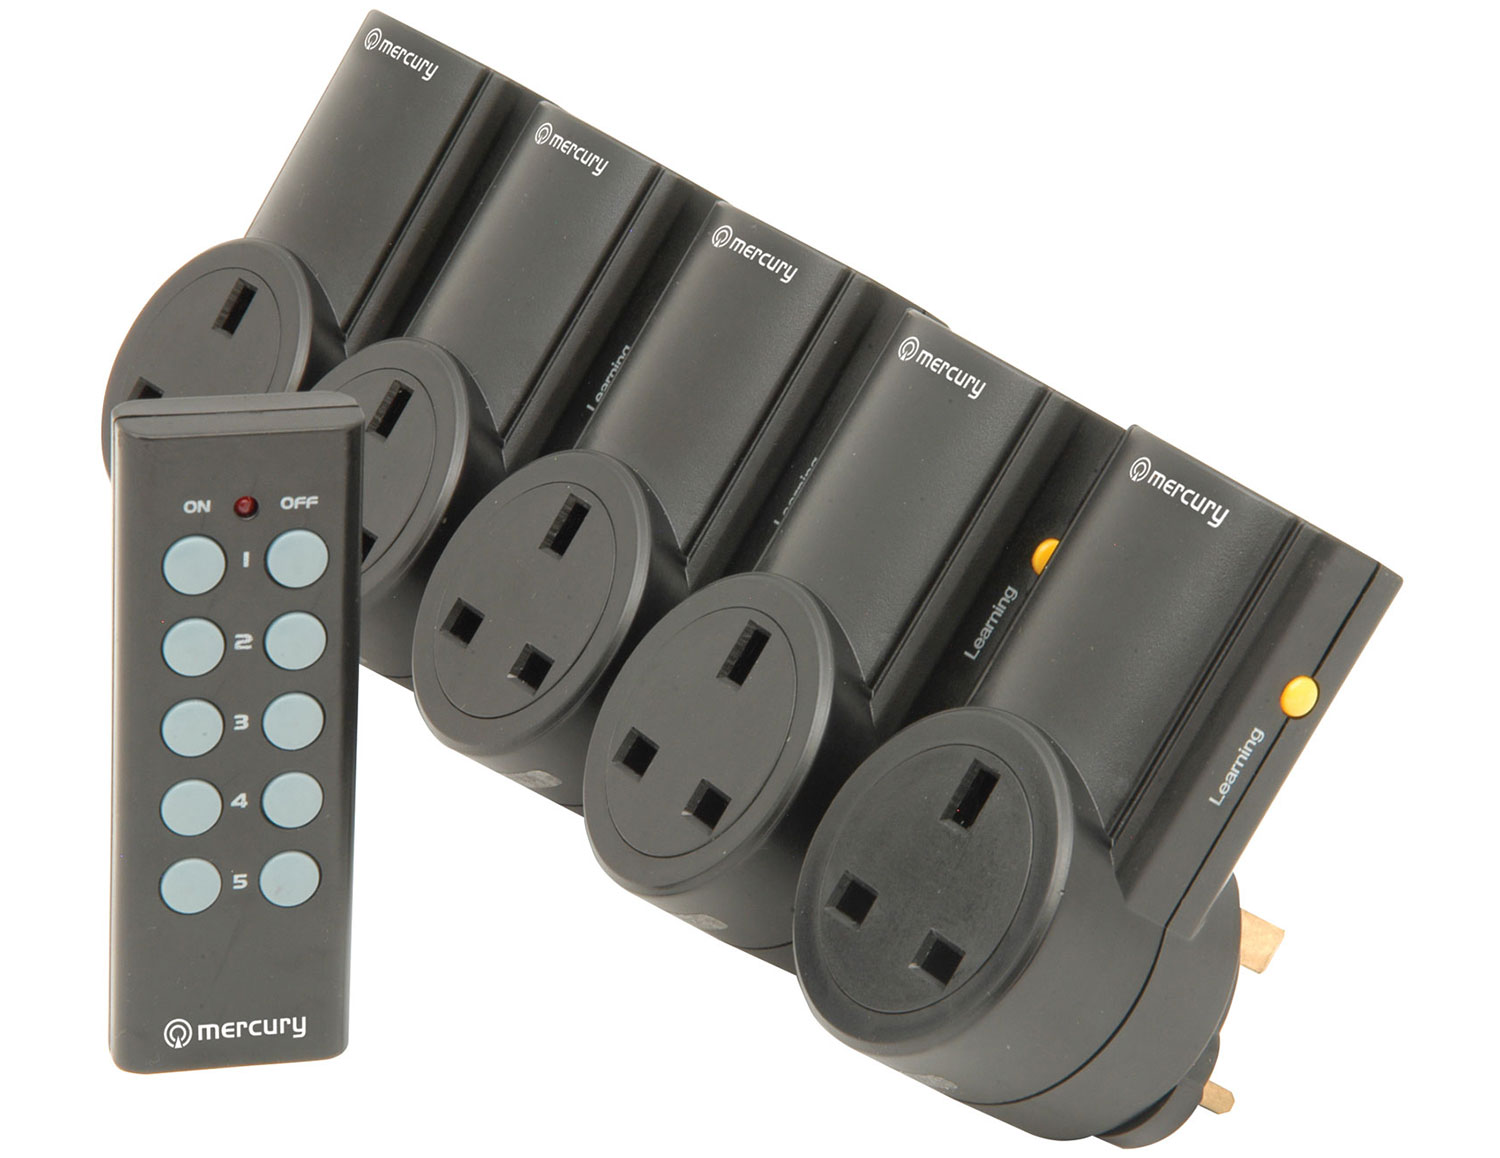
Control RF Switches such as these ones by Mercury via the Beaglebone PRU.
As well as your Beaglebone you will need a cheap 433mhz transmitter. Ebay is a good source.
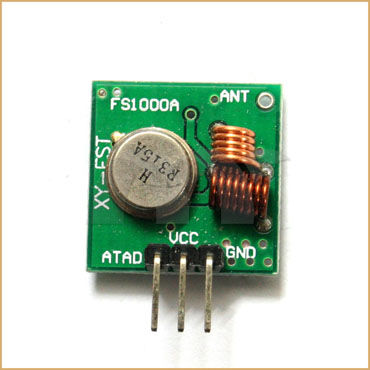
Connections:
- Vcc to P9.07 (+5v SYS)
- Gnd to P9.1 (DGND)
- Data to P8.11.
The Beaglebones, apart from being completely open source, have one big advantage over their rivals such as the Raspberry pi. The AM3358 Sitara processor used contains not only an ARM Cortex-A8 but also 2 32 bit 200MHz microcontrollers, known as PRU's (Programmable Realtime Units). rfsend uses one of these to create the pulse train for the 433mhz transmitter. They run independently of the main processor and are completely deterministic - making them great for doing timing critical tasks such as this.
rfsend uses the Linux Userspace I/O (UIO) method of communicating with the PRU's. Ensure you have this configured properly on your linux distribution. I'm using Debian 9.1 with a 4.4.88-ti kernel. In order to use uio instead of the default rproc, modify your /boot/uEnv.txt as shown:
###PRUSS OPTIONS
###pru_rproc (4.4.x-ti kernel)
#uboot_overlay_pru=/lib/firmware/AM335X-PRU-RPROC-4-4-TI-00A0.dtbo
###pru_uio (4.4.x-ti & mainline/bone kernel)
uboot_overlay_pru=/lib/firmware/AM335X-PRU-UIO-00A0.dtbo
Reboot & do a lsmod | grep uio Check you get:
uio_pruss               4629  0
uio_pdrv_genirq         4243  0
uio                    11100  2 uio_pruss,uio_pdrv_genirq
You will also need to load a cape to configure the Beaglebone pins.
sudo sh -c "echo cape-universal > /sys/devices/platform/bone_capemgr/slots"
or, if you want it loaded at boot, add it to '/etc/default/capemgr':
# Default settings for capemgr. This file is sourced by /bin/sh from
# /etc/init.d/capemgr.sh

# Options to pass to capemgr
# CAPE=BB-UART1,BB-UART2
CAPE=cape-universal
Now cat /sys/devices/platform/bone_capemgr/slots - You should now see something like:
0: PF----  -1
 1: PF----  -1
 2: PF----  -1
 3: PF----  -1
 4: P-O-L-   0 Override Board Name,00A0,Override Manuf,cape-universal
Finally, connect the P8.11 pin to PRU0 with config-pin P8.11 pruout
If you don't have the config-pin script installed you can use this instead
sudo sh -c "echo pruout > /sys/devices/platform/ocp/ocp\:P8_11_pinmux/state"
You will probably want to add that as a boot script so it survives reboots so create a text file with the following:
[Unit]
Description=Connect P8.11 to pru for rfsend command
After=capemgr.service

[Service]
Type=oneshot
ExecStart=/bin/sh -c "echo pruout > /sys/devices/platform/ocp/ocp:P8_11_pinmux/state"

[Install]
WantedBy=multi-user.target
Save it as /etc/systemd/system/config-pin.service
Enable with systemctl enable config-pin.service
Alternatively you could create a custom overlay instead of using cape-universal.
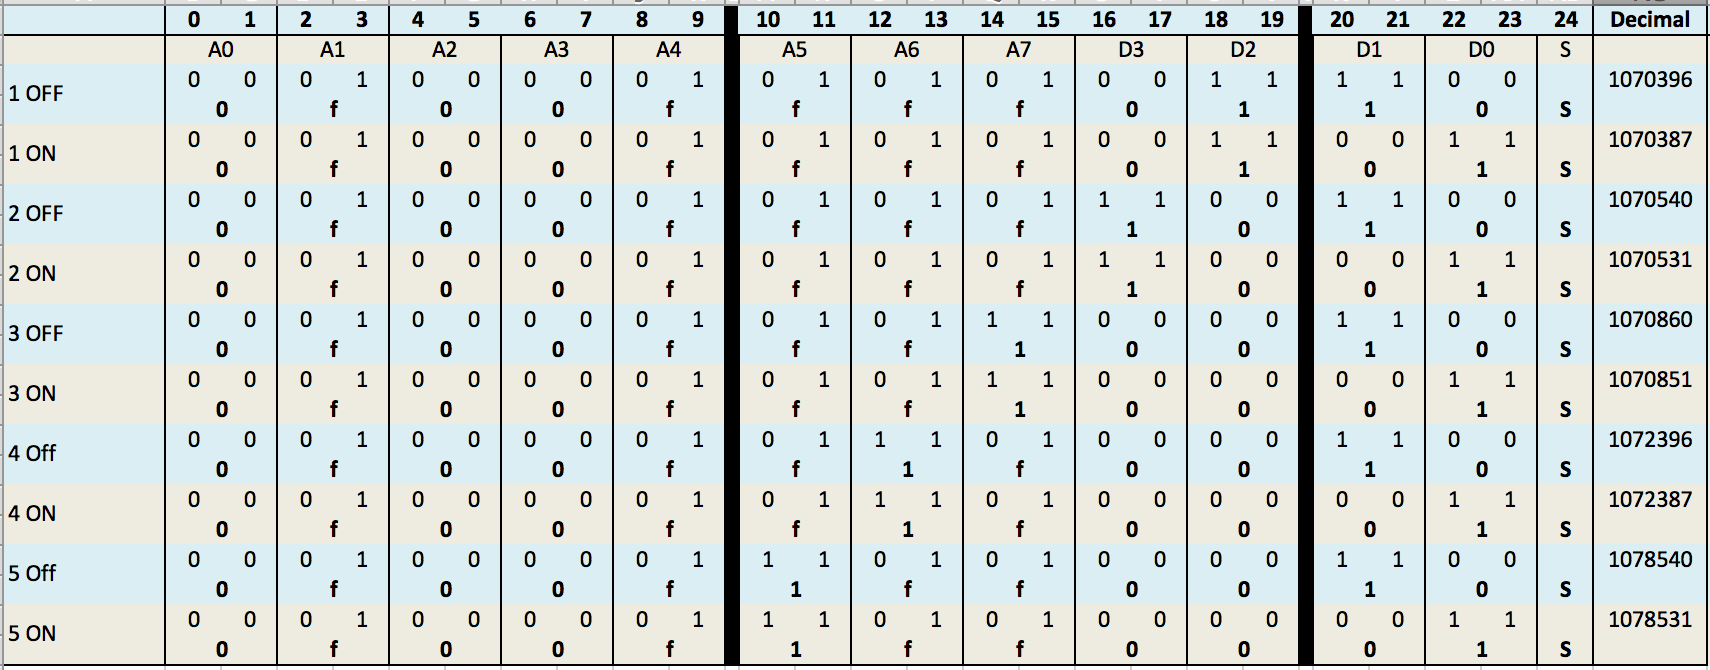
The code table above shows the binary code used to control my switches. The code consists of 12 tri-state bits and a sync bit. The first 5 tri-state bits are common to all sockets in the pack and form the group address. The next 5 tri-state bits are the individual socket address. Finally the last 2 tri-state bits are the socket state - ON or OFF.
Each tri-state bit is represented by 2 binary bits. So 24 binary bits form each code.
I used an oscilloscope to decode the signals but you could also use an Arduino with a cheap receiver module and the rc-switch library.
For more information google the datasheet for the PT2260 chip used in the transmitter fob.
The Mercury switches use a short pulse duration of 180us. So, based on codes from the above table
sudo rfsend -t180 -b 000100000101010100111100 will turn off socket 1
sudo rfsend -t180 107387 will turn on socket 1