This library is provides tools for performing regressions between EnergyPlus builds. Developers often propose changes to EnergyPlus for:
- New feature development
- Defect repair
- Refactoring for structure or performance
- etc.
When a developer proposes these changes, they must be tested. The continuous integration system over on EnergyPlus handles this, and provides results, but there can be a long time delay waiting on those results, depending on how busy CI is at that moment. This tool provides a way to run these regressions locally. In addition, because this tool isn't intermingled with the CI structure, enhancements to the regression analysis can be added quickly to this tool to provide developers with more information. These can be rolled upstream into the CI code, but must be done with much more care to avoid breaking CI.
This tool is written to be functional on all three major platforms, but Windows and Mac have known issues. On Windows the multiprocessing code does not work, causing the runs to be executed serially, which means a long testing time. On Mac there are a number of theme icons missing, causing the results tab to appear to be empty after a run, when in fact the icons are there just not rendered.
In general, this tool works amazingly well on Ubuntu 18.04. And it is super easy to set up an EnergyPlus build development environment on Ubuntu. So if at all possible, use this platform, in a VM or whatever, to use this tool. I'll keep pushing on the tool on all these platforms, but my focus will always be on Ubuntu for the time being.
For setting up a development environment to actually work on this tool, see the next section. If you are not interested in developing this tool, and only looking to use it for your EnergyPlus work, read on here.
For this case, the dependencies for this tool are typically installed into the system Python 3 installation, and this system Python 3 is used to execute the program. Instructions for this are actually really simple, and follow a few steps for each platform:
- Install Python
- Install GTK/PyGTK
- Clone the regression repo
- Install regression dependencies
- Run the regression tool
These are based on a fresh new installation of Ubuntu 18.04. If you are on a different distribution or version, or you are installing into a system that already has other dependencies installed, your mileage will vary.
So, starting with Ubuntu 18.04:
- Follow the PyGObject install instructions page and install the GObject dependencies:
sudo apt-get install python-gi python-gi-cairo python3-gi python3-gi-cairo gir1.2-gtk-3.0- Optionally test this: run
python3and try to executeimport gi. It should just do it without error. Pressctrl-dto exit.
- Install a couple other dependencies that we'll use in the next steps:
sudo apt-get install git python3-pip
- Download the regression tool and install python dependencies:
git clone https://github.com/NREL/EnergyPlusRegressionToolcd EnergyPlusRegressionToolpip3 install -r requirements.txt- Optionally test this: run
python3 eplus_regression_runner. It should run the GUI. Close it.
- Install the program into your applications:
python3 epregressions/install_desktop
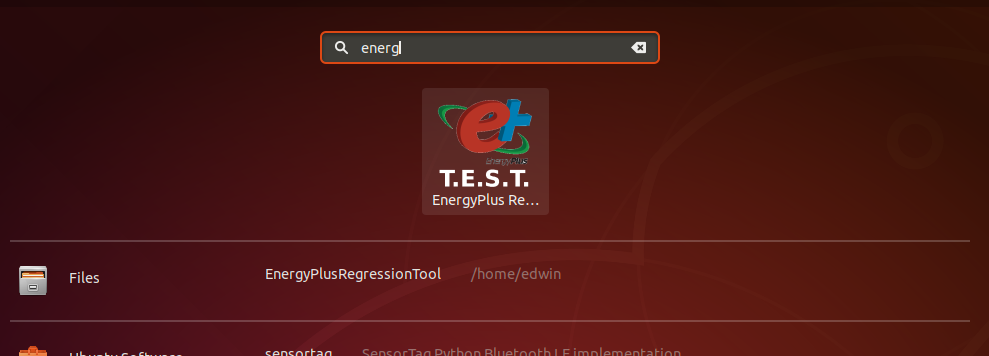
You should now be able to press the "Windows key" on your keyboard, start typing EnergyPl.., and it will find the tool and you can press enter, as shown here:
You can then right click on the icon in the taskbar and save it as a favorite to reopen anytime.
Then to get an update to the program, then only thing you have to do is update your clone:
cd EnergyPlusRegressionToolgit pull
In the rare event that a dependency has changed, you may have to re-run the pip install command, but specific instructions will be offered if that happens.
This was tested on Windows 7, and thanks to the PyGI packaging, it's not too hard. You just need to make sure you have a valid version of Python and then install PyGI into it.
- Download and install a valid Python version from Python.org:
- Valid Versions: Up to 3.4, not newer, 32-or-64-bit)
- https://www.python.org/downloads/windows/
- Then grab the PyGI installer from here:
- During that install:
- Select your Python 3.4 installation folder
- Select the GTK+ entry in the first list
- That Python version will now have PyGTK in it.
- Next you need to get the regression tool.
- The easiest way to do this is to get it using Git, which is also convenient because you'll be able to pull down updates using a Git Pull.
- Find a place to clone it on your machine, and do it:
git clone https://github.com/NREL/EnergyPlusRegressionTool
- Change into that directory:
cd EnergyPlusRegressionTool
- Install the dependencies for the Regression tool using Pip:
C:\Python34\Scripts\pip3.exe install -r requirements.txt
- Run the tool!
C:\Python34\python.exe eplus_regression_runner
For the case of developing this tool, you should start by installing the dependencies listed in the installation section. Then you will generally set up a separate Python environment to install the dependencies so you don't mess with the system Python. This gets a bit trickier than usual though because of the interplay between the system level dependencies installed with apt and the virtual environment isolation. The instructions over on GObject's website are perfect. I was skeptical because I have struggled with this in the past, but in this case, they work great. So follow the instructions here: https://pygobject.readthedocs.io/en/latest/devguide/dev_environ.html#devenv
Further program documentation, including user guide and typical workflows, are available in the documentation. This documentation is written using RST with Sphinx, and published on ReadTheDocs.
Exhaustive unit tests have been added to the codebase. The "underneath the hood" code, like the functions that calculate diffs and run builds, are fully tested. A major chunk of the GUI code itself has been unit tested, but that's difficult to do, so it's not so exhaustive. The unit tests are run by Travis.

