Logic gates are the basic building blocks of any digital system. It is an electronic circuit having one or more than one input and only one output. The relationship between the input and the output is based on a certain logic. Based on this, logic gates are named as AND gate, OR gate, NOT gate etc.
Now you can edit and run your digital circuit simulation designs online on PCs, Macs, thin clients, tablets, smart phones, smart TVs and e-book readers without any installation. You can use BrainBox in the office, classroom or at home and connect even your RaspberryPi to drive real physical devices.
(Extended Demo project for the draw2d.js library which shows how to connect the browser with a node.js server on raspberry Pi or just your local computer.)
You can install brainboxon your desktop or your Raspberry Pi just by using npm as
package manager. But what is npm?
NPM ist the package manager for NodeJS applications.
It's the world's largest software registry, with approximately 3 billion downloads per week. Open-source developers from every continent use npm to share and borrow packages, and many organizations use npm to manage private development as well.
If you didn't have installed NodeJS and npm - go ahead and install it
npm install -g brainbox
and start the server with brainbox. The server reports the URL how to connect to
your RaspberryPi with the browser.
See the running example on YouTube: https://www.youtube.com/watch?v=fUkAIjTaNXI
You can install the application even in your local intranet for training purpose. Just install and run the backend server (to store and load the circuit files) on every computer which can run a simple node.js server.
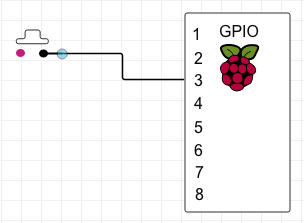
You have full access to the GPIO pins on you RaspberryPi with the browser based digital circuit simulator. If
node.js already running on your raspi you need just to install the simulator
like on your desktop
You find a lot of documentation how to connect a simple LED to your raspi. A good source is always the web page of the original raspberry pi organisation
Now you can start the simulation in your browser and the LED connecte to the GPIO(3) lights up if you press the button in your simulator.
I develop the project with yarn to build my webpack.
YARN runs on Node.js, so if you don't have npm installed already, go ahead and install it.
npm install
node ./app/backend/index.js
open a second console and run
yarn dev

