Getting Started
This guide provides step-by-step instructions to show you how to use the Homebridge Raspberry Pi Image to setup Homebridge on your device.
Before getting started, make sure you have the following:
- One of the supported Raspberry Pi Models
- A 4GB or larger SD card (Class 10 40Mb/s or faster is recommended)
- A Windows, macOS, or Linux computer with an SD card reader
Note: The homebridge Image is temporarily not available for download within the Raspberry PI Imager Tool.
As a workaround, please download latest image from here, and use the 'Custom' option under 'Choose OS' within the imager tool.
The Homebridge Raspberry Pi Image is completely free (no sign up required).
The easiest way to flash the Homebridge Raspberry Pi Image to your SD card is to use the Raspberry Pi Imager.

- Download and install the latest version of Raspberry Pi Imager.
- Open the Raspberry Pi Imager application.
- Click Choose Device
- Scroll down and select the No filtering option.
- Click Choose OS.
- Scroll down and select the Other specific purpose OS category.
- Select the Home assistants and home automation category.
- Select Homebridge, then choose your Homebridge image.
- 32bit - For all RPI Models
- 64bit - For RPI 3B, 3B+, 3A+, 4B, 400, 5, CM3, CM3+, CM4, CM4S, Zero 2 W
- Click Choose Storage and select your SD card.
- Click Next
- For Use OS Customisation, select No
- Click Write
Raspberry Pi Imager will now download and flash the latest version of the Homebridge Raspberry Pi Image to your SD card, this may take several minutes depending on the speed of your internet connection and SD card.
Advanced users:
If you wish to use another tool such as Etcher or dd to flash the Homebridge Raspberry Pi Image, you can manually download the image from our releases page:
If you have decided to connect your Raspberry Pi using ethernet, do so before you power on your device for the first time.
No additional configuration is required to connect.
Follow these steps to connect your device to WiFi:
- Power on your device without an Ethernet cable attached.
- Wait 1-2 minutes
- Use your mobile phone to scan for new WiFi networks
- Connect to the hotspot named Homebridge WiFi Setup
- Wait a few moments until the captive portal opens, this portal will allow you to connect the Raspberry Pi to your local WiFi network.
If you enter your WiFi credentials incorrectly the Homebridge WiFi Setup hotspot will reappear allowing you to try again.
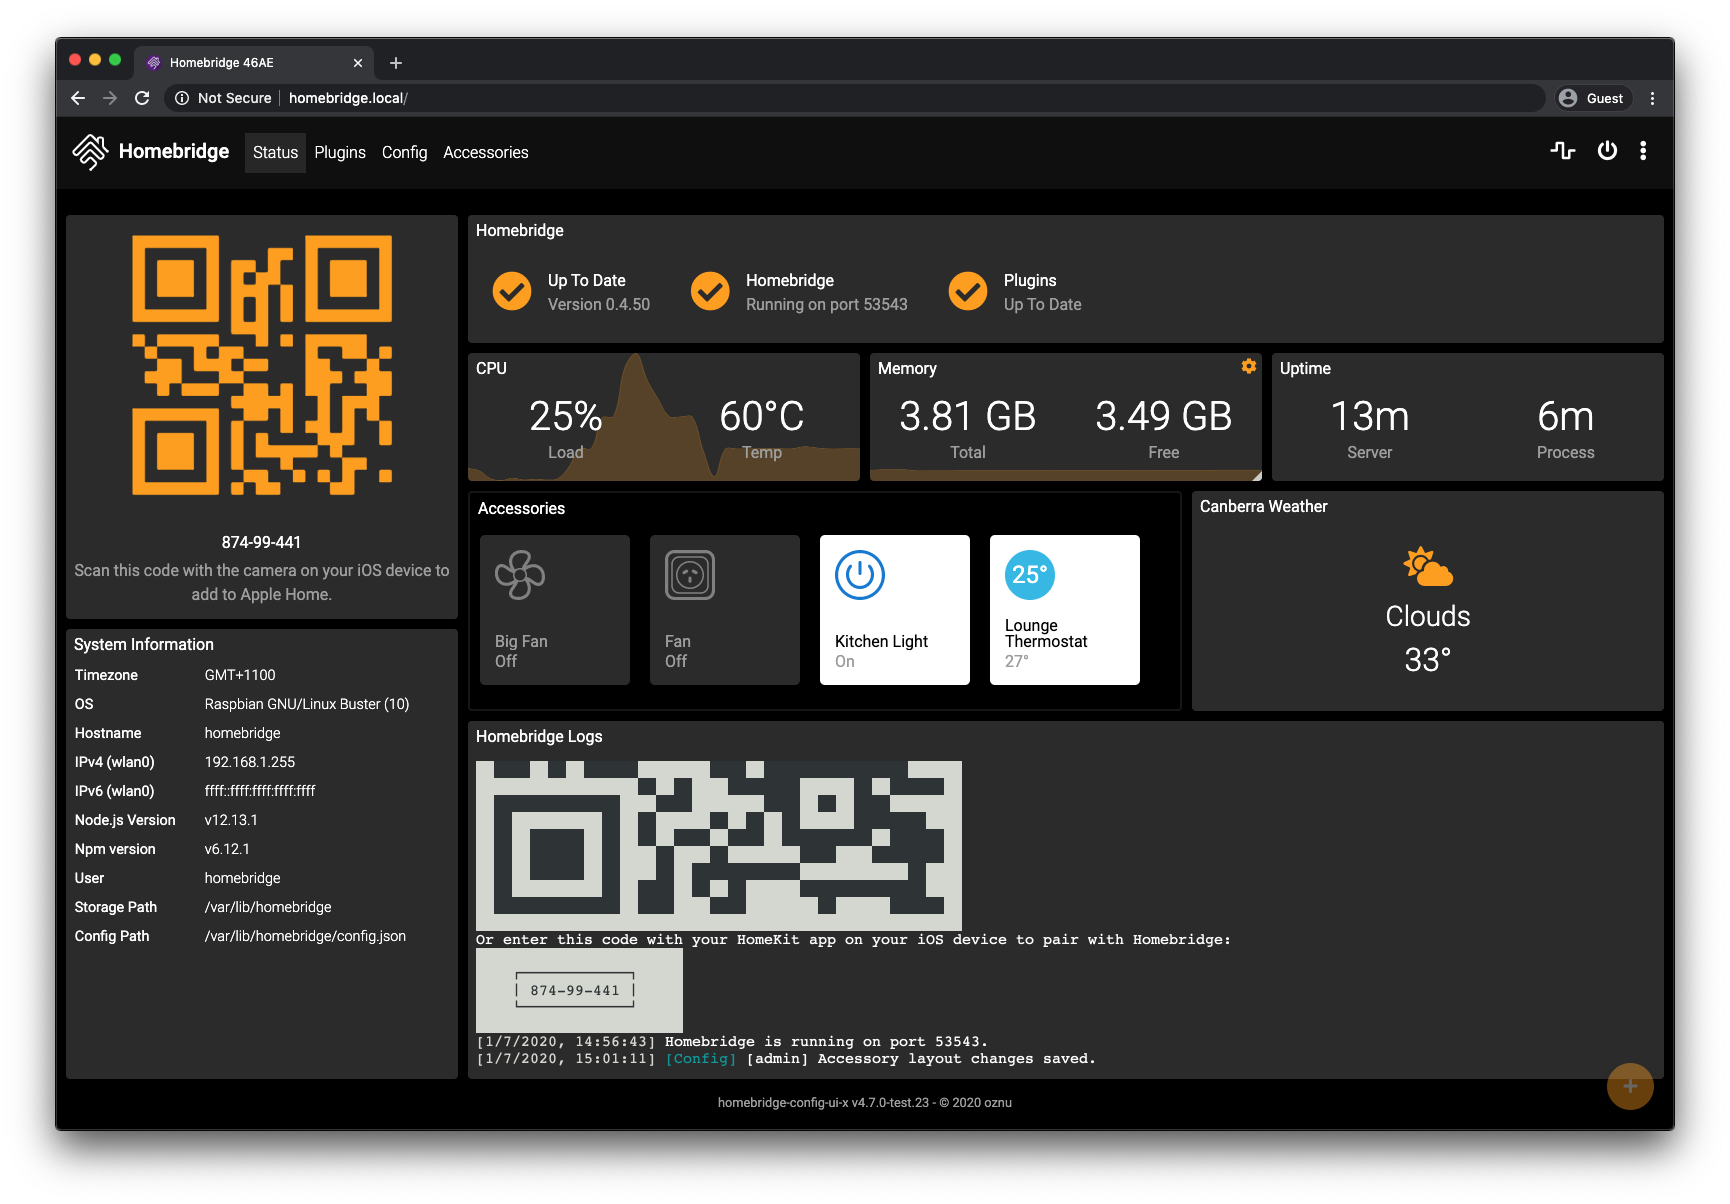
The Homebridge UI web interface will allow you to install, remove and update plugins, and modify the Homebridge config.json and manage other aspects of your Homebridge service.
If you're using macOS or a mobile device, you should be able to access the UI via http:https://homebridge.local.
If you're using Windows, or http:https://homebridge.local does not work for you, you will need to find the IP address of your Raspberry Pi another way:
- Login to your router and find the "connected devices" or "dhcp clients" page to find the IP address that was assigned to the Raspberry Pi.
- Use an iPhone to access
http:https://homebridge.local, once you login using the default username and password (admin/admin) you can find the IP address under System Information. - Download the Fing app for iOS or Android to scan your network to find the IP address of your Raspberry Pi.
- As a last resort, if you plug a monitor into your Raspberry Pi, the IP address will be displayed on the attached screen once it has finished booting.
Once you've found your IP address, login to the web interface by going to http:https://<ip address of your server>.
- Open the Home
 app on your device.
 - Tap the Home tab, then tap
 .
. - Tap Add Accessory, then scan the QR code shown in the Homebridge UI.
Your bridge does not have any accessories yet, so you may receive a message saying Additional Set-up Required, this is ok, as you add plugins they will show up in the Home app without the need to pair again (except for Cameras and TVs).
Using the Homebridge UI, select the Plugins tab and search for the name of the device or plugin you want to install.
Many plugins will allow you to configure the plugin from the GUI without having to manually edit the JSON config file. Plugins that support this feature have the SETTINGS button shown in their card once installed.
If the plugin you have installed requires manual configuration, go to the Config tab. This is where you can edit the Homebridge config.json file. The Homebridge UI will syntax check your config, and provide hints as to where the errors are, so don't be to worried about messing things up here.
If you need help understanding the JSON structure of the config file, see this wiki article.
Once you have finished configuring your plugin, click the restart button  found in the top right hand corner to restart the Homebridge process. You will need to restart Homebridge each time you make a change to a plugin's config.
The Homebridge Raspberry Pi Image wiki contains detailed information about your setup and instructions on how to further customise your install:
https://github.com/homebridge/homebridge-raspbian-image/wiki