- Clone this repository:
git clone https://github.com/hendisantika/spring-boot-kafka-demo.git - Navigate to the folder:
cd spring-boot-kafka-demo - Make sure your ZooKeeper & Kafka already run
- Run this command to run ZooKeeper:
bin/zookeeper-server-start.sh config/zookeeper.properties - Run this command to run Kafka:
bin/kafka-server-start.sh config/server.properties - Run the application:
mvn clean spring-boot:run - Publish message to kafka topic:
curl --location --request POST 'https://localhost:8082/api/kafka/publish' \
--header 'topic-name: book-update' \
--header 'Content-Type: application/json' \
--data-raw '{
    "message": "Testing1"
}'- Publish message to kafka topic:
curl --location --request POST 'https://localhost:8082/api/kafka/books/publish' \
--header 'topic-name: book-update' \
--header 'Content-Type: application/json' \
--data-raw '{
    "bookName": "Spring Boot Tutorial",
    "author": "Hendi Santika"
}'
This simple application connects to a kafka cluster installed on your local machine and publishes and subscribes messages from a kafka topic.
- Local kafka setup
- Testing local kafka using command line tools
- Kafka Tool setup
- Sending message using Kafka Tool UI
- Publishing and subscribing to kafka topic
- Find the program using a specific port
The steps outlined below are for MAC users.
-
brew install kafka -
Start zookeeper using brew services:
brew services start zookeeperIf you don't want to run it as a background service you can just run :
zookeeper-server-start /usr/local/etc/kafka/zookeeper.properties -
Now start kafka using brew services:
brew services start kafkaIf you don't want to run it as a background service you can just run :
kafka-server-start /usr/local/etc/kafka/server.properties -
To view the services:
brew services list -
To stop zookeeper & kafka using brew services
 brew services stop zookeeper
 brew services stop kafka
NOTE: Brew services will keep the services running in the background. So the services will be running at all times.
In this section we will create a topic, a producer and a consumer and test the flow using kafka command line tools.
-
Create a topic named
book-updatekafka-topics --create --zookeeper localhost:2181 --replication-factor 1 --partitions 1 --topic book-updateorbin/kafka-topics.sh --create --partitions 1 --replication-factor 1 --topic book-update --bootstrap-server localhost:9092 -
Create Producer console and send messages to the topic
book-updatekafka-console-producer --broker-list localhost:9092 --topic book-updateorbin/kafka-console-producer.sh --topic book-update --bootstrap-server localhost:9092You will see
>once you run the above command. Now you can type in the messages that you want to send. An example is shown below.>First book update >Second book update -
Create Consumer console which will listen to localhost at port 9092 at topic
book-updatekafka-console-consumer --bootstrap-server localhost:9092 --topic book-update --from-beginningorbin/kafka-console-consumer.sh --topic book-update --from-beginning --bootstrap-server localhost:9092Example output of the above command
 First book update
 Second book update
We are going to use Kafka Tool as a GUI for managing and using Kafka cluster. It is a free tool as long as you are not using it for commercial purposes.
NOTE: Do not use this tool for any commercial purposes without purchasing a license
-
Download link for the tool - https://www.kafkatool.com/download.html
-
Once you have installed the software on your machine open the tool to setup the connection details.
Zookeeper Host : localhost
Zookeeper Port : 2181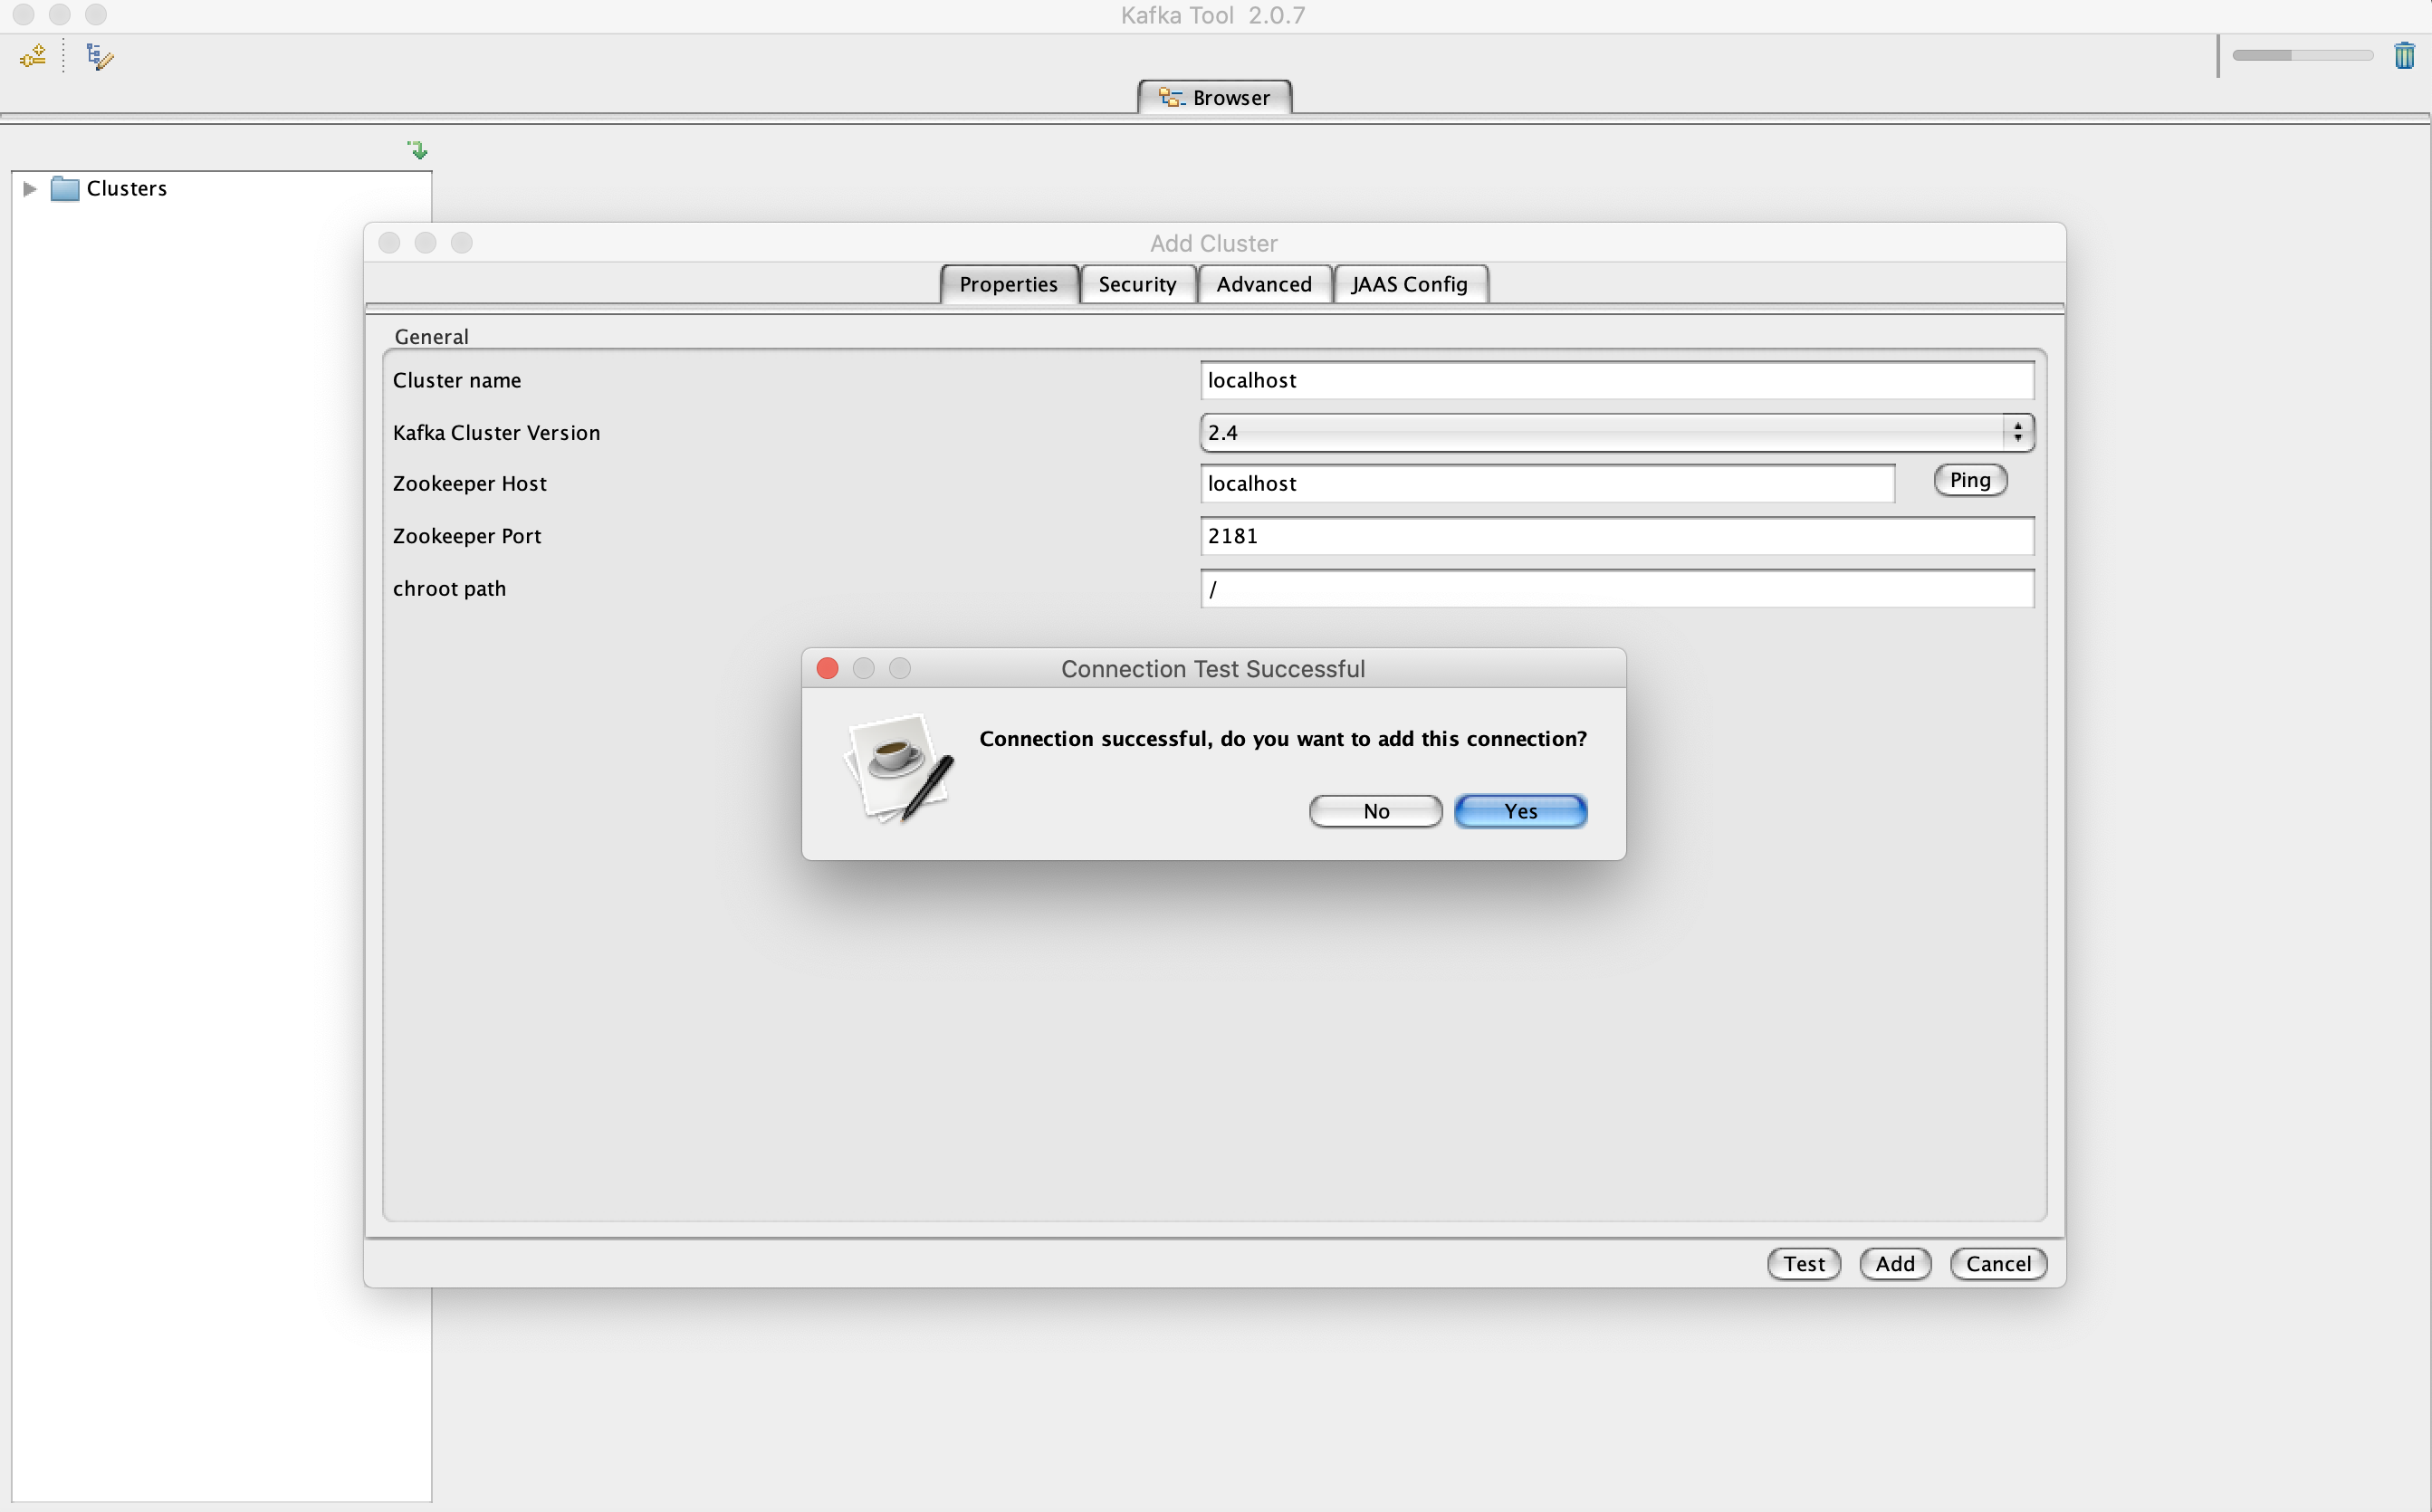
-
Inside topics section you will see the
book-updatetopic that we created earlier with the command line tool. Click on the Data tab and click onRetrieve messageswhich looks like a play button to see the messages added earlier. Notice that by default the messages are displayed in bytes. In the next step we will convert it to string.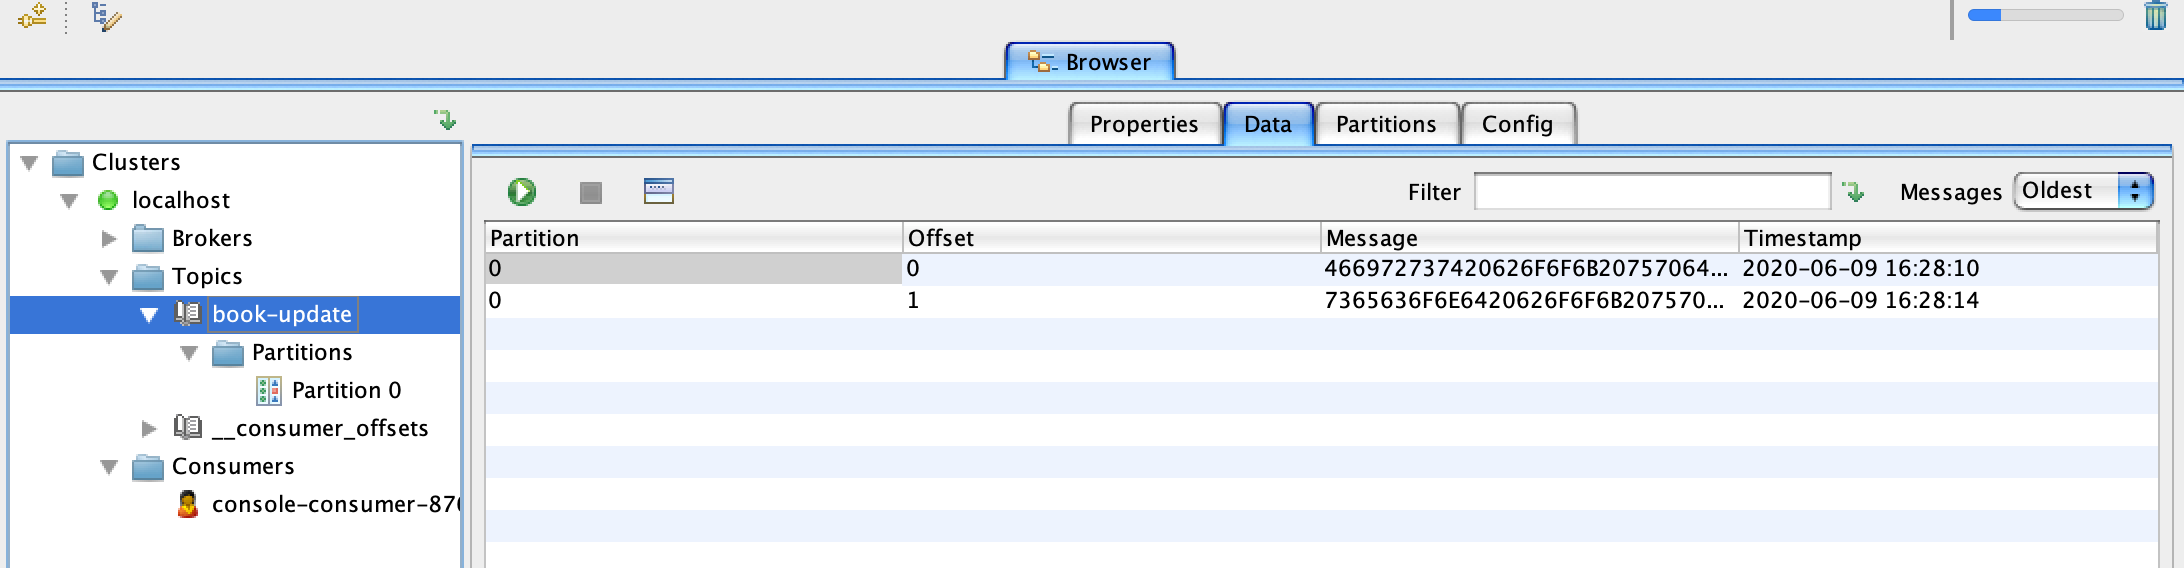
-
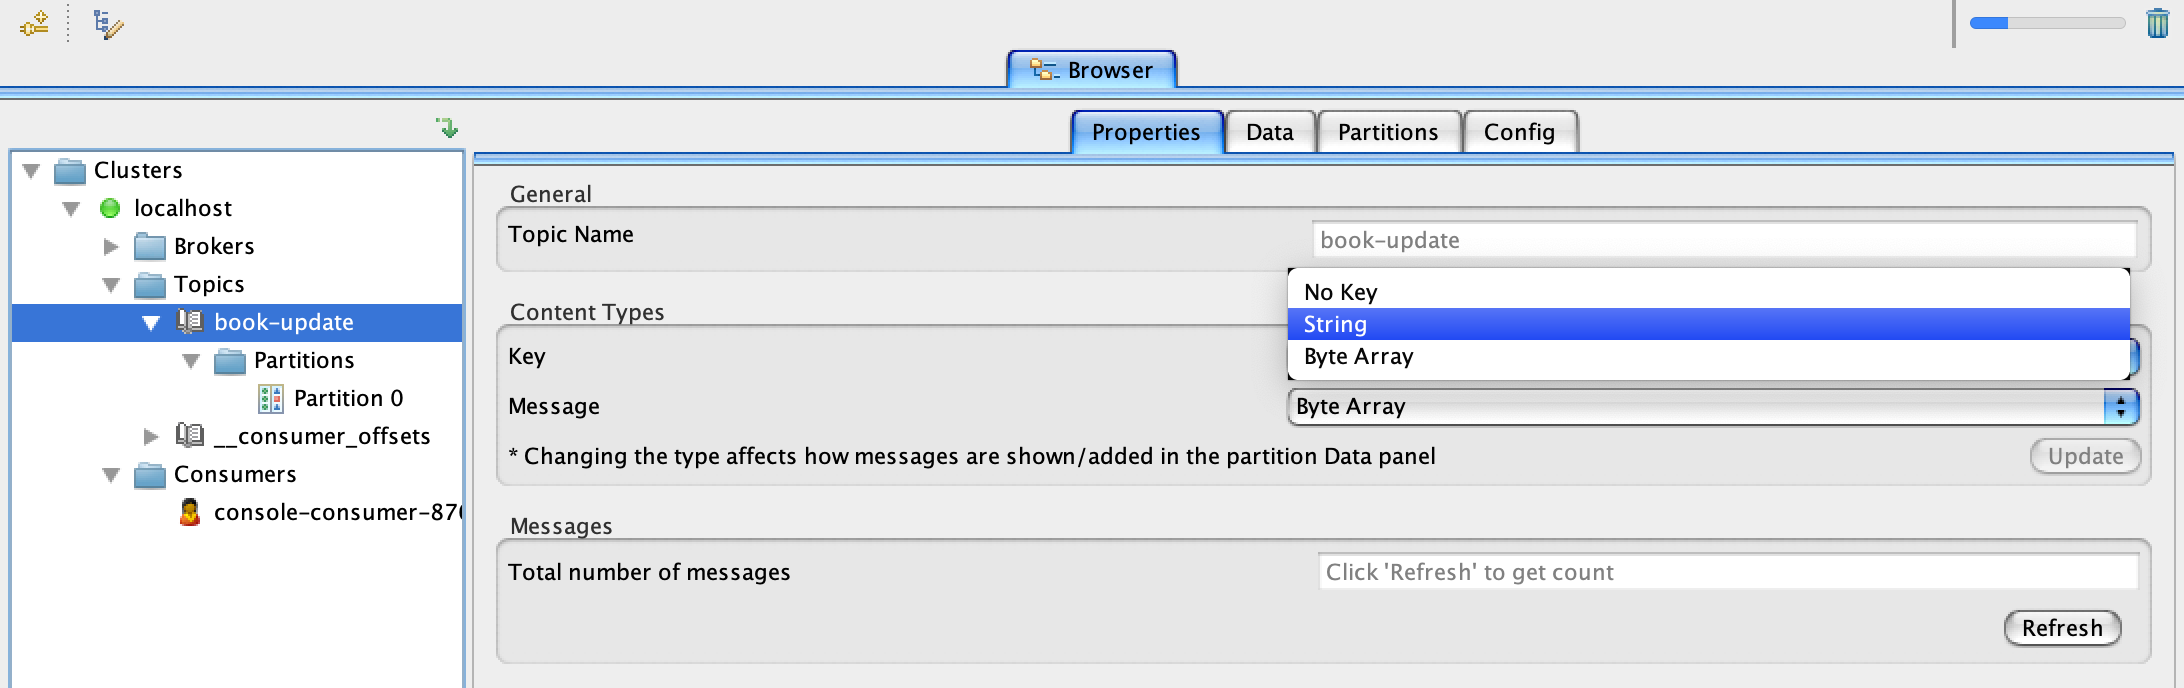
To change from byte to string switch over to the properties tab and change both key and message to string and click update as show in the below screenshot.
-
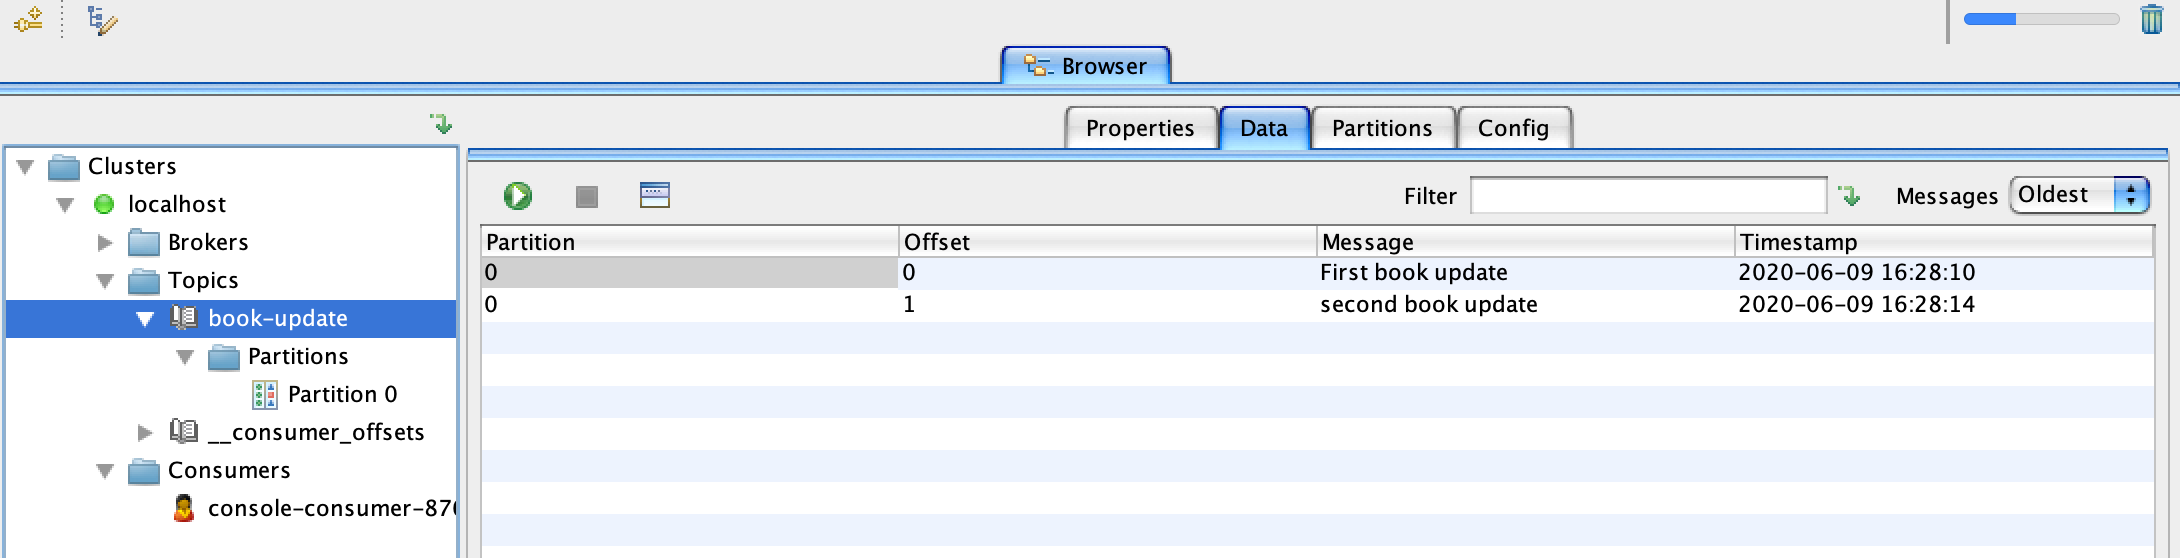
Messages displayed in string.


Now let's try to send a message using Kafka Tool UI.
-
Click on partition 0 under your topic name and then switch over to the Data tab and click on the plus sign and add single message.
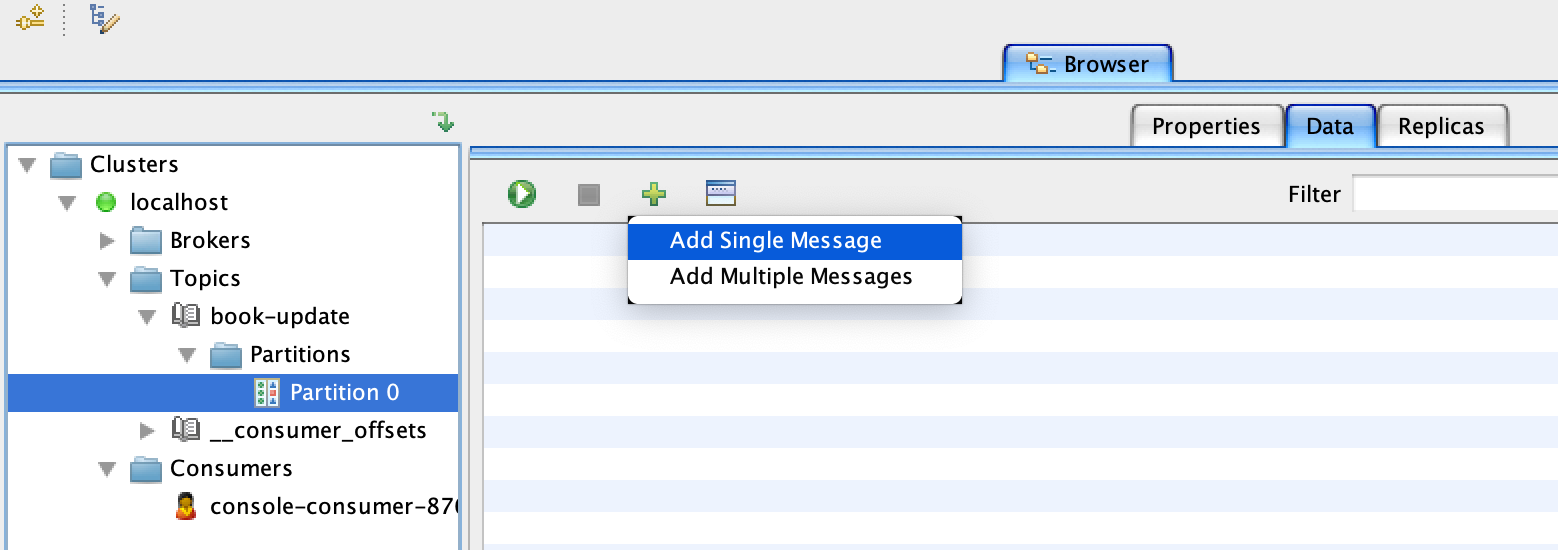
-
For both
keyandvaluesection switch fromfrom filetoEnter manually [HEX]. In the below screenshot example i didn't give a value forkey. Click on Add and you can keep adding messages if you want to.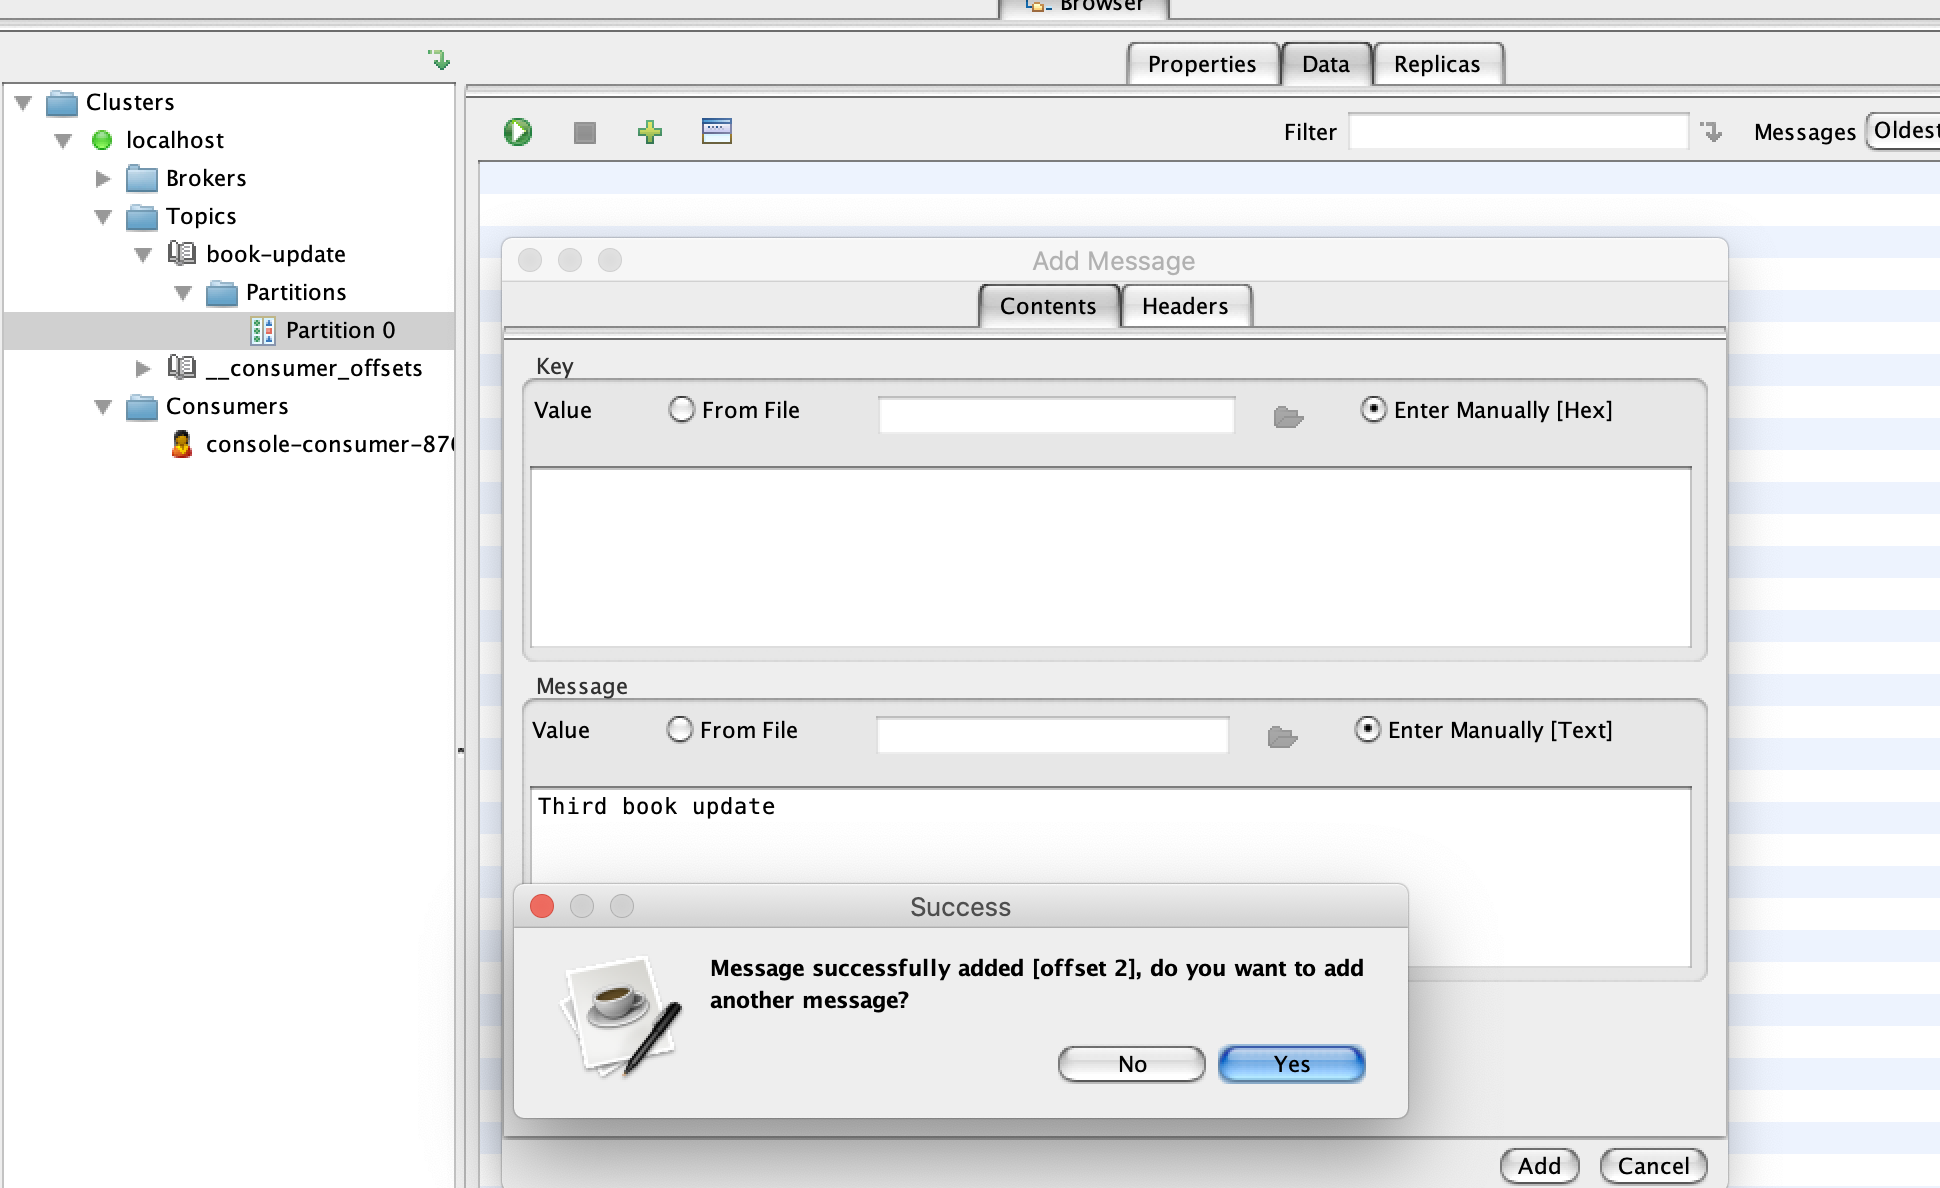
-
Now click on the topic name which in this case is
book-updateand switch to the data tab. Click onRetrieve messageswhich looks like a play button to see the new messages added from the previous step.


Before running the project let's look at some screenshots from the code base.
-
Check
KafkaConsumerConfigandKafkaProducerConfigclasses incorepackage for consumer and producer configuration. -
Check
KafkaConsumerclass in theservicepackage for code that cosumes messages from the topicbook-update. You can add consumers for different topics in this class.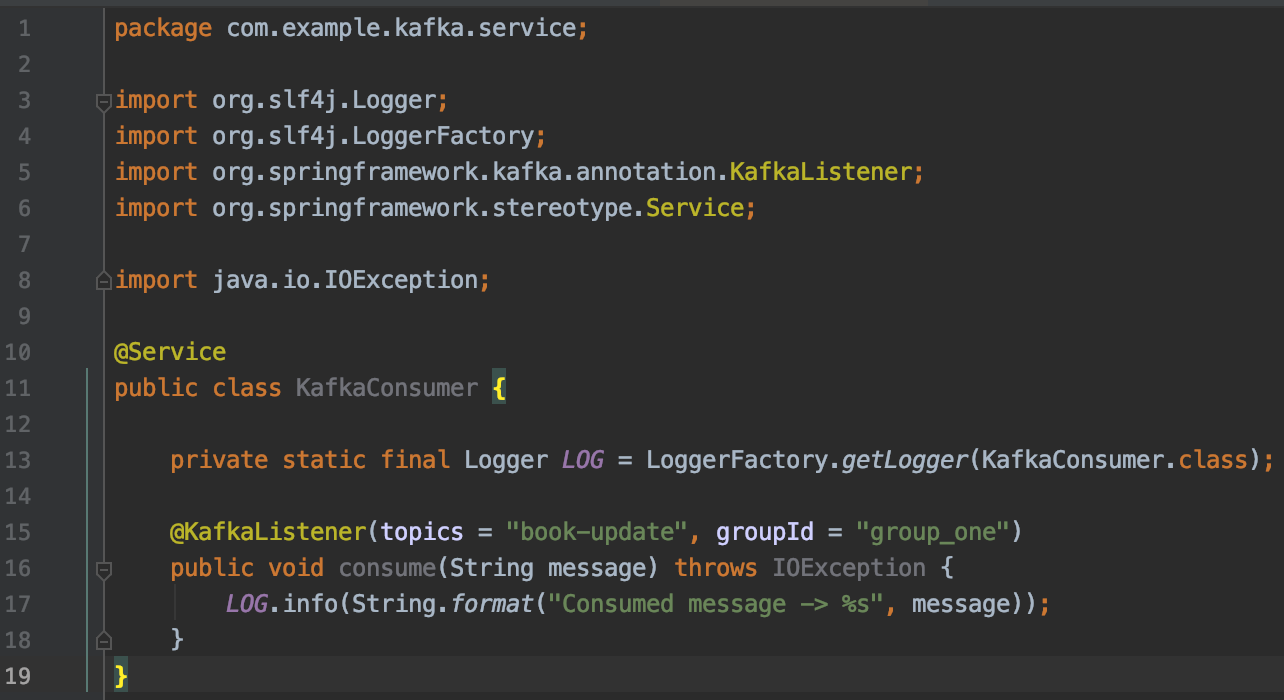
-
spring-boot let's you create topic on a kafka cluster programmatically. Check class
KafkaTopicConfigincorepackage. It will programmatically create a topic with the name you pass to it. Checkkafka.topic.nameinapplication.propertiesfile to see the name of the topic we are creating.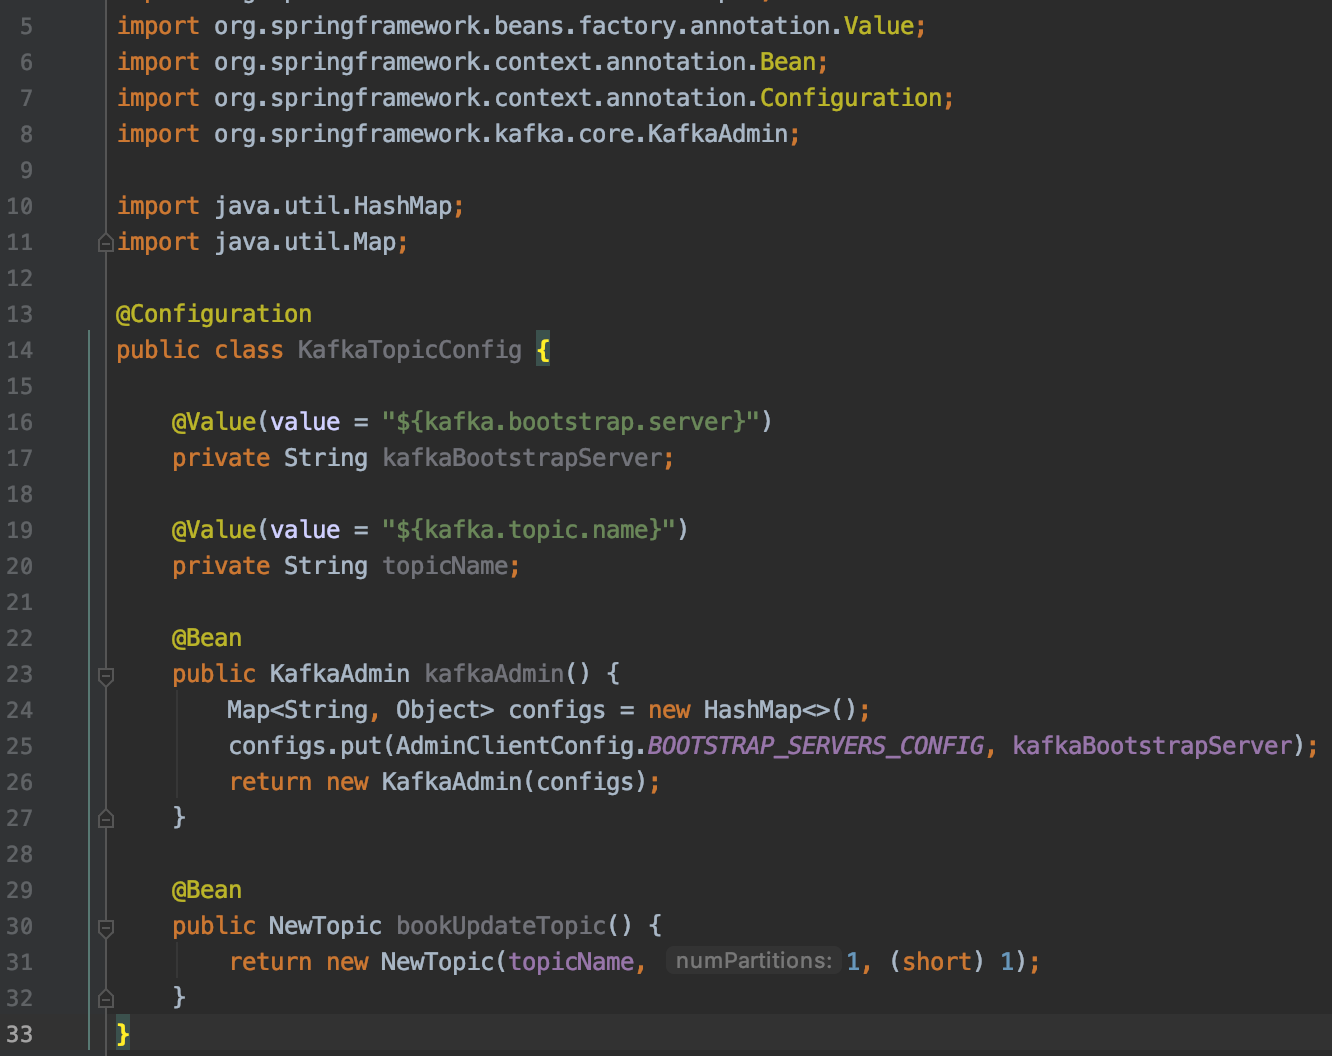
-
we have two REST api's that you can use to publish message to a topic.
a. POST service that accepts string message as body. You will have to pass a header with the topic name you wish to publish the message to.
 POST : https://localhost:8082/kafka/publish
 HEADER :
         "key" : "topic-name",
         "value" : "book-update"
b. POST service that accepts json as body. The body should match the structure of pojo books. Also you need to pass a header with the topic name you wish to publish the message to.
POST : https://localhost:8082/kafka/books/publish
HEADER :
        "key" : "topic-name",
        "value" : "book-update"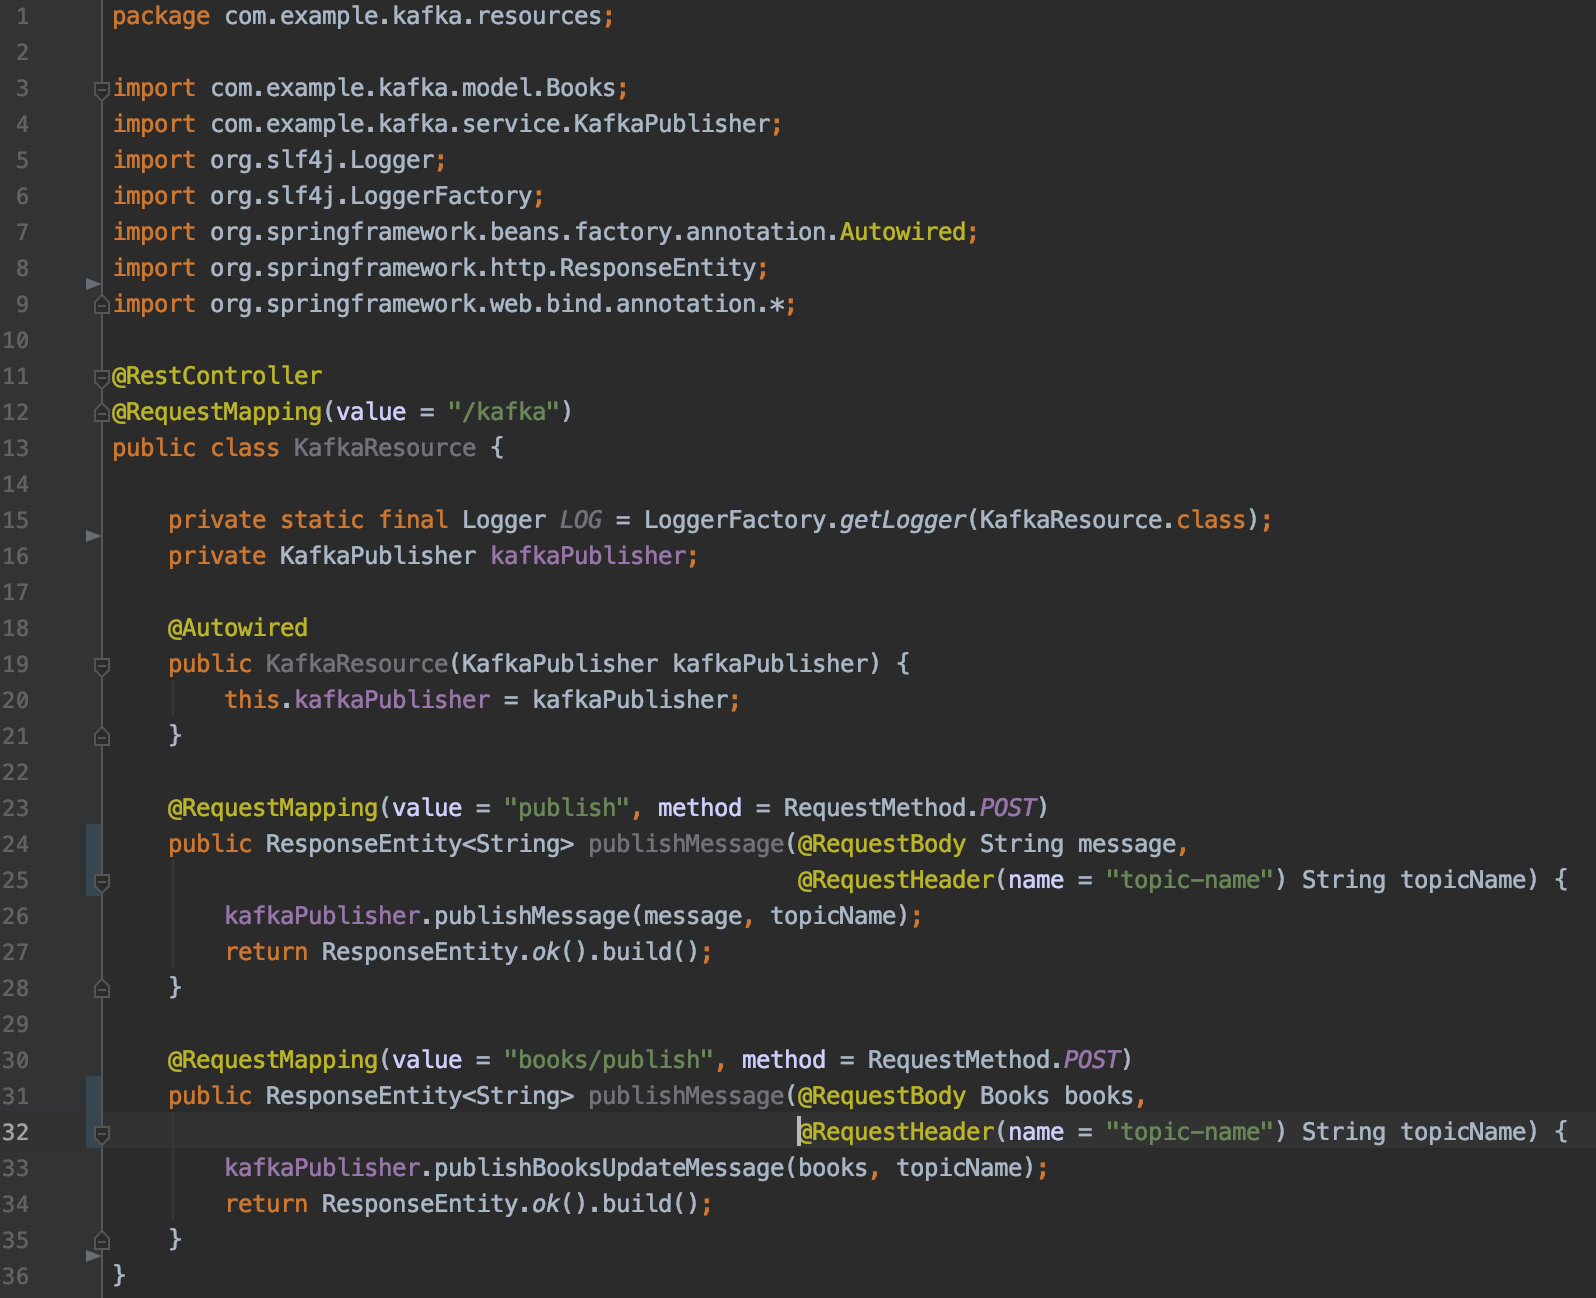


we have setup the cluster so let's try to run the project.
-
Clone this git repo
git clone github.com/hendisantika/spring-boot-kafka-demo.git -
Just take a look at
application.propertiesunderresourcesfolder of the project. By default springboot runs on 8080 but i changed it to 8082 because our zookeeper was using port 8080.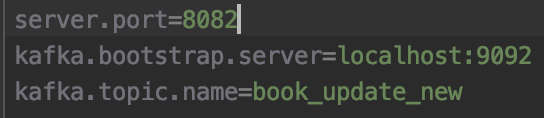
-
Now let's run the project :
mvn clean spring-boot:run -
Let's go and look at the kafka tool. You can see that the topic
book_update_newgot created programmatically once we ran the app.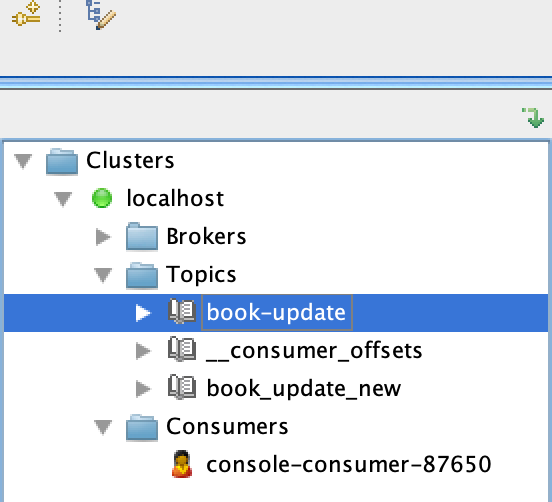
-
Let's publish a message using the REST api. Below screenshot shows an example and don't forget to add the header
topic-namewhen you hit the service.
-
If you go back to the window you ran the spring-boot project from you can see the log message from the consumer that consumes the message published from the previous post. The below screenshot shows the same.

-
This last screenshot is the second REST api if you like to test it out and don't forget to add the header
topic-namewhen you hit the service.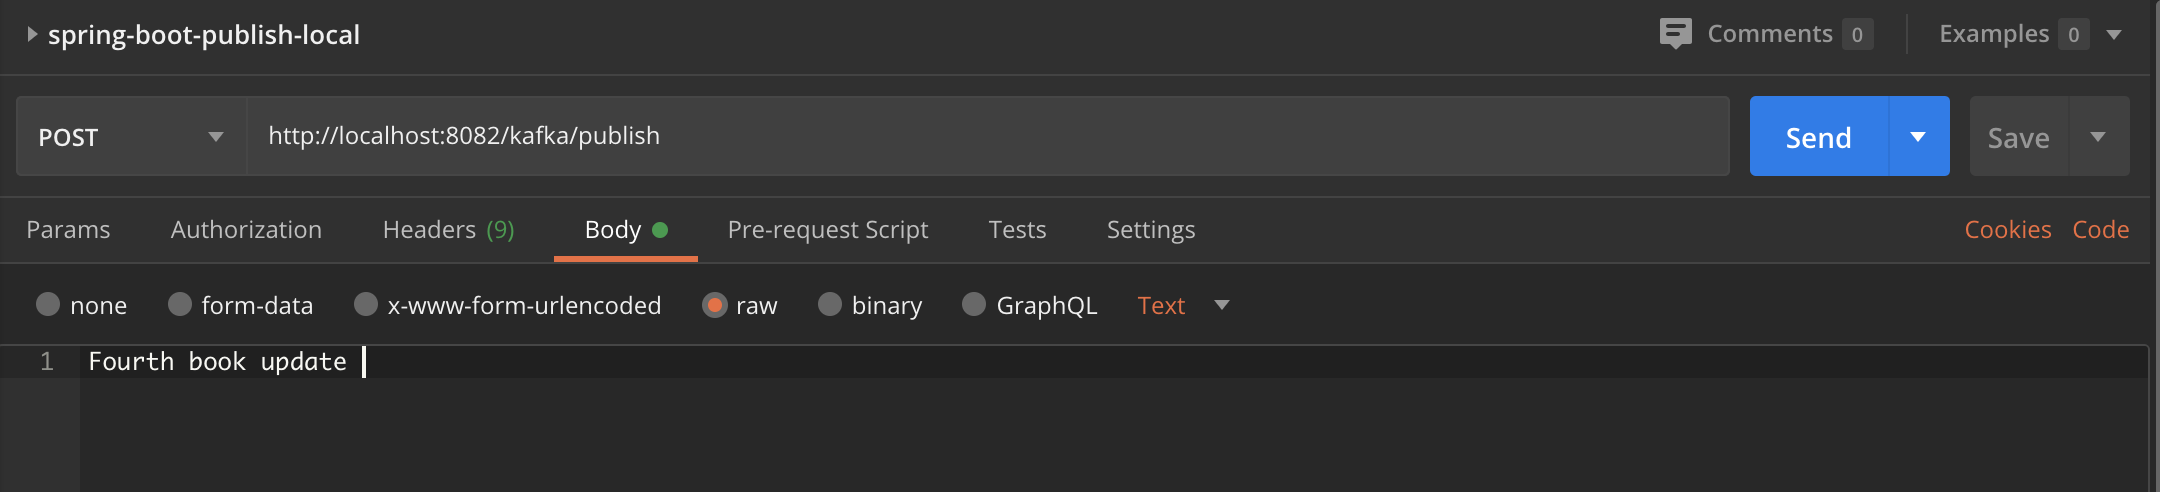


This section is just for folks who are curious and want to see more details on the process using a specific port.
- To find the process id usig a specific port run this command from your terminal
window :
lsof -i :8080 | grep LISTEN - To get details on the process id :
ps -ef "pid"