The recently released rpitx by Evariste, F5OEO allows us to transmit an RF signal over GPIO18 (pin 12) of a Raspberry Pi. The software can accept an I/Q signal as an input, so now a Pi can be used as a general purpose SDR transmitter.
This document is about using GNU Radio and csdr with rpitx.
Table of contents
-
Using a Raspberry Pi as remote software defined radio peripheral from GNU Radio
-
Using rpitx with csdr to modulate streaming input
- Modulate from raw audio file
- Modulate from microphone input source
- Modulate from audio streamed from remote computer
- Using ADPCM codec to decrease network usage while streaming
- Transmitting amateur radio digital modes from remote computer

The output of the Raspberry Pi GPIO 18 is a square wave, which contains harmonics.
For example, if you transmit on 28 MHz, you will also transmit on:
-
28 × 3 = 84 MHz
-
28 × 5 = 140 MHz
-
28 × 7 = 196 MHz
...
...and actually you may distrub some important radio communication services. Please don't do this! You can get into trouble! You have been warned.
In addition to the squre wave output, the spectrum is also affected by the PWM-based amplitude modulation implemented in rpitx.
- Right now it is more useful to use these examples for e.g. demonstrations on SDR transmitters
(as most of them use the PWM mode). - If you want to connect this to a real antenna, you should use a very good band-pass filter!
- Please check your signal output on a proper spectrum analyzer before ever using this on the air!
- In addition, only transmit if you have a proper license to do so.
To do this, you will need:
- a PC running GNU Radio on Linux,
- a Raspberry Pi with rpitx installed,
- both connected to the same network.
We will stream the I/Q signal from the PC to the Raspberry Pi via TCP.
On the Raspberry Pi, execute:
nc -l 8011 | sudo rpitx -i- -m IQFLOAT -f 28400
- This will listen on TCP port 8011 for the I/Q signal.
- The center frequency of the transmitter will be 28400 kHz.
If you want it to restart everytime the connection is lost, use this command:
while true; do (nc -l 8011; dd if=/dev/zero bs=4096 count=30); done | sudo rpitx -i- -m IQFLOAT -f 28400
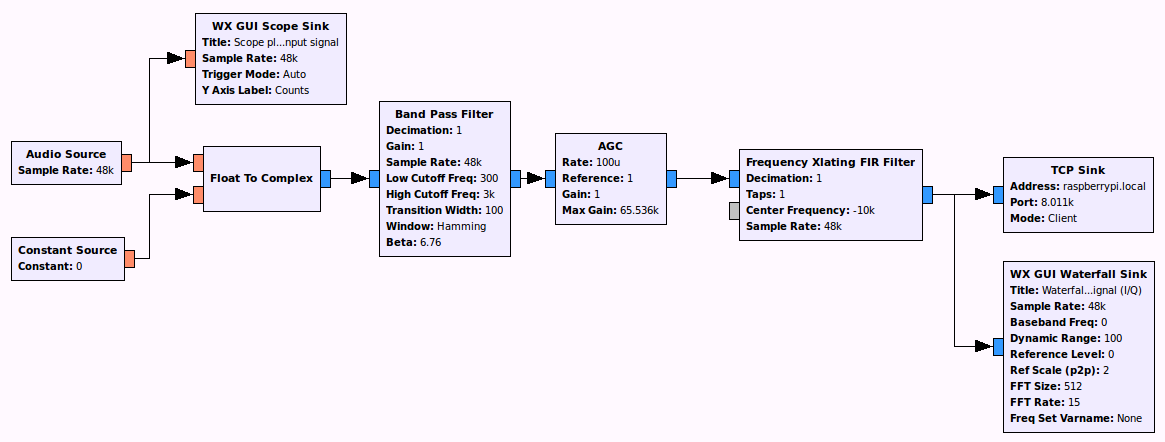
On the PC, open GNU Radio Companion, and load the flow graph in this repo at gnuradio/nfm-rpitx.
If you execute it, the I/Q signal will be streamed to the Raspberry Pi through the TCP socket.
- Note that the frequency translation is there on intention. On some unkown reason, the spectrum is quite distorted if our signal is centered at DC.
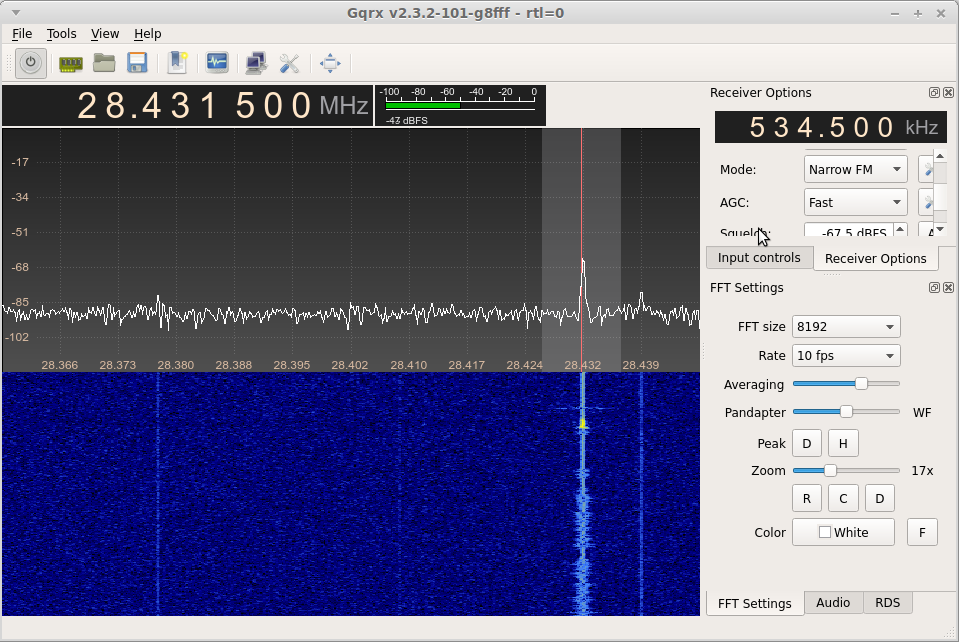
Here is the good result if received with an RTL-SDR and GQRX:
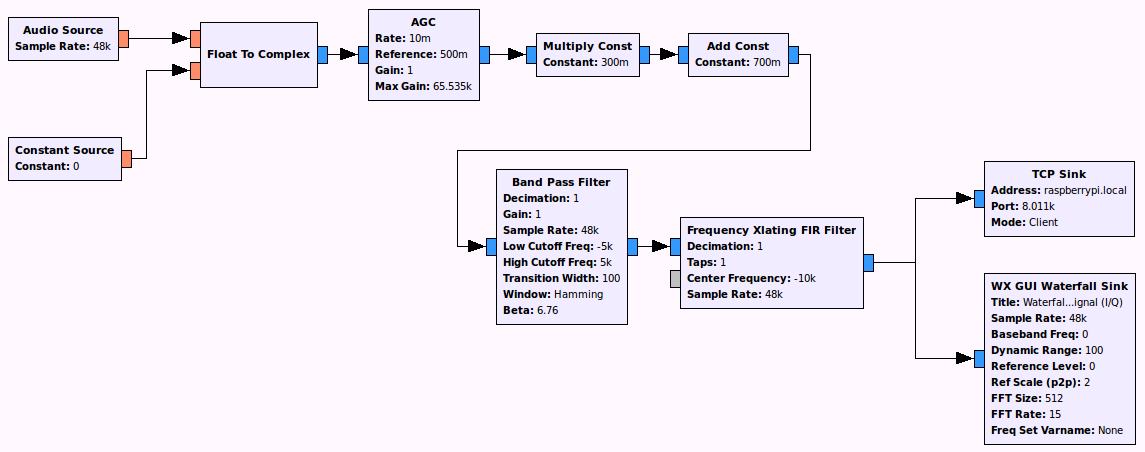
Use the flow graph in gnuradio/ssb-rpitx.
This will transmit an USB signal.
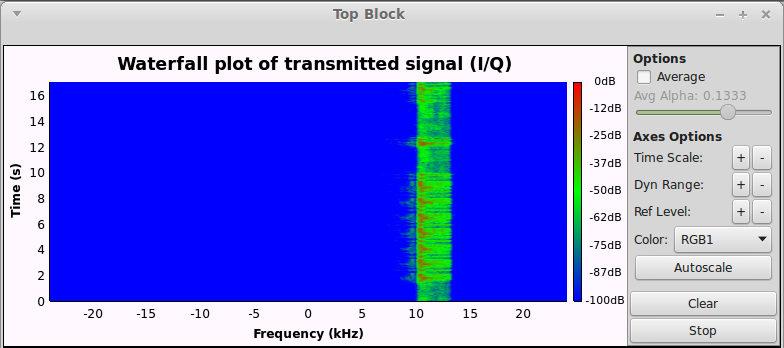
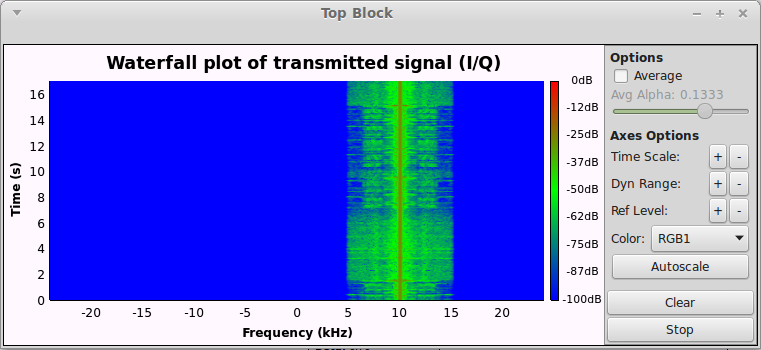
The spectrum of the transmitted I/Q signal looks like this:
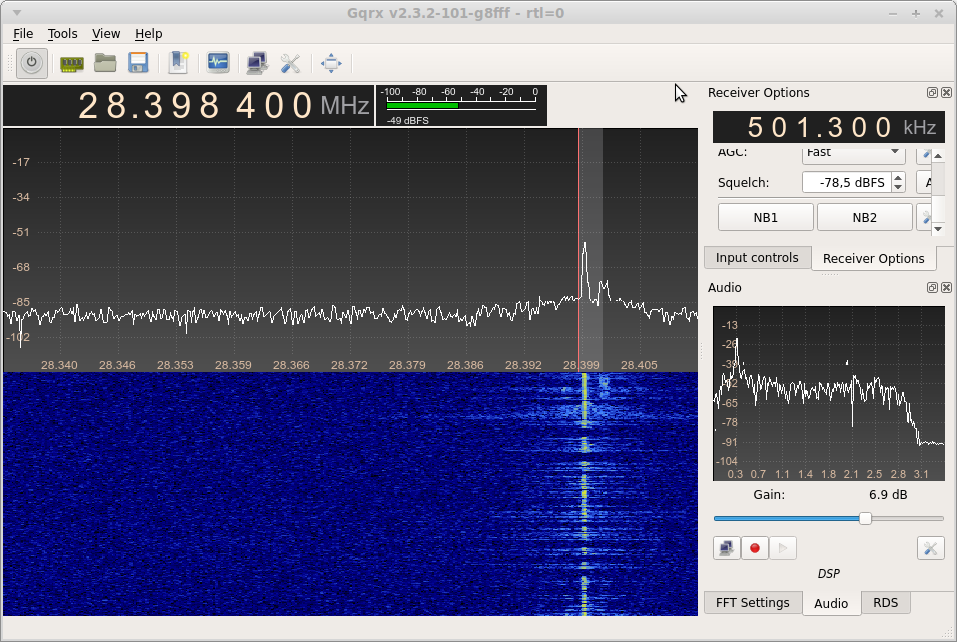
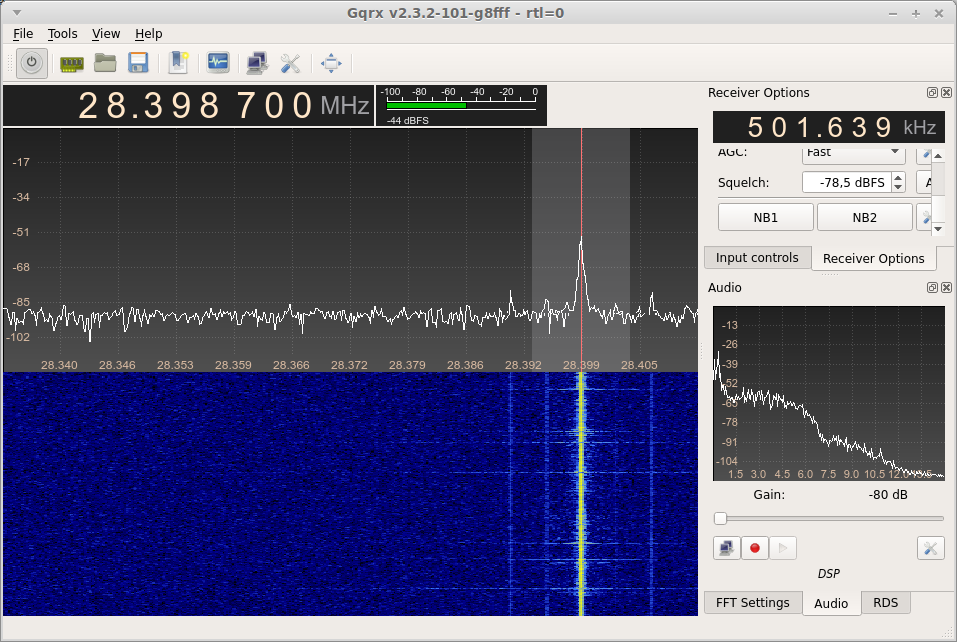
After receiving it with RTL-SDR and GQRX:
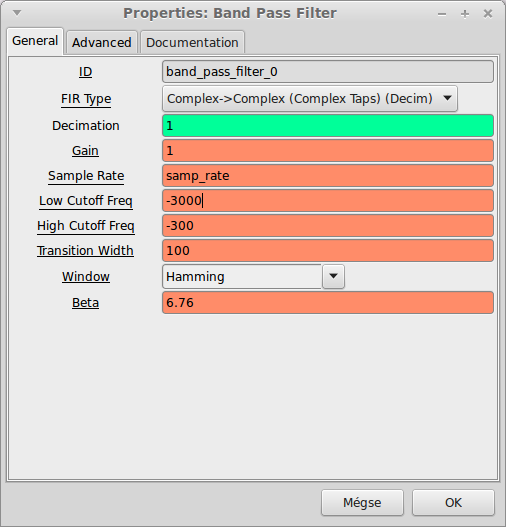
If you want LSB, you should double-click the "Band Pass Filter" block, and change:
- Low Cutoff Freq to -3000
- High Cutoff Freq to -300
Use the flow graph in gnuradio/am-rpitx.
This will transmit an AM signal.
- One thing that can be screwed up is gain. I had to play with the AGC to get it right.
The spectrum of the transmitted I/Q signal looks like this:
After receiving it with RTL-SDR and GQRX:
csdr is a command line tool for simple DSP tasks. It can be used to build simple AM/FM/SSB receivers, and now transmitters as well, and is quite fast to setup.
You will need the dev branch of csdr for doing this.
Setup instructions:
git clone https://github.com/simonyiszk/csdr.git
cd csdr
git fetch
git checkout dev
make && sudo make install
Note that it should be already done if you installed qtcsdr previously.
These examples will use the raw audio file music48000.raw and speech48000.raw, which is present in this repo. You can get this file by:
git clone https://github.com/ha7ilm/rpitx-app-note
cd rpitx-app-note; ls  #There are your files.
We will play these files in a loop, you can stop it with Ctrl+C.
Generate AM modulation:
(while true; do cat music48000.raw; done) | csdr convert_i16_f | csdr gain_ff 1.0 | csdr dsb_fc | csdr add_dcoffset_cc | sudo rpitx -i- -m IQFLOAT -f 28400
- The part
csdr gain_ff 1.0can be changed to increase/decrease modulation. - The
-f 28400at the end gives the transmit frequency in kHz.
Generate USB modulation:
(while true; do cat speech48000.raw; done) | csdr convert_i16_f | csdr dsb_fc | csdr bandpass_fir_fft_cc 0 0.1 0.01 | csdr gain_ff 2.0 | csdr shift_addition_cc 0.2 | sudo rpitx -i- -m IQFLOAT -f 28400
Generate LSB modulation:
(while true; do cat speech48000.raw; done) | csdr convert_i16_f | csdr dsb_fc | csdr bandpass_fir_fft_cc -0.1 0 0.01 | csdr gain_ff 2.0 | csdr shift_addition_cc 0.2 | sudo rpitx -i- -m IQFLOAT -f 28400
- It's the matter of the filter which sideband do we select:
csdr bandpass_fir_fft_cc -0.1 0is the lower sidebandcsdr bandpass_fir_fft_cc 0 0.1is the upper sideband
- I have experienced that if the SSB signal is in the center of the I/Q signal, then it is not transmitted correctly. The solution was to shift it. So the exact frequency should be around:
rpitx frequency + 48000*0.2 = rpitx frequency + 9600 Hz - If you want to get some compression on the speech, you can try
csdr fastagc_ffinstead ofcsdr gain_ff 2.0.
Generate NFM modulation:
(while true; do cat music48000.raw; done) | csdr convert_i16_f | csdr gain_ff 7000 | csdr convert_f_samplerf 20833 | sudo rpitx -i- -m RF -f 28400
Generate WFM modulation:
(while true; do cat music48000.raw; done) | csdr convert_i16_f | csdr gain_ff 70000 | csdr convert_f_samplerf 20833 | sudo rpitx -i- -m RF -f 28400
- Frequency deviation is set much higher with
csdr gain_ff 70000, that's the only difference between this and NFM.
Use this if you have a microphone connected to the Raspberry Pi via external USB audio device.
You will have to get the correct ALSA device ID via arecord -L, it will be something like plughw:CARD=Device,DEV=0. You should enter as the argument of the -D switch of arecord.
#AM:
arecord -c1 -r48000 -D plughw:CARD=Device,DEV=0 -fS16_LE - | csdr convert_i16_f | csdr gain_ff 1.0 | csdr dsb_fc | csdr add_dcoffset_cc | sudo rpitx -i- -m IQFLOAT -f 28400
#USB:
arecord -c1 -r48000 -D plughw:CARD=Device,DEV=0 -fS16_LE - | csdr convert_i16_f | csdr dsb_fc | csdr bandpass_fir_fft_cc 0 0.1 0.01 | csdr gain_ff 2.0 | csdr shift_addition_cc 0.2 | sudo rpitx -i- -m IQFLOAT -f 28400
#LSB:
arecord -c1 -r48000 -D plughw:CARD=Device,DEV=0 -fS16_LE - | csdr convert_i16_f | csdr dsb_fc | csdr bandpass_fir_fft_cc -0.1 0 0.01 | csdr gain_ff 2.0 | csdr shift_addition_cc 0.2 | sudo rpitx -i- -m IQFLOAT -f 28400
#NFM:
arecord -c1 -r48000 -D plughw:CARD=Device,DEV=0 -fS16_LE - | csdr convert_i16_f | csdr gain_ff 7000 | csdr convert_f_samplerf 20833 | sudo rpitx -i- -m RF -f 28400
#WFM:
arecord -c1 -r48000 -D plughw:CARD=Device,DEV=0 -fS16_LE - | csdr convert_i16_f | csdr gain_ff 70000 | csdr convert_f_samplerf 20833 | sudo rpitx -i- -m RF -f 28400
First, start the transmitter:
#AM:
nc -l 8011 | csdr convert_i16_f | csdr gain_ff 1.0 | csdr dsb_fc | csdr add_dcoffset_cc | sudo rpitx -i- -m IQFLOAT -f 28400
#USB:
nc -l 8011 | csdr convert_i16_f | csdr dsb_fc | csdr bandpass_fir_fft_cc 0 0.1 0.01 | csdr gain_ff 2.0 | csdr shift_addition_cc 0.2 | sudo rpitx -i- -m IQFLOAT -f 28400
#LSB:
nc -l 8011 | csdr convert_i16_f | csdr dsb_fc | csdr bandpass_fir_fft_cc -0.1 0 0.01 | csdr gain_ff 2.0 | csdr shift_addition_cc 0.2 | sudo rpitx -i- -m IQFLOAT -f 28400
#NFM:
nc -l 8011 | csdr convert_i16_f | csdr gain_ff 7000 | csdr convert_f_samplerf 20833 | sudo rpitx -i- -m RF -f 28400
#WFM:
nc -l 8011 | csdr convert_i16_f | csdr gain_ff 70000 | csdr convert_f_samplerf 20833 | sudo rpitx -i- -m RF -f 28400
The Raspberry Pi will listen on TCP port 8011, and wait for connection.
Then, on the remote computer, execute:
arecord -fS16_LE -r48000 -c1 - | nc raspberrypi.local 8011
You should replace raspberrypi.local with the IP address of the Raspberry Pi (unless avahi config is the default).
Let's see an example for this on the NFM modulator. Execute on the Raspberry Pi:
nc -l 8011 | csdr decode_ima_adpcm_u8_i16 | csdr convert_i16_f | csdr gain_ff 7000 | csdr convert_f_samplerf 20833 | sudo rpitx -i- -m RF -f 28400
On the PC, execute this:
arecord -fS16_LE -r48000 -c1 - | csdr encode_ima_adpcm_i16_u8 | nc raspberrypi.local 8011
On the Raspberry Pi, run this to transmit USB:
nc -l 8011 | csdr convert_i16_f | csdr dsb_fc | csdr bandpass_fir_fft_cc 0 0.1 0.01 | csdr gain_ff 2.0 | csdr shift_addition_cc 0.2 | sudo rpitx -i- -m IQFLOAT -f 28400
On your PC, run:
arecord -fS16_LE -r48000 -c1 - | nc raspberrypi.local 8011
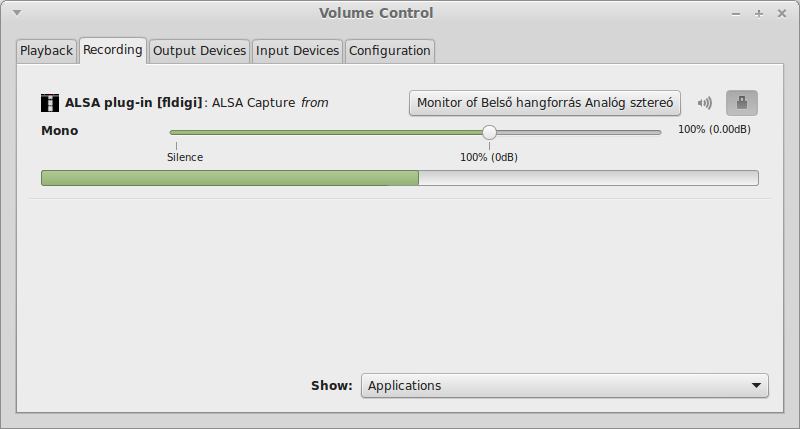
If you have Ubuntu on your PC, you are likely to have PulseAudio.
Run pavucontrol and set the recording source of arecord to "Monitor of" your audio output.
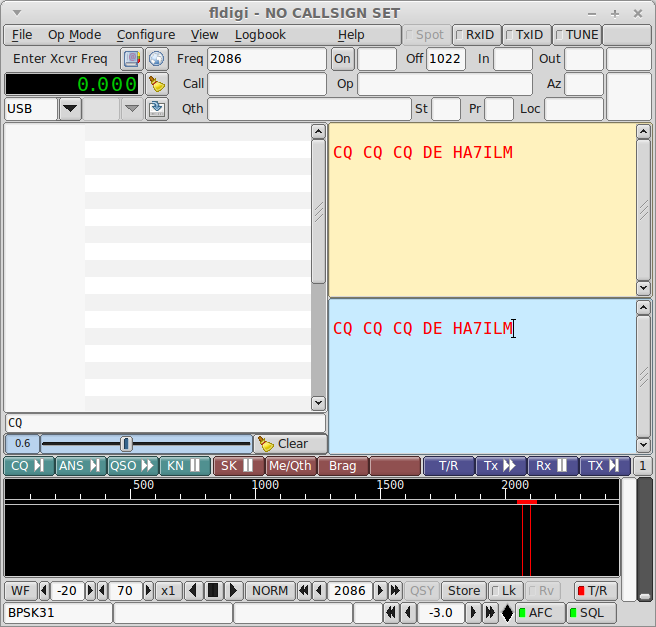
On the PC, run fldigi, and start to transmit:
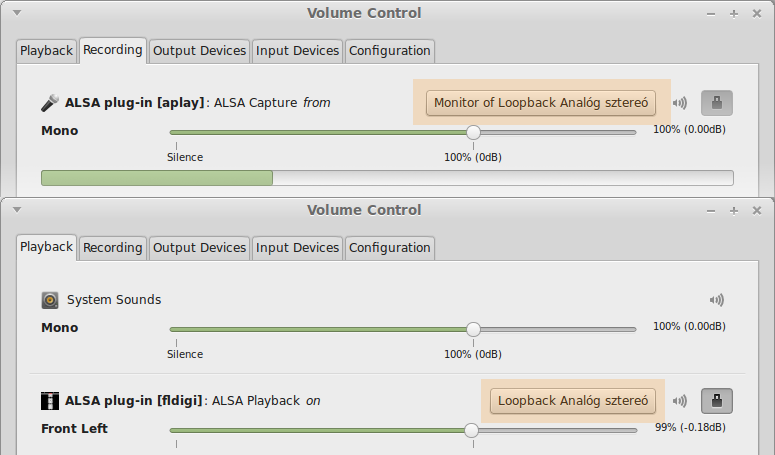
If you don't want to listen to the transmitted signal on your PC:
sudo modprobe snd-aloop
This will create an ALSA loopback interface. You also have to make the appropriate changes in pavucontrol:

