lua的代码覆盖率工具
- 数据采集用C++编写,性能更高,对宿主进程影响更小
- 简单require即可使用,或通过hookso注入
- 解析器用go编写,通过解析lua语法,精确计算文件及函数的覆盖率
- 支持输出lcov格式,进而可生成html格式的图形展示
- 配合lua_helper搭建覆盖率统计服务
- 安装lua 5.3
- 编译libclua.so
# cmake .
# make
- 编译clua解析工具
# go get "github.com/milochristiansen/lua"
# go build clua.go
- 编译cluahelper覆盖率服务
# go get "github.com/esrrhs/go-engine/src/common"
# go get "github.com/esrrhs/go-engine/src/fastwalk"
# go get "github.com/esrrhs/go-engine/src/loggo"
# go build clua_helper.go
- 直接嵌入lua脚本中使用,lua文件里使用如下
-- 加载libclua.so
local cl = require "libclua"
-- 开始记录执行过程,生成结果文件
-- 第一个参数为结果文件的文件名
-- 第二个参数为定时生成结果文件的间隔(秒),0表示关闭
cl.start("test.cov", 5)

-- 执行某些事情
do_something()

-- 结束记录
cl.stop()
- 或者使用hookso注入到进程中(假设进程id为PID),手动开启
a) 首先获取进程中的Lua_State指针,比如进程调用了lua_settop(L)函数,那么就取第一个参数
# ./hookso arg $PID liblua.so lua_settop 1
123456

b) 加载libclua.so
# ./hookso dlopen $PID ./libclua.so

c) 执行libclua.so的start_cov手动开启,等价于start_cov(L, "./test.cov", 5)
# ./hookso call $PID libclua.so start_cov i=123456 s="./test.cov" i=5

c) 执行libclua.so的stop_cov手动关闭,等价于stop_cov(L)
# ./hookso call $PID libclua.so stop_cov i=123456
- 执行完上述两种方法的任一一种,用clua解析test.cov查看结果。clua更多参数参考-h
# ./clua -i test.cov
- 运行test.lua
# lua5.3 ./test.lua
- 查看目录下,已有test.cov文件
# ll test.cov
- 查看结果,每行前面的数字表示执行的次数,空表示没被执行,方便定位潜在bug。最后几行显示了总体覆盖率,以及每个函数的覆盖率
# ./clua -i test.cov
total points = 27, files = 1
coverage of /home/project/clua/test.lua:
    local cl = require "libclua"
    cl.start("test.cov", 5)

1   function test1(i)
10      if i % 2 then
10          print("a "..i)
        else
            print("b "..i)
        end
11  end

1   function test2(i)
40      if i > 30 then
19          print("c "..i)
        else
21          print("d "..i)
        end
41  end

1   function test3(i)

51      if i > 0 then
51          print("e "..i)
        else
            print("f "..i)
        end

52  end

    test4 = function(i)

        local function test5(i)
12          print("g "..i)
15      end

15      for i = 0, 3 do
12          test5(i)
        end

4   end

102 for i = 0, 100 do
101     if i < 10 then
10          test1(i)
91      elseif i < 50 then
40          test2(i)
        else
51          test3(i)
        end
    end

4   for i = 0, 2 do
3       test4(i)
    end

1   cl.stop()

/home/project/clua/test.lua total coverage 78% 22/28
/home/project/clua/test.lua function coverage [function test1(i)] 66% 2/3
/home/project/clua/test.lua function coverage [function test2(i)] 100% 3/3
/home/project/clua/test.lua function coverage [function test3(i)] 66% 2/3
/home/project/clua/test.lua function coverage [test4 = function(i)] 75% 3/4
/home/project/clua/test.lua function coverage [local function test5(i)] 100% 1/1
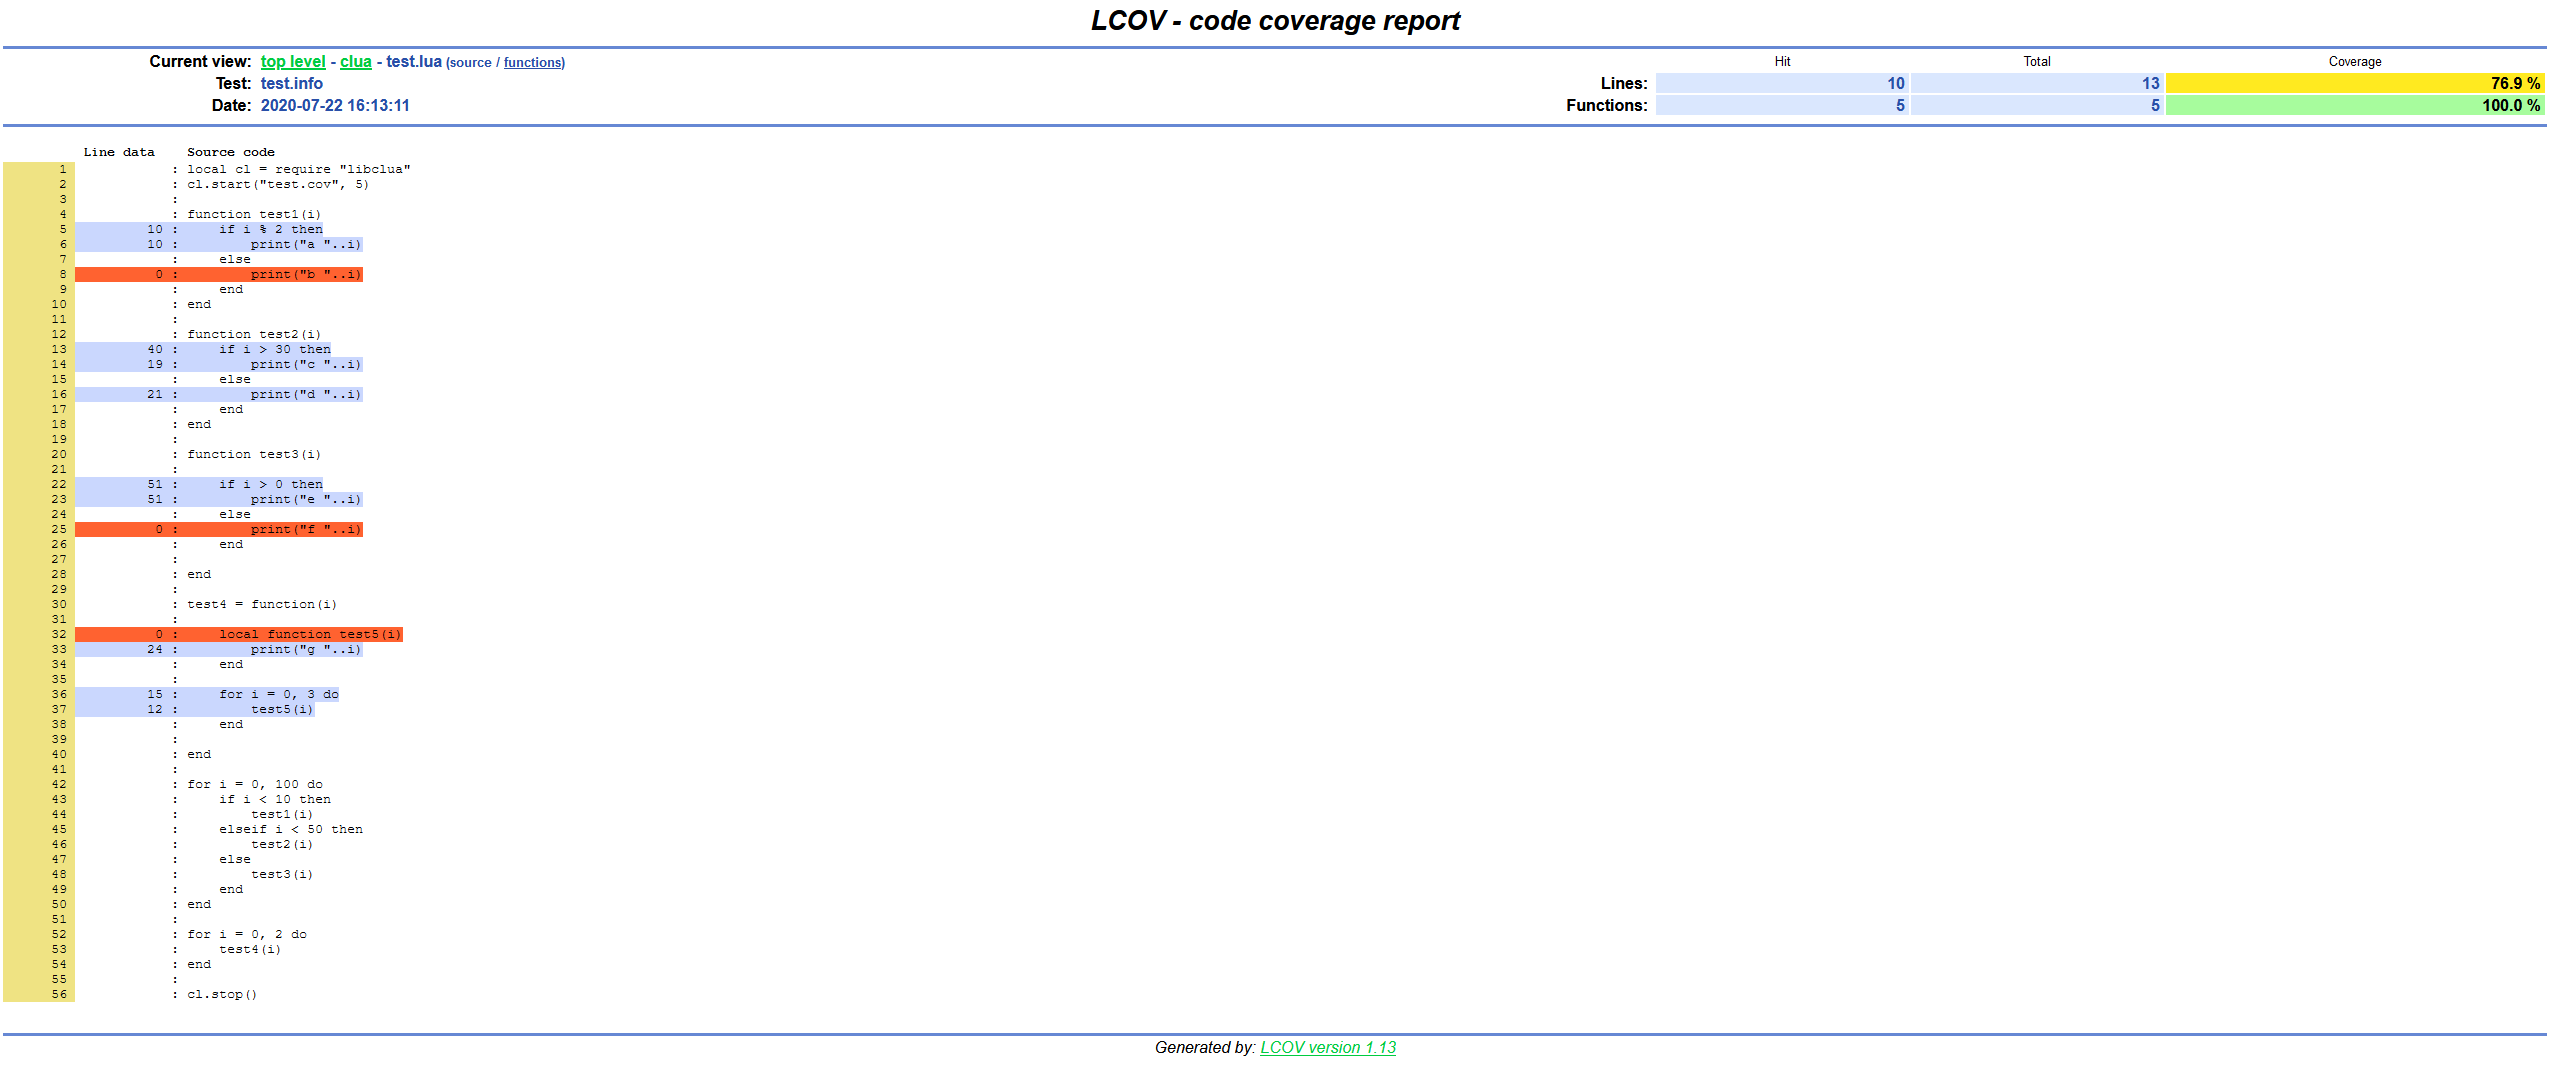
- 也用lcov查看
# ./clua -i test.cov -lcov test.info
- 此时目录下已有
test.info文件,然后用lcov的工具输出html
# genhtml -o htmltest test.info
覆盖率服务分为客户端、服务器、生成器三部分,二进制文件为clua_helper,参数通过./clua_helper -h查看。
客户端搜索宿主进程,注入进程,打开覆盖率统计,监控代码路径变化,最后发送数据到服务器
# ./clua_helper -type client -bin 宿主bin名字 -getluastate "获取LuaState的指令,如:liblua.so lua_settop 1" -path 代码目录 -server https://server_ip:8877
服务器接受客户端的数据,保存数据文件到本地,同时对外服务html结果目录的静态网页。
# ./clua_helper -type server -port 8877
生成器读取服务器保存的数据文件,根据本地代码,自动把结果合并,最后生成html结果目录。
# ./clua_helper -type gen -covpath 服务端保存的结果目录 -path 本地的代码目录 -clientpath 客户端的代码目录

