This Unity package is a library to make runtime procedural mesh generation as flexible as possible.
The mesh structure is similar to the one used in Blender, and a mechanism for adding arbitrary attributes to vertices/edges/loops/faces is available, for instance for people used to Houdini's wrangle nodes.
Unreal Engine This library has been ported to Unreal Engine by Daniel Amthauer: https://github.com/daniel-amthauer/BMeshUnreal
This is a standard git-based package:
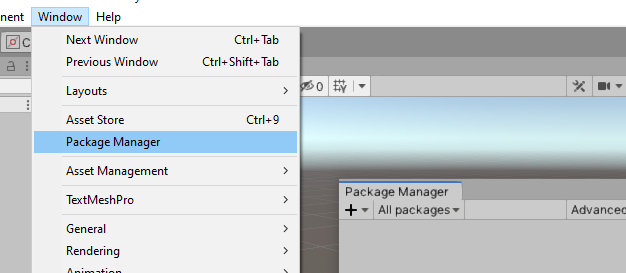
- Open the package manager.
- Click on "+" in the upper-left corner of the Package Manager, and chose "Add package from git URL..."
- In the text field, paste
https://github.com/eliemichel/BMeshUnity.git:
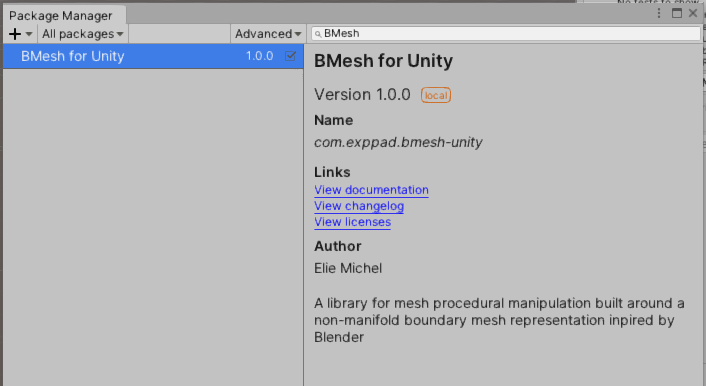
You should now see the BMesh package in the Package Manager:
We start with a very simple and detailed example:
- Create a new script, we'll call it for instance
MyMeshGenerator.cs:
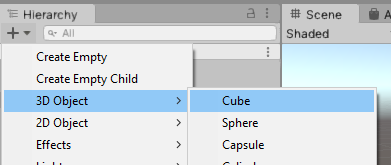
- Create an object on which we will attach the script, take any 3D object, we'll replace its mesh.
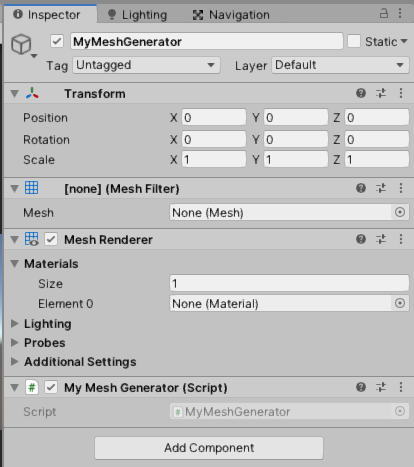
- Add the script to the object, make sure you have at least a "MeshFilter", a "MeshRenderer" and your script "MyMeshGenerator" visible in the inspector (if one is missing, just add it).
- In
MyMeshGenerator.cs, we write:
using UnityEngine;
using static BMesh; // otherwise you'll have to write "BMesh.Vertex" etc.

public class MyMeshGenerator : MonoBehaviour
{
    void Start()
    {
        // Create a new empty mesh
        BMesh mesh = new BMesh();

        // Add a few vertices
        Vertex v1 = mesh.AddVertex(-1, 0, -1);
        Vertex v2 = mesh.AddVertex( 1, 0, -1);
        Vertex v3 = mesh.AddVertex( 1, 0,  1);
        Vertex v4 = mesh.AddVertex(-1, 0,  1);

        // Add a face using the vertices
        mesh.AddFace(v1, v2, v3, v4);

        // Set the current mesh filter to use our generated mesh
        BMeshUnity.SetInMeshFilter(mesh, GetComponent<MeshFilter>());
    }
}
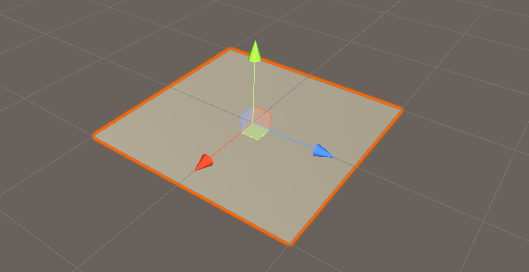
Don't forget the SetInMeshFilter to make the mesh visible in the game. A BMesh is a mesh optimized for procedural generation and manipulation, but not for rendering. This line converts it to the rendering-oriented mesh structure used by Unity and replace the previous mesh with it in the "MeshFilter" component. You should now see a plane when starting the game:
At this point, the BMesh structure is destructed as soon as the Start() function is done, so that all we are left is the rendering-oriented Mesh. This is good in general, but for debugging it can quickly become usefull to keep a reference to it, for instance to draw debug information in the viewport:
using UnityEngine;
using static BMesh; // otherwise you'll have to write "BMesh.Vertex" etc.

public class MyMeshGenerator : MonoBehaviour
{
    BMesh mesh; // We keep a reference to the BMesh

    void Start()
    {
        mesh = new BMesh();
        Vertex v1 = mesh.AddVertex(-1, 0, -1);
        Vertex v2 = mesh.AddVertex( 1, 0, -1);
        Vertex v3 = mesh.AddVertex( 1, 0,  1);
        Vertex v4 = mesh.AddVertex(-1, 0,  1);
        mesh.AddFace(v1, v2, v3, v4);

        // Set the current mesh filter to use our generated mesh
        BMeshUnity.SetInMeshFilter(mesh, GetComponent<MeshFilter>());
    }

    // In the editor, draw some debug information about the mesh
    private void OnDrawGizmos()
    {
        if (mesh != null)
        {
        	Gizmos.matrix = transform.localToWorldMatrix;
            BMeshUnity.DrawGizmos(mesh);
        }
    }
}
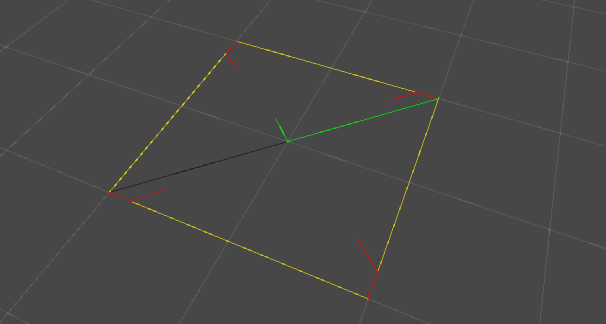
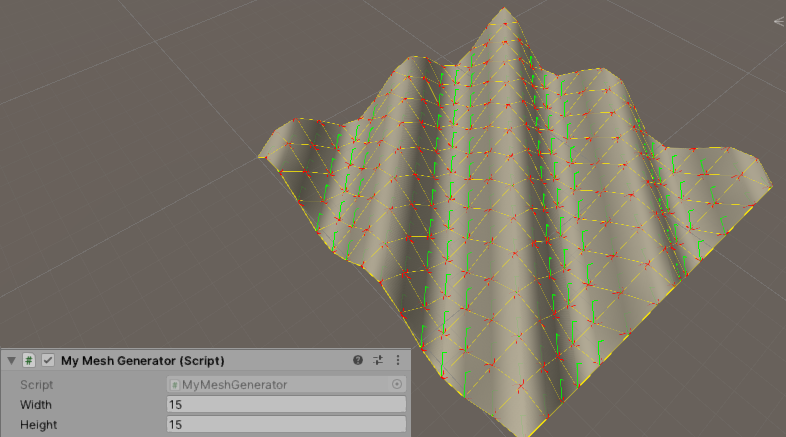
Thus in the viewport you can now see some debug overlay showing the BMesh' edges, loops, etc. This can be even used for BMeshes that are not yet set in a mesh filter.
using UnityEngine;
using static BMesh;

public class MyMeshGenerator : MonoBehaviour
{
    public int width = 15;
    public int height = 15;

    BMesh mesh;

    BMesh GenerateGrid() {
        BMesh bm = new BMesh();
        for (int j = 0; j < height; ++j) {
            for (int i = 0; i < width; ++i) {
                bm.AddVertex(i, 0, j); // vertex # i + j * w
                if (i > 0 && j > 0) bm.AddFace(i + j * width, i - 1 + j * width, i - 1 + (j - 1) * width, i + (j - 1) * width);
            }
        }
        return bm;
    }

    void Start() {
        mesh = GenerateGrid();
        foreach (Vertex v in mesh.vertices) {
            v.point.y = Mathf.Sin(v.point.x + v.point.z); // Vertical displacement
        }
        BMeshUnity.SetInMeshFilter(mesh, GetComponent<MeshFilter>());
    }

    private void OnDrawGizmos() {
        Gizmos.matrix = transform.localToWorldMatrix;
        if (mesh != null) BMeshUnity.DrawGizmos(mesh);
    }
}You can add UVs to the generated mesh using a custom vertex attributes called "uv".
using UnityEngine;
using static BMesh;

public class MyMeshGenerator : MonoBehaviour
{
    void Start()
    {
        // Same beginning as the first example
        BMesh mesh = new BMesh();
        Vertex v1 = mesh.AddVertex(-1, 0, -1);
        Vertex v2 = mesh.AddVertex(1, 0, -1);
        Vertex v3 = mesh.AddVertex(1, 0, 1);
        Vertex v4 = mesh.AddVertex(-1, 0, 1);
        mesh.AddFace(v1, v2, v3, v4);

        // Add UVs
        // First define a vertex attribute called "uv" which is made of 2 floats
        var uv = mesh.AddVertexAttribute("uv", AttributeBaseType.Float, 2);

        // Then fill it in in each vertex
        v1.attributes["uv"] = new FloatAttributeValue(0.0f, 0.0f);
        v2.attributes["uv"] = new FloatAttributeValue(1.0f, 0.0f);
        v3.attributes["uv"] = new FloatAttributeValue(1.0f, 1.0f);
        v4.attributes["uv"] = new FloatAttributeValue(0.0f, 1.0f);

        BMeshUnity.SetInMeshFilter(mesh, GetComponent<MeshFilter>());
    }
}
Custom attributes like UVs can be attached to any of the points, vertices or faces. They may be Float or Int and have an arbitrary size. They may be used for your own generation purposes, but the following ones have a particular meaning when calling SetInMeshFilter():
| Attribute Name | Attachement | Type | Interpretation |
|---|---|---|---|
| uv | Vertex | Float2 | Primary texture coordinate |
| uv2 | Vertex | Float2 | Secondary texture coordinate |
| normal | Vertex | Float3 | Normal vector at each vertex. If not present, normals are automatically calculated using RecalculateNormals |
| color | Vertex | Float3 | Vertex color |
| materialId | Face | Int1 | Index of the material to use in the renderer.materials array |
Now that you know the basics, you can simply look at the source files, they are commented before each function.
This library is still young, and far from being a complete toolkit. Whenever you find yourself writing operators that are somehow reusable, you are more than welcome to contribute back, by sending a pull request here for instance. Contribution can also be the identification of weak parts of the current design of the library.

