Go North is aimed at Munchkin and D&D players who are fans of John Robertson's live-action text-based adventure The Dark Room. Users begin as a level 0 adventurer. By selecting from on-screen options as they go through the game, they can gain or loose levels on their quest to become a level 5 adventurer! 'Loot' and 'Cheat Codes' will gain levels. 'Monsters' or 'Curses' will lose levels. Lose too many levels and it's game over.
- Overview of Gameplay
- User Stories
- Gameplay Logic
- Project Development
- Testing
- Future Features
- Deployment
- Technologies used
- Credits
Users should be able to
- Understand what to enter at each prompt.
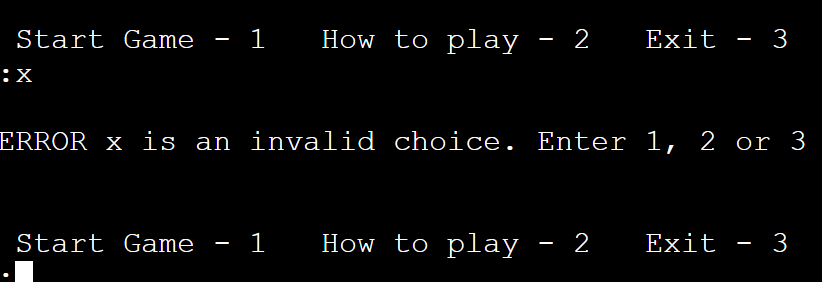
- Recieve clear feedback for incorrect text entries.
- Find out how to play the game.
- Exit back to the start point at any time.
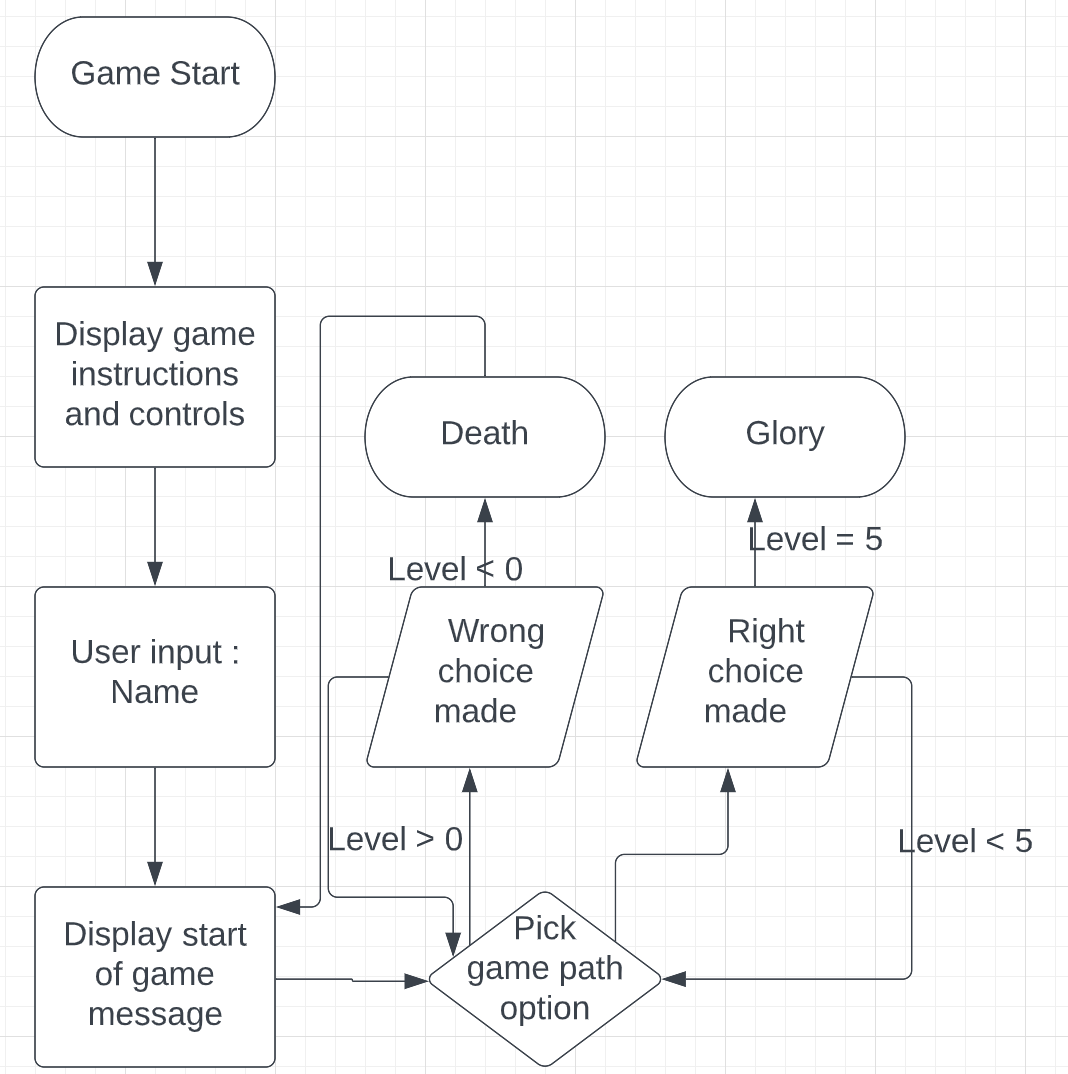
Call main()
    Display title screen( print to screen )
    Input username - verifyname( check input contains alpha chars only )
    Print Options 1 - Start 2 - How to play
                        Display instructions( print to screen then display input options again )
    start game()
        Build new Game object
        Display Game string representation
        Print initial game option
        User input response - verify response ( check for a, b, c, d, x then run Handle response() )
        Handle response:
            (Check response type:
            x = exit back to game menu
            a,b,c,d = enter while loop
            other = display error and ask for re-entry of response
        While game level counter < 5
            User input response - verify response()
            Handle response()
        If game level counter < 0
            Game over
            Return to start of game
        If game level counter > 5
            Display winning message
            Return to start of game
    End game
This function uses a multi-line string to print the title art to the screen at the start of the game and then displays a welcome message introducing the game.
The code for this function was researched from Stack Overflow and when called, clears all previous text from the mock terminal placing the most recent output at the top of a clean window. This keeps the game flow fresh and easy to read for the user.
This function gives the user a keyboard input and saves to the username variable. A check variable is initialised to True while checking is taking place inside a while loop.
The test is run to see if the input stored to the username variable consists of all alpha characters, using isalpha. If this test proves Truea print statement welcomes the user to the game. At this point, the check variable is also set to False to indicate that checking is no longer taking place and the while loop can be broken. The loop ends and the verified variable username is returned by the function.
else an error message is shown to the user that the input they have given is invalid and they should enter only letters for their name.
This function gives the user the first options within the game, to start the game or display the gameplay instructions.
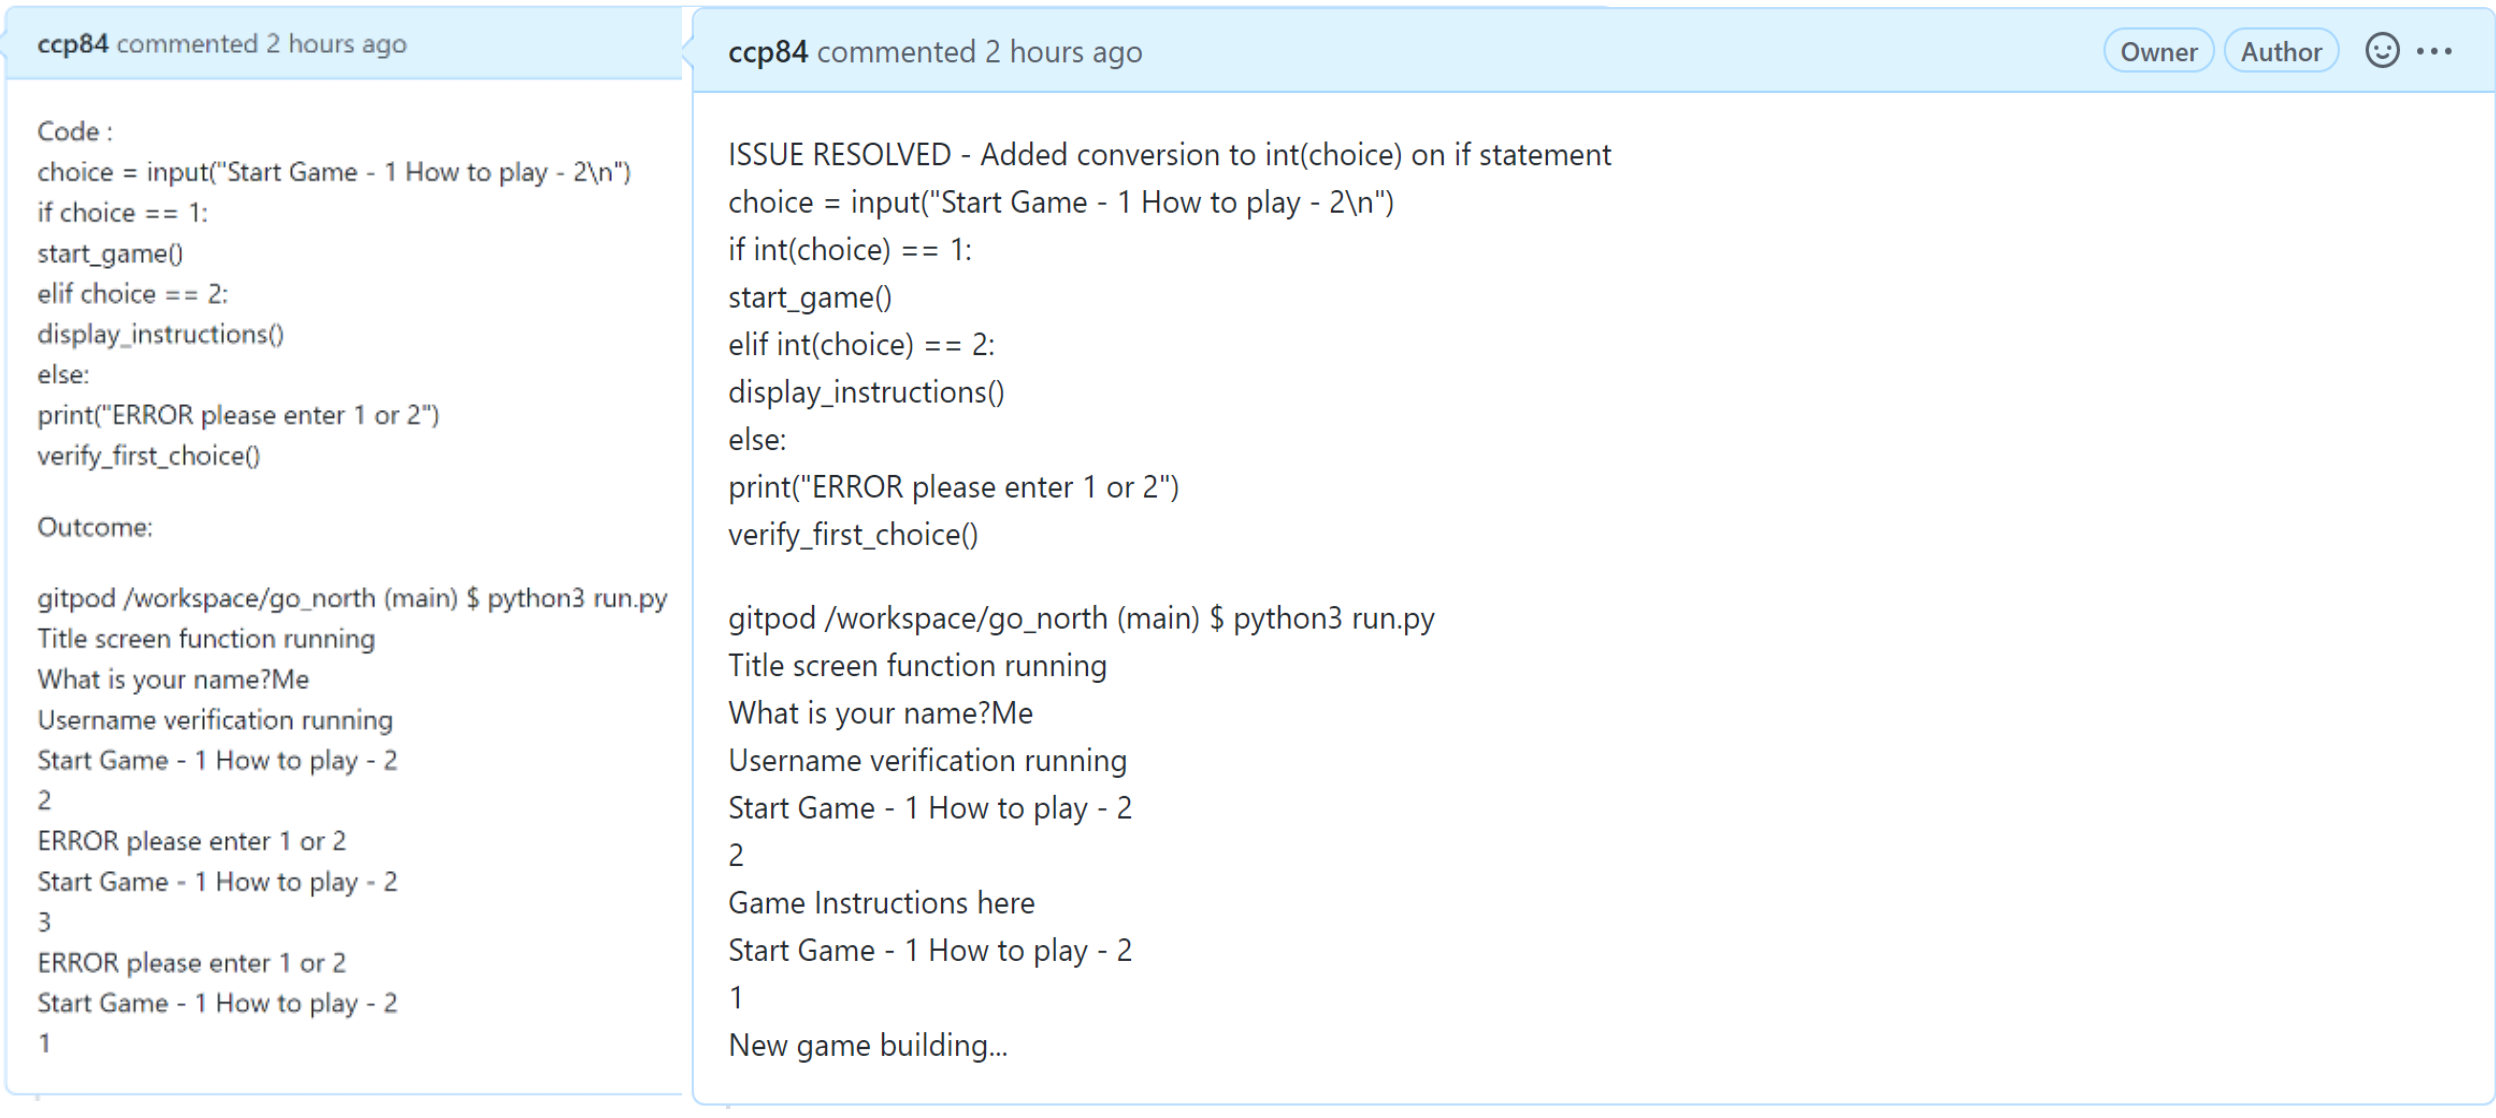
An if elif statement handles input of 1 - calls start_game()
2 - calls display_instructions()
3 - calls main() and returns the user to the title screen
An else then handles any incorrect entries and loops the user back, displaying the choices again
This function first makes use of the clear_terminal() function to clear the screen. It prints out the game instructions using a multi-line string and then calls verify_first_choice() to loop the user back to their start of game choices once again.
The start_game() function is responsible for the main running of the game. It first uses the clear_terminal() function to clear the game window ensuring the new game starts at the top of the screen. It then builds a new game using the Game class storing this as the object new_game. Within this object, the journey the user is taken on is stored in an object built from the Pathway class.
A while loop is initialised, checking against new_game.game_level which will hold the user in the current game. During this time they are guided through the pathway with display_option() showing them each set of 4 options to choose from, and handle_response() either increasing or decreasing their game_level based on the option chosen.
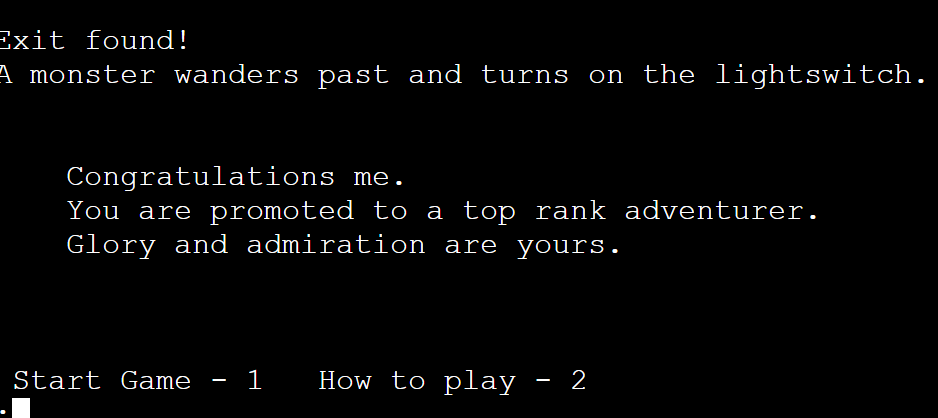
When game_level > 5 and the user becomes a Level 5 Adventurer the while loop is broken, a congratulatory message is displayed and the user is returned to the start menu by calling verify_first_choice().
This function takes in the current_game object as an argument and uses the gamepath attribute of that object to determine the set of options that should be displayed for the user's current level.
The gamepath is an object of the Pathway class which builds itself from story.py.
display_level is set to game_level + 1 to account for the initial level starting at 0 and the timing of calculations meaning an index of -1 being passed to the options list just before 'death'. The display_level is used as an index to retrieve the list of options linked to the current level of play from gamepath.
This function asks for a choice from the available game path choices displayed by the display_current_option() function and then checks that the user response is valid.
It first sets a check variable to False to indicate that verification is not yet complete and holds a while loop whilst waiting for checking to be completed. Input from the user is converted using lower() so that both 'A' and 'a' etc. are accepted as responses and verified as acceptable by the if statement.
If the user input is checked as acceptable, the checking variable is set to True and the while loop is broken. The verified input is returned from the function to the game to be used to continue gameplay.
However, if the user input does not pass the initial if statement an else statement displays an error message and the user is held in the while loop to try again.
This function first calls verify_response() to get a path choice from the user. If the option to quit the game has been selected, the screen is cleared and the game resets ready for another user to play by calling main(). However, if one of the paths has been chosen then the game continues and a number of checks happen to increase or decrease the user's game level.
First of all the relevant path is found by returning the list associated with game_level + 1, this path is a dictionary of all 4 choices the user could have picked from at this level of the game. The outcome is set to the key associated with the choice that the user made.
If outcome[2] is True it means the user selected 'Loot' or a 'Cheat Code', logic checks if the game level is less than 5 in which case their level should advance however if game_level is now >= 5 the loop will break and return to the main game flow where a congratulatory message is displayed (see start_game() function):
elif a False returned would mean they selected a 'Curse' or 'Monster' but lives remain game_level - 1 >= 0 and their level should be decreased:
The final else statement means none of the above conditions were met, so the level cannot be increased and no lives remain. Unfortunately, that means game over this time. The relevant message is displayed on screen and the user is given the option to start a new game, display the rules, or quit to the title screen.
Main is the first function called when the program is run and initiates gameplay. It first calls display_title_screen() to welcome users to the game. Next, verify_username() is called to set the player's name for the game and lastly verify_first_choice() begins the game.
This function is called when building the Pathway object and contains a randomly generated storyline for each game. It is imported from the story.py file.
The first task of building the game story is to create 4 levels containing 3 positive 1 negative outcome. This is started by initialising 2 empty lists called 'positives' and 'negatives' and then reading from text files a line at a time into those relevant lists:
with open("positive.txt") as positive:
    for line in positive:
        new_line = line.strip('\n')
        positives.append(new_line)
After this code has run for both positive and negative options the lists are shuffled using shuffle().
Next, a while loop is used to build the first 4 levels. A current_level counter is initialised to 1 and a blank storyline dictionary is created.
current_level = 1
storyline = {}
while current_level < 5:
    level_options = []
    level_options.extend([positives.pop(),
                        positives.pop(),
                        positives.pop(),
                        negatives.pop()])
random.shuffle(level_options)
A blank list is temporarily created within the while loop so that it is reset each time the loop starts for a new level. This list is then populated with 3 items from the shuffled positives list and 1 item from the shuffled negatives list. pop() is used so that the item is removed from the main storage list and will not be repeated in a different level during the same game. The level list is then shuffled so that A, B, C and D are randomised each level for finding positive and negative responses.
Still within the while loop. The level list is used to build each level of the storyline dictionary. The current_level is used as a key and then a dictionary is built as the value for that key. The inner dictionary has keys a, b, c and d, and lists as the items returned from the positive and negative lists.
storyline[current_level] = {
        "a": ast.literal_eval(level_options[0]),
        "b": ast.literal_eval(level_options[1]),
        "c": ast.literal_eval(level_options[2]),
        "d": ast.literal_eval(level_options[3])
 }
current_level += 1
I used code from Stack overflow to solve the problem of additional apostrophes being returned when building my lists from text files.
The final level of the game is built with 2 options from the winning text file and 2 options from the negatives text file but following the same mechanics as above.
winning = []
ending = []
with open("winners.txt") as winners:
    for line in winners:
        new_line = line.strip('\n')
        winning.append(new_line)
random.shuffle(winning)
ending.extend([winning.pop(),
                winning.pop(),
                negatives.pop(),
                negatives.pop()])
random.shuffle(ending)
storyline[current_level] = {
    "a": ast.literal_eval(ending[0]),
    "b": ast.literal_eval(ending[1]),
    "c": ast.literal_eval(ending[2]),
    "d": ast.literal_eval(ending[3])
}
Finally, the function returns a fully built randomised storyline back to the options attribute of the Pathway object.
The Game class describes and contains the current game being played. It's attributes of name, game_level and game_path are all individual to each game session initiated and are the key variables needed to make each play through unique.
game_path is an unusual attribute as it is itself also an object built from the Pathway class.
The string representation for this class prints out the starting line to the story when a new Game object is called 'You awake to find yourself in a dark room...'
The Pathway class has only one attribute and one function which is to build and contain the story path for the current game.
When a new Pathway object is built, it's options attribute calls the build_story() function from story.py so that a fresh and randomised story path is generated for each different game.
Given more time and scope to develop this project,
- I would have liked to allow users to select the difficuly of the game allowing for shorter / longer game lengths.
- I would have liked to work on developing the storyline to give better flow of responses and options, and build in a choice of pathways to take for further replayability.
Code Institute has provided a template to display the terminal view of this backend application in a modern web browser. This is to improve the accessibility of the project to others. The live deployed application can be found at Go North.
Gitpod IDE was used to write the code for this project. To make a local copy of this repository, you can clone the project by typing the follow into your IDE terminal:
git clone https://github.com/ccp84/go_north.git Alternatively, if using Gitpod, you can click below to create your own workspace using this repository.
This project uses Heroku, a platform as a service (PaaS) that enables developers to build, run, and operate applications entirely in the cloud. Deployment steps are as follows, after account setup:
- Select New in the top-right corner of your Heroku Dashboard, and select Create new app from the dropdown menu.
- Your app name must be unique, and then choose a region closest to you (EU or USA), and finally, select Create App.
- From the new app Settings, click Reveal Config Vars, and set the value of KEY to
PORT, and the value to8000then select add. - Further down, to support dependencies, select Add Buildpack.
- The order of the buildpacks is important, select
Pythonfirst, thenNode.jssecond. (if they are not in this order, you can drag them to rearrange them) Heroku needs two additional files in order to deploy properly. - requirements.txt
- Procfile
You can install this project's requirements (where applicable) using:
pip3 install -r requirements.txt. If you have your own packages that have been installed, then the requirements file needs updated using:pip3 freeze --local > requirements.txt The Procfile can be created with the following command:echo web: node index.js > Procfile For Heroku deployment, follow these steps to connect your GitHub repository to the newly created app: - In the Terminal/CLI, connect to Heroku using this command:
heroku login -i - Set the remote for Heroku:
heroku git:remote -a <app_name>(replace app_name with your app, without the angle-brackets) - After performing the standard Git
add,commit, andpushto GitHub, you can now type:git push heroku main The frontend terminal should now be connected and deployed to Heroku.
- Git - Version control and project flow management
- GitHub Issues - For tracking and resolving bug fixes

- Code Institute Python Terminal Template
- Heroku - Deployment of Python project
- Python Class and Object Oriented Code
- Flowchart from Lucidchart
- Isalpha for checking username from w3schools
- Storyline and creative ideas based on John Robertson's live interactive show
- Further storyline ideas from Steve Jackson's Munchkin
- Block letters formation from Codecademy
- File handling method from Codecademy tutorial
- How to shuffle from w3schools documentation
- String replace method learned in Codecademy tutorial
- Fix for using ast / json to remove added aspostrophes when appending to a dictionary from Stack Overflow
- Clear terminal function from Stack Overflow
- Mentor, Tim Nelson, for assistance with Heroku deployment instructions.


