Facebook recently opened up their Messenger platform to enable bots to converse with users through Facebook Apps and on Facebook Pages.
You can read the documentation the Messenger team prepared but it's not very clear for beginners and intermediate hackers.
So instead here is how to create your own messenger bot in 15 minutes.
Messenger bots uses a web server to process messages it receives or to figure out what messages to send. You also need to have the bot be authenticated to speak with the web server and the bot approved by Facebook to speak with the public.
You can also skip the whole thing by git cloning this repository, running npm install, and run a server somewhere.
-
Install Node from here https://nodejs.org, this will be the server environment. Then open up Terminal or Command Line Prompt and make sure you've got the very most recent version of npm by installing it again:
sudo npm install npm -g -
Install the Heroku CLI from here https://devcenter.heroku.com/articles/heroku-cli to launch, stop and monitor instances. Sign up for free at https://www.heroku.com if you don't have an account yet.
brew install heroku/brew/heroku //In case that you don't have homebrew, this is the intaller command of MacOS /usr/bin/ruby -e "$(curl -fsSL https://raw.githubusercontent.com/Homebrew/install/master/install)" ``` -
Create a new folder somewhere and let's create a new Node project. Hit Enter to accept the defaults.
npm init -
Install the additional Node dependencies. Express is for the server, request is for sending out messages and body-parser is to process messages.
npm install express request body-parser --save -
Create an index.js file in the folder and copy this into it. We will start by authenticating the bot.
'use strict'

const express = require('express')
const bodyParser = require('body-parser')
const request = require('request')
const app = express()

app.set('port', (process.env.PORT || 5000))

// Process application/x-www-form-urlencoded
app.use(bodyParser.urlencoded({extended: false}))

// Process application/json
app.use(bodyParser.json())

// Index route
app.get('/', function (req, res) {
	res.send('Hello world, I am a chat bot')
})

	// for Facebook verification
	app.get('/webhook/', function (req, res) {
			if (req.query['hub.verify_token'] === vtoken) {
					res.send(req.query['hub.challenge'])
			}
			res.send('No sir')
	})

// Spin up the server
app.listen(app.get('port'), function() {
	console.log('running on port', app.get('port'))
})
-
Make a file called Procfile and copy this. This is so Heroku can know what file to run.
web: node index.js -
Commit all the code with Git then create a new Heroku instance and push the code to the cloud.
git init
git add .
git commit --message "hello world"
heroku create
git push heroku master
-
Create or configure a Facebook App or Page here https://developers.facebook.com/apps/
-
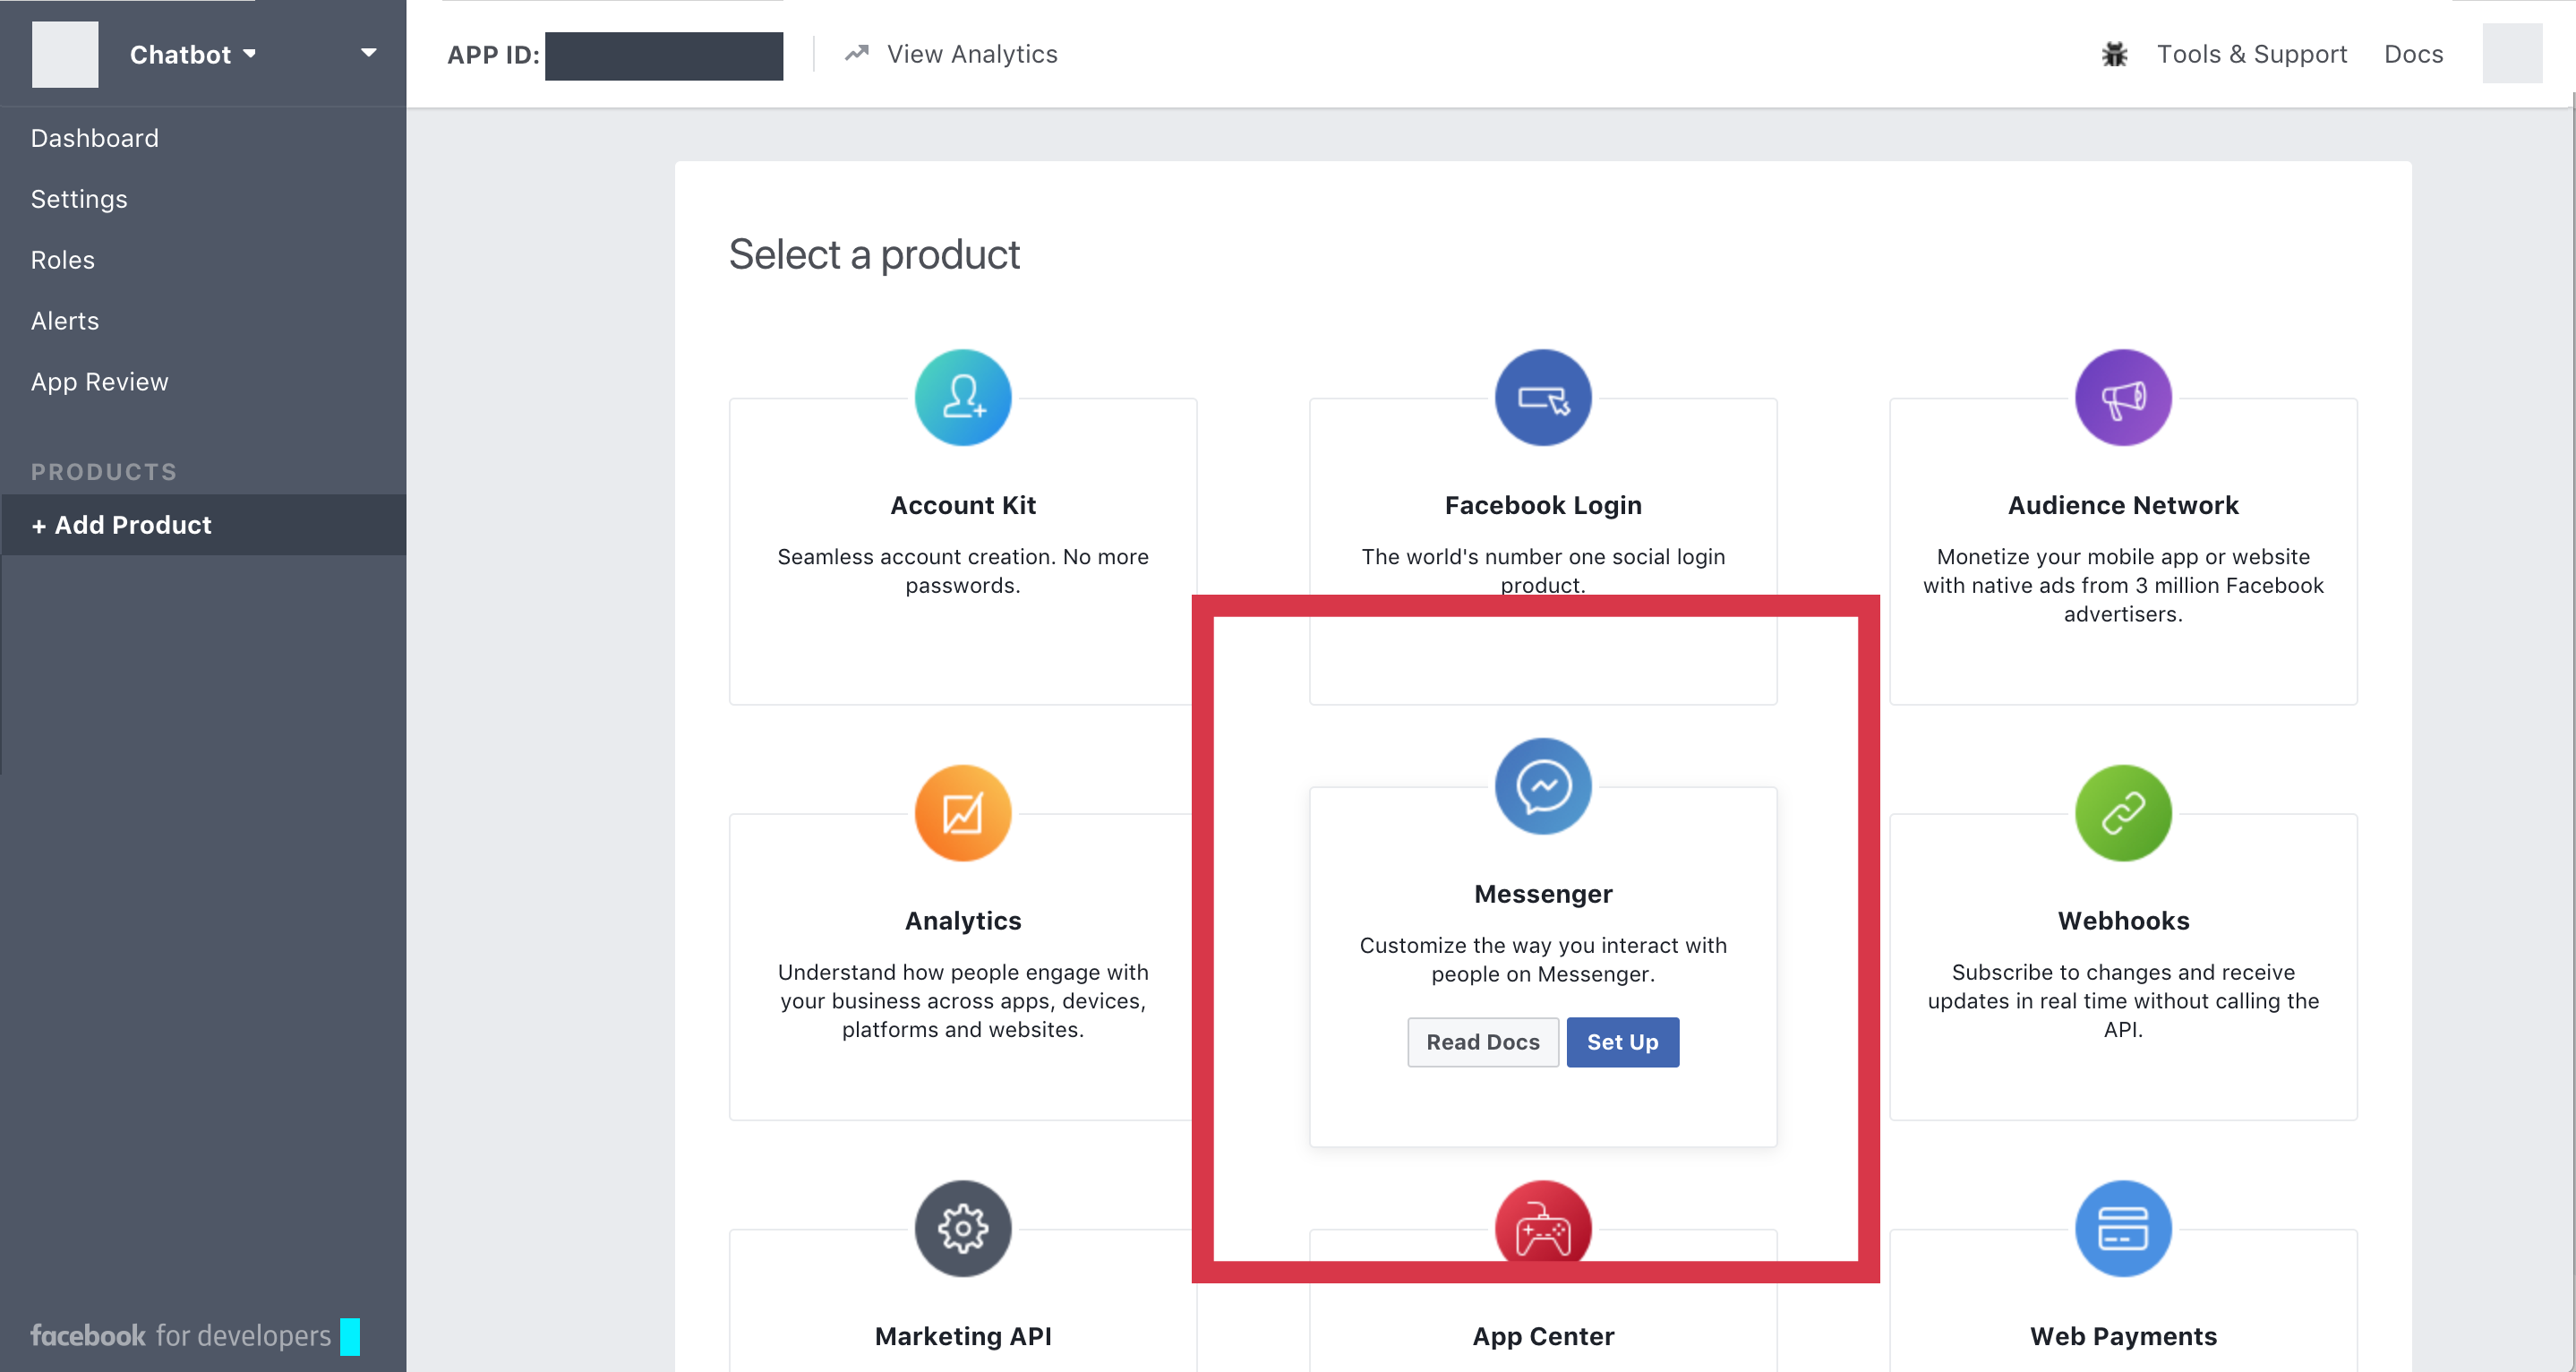
Select Messenger as a product
-
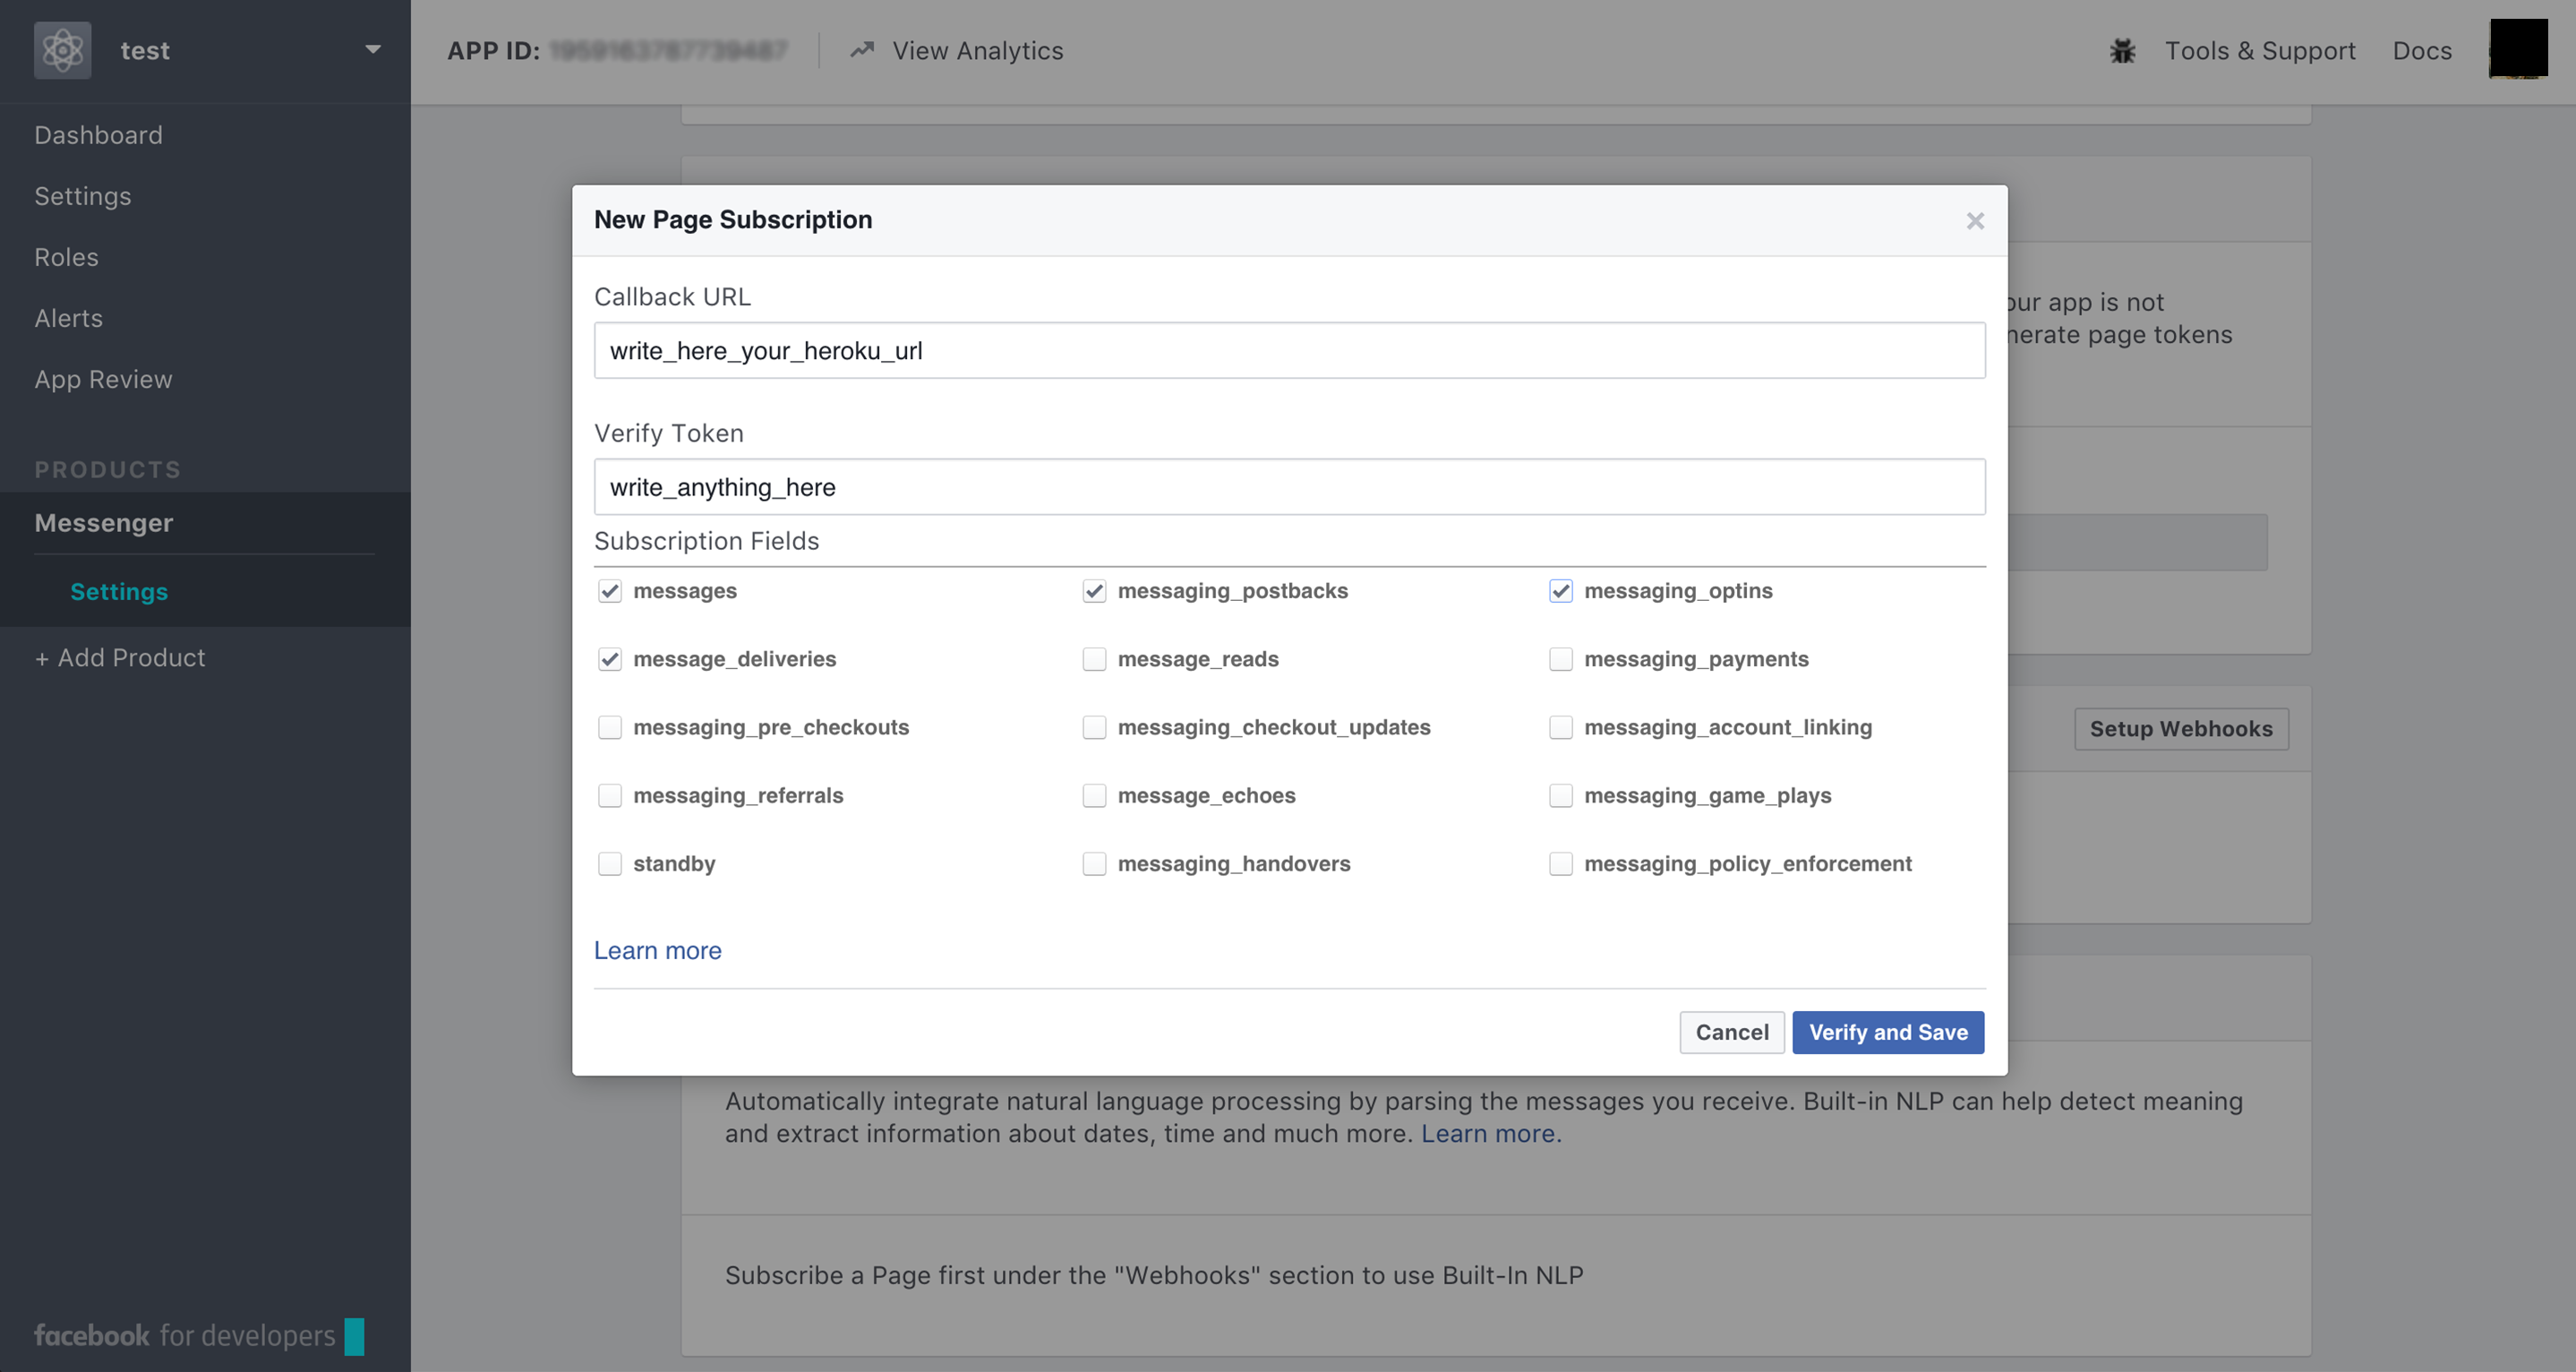
In the app go to Messenger tab then click Setup Webhook. Here you will put in the URL of your Heroku server and a token. Make sure to check all the subscription fields.
-
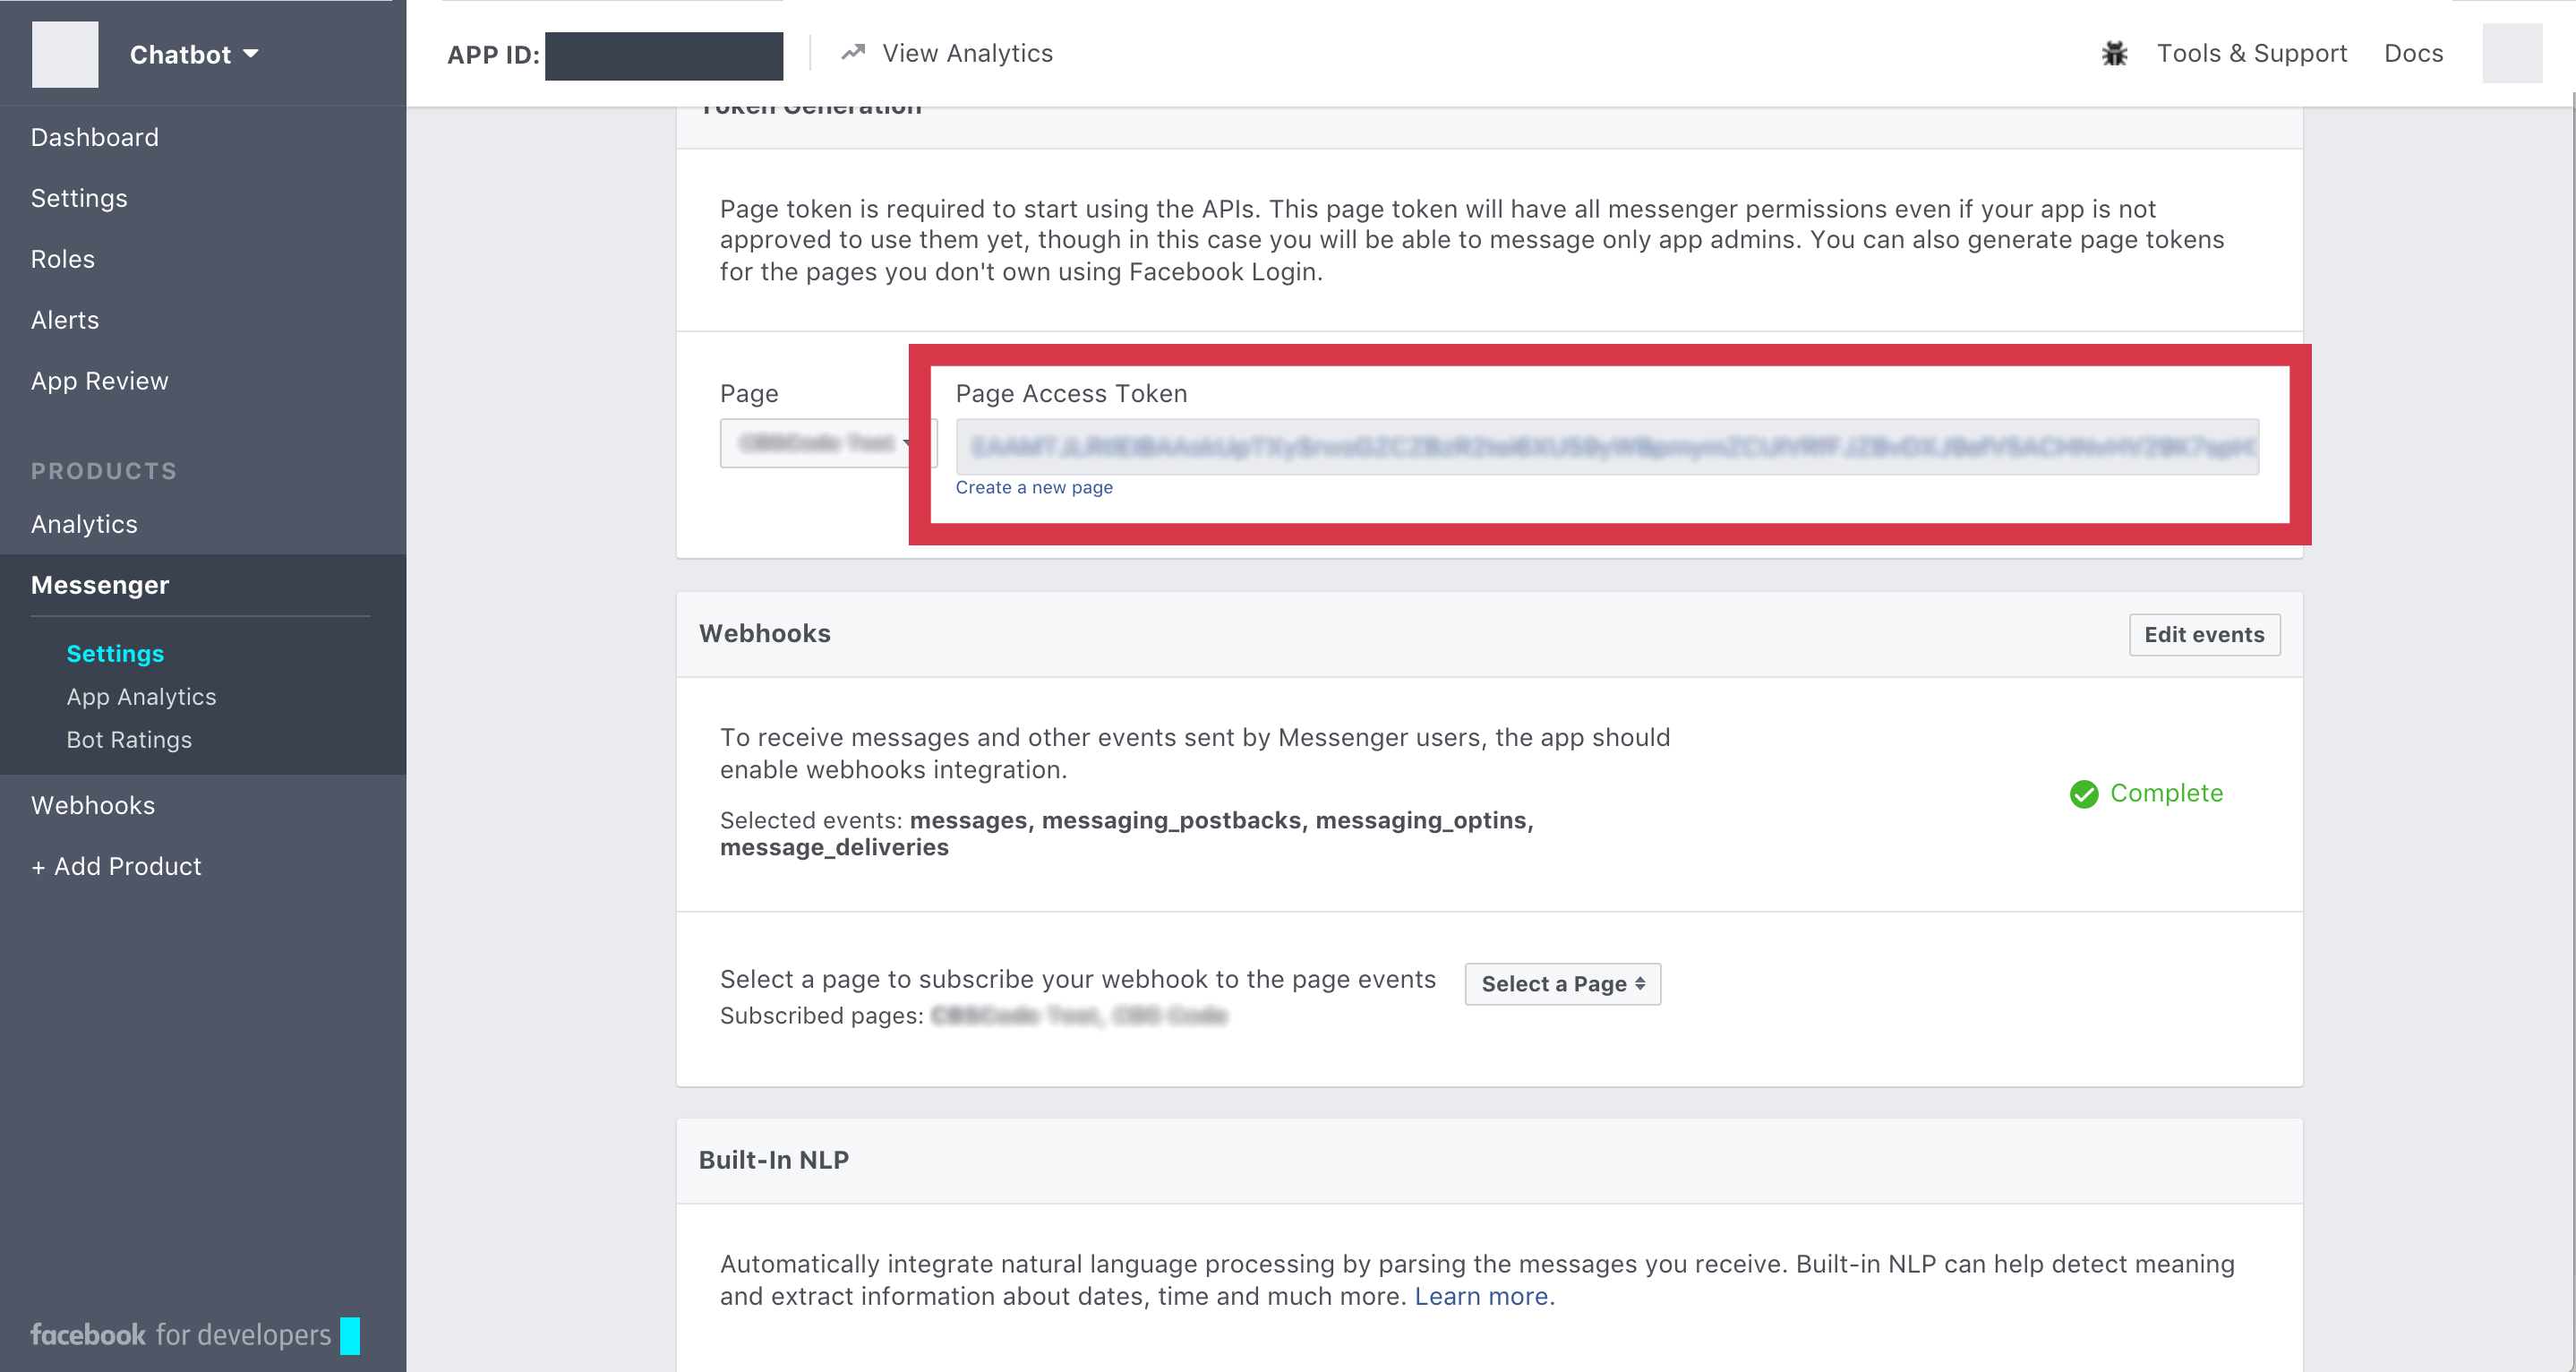
Get a Page Access Token and save this somewhere.
-
In order to release your chatbot, you will need to create a privacy policy. Do it here: https://termsfeed.com/privacy-policy/generator/
-
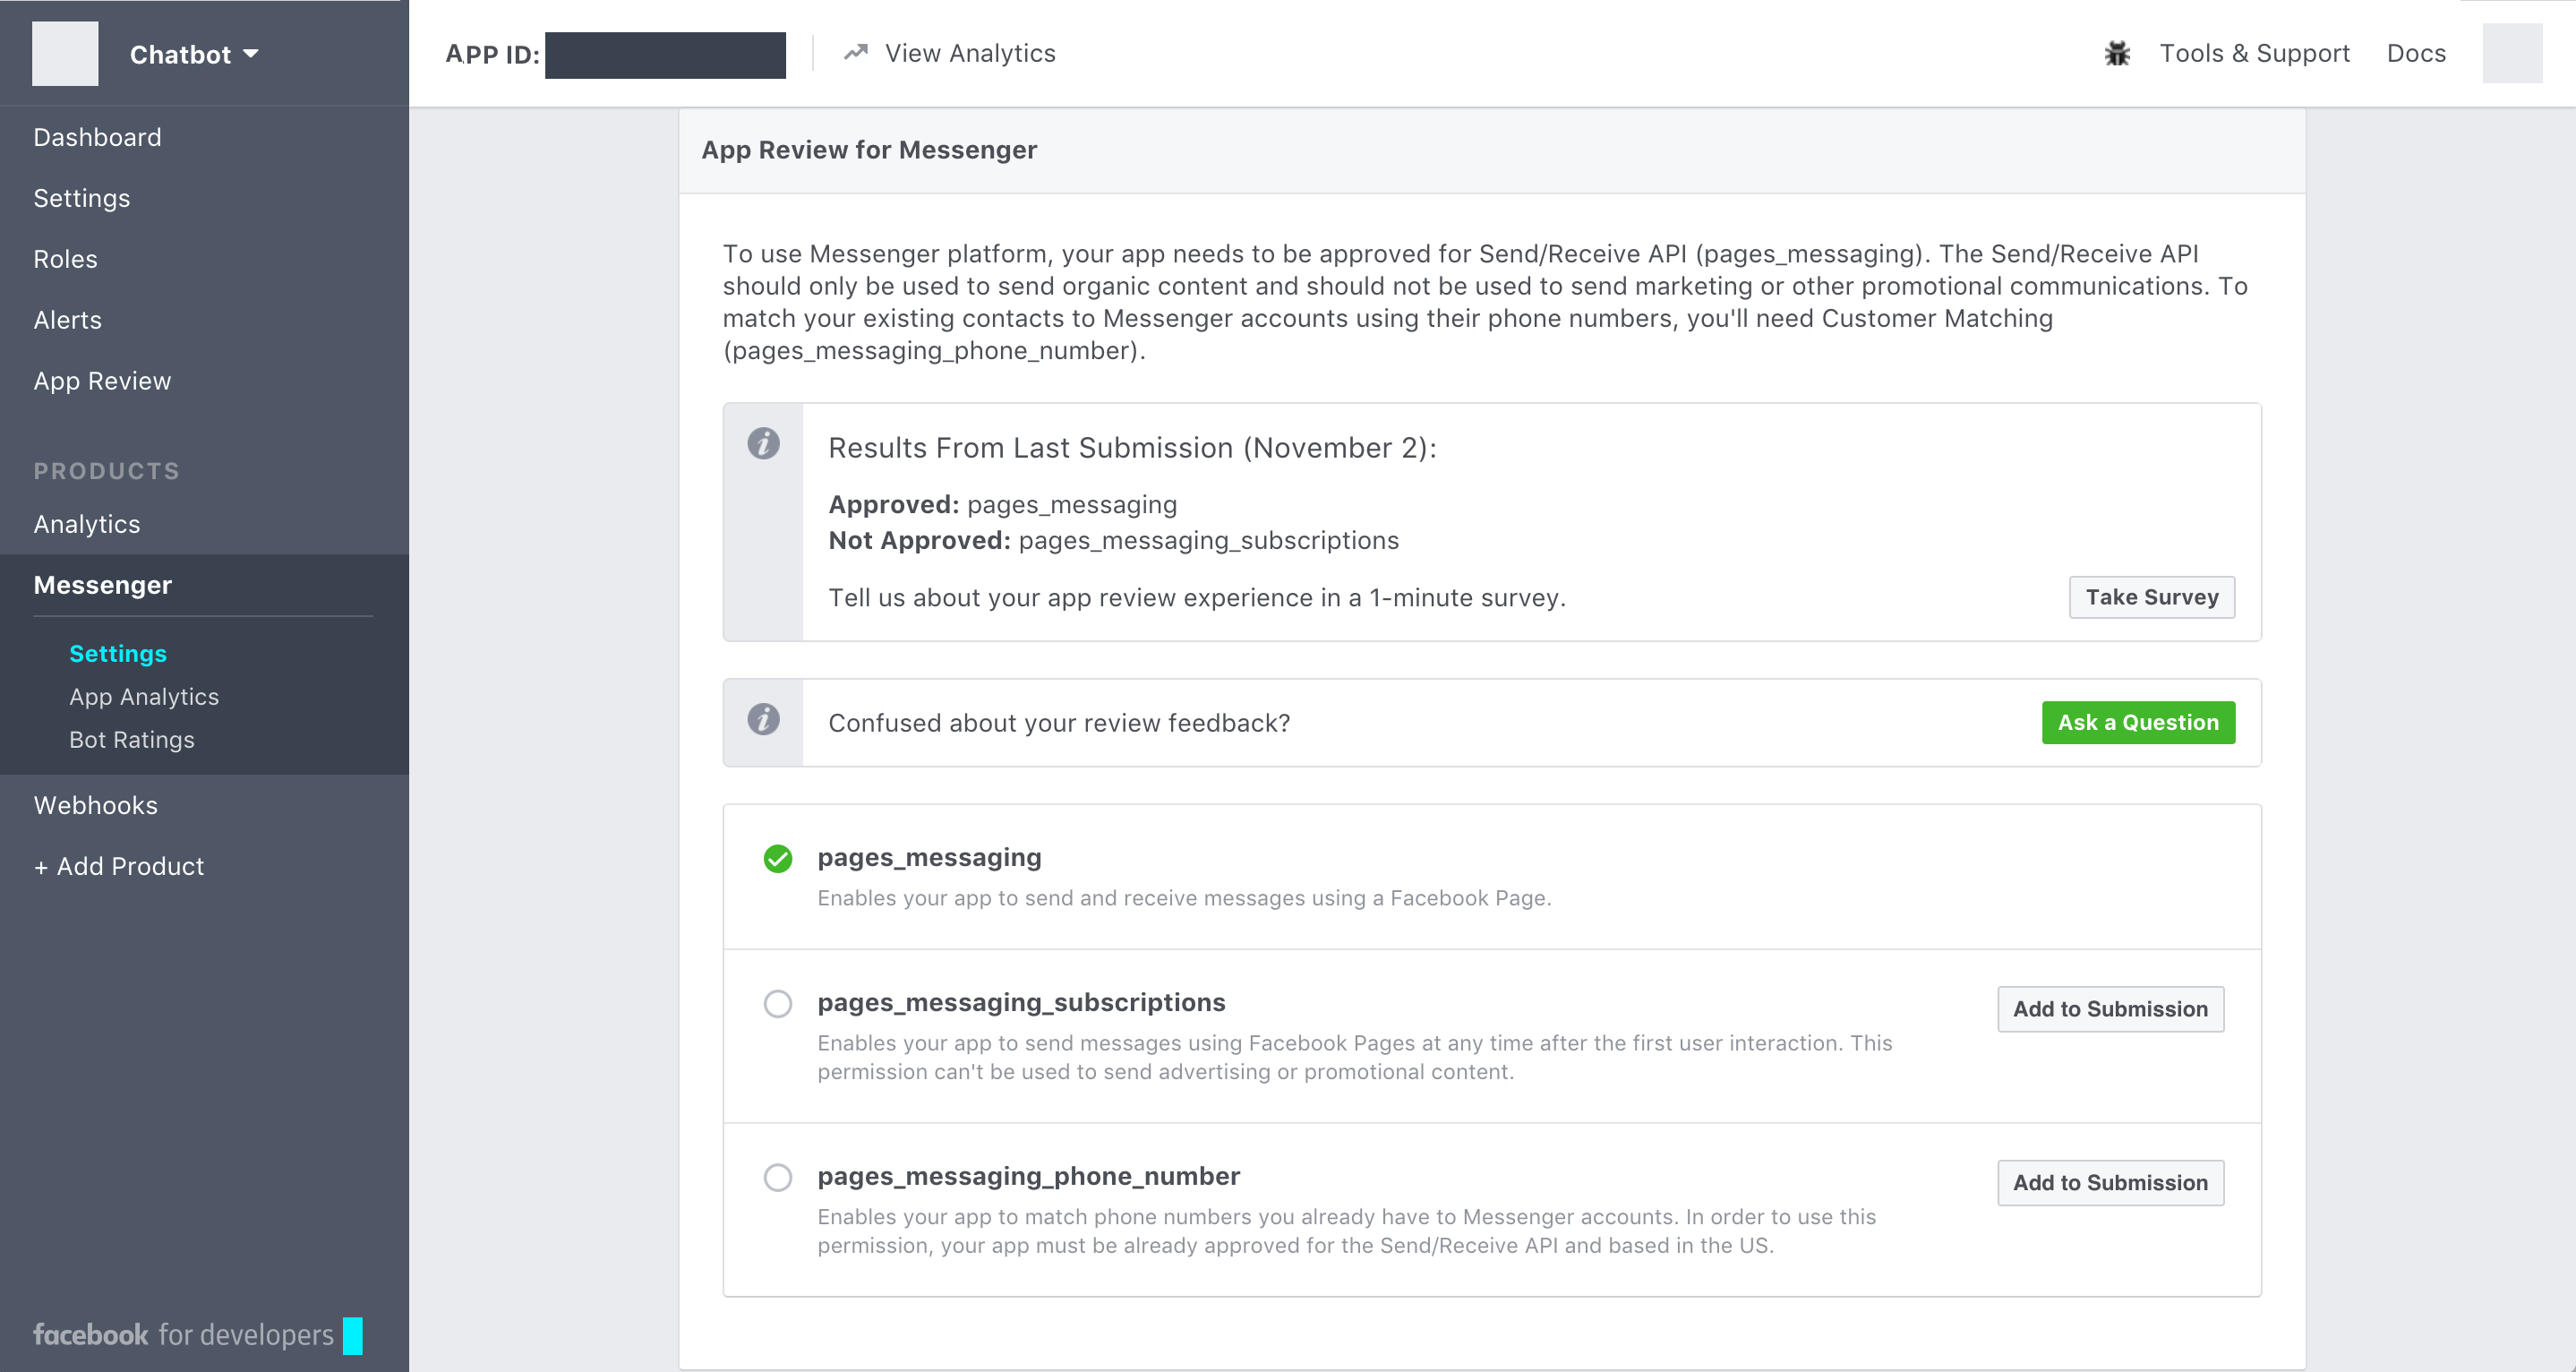
Until this point you can test your app only in a developer account, to release send the messenger app for permission on pages-messaging.
-
Go back to Terminal and type in this command to trigger the Facebook app to send messages. Remember to use the token you requested earlier.
curl -X POST "https://graph.facebook.com/v2.6/me/subscribed_apps?access_token=<PAGE_ACCESS_TOKEN>"


Now that Facebook and Heroku can talk to each other we can code out the bot.
-
Add an API endpoint to index.js to process messages. Remember to also include the token we got earlier.
	//If you declared your access variables on Heroku you need to bring them back like this
	const token = process.env.FB_PAGE_ACCESS_TOKEN
	const vtoken = process.env.FB_PAGE_VERIFY_TOKEN

app.post('/webhook/', function (req, res) {

		// Parse the request body from the POST
		let body = req.body;

		// Check the webhook event is from a Page subscription
		if (body.object === 'page') {

			// Iterate over each entry - there may be multiple if batched
			body.entry.forEach(function(entry) {

				// Get the webhook event. entry.messaging is an array, but
				// will only ever contain one event, so we get index 0
				let webhook_event = entry.messaging[0];

					// Get the sender PSID
					let sender_psid = webhook_event.sender.id;

					// Check if the event is a message or postback and
					// pass the event to the appropriate handler function
					if (webhook_event.message) {
						handleMessage(sender_psid, webhook_event.message);
					} else if (webhook_event.postback) {
						handlePostback(sender_psid, webhook_event.postback);
					}

				});

				// Return a '200 OK' response to all events
				res.status(200).send('EVENT_RECEIVED');

			} else {
				// Return a '404 Not Found' if event is not from a page subscription
				res.sendStatus(404);
			}

		});
Optional, but recommended: keep your app secrets out of version control!
- On Heroku, its easy to create dynamic runtime variables (known as config vars). This can be done in the Heroku dashboard UI for your app or from the command line:
heroku config:set FB_PAGE_ACCESS_TOKEN=MY_SECRET_TOKEN_NUMBER heroku config:set FB_PAGE_VERIFY_TOKEN=MY_VERIFY_TOKEN #To view your config variables heroku config- For local development: create an environmental variable in your current session or add to your shell config file.
# create env variable for current shell session
export FB_PAGE_ACCESS_TOKEN=fake-access-token-dhsa09uji4mlkasdfsd

# alternatively, you can add this line to your shell config
# export FB_PAGE_ACCESS_TOKEN=fake-access-token-dhsa09uji4mlkasdfsd

echo $FB_PAGE_ACCESS_TOKEN
config varaccess at runtime
const token = process.env.FB_PAGE_ACCESS_TOKEN
-
Add a function to echo back messages
function sendTextMessage(sender, text) {
    let messageData = { text:text }
    request({
	    url: 'https://graph.facebook.com/v2.6/me/messages',
	    qs: {access_token:token},
	    method: 'POST',
		json: {
		    recipient: {id:sender},
			message: messageData,
		}
	}, function(error, response, body) {
		if (error) {
		    console.log('Error sending messages: ', error)
		} else if (response.body.error) {
		    console.log('Error: ', response.body.error)
	    }
    })
}
-
Commit the code again and push to Heroku
git add . git commit -m 'updated the bot to speak' git push heroku master -
Go to the Facebook Page and click on Message to start chatting!

Facebook Messenger can send messages structured as cards or buttons.

-
Copy the code below to index.js to send a test message back as two cards.
function sendGenericMessage(sender) {
    let messageData = {
	    "attachment": {
		    "type": "template",
		    "payload": {
				"template_type": "generic",
			    "elements": [{
					"title": "First card",
				    "subtitle": "Element #1 of an hscroll",
				    "image_url": "http:https://messengerdemo.parseapp.com/img/rift.png",
				    "buttons": [{
					    "type": "web_url",
					    "url": "https://www.messenger.com",
					    "title": "web url"
				    }, {
					    "type": "postback",
					    "title": "Postback",
					    "payload": "Payload for first element in a generic bubble",
				    }],
			    }, {
				    "title": "Second card",
				    "subtitle": "Element #2 of an hscroll",
				    "image_url": "http:https://messengerdemo.parseapp.com/img/gearvr.png",
				    "buttons": [{
					    "type": "postback",
					    "title": "Postback",
					    "payload": "Payload for second element in a generic bubble",
				    }],
			    }]
		    }
	    }
    }
    request({
	    url: 'https://graph.facebook.com/v2.6/me/messages',
	    qs: {access_token:token},
	    method: 'POST',
	    json: {
		    recipient: {id:sender},
		    message: messageData,
	    }
    }, function(error, response, body) {
	    if (error) {
		    console.log('Error sending messages: ', error)
	    } else if (response.body.error) {
		    console.log('Error: ', response.body.error)
	    }
    })
}
-
Update the webhook API to look for special messages to trigger the cards
app.post('/webhook/', function (req, res) {
    let messaging_events = req.body.entry[0].messaging
    for (let i = 0; i < messaging_events.length; i++) {
	    let event = req.body.entry[0].messaging[i]
	    let sender = event.sender.id
	    if (event.message && event.message.text) {
		    let text = event.message.text
		    if (text === 'Generic') {
			    sendGenericMessage(sender)
		    	continue
		    }
		    sendTextMessage(sender, "Text received, echo: " + text.substring(0, 200))
	    }
    }
    res.sendStatus(200)
})
What happens when the user clicks on a message button or card though? Let's update the webhook API one more time to send back a postback function.
  app.post('/webhook/', function (req, res) {
    let messaging_events = req.body.entry[0].messaging
    for (let i = 0; i < messaging_events.length; i++) {
      let event = req.body.entry[0].messaging[i]
      let sender = event.sender.id
      if (event.message && event.message.text) {
  	    let text = event.message.text
  	    if (text === 'Generic') {
  		    sendGenericMessage(sender)
  		    continue
  	    }
  	    sendTextMessage(sender, "Text received, echo: " + text.substring(0, 200))
      }
      if (event.postback) {
  	    let text = JSON.stringify(event.postback)
  	    sendTextMessage(sender, "Postback received: "+text.substring(0, 200), token)
  	    continue
      }
    }
    res.sendStatus(200)
  })
Git add, commit, and push to Heroku again.
Now when you chat with the bot and type 'Generic' you can see this.

Go here to learn how to add a chat button your page.
You can use https://m.me/<PAGE_USERNAME> to have someone start a chat.
You can learn how to get your bot approved for public use here.
You can also connect an AI brain to your bot here
Read about all things chat bots with the ChatBots Magazine here
You can also design Messenger bots and Mockups with the Bot Society Tool!
You can send us your questions to [email protected]