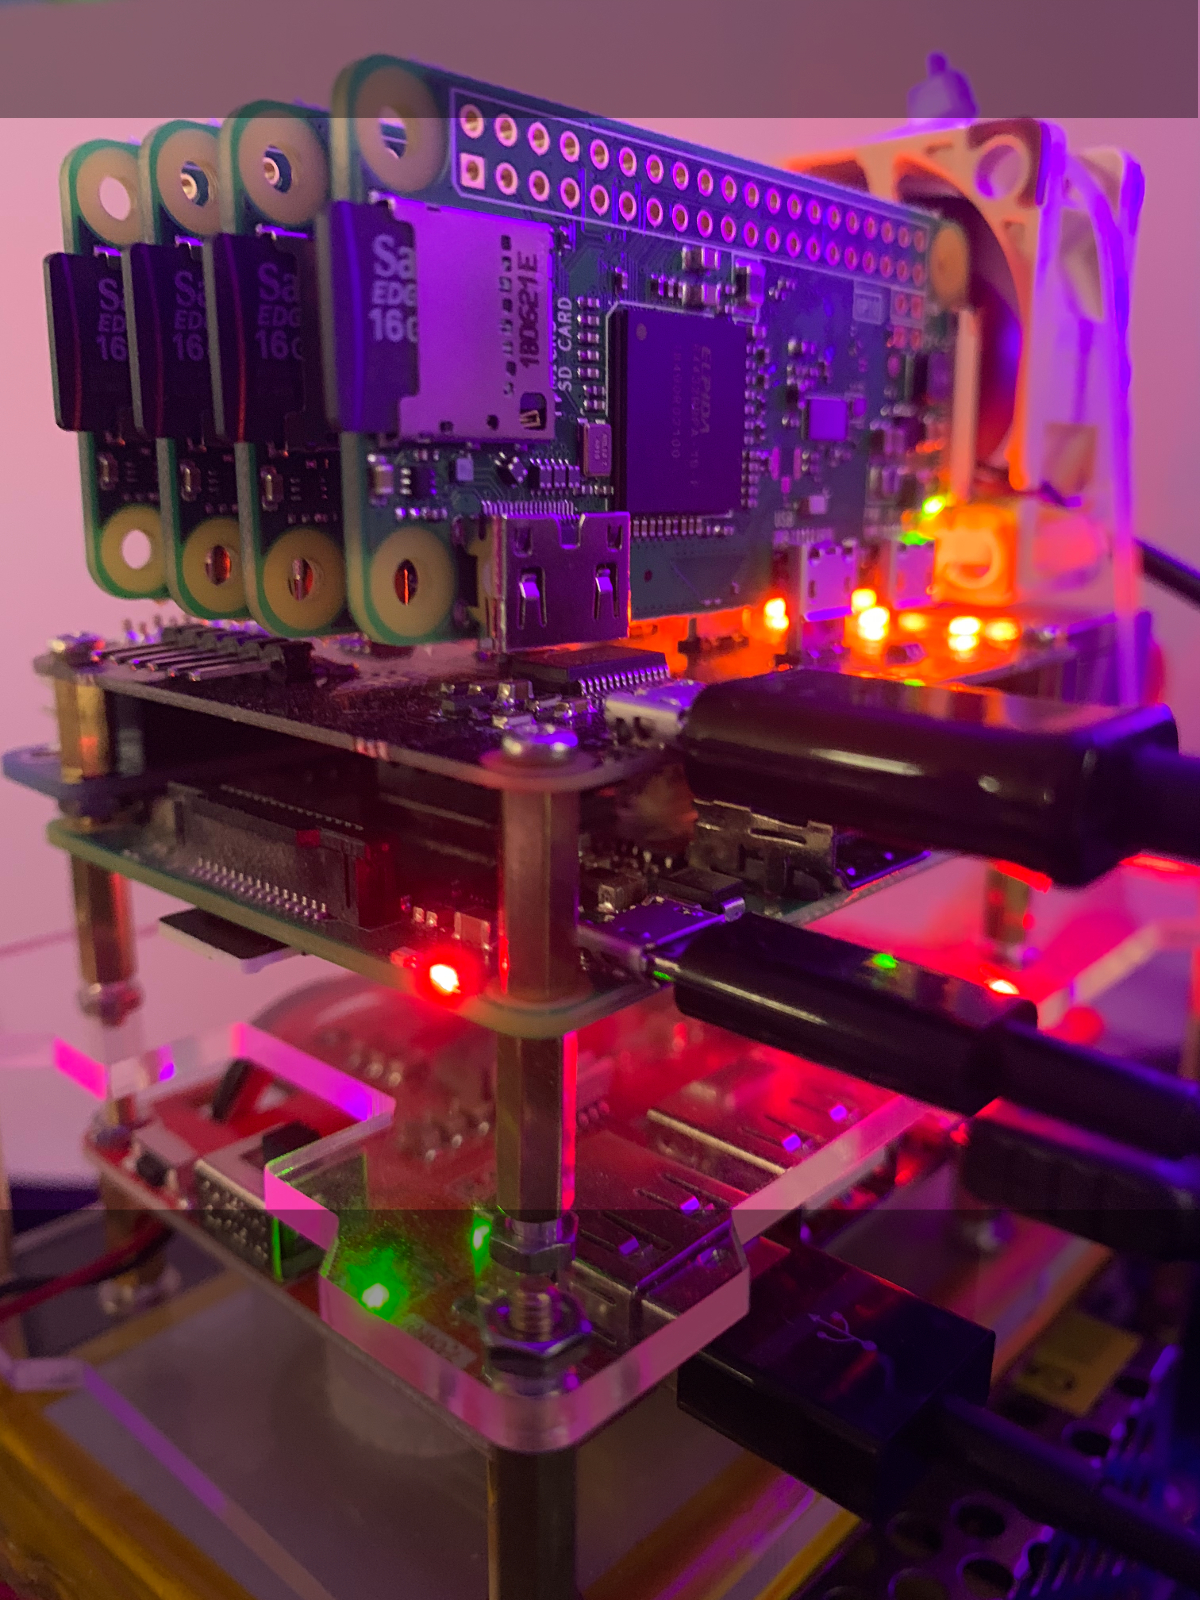
- Raspberry Pi 3B+
- 4x Raspberry Pi Zero W
- Raspberry Pi ClusterHat
- 5x MicroSD (>=16GB) Memory Cards
- Stable 5V power supply >= 3A (5V/5A PSU pictured)
Optional Equipment (Pictured)
- 40mm fan
- Raspberry Pi UPS Battery Backup w/ 3250mah & 10000mah Lipo packs
- Dual GPIO header breakout
Develop a fully autonomous environment for the deployment and management of a Raspberry Pi Clusterhat device.
Of course, we will be using containers to deploy workloads to our cluster. Installing docker on the latest raspian-stretch-lite image was a breaze. I simply used the get.docker.com install script and had docker installed in no time. Unfortunatly, the RPi-Zero's were not that simple.
I took a few approaches to setting up docker on the RPi Zero's:
- I had no success with the install script:
curl -sSL https://get.docker.com | sh. I tried a plethora of workarounds and fixes to no avail. - Next, I attempted to download
docker-ce- no luck. - Then
docker.iowhich kind of worked, but was throwing errors about connecting to docker.sock that I could not rememdy. - Finally, I downladed hypriotos-rpi-v1.10.0, etched to microsd and booted up on Rpi Zero W.
dockerdwas already up and running with a total footprint of around 70mb in RAM. :)
- Two architectures,
arm32v7andarmv6l. - Raspberry Pi 3B+ is the defacto
controlleror Master of the cluster, because it manages the power supply to the Clusterhat device. - Best option for stable network connection was to use the individual wifi from the zero's. Options exists to bridge ethernet connections through the usb cable to the raspberry pi 3B+. I experienced poor network performance (dropped packets mainly) and unstable power supply using the usb netowrk tunnelling method.
- Powering the clusterhat with its own line to the power supply resulted in stable performance of all zero's while under load.
- RPIboot: I tested and had very little success netbooting the zero's from the raspberry pi 3b+ using RPIboot. The zero's would choke everytime they were restarted and I would have to ungplug the usb cable and reboot. Again, this could been because of power issues.
Native cluster management using kubernetes is ideal. Work in progress.
To create an exclusive wifi test environment, an eth0 wlan0 bridge can be configured on the Raspberry Pi 3B+. I won't go into that here. To keep it simple, I am using my home wifi.
Time Estimate: 45 mninutes to 1 hour
- Assemble your Raspberry Pi ClusterHat. Check the Clusterhat.com Official Guide if you have any questions.
- Download Lite Controller image from clusterhat.com
- Write the image to a microsd and place into the Raspberry Pi 3B+
- Eject the fresh microsd and reinsert into your computer.
- Copy
sshfrom./sd_card/boot-controller/sshto the microsdbootpartition. Optional: also edit wpa_supplicant.conf.skel to include your wifi ssid and key. Rename the file towpa_supplicant.confand also copy over to the microsd. - Eject the edited microsd and insert into you Raspberry Pi 3B+
- Turn on the Raspberry Pi 3B+
- Download Hypriot-rpi-v1.10.0 image from hypriot.com.
- Write the image to 4x microsd, eject after writing, and reinsert into the computer to finish loading files.
- Copy the
sshfile from./sd_card/boot-zero/ssh - Copy the
cmdline.txtfile from./sd_card/boot-zero/cmdline.txt - You must edit the
wpa_supplicant.conf.skelto include your SSID and key. Then rename the file towpa_supplicant.confand copy to the sd cards. - Insert the sd cards into the Raspberry Pi Zero W's
- Find the IP address of your raspberry pi zero's
- Login to your raspberry pi 3b+
- Default password is
clusterhat - Fire up the clusterhat and give the Zero's some time to boot and expand the filesystem on the micro-sd cards.
clusterhat on
- Update the apt cache and install nmap
sudo apt-get update && \ sudo apt-get install -y nmap - You need to know a little about your network here. Which range of IP's does your local network use? Two most common are 192.168.1.0/24 and 192.168.0.1/24. The postfix
/24tells the computer to check the IP range from 1-255.sudo nmap -sn 192.168.0.1/24
