Finally brushing up on this piece which I started as my fourth-year project. In a nutshell, This is an automated attendance system that eliminates the manual efforts which are involved. The overall accuracy of around 85% and is highly dependent on the lighting conditions. For now, I have created the system for English and Hindi lectures which can be further extended to more lectures/subjects. Everything is automated from enrolling students in MongoDB, to creating directories, and saving the marked attendance.
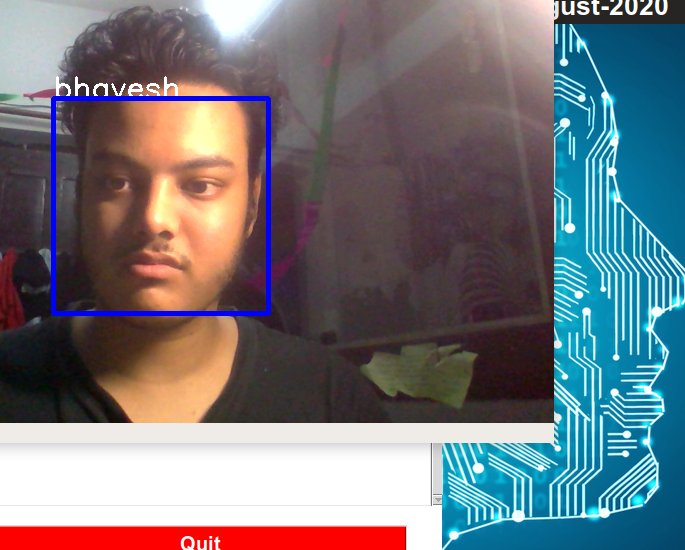
This is the overview of the UI

The project is divided into the following sections:
- Generating Training data/ Students pic and enrolling them in MongoDB database in all the collections(Hindi and English)_and a CSV file named Students Enrollment
- Once the required dataset is generated the model is trained which comprises of several layers with softmax in the output layer** (I have not used any regularization as such as the model was giving good response in normal lightning conditions however it can be used if we have too many classes/students)
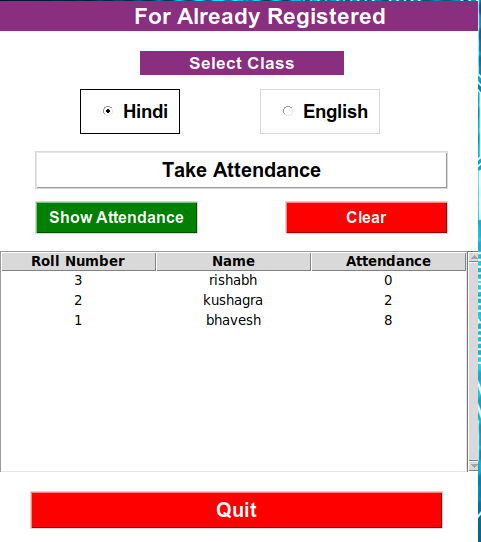
- The user can then select the required lecture (English and Hindi) and check the existing attendance
- The user can then take the attendance by clicking on the required button. It takes approximately 15 seconds to start the attendance window. (The attendance is stored in MongoDB database and separate collections are created for English and Hindi classes to avoid overlaps)

Install the packages mentioned in Requirements folder depending on CPU/ GPU based systems.
(UI is made using python Tkinter)
Warning: Make sure that the students are enrolled sequentially starting from Roll Number 1 and make sure that duplicated Roll number is not inserted
Step 1: Run Python3 UI.py
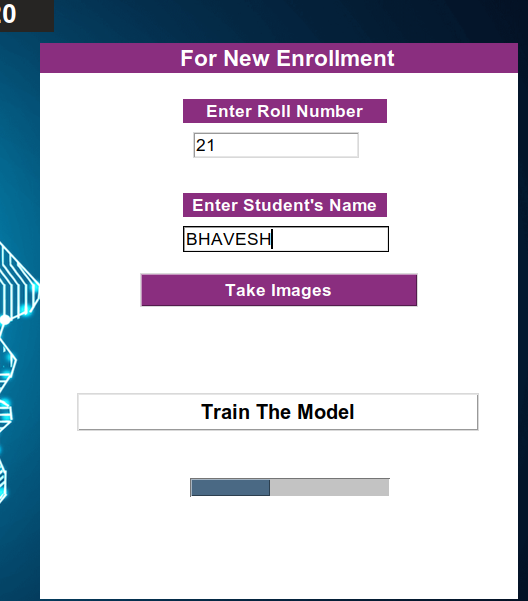
Step 2: Once the UI is up and running, start with the right-hand section for new enrollments(Students entered are enrolled in both the subjects(Collections in MongoDB) with 0 Attendance)

Step 3: Clik on the Take Images button, A new window (frame) should open and clicks 50 images of the detected face
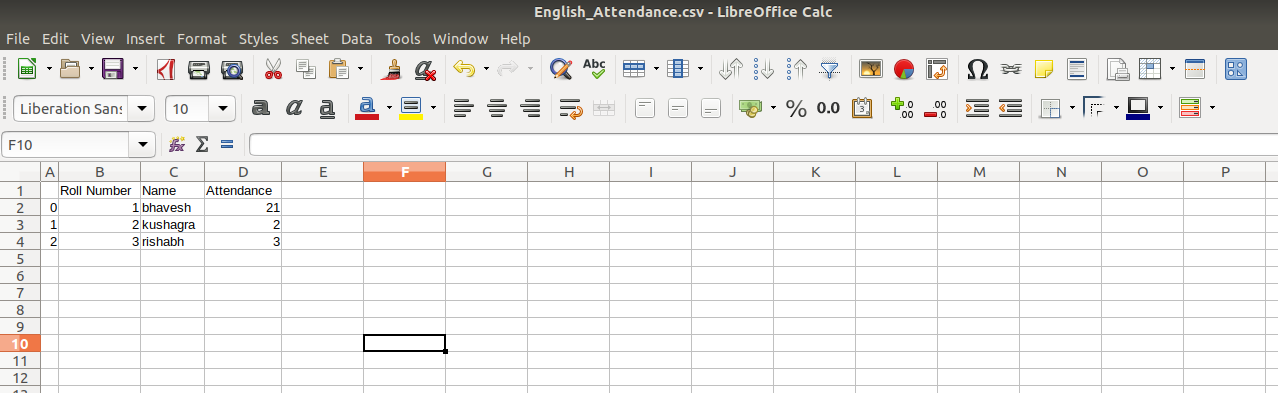
Step 4: Once the students are enrolled, you can check the attendance in the Students_Enrollment.CSV

Step 5: Click on Train the Model. Here I have used multi-threading, thread 1 for the progress bar, and thread 2 for model training.
Step 6: The model will be trained in backend and saved into the Model directory as a .model file.

Step 7: You can now jump on to the left section for taking attendance.
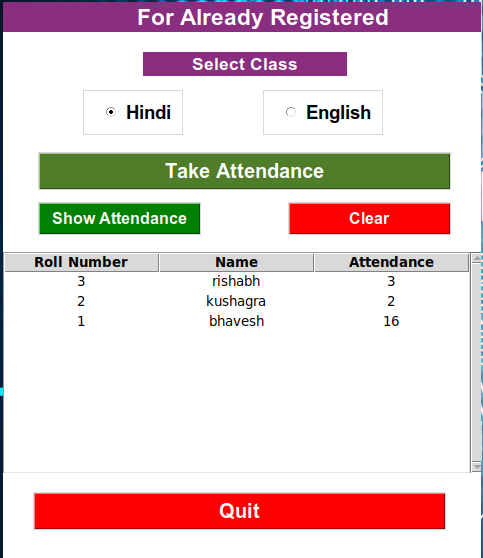
Step 8: I have considered English and Hindi lecture for now and can be increased to desired numbers. Click on any of them and click on check attendance. The attendance will be displayed below and a clear button can be used to clear the window.
Step 9: After verifying the existing attendance, Select the desired lecture and click on "Take Attendance"

Step 10: The model will take approximately 15 secs to start now and a new window will be displayed.
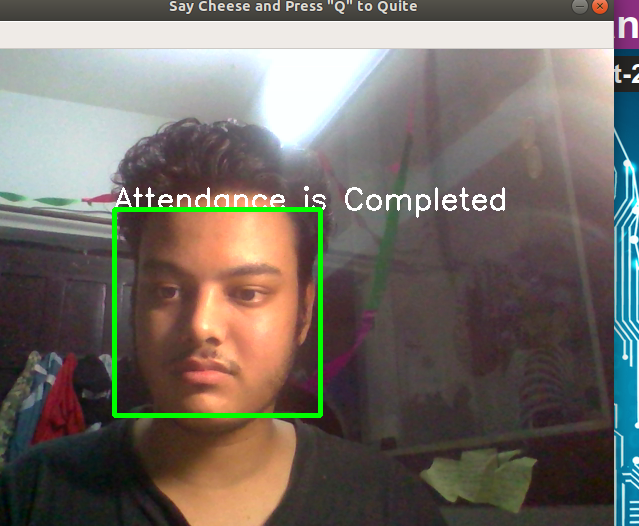
Step 11: The window will capture the attendance of the recognized face for only 1 time for the desired class.
Step 12: When the attendance is taken, you can click on show attendance and the updated attendance will be displayed for the respective lecture/class.

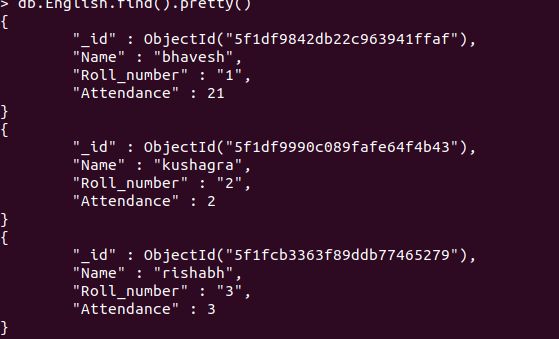
Step 13: For reference, the attendance is stored in both MongoDB and the CSV files present in Hindi and English Directories.
Step 14: Click on Quit to close the window.
Diving deep into the process:
-
The student's input is taken from the Tkinter UI using a text field and a function is called in Generate_Dataset.py file. The code pops up a window frame.
-
As soon as the user inputs the details (Name and Roll Number) the data is saved in the MongoDB database using Pymongo

-
The students are enrolled in both the subjects with 0 Attendance in the function PushMongo.
-
After the students are enrolled in Mongo they are appended in a CSV file "Student_Enrollment.CSV"(This file is important as the number of classes in Recognizer are derived from here)
-
Then, the names folders/directories are created in the people folder with "roll number"+"name" format


6. Faces of students are detected in real-time using Harcascade classifier in OpenCV2 (Faces.xml)
7. The pictures are stored in increasing digits order( 30 Pictures per person are taken as of now)

- After taking 30 images the window(frame) is automatically destroyed
- Following the above steps, new students can be enrolled
- After taking pictures of the desired students now you can click on Train the model Button
- The control is shifted to ModelTraining() function in Model_train.py
- Number of classes are then calculated by reading the Student_Enrollment.csv using pandas and calculating the shape[0]
- Learning rate is set to 0.01, epochs to 400 and batch_size to 16, hyperparameters can be further tweaked for better performance
- Then the folders from People folder are sorted and read to extract the images
- Images are resized to (160,160) then embeddings are extracted using pre-trained model "facenet_keras.h5"
- The embeddings are appended to a list and then converted to NumPy array for Training
- I have used Adam optimizer and the following are the layers:
- Input layer 128 Neurons followed by Relu Activation
- 3 Hidden layers with 64, 32 and 16 neurons respectively
- Output Layer with Softmax Activation
- The model takes around 30-40 seconds for training and saved as "Face_recoginition. Model" in the Model directory


-
On clicking the class (Hindi/English) Radiobutton, you can click on Take attendance
-
The control is shifted to Recognition() function in Recognizer.py
-
The labels are created in a dictionary with value 0 for all the names of students(names are extracted from people folder)
-
Then a window is popped which detects the face in realtime with the same CV2 haar cascade classifier followed by extraction of embeddings
-
If the output value is more than 0.85(hardcoded) then a respective class is matched against that value.
-
I have created an empty dictionary initializing 0 values for all the students. Every time the face is matched with the label the value is incremented by 1 value. Once this value reached to 30(hardcoded) "Attendance is completed" is displayed on the header of the frame
-
When the threshold reaches 30, for all the present students the data is updated in MongoDB table using Data.update
-
For MongoDB, the control is shifted to retrieve_pymongo_data.py where the Database and collections are pulled based on the subject and updated
-
Export CSV function saves the MongoDB data to CSV files for English and Hindi folders respectively.
-
"q" key on the keyboard can be used to exit the window.
-
Quit can be used to exit the Tkinter UI.


