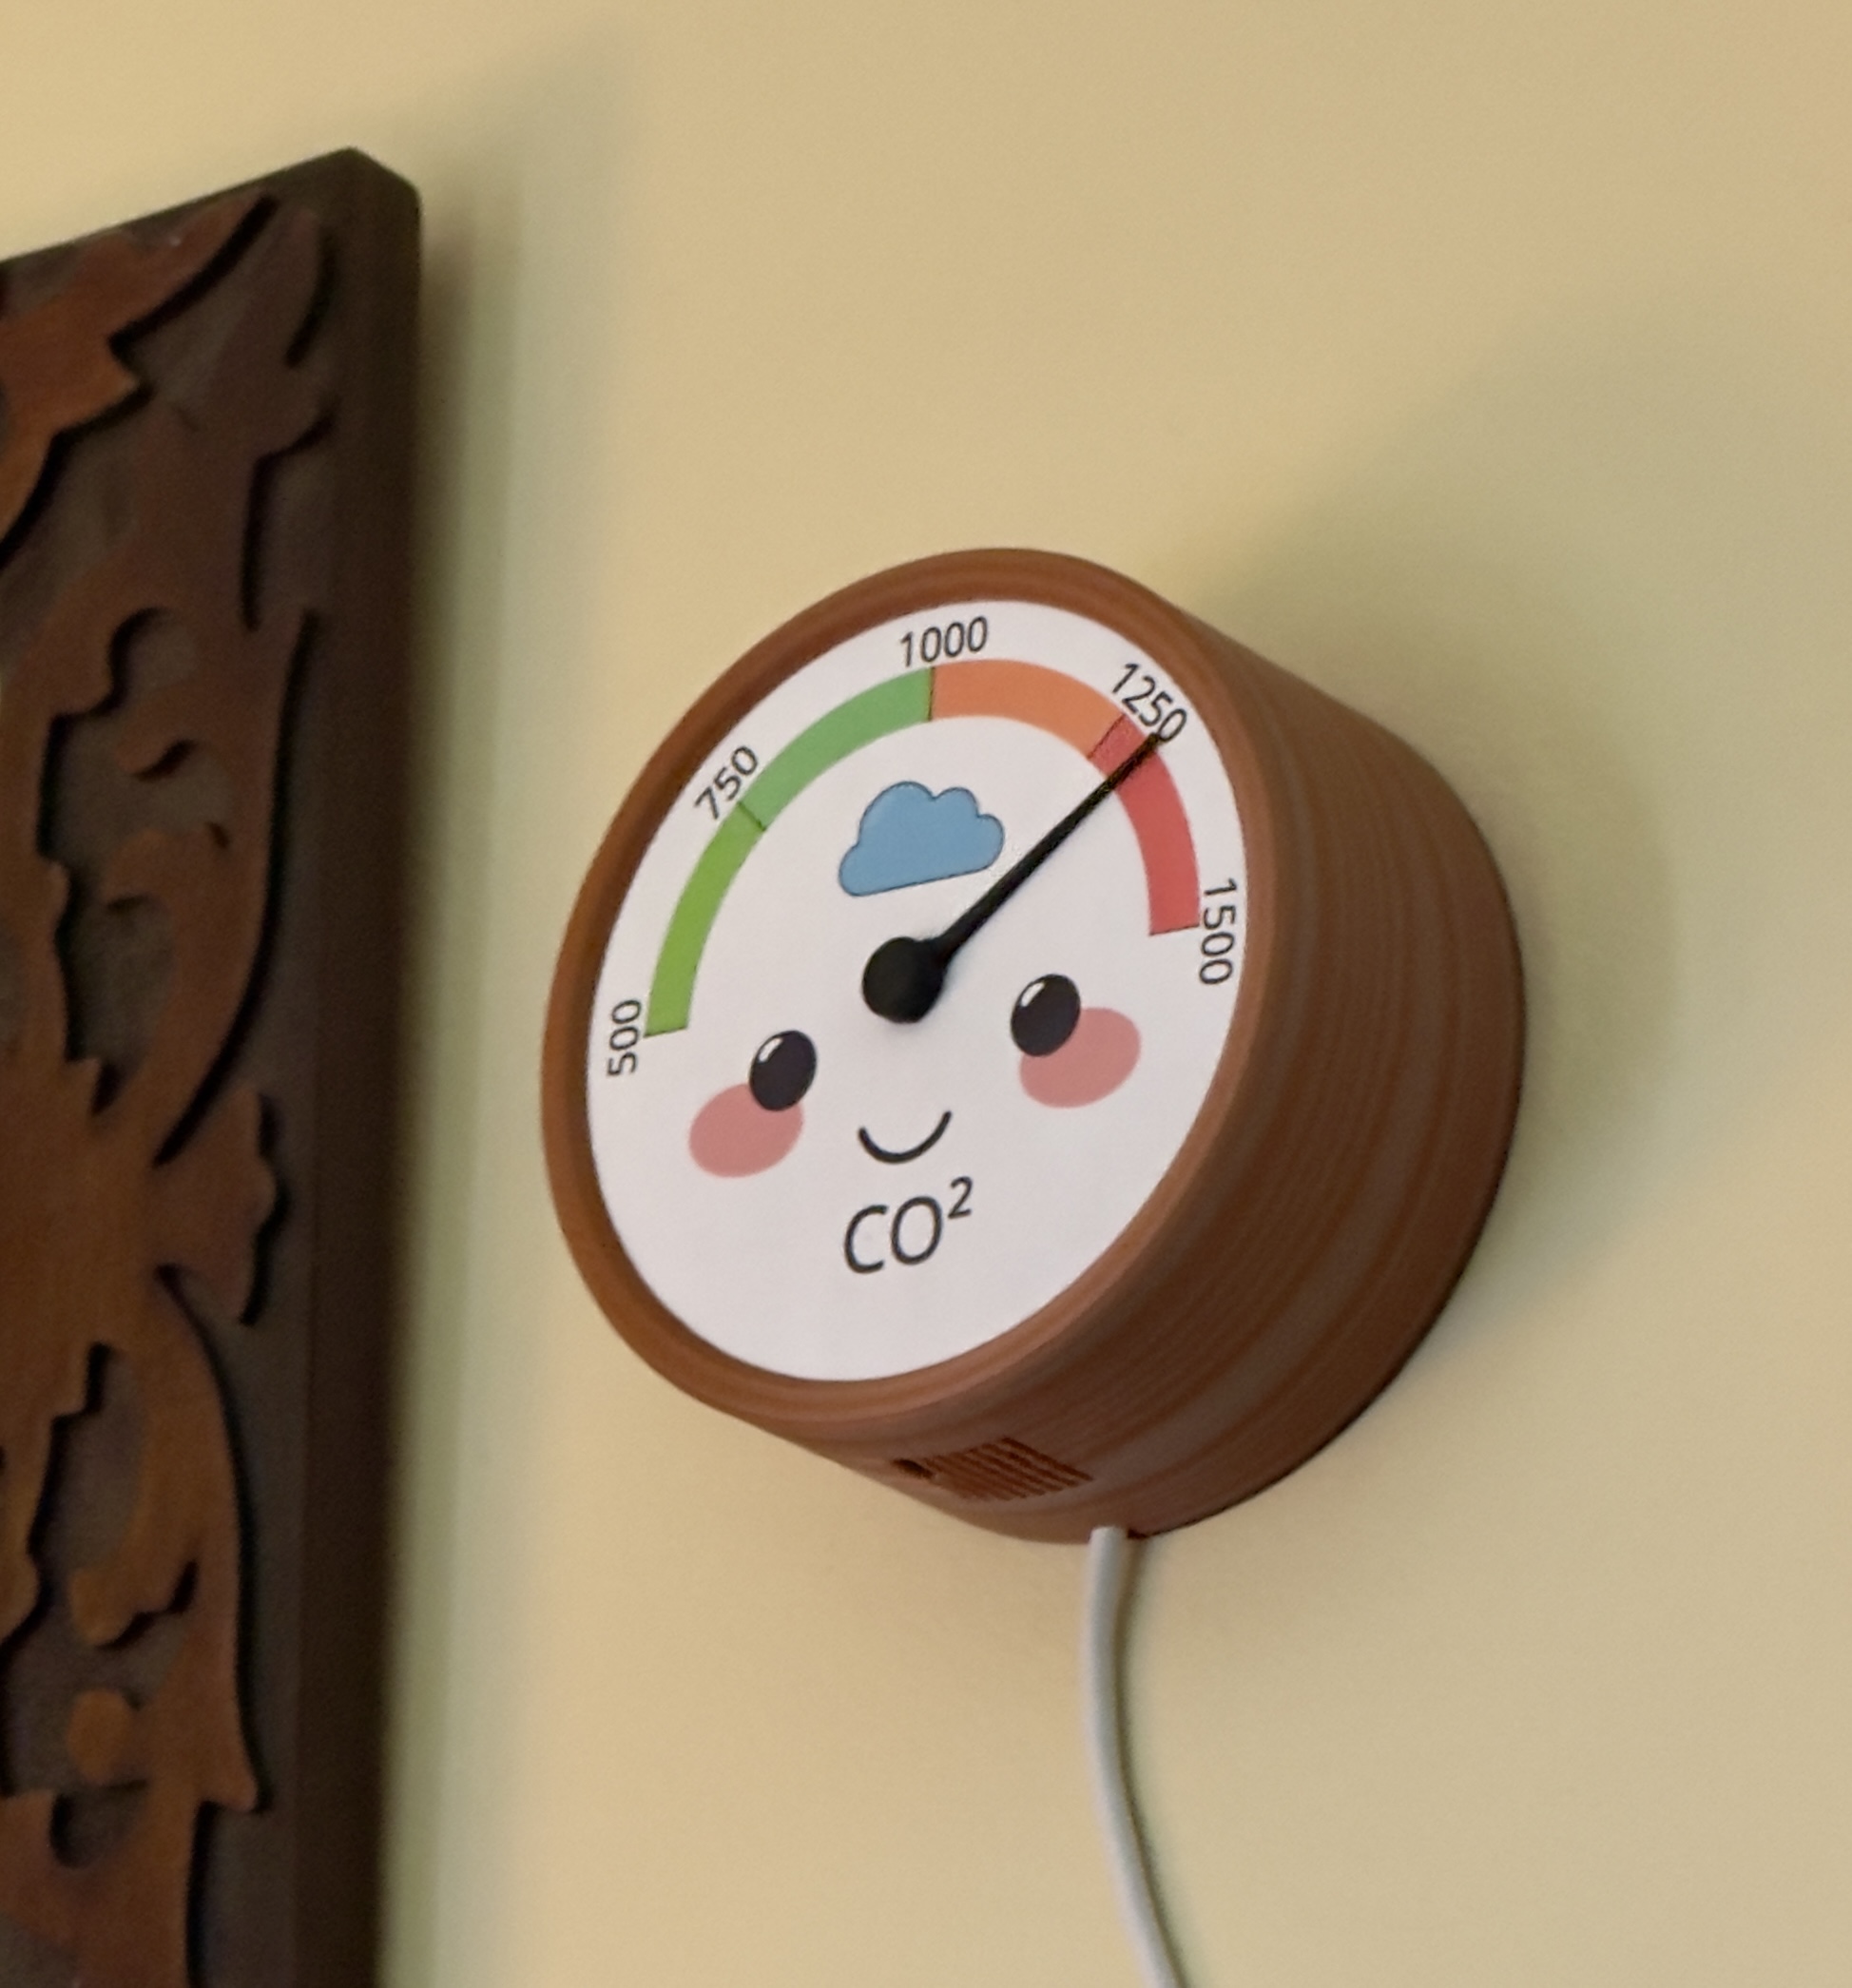
This is a modification of Cyrill Künzi's cute CO2 gauge that he described here: https://kuenzi.dev/co2/. His original implementation integrates with Home Assistant but I needed it to be standalone for my purposes so I used CircuitPython with an Adafruit QT Py ESP32 and an SCD30 CO2 sensor and wrote some code.
You'll also need the following libraries in your device's lib directory from the most recent (I used v9.05) CircuitPython bundle:
- adafruit_bus_device
- adafruit_motor
- adafruit_register
- adafruit_scd30.mpy
I used the following parts in my build:
- DS3225 Servo, this matches what was used originally (I used this one from Amazon)
- QT Py ESP32-S2 from Adafruit. You could use any of the QT Py boards (and numerous others), this just was what I had on-hand.
- A SCD30 CO2 sensor from Adafruit - had one of these left over from a previous project, you could go with one of the cheaper ones like this. I'd recommend a true CO2 sensor, not one that only provides eCO2. These seem to be iffy in my experience. If you're comfortable soldering and wiring the I2C connections yourself, you can find a lot of cheap options on AliExpress as well.
- A STEMMA QT cable to easily connect sensor to QT Py (Adafruit)
- To connect the motor to the mounting plate you'll need some M4 threaded heat set inserts, 4 M4 bolts (~6mm) and of course a soldering iron with heat set tip to match
- Also obviously helpful: a 3D printer and a color inkjet or other printer. Cyrill's image for the gauge graphic is sized for A4 paper, so careful if you are in US not to allow it to be resized to fit (because then it won't fit correctly in the space).
I also modified the original case to add some venting since I was shoving the ESP32 and the CO2 sensor inside and wanted a little airflow so the readings were reasonable. You can find the modifed part here. You'll need Cyrill's original STL also, I've only included the modified part here. It's available in his GitHub repo.
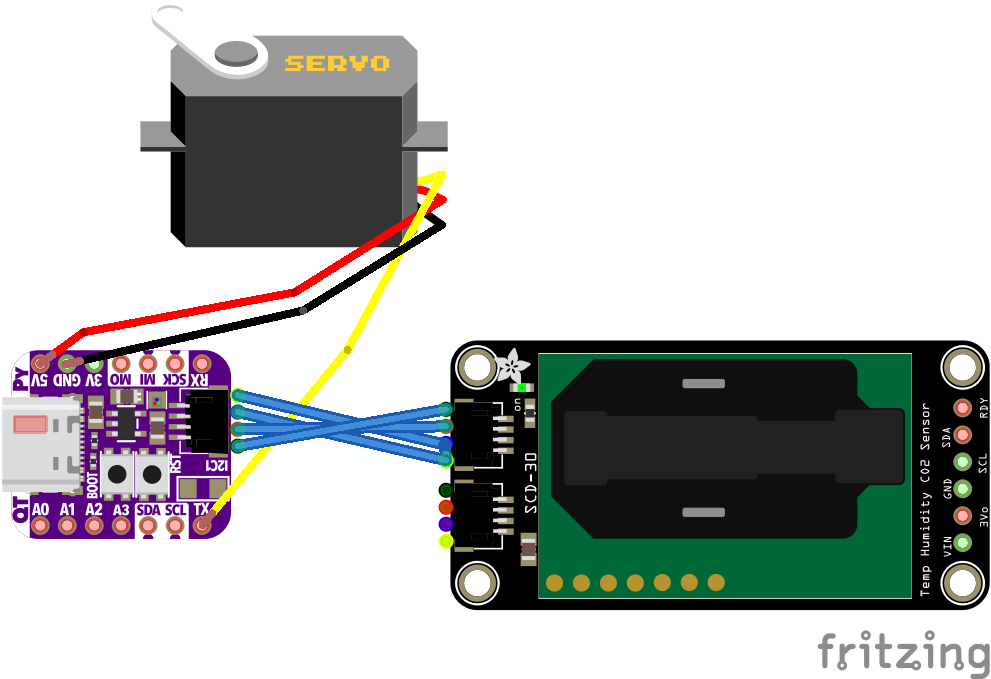
The wiring is very simple. The SCD30 is connected via the STEMMA QT cable to the QT Py's STEMMA QT connector. The motor is connected to the 5v power, ground and TX pins of the QT Py. You'll need to take the data wire out of the 3 pin Dupont female connector the motor comes with and put on a new single pin female connector assuming you have headers on your ESP32. Alternately just solder,
I printed the modified case part with Amolen wood grain PLA, looks like this when all assembled:

