The main steps of this project are the following:
- Generate two instances of Camera class and Perspective class that will be used repeatedly
- Correct distortion images
- Combine color transforms and gradients to find lane line edges
- Apply a perspective transform
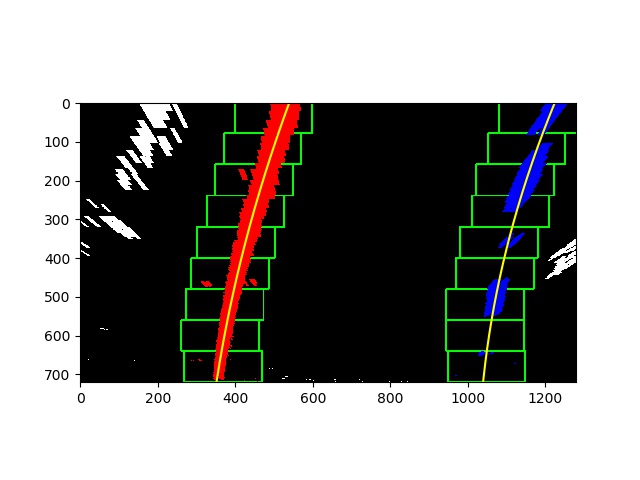
- Detect lane line pixels to fit a quadratic polynomial
- Lane lines' sanity check
- Smooth the lane lines
- Calculate the radius of curvature and vehicle position with respect to center
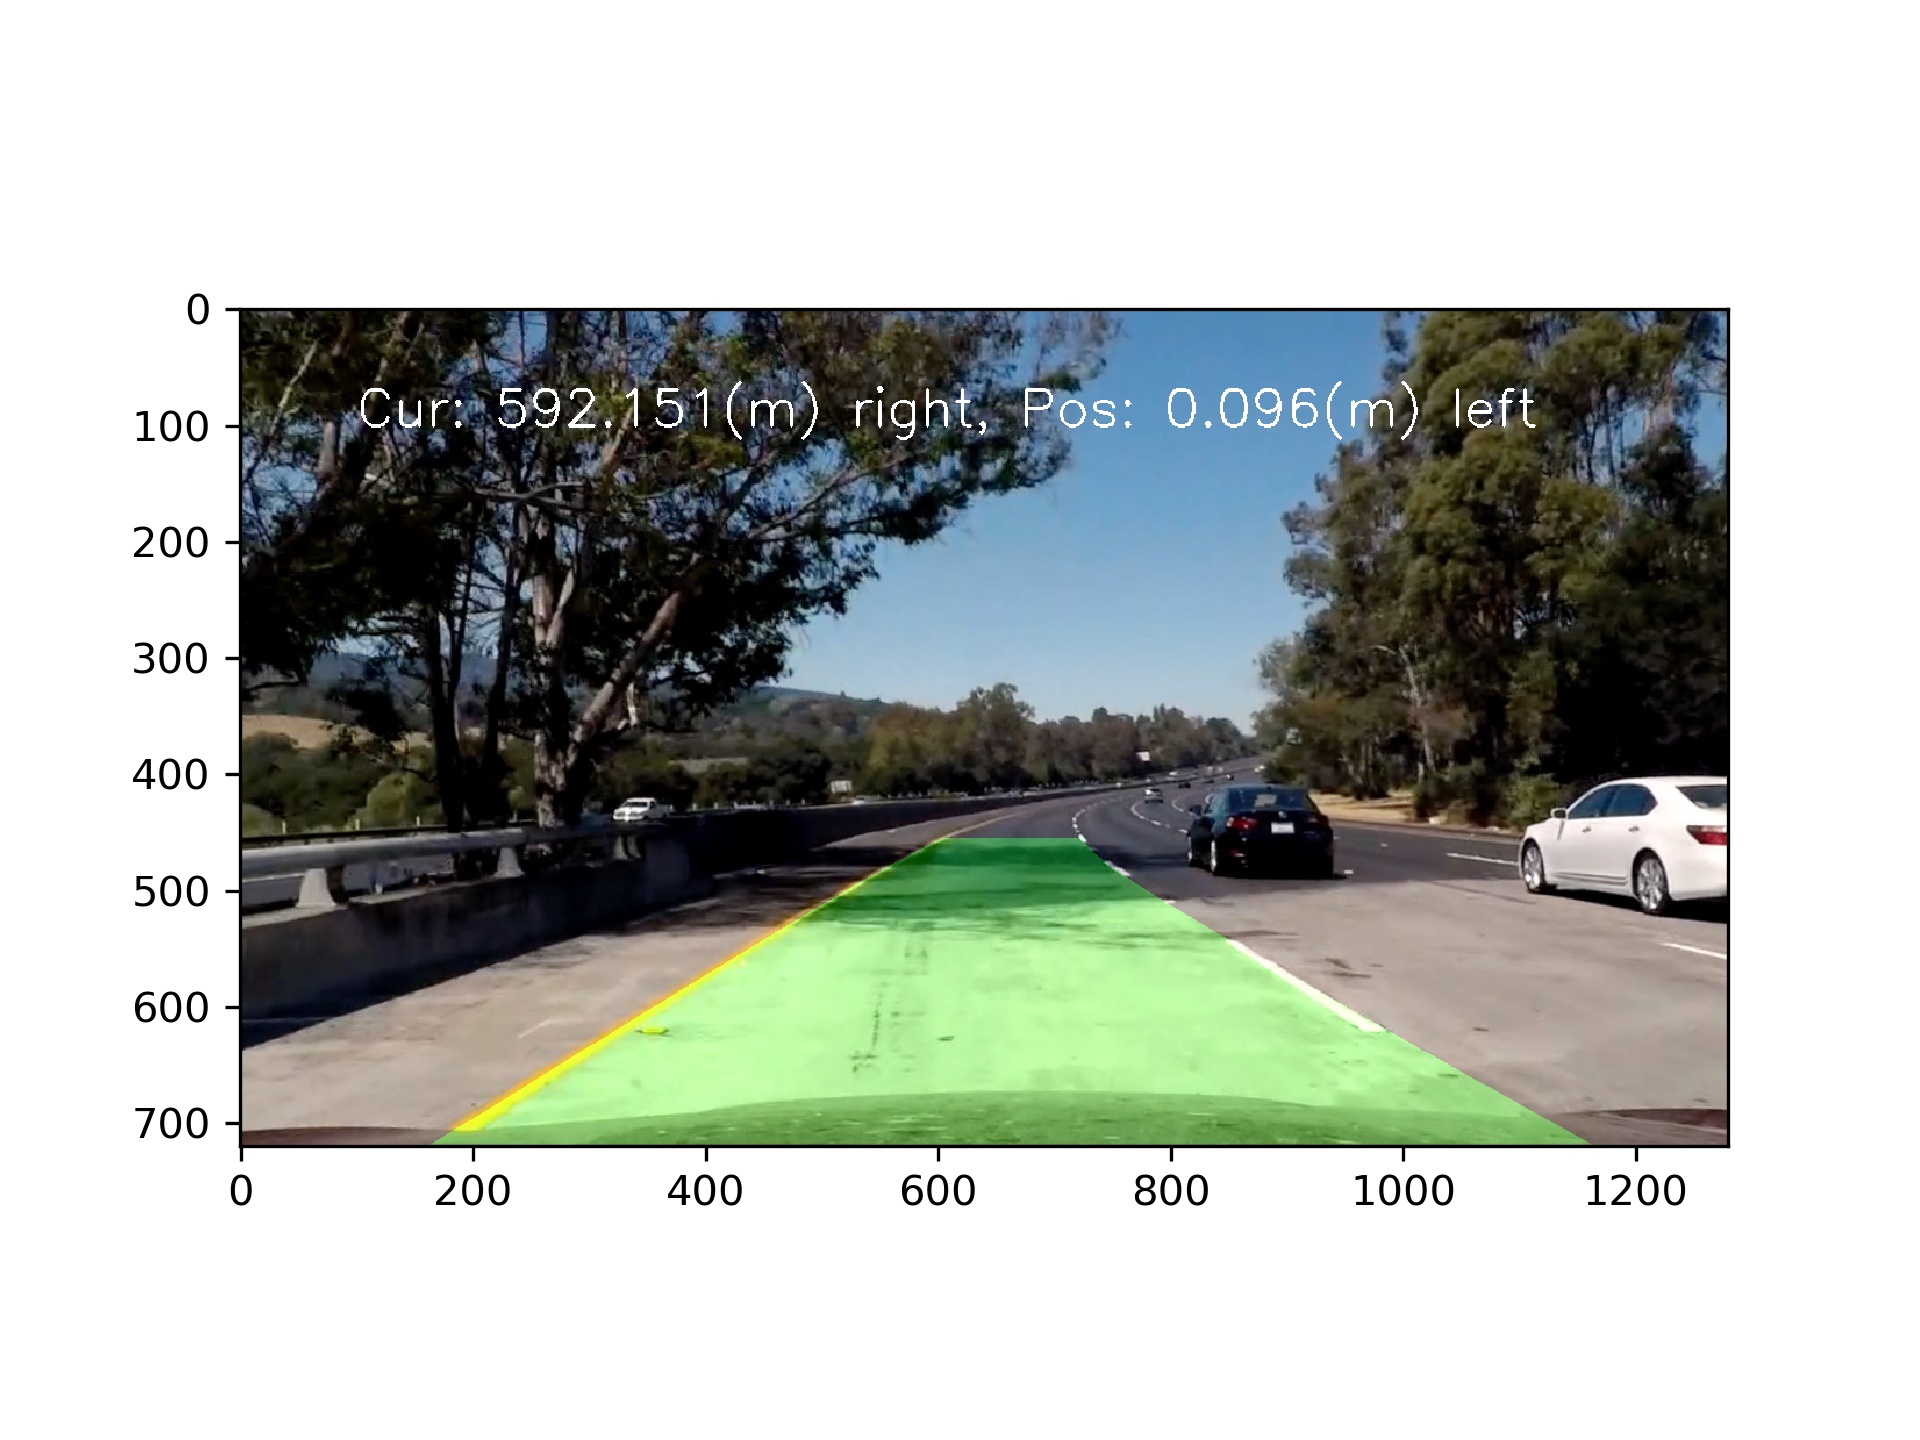
- Warp the detected lane boundaries back onto the original image.
- Output visual display of the lane boundaries and numerical estimation of lane curvature and vehicle position.
This code pre_process() starts in line #254.
The whole project starts from a function named pre_process(), which will return two instances of Camera class and Perspective class.
The Camera class is used for camera calibration and image correction.
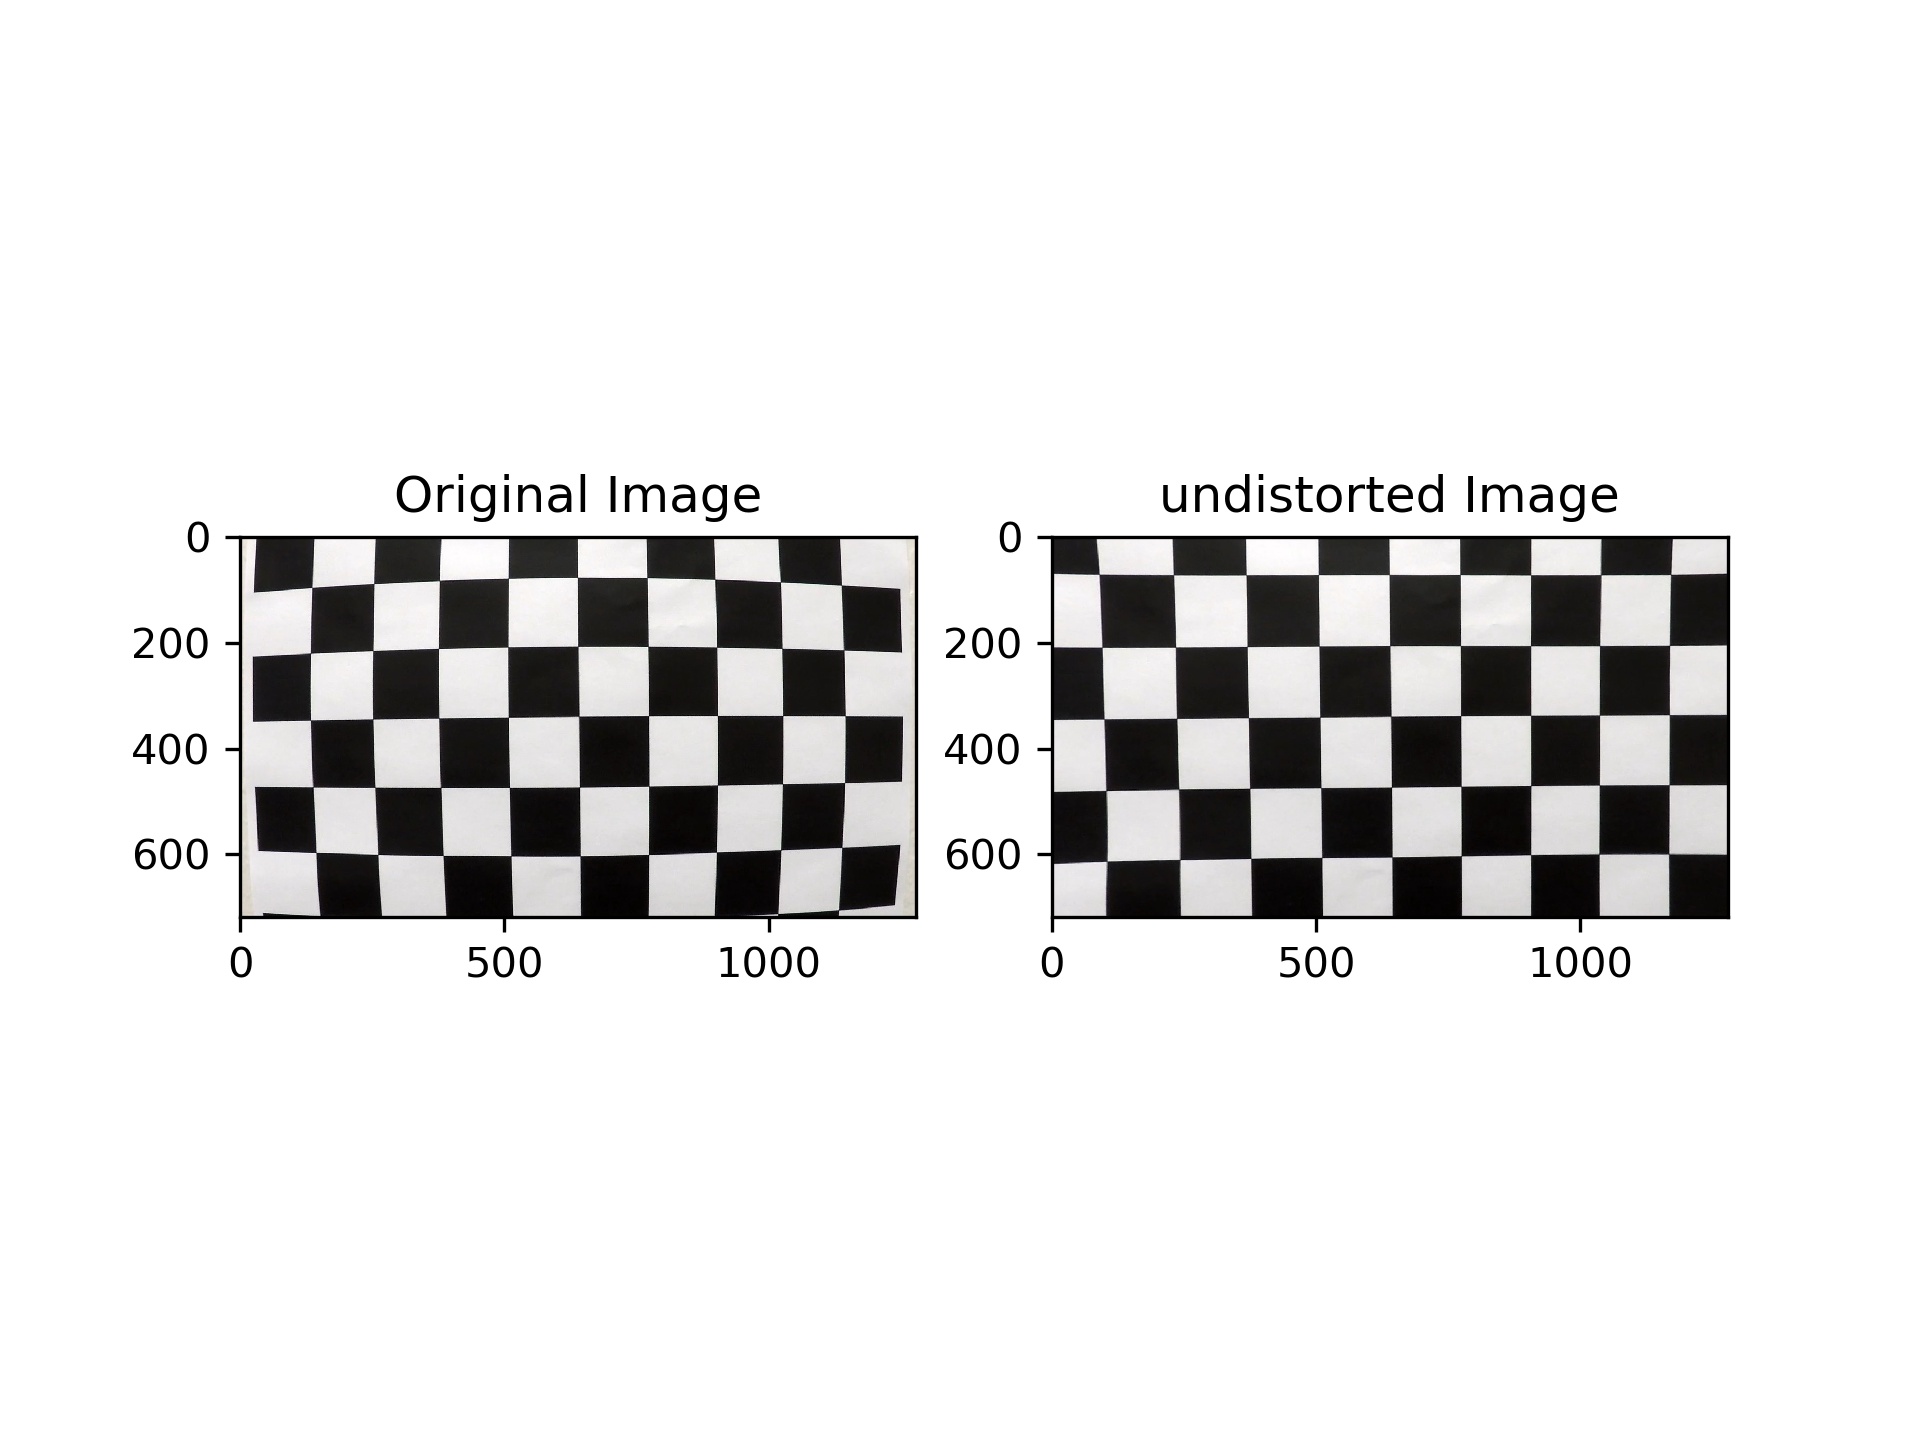
In function camera_calibration(), first I defined an array of 9x6x1 object points named obj_p which represents the 9x6 chessboard corners in the real world (3D).
Then by applying cv2.findChessboardCorners() on images in the camera_cal folder, I got one list of img_points corresponding to each image, and one list of obj_points which would be appended with a copy of obj_p whenever the chessboard corners in the image were detected successfully.
Finally by applying cv2.calibrateCamera() on img_points and obj_points, I got the camera calibration and distortion coefficients. Using cv2.undistort() and these two outputs I could apply correction to the distorted images. Here is an example below.
The perspective class is used for perspective transformation and its reverse.
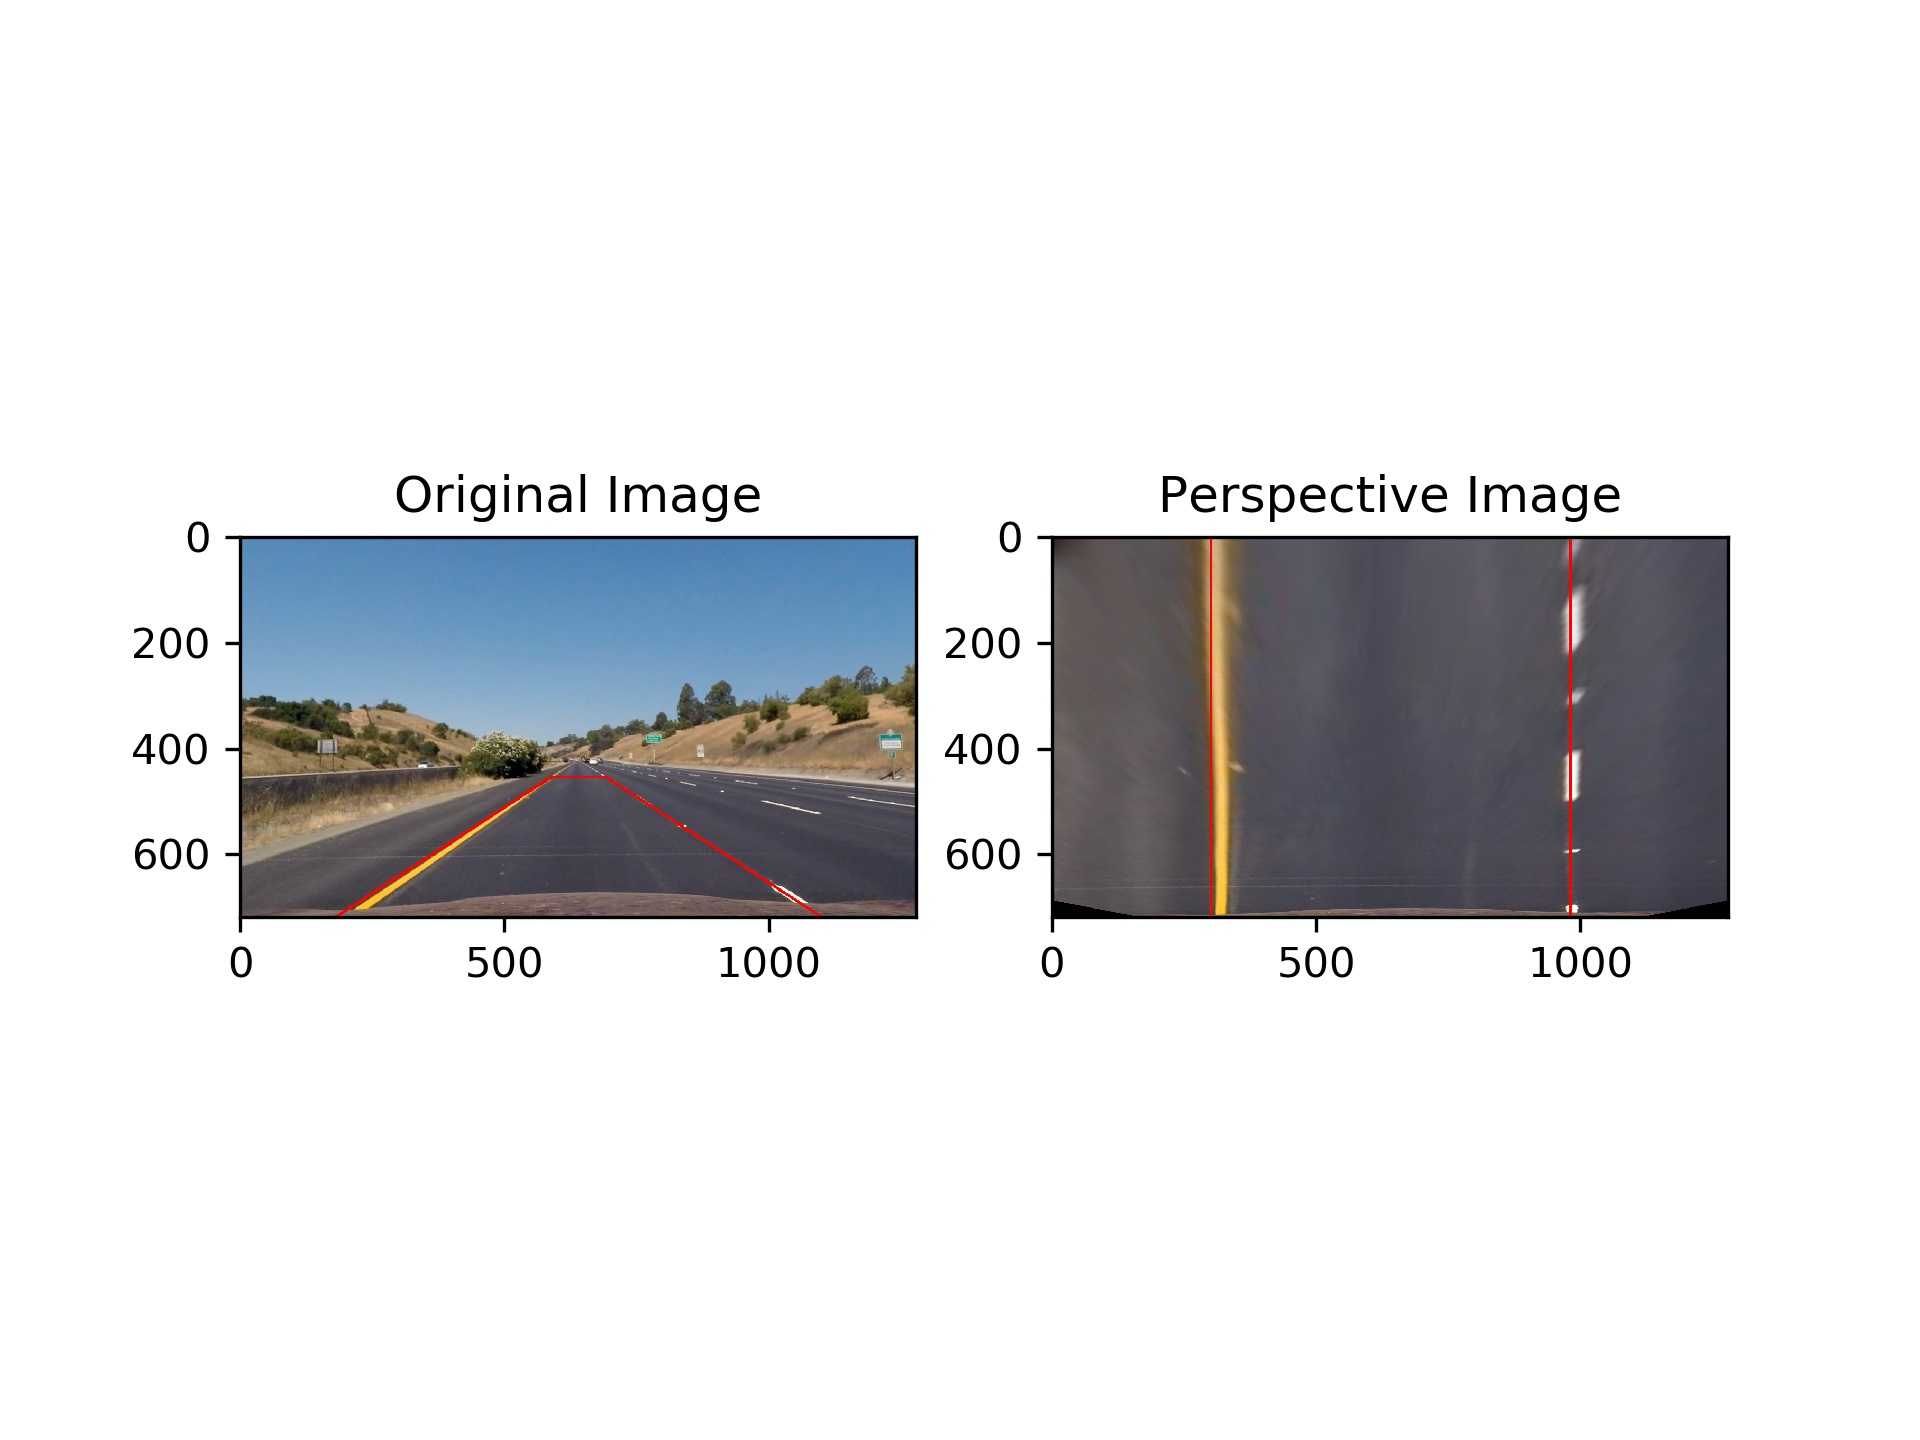
To calculate the transform matrix, I chose test_images/straight_lines1.jpg as my test image and used it to locate src and dst points.
The goal was to define a trapezoidal area along the lane lines, then map it into a rectangular area by perspective transformation, and keep the mapped lane lines exactly coincident with the edges of the rectangular area. Below are my definitions:
| Source | Destination |
|---|---|
| 588, 455 | 300, 0 |
| 692, 455 | 980, 0 |
| 1100, 720 | 980, 720 |
| 180, 720 | 300, 720 |
Then applying cv2.getPerspectiveTransform() with these points, I calculated the perspective transform matrix and its reverse matrix.
Here is an example.
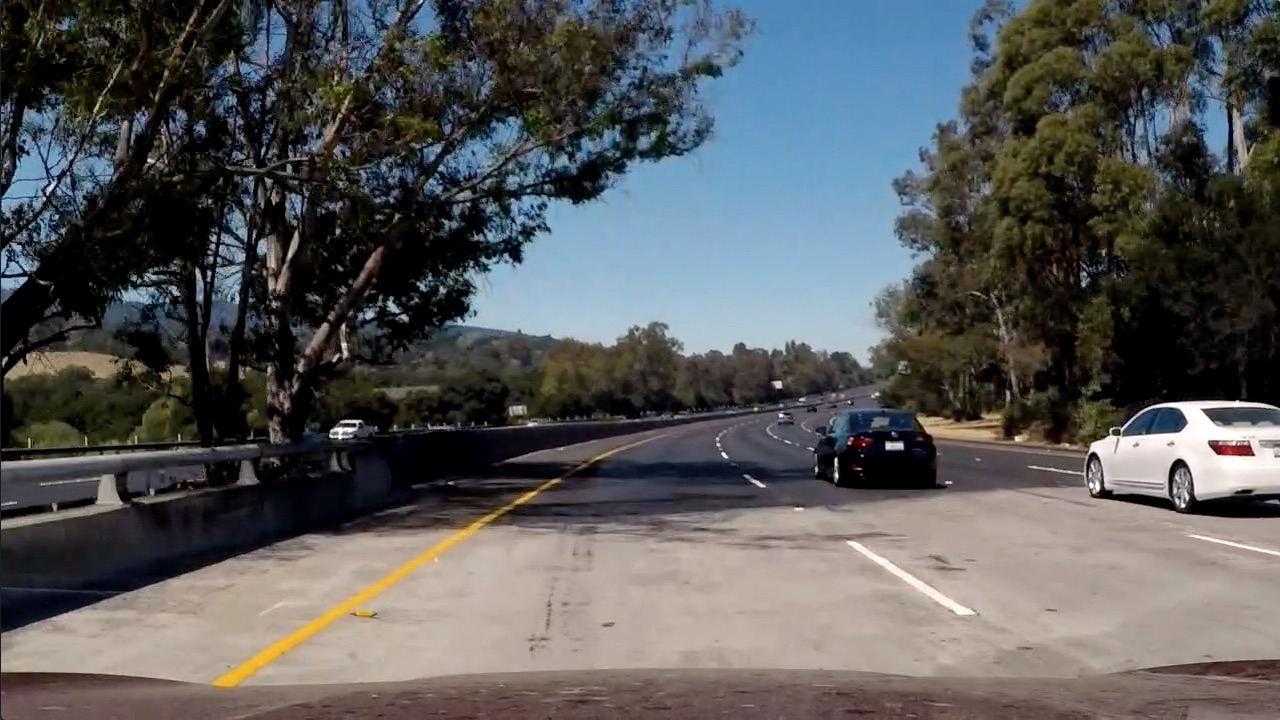
This code find_lane_line() starts in line #269 and the original image is shown below.
This code edge_detection() starts in line #70.
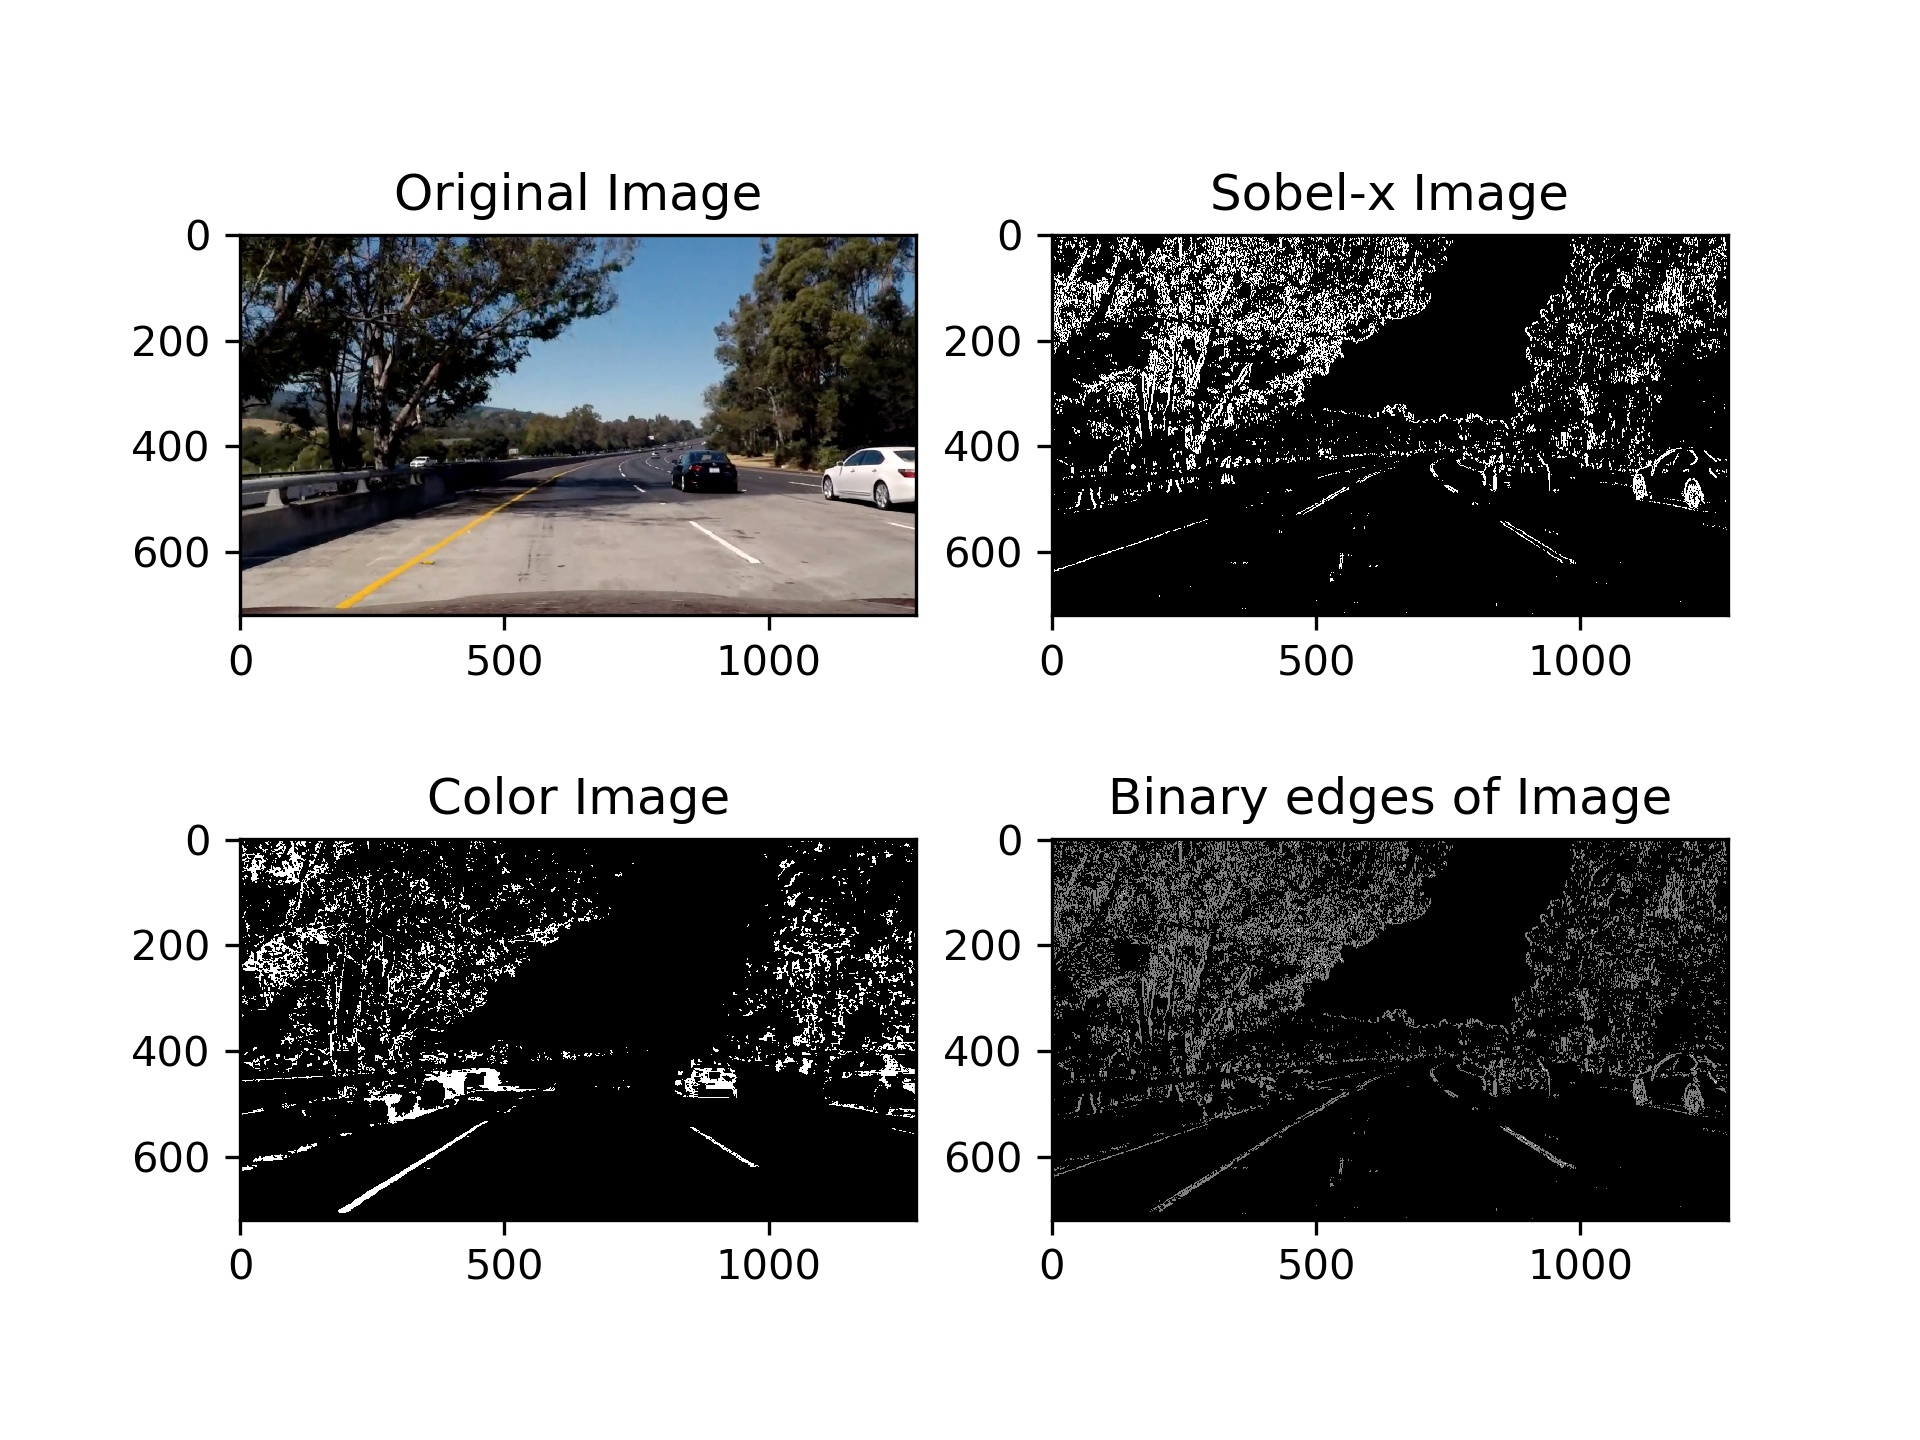
In order to get a lane line binary image as clear as possible, I used both gradient and color space thresholds and combined the results together.
For gradient magnitude thresholds I started using cv2.Canny() but it didn't work well enough because there was too much noise near the lane line.
So I used cv2.Sobel() only at x-axis direction instead and this time it seemed much better.
And the advantage of this method was that the lines perpendicular to the x-axis direction will be clear enough even if the lane line was far away or the color was turbid.
I also transformed the image from RGB space to HLS space and applied thresholds on the s-channel. Mostly it would perform a robust result and wouldn't be disturbed by lightness. But there were also many horizontal lines that were detected such as shades, so I added a gradient direction filter which would only focus on lines with certain angles.
Then I combined the sobelx result, the color_img result and the grad_dire_img result together, below is the sample image.
This code predict_lane_line() starts in line #571. The following is the pseudo code for this function.
# init params
lane_line.detected = False

# judge if lane line is detected or not
if lane_line.detected is True:
    tmp_lane_fit = search_from_poly(img)  # search lane line using prior polynomial
else:
    tmp_lane_fit = sliding_window(img)  # search lane line using sliding window

# check whether the lane_fit detected make sense or not
if sanity_check(tmp_lane_fit) is True:
    lane_line.detected = True
    smooth_lane_fit = line_smoothing(tmp_lane_fit)  # use pixels of recent good lane_fit to smooth the lane line
else:
    lane_line.detected = False
    smooth_lane_fit = last_smooth_lane_line  # use the last good smooth_lane_fit

# use the smooth_lane_fit the calculate the radius of curvature and the vehicle position
curvature, position = calc_curvature_and_position(smooth_lane_fit) This code starts in line #286. Below is the sample image.
This code starts in line #416.
This code starts in line #510.
In order to check whether the detected lines were reasonable, I checked them from three aspects.
First I calculated the curvatures of the left and right lines in order to check the directions of them. If directions were opposite, they must be two straight lines and both of their curvatures should be very large values. And if directions were the same, their curvatures should be very close.
Then I checked the distance between the two lines at the bottom of the image. It should be about the half width of the image.
Finally in order to check if the two lines were roughly parallel or not, I chose the top, middle and bottom y values to calculate their derivatives. If the lines were parallel, their derivatives at the same position should be close.
This code starts in line #551.
In this function, I used a fixed length queue to hold good lane line positions of several recent frames. And I used all these positions to calculate smooth lane line polynomial.
This code starts in line #450.
This code starts in line #614.
To warp the results back, first I calculated all points on the lane line polynomial.
Then I drew the lane line area using cv2.fillPoly(), and warp the result back to original image space using inverse perspective matrix perspective.reverse_warp().
Here is an example below.
This code my_pipeline_with_video() starts in line #678.
Here's a link to my video result
Now for my project there are still four main problems I know need to be solved.
- When the video image is jittered, the lane line detection will have an instantaneous offset.
- There shouldn't be any vertical lines near the lane line, otherwise, it is easy to misidentify.
- The position of the lane line should be in the middle of the image. If there is too much offset, the recognition will fail.
- There must be two left and right lane lines. If one of them is occluded, the recognition will fail.
My promotion ideas:
- Identify lane line colors, add yellow and white lane line filters.
- Expand the lane recognition area, not limited to the center of the image.
