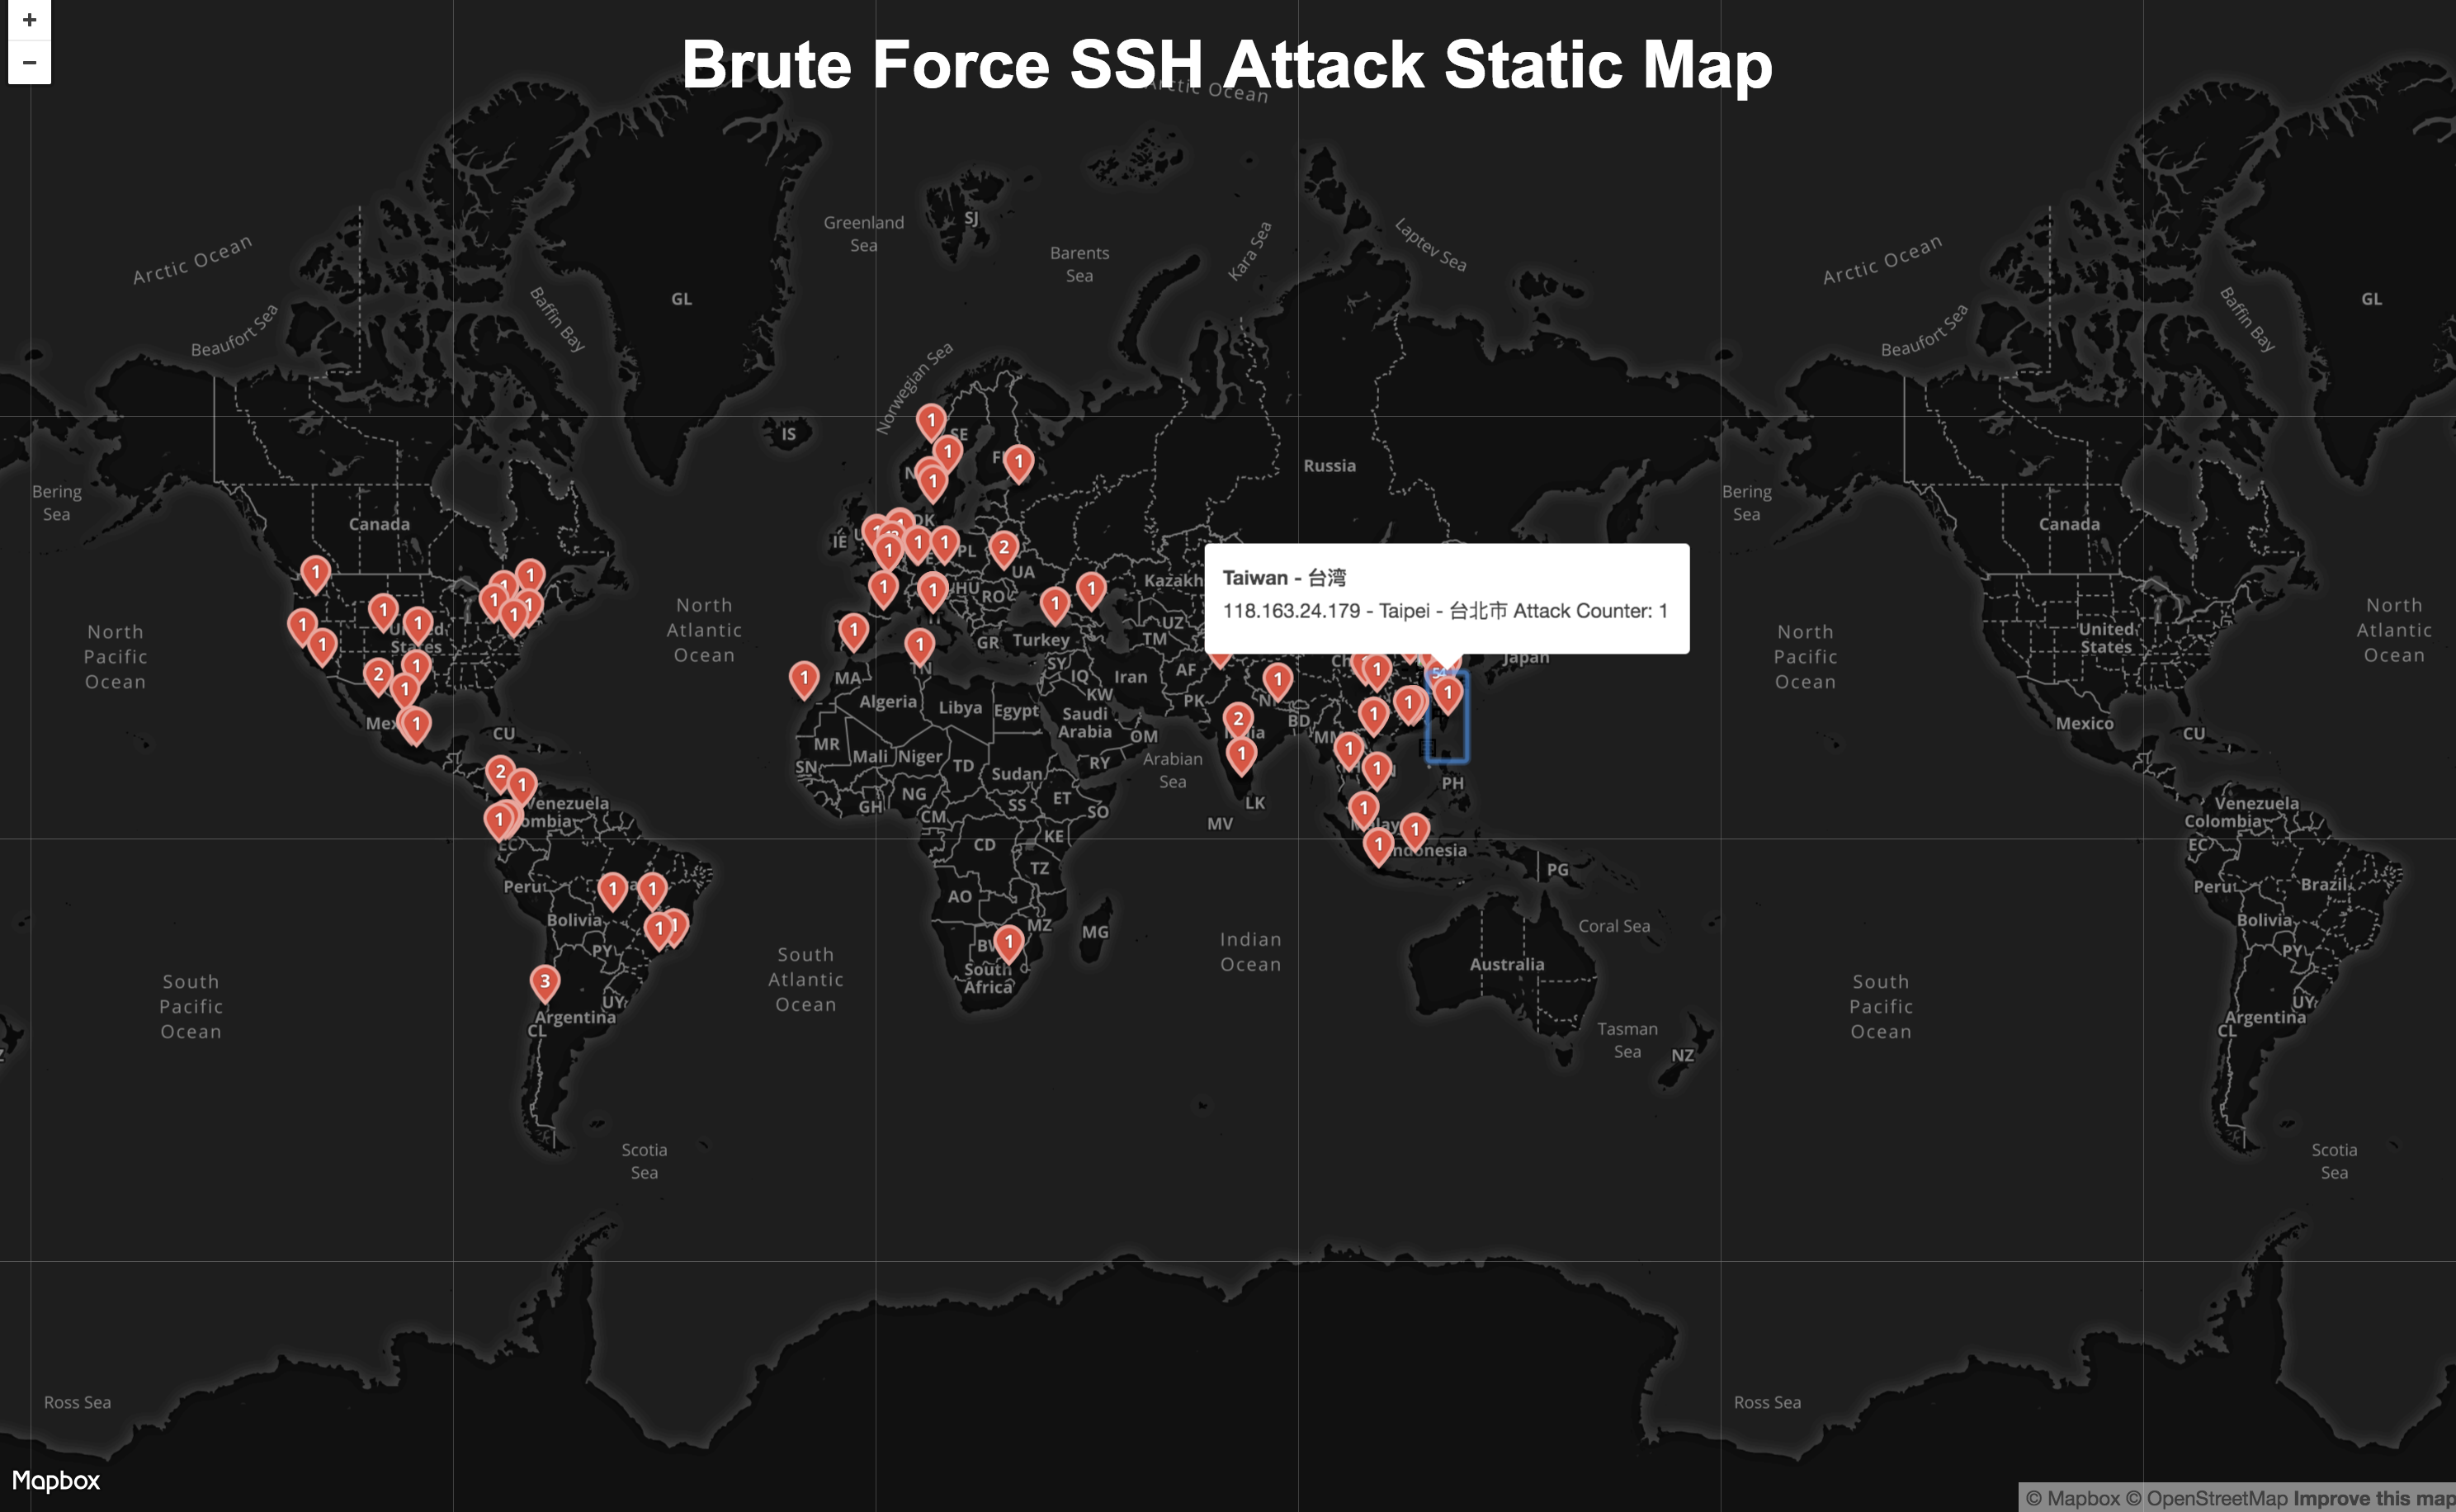
本项目只支持 Python3.6+ 版本
因为之前买的一个 Vultr VPS 一直遭到 SSH 暴力破解,也是够烦人。你们尽管猜,猜出来算我输!
于是一个想法在我脑海中展开,统计 /var/log/auth.log 下日志,找出那些个无聊的 ip ,可视化统计出具体的地理位置。反正那些日志闲着也是闲着。
功能单一,仅仅是为了展示,有时间再添加骚想法。
检出源码:
git clone [email protected]:Xarrow/py-attack-map.git安装依赖
pipenv install 或者
pip install -r requirements.txt可选择项
$ python py_attack_map.py -h

usage: Py Attack Map [-h] [-p PORT] [-f FILE] [-d DEBUG] [-v]

Py Attack Map Author: Helixcs

optional arguments:
  -h, --help            show this help message and exit
  -p PORT, --port PORT  port (default: 6789)
  -f FILE, --file FILE  auth log file path (default: sample_auth.log)
  -d DEBUG, --debug DEBUG
                        is debug (default: False)
  -v, --version         show program's version number and exit
运行
python py_attack_map.py -f /var/log/auth.log gunicorn -w [worker count] -b [bind port] 'py_attack_map:gunicornApp([file="auth log path(default '/var/log/auth.log')"])'
例如:
auth.log 日志位于 /var/log/auth.log , gunicorn 绑定 6789端口;
gunicorn -b 0.0.0.0:6789 'py_attack_map:gunicornApp(file="/var/log/auth.log")'
auth.log 日志位于 /var/log/auth.log , gunicorn 绑定 6789端口 ,使用 4 个进程;
gunicorn -w 4 -b 0.0.0.0:6789 'py_attack_map:gunicornApp(file="/var/log/auth.log")'
auth.log 日志位于 /var/log/auth.log , gunicorn 绑定 6789端口,使用 4 个进程,后台运行;
gunicorn -b 0.0.0.0:6789 -w 4 --daemon 'py_attack_map:gunicornApp(file="/var/log/auth.log")'
详细 gunicorn 配置参考: https://docs.gunicorn.org/en/stable/settings.html
浏览器访问 https://127.0.0.1:6789/attack_map_view,默认6789端口;
在线demo : https://45.76.76.243:6789/attack_map_view
-
MapBox地图实现。 因为 Google Map API 现在收费。 -
GeoIp2IP 地址精简数据库。 -
通过 Linux 命令统计
auth.log日志, 实现比较丑陋。
