(https://github.com/VirtualWhirlwind/vscode-povray2)
The Persistence of Vision Raytracer is a high-quality, free software tool for creating three-dimensional graphics by using a Scene Description Language.
This extension allows you to use Visual Studio Code to edit POV-Ray Scene Description files and render them using POV-Ray in the integrated terminal.
- After installing POV-Ray and this extension, open the Extension Settings and be sure to fill in:
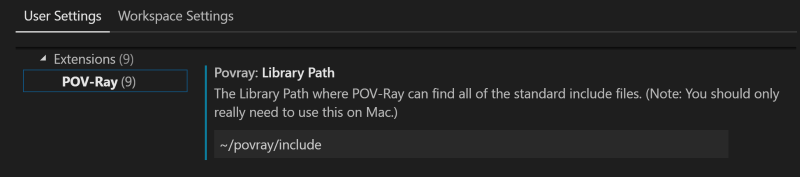
- Library Path
- Pvengine Path
- Start creating .pov files and use the "P" button in the upper right to trigger rendering
- Rendering errors are not shown in VSCode yet, you need to open the pov file in the POV-Ray editor to see scene problems
POV-Ray for VS Code Extension on GitHub
POV-Ray for VS Code Extension in the VS Code Marketplace
POV-Ray for VS Code Extension in the Open VSX Registry
- Snippet improvements
- Development package updates
- Additional QOL improvements
- Removed INI syntax highlighting
- Miscellaneous QOL improvements
- Added code completion (similar to IntelliSense) for several default library files when the LibraryPath is provided.
- Forked from J. Max Wilson's code (as that repo has been quiet for a while).
- Fixed issues that appeared when VSCode made backend changes.
- Made a tweak to support a security change ion POV-Ray.
- Prep work for possible future updates.
- Library Updates to address security vulnerabilities in 3rd party package.
-
Render the current .pov or .ini scene file by clicking the POV-Ray render icon in the editor menu or by using the VS Code build task key combination
ctrl-shift-b.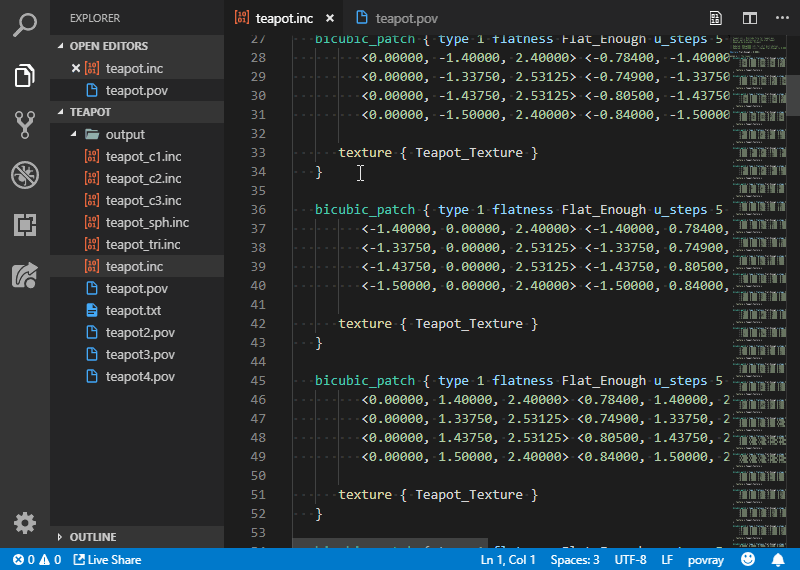
-
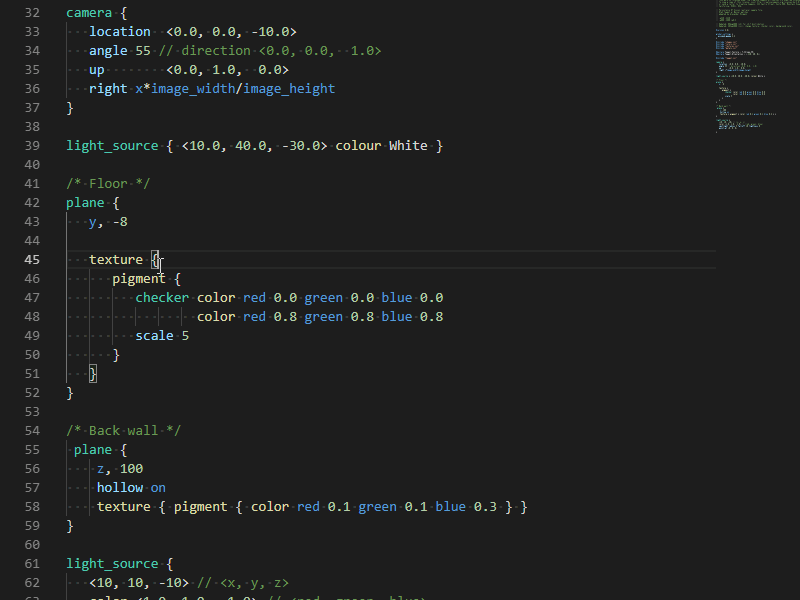
Includes Syntax Highlighting and Snippets for common POV-Ray scene elements

-
Includes Basic Code Completion from the standard INC files for several POV-Ray scene elements
-
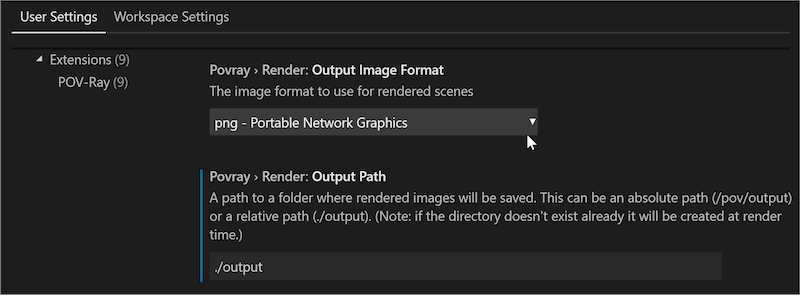
Control output image format and output path through User and Workspace settings
-
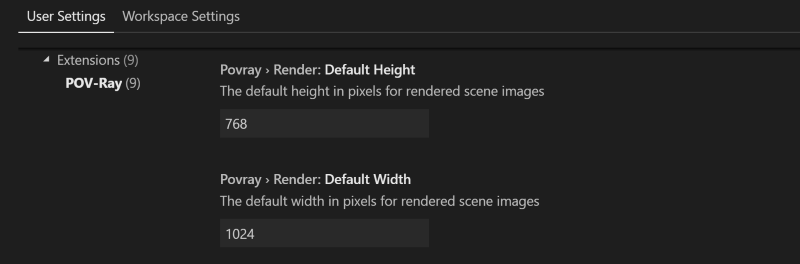
Set default image dimensions for rendered images
-
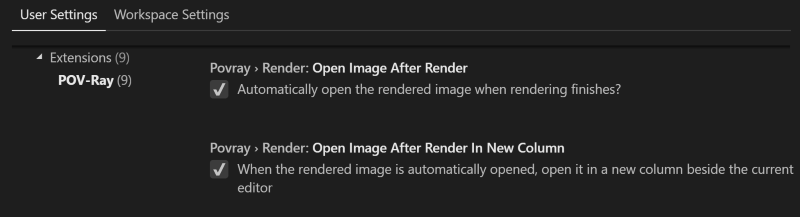
Option to open the rendered image when rendering completes.
-
Enjoy built in VS Code features like bracket matching, code folding, and comment toggling
-
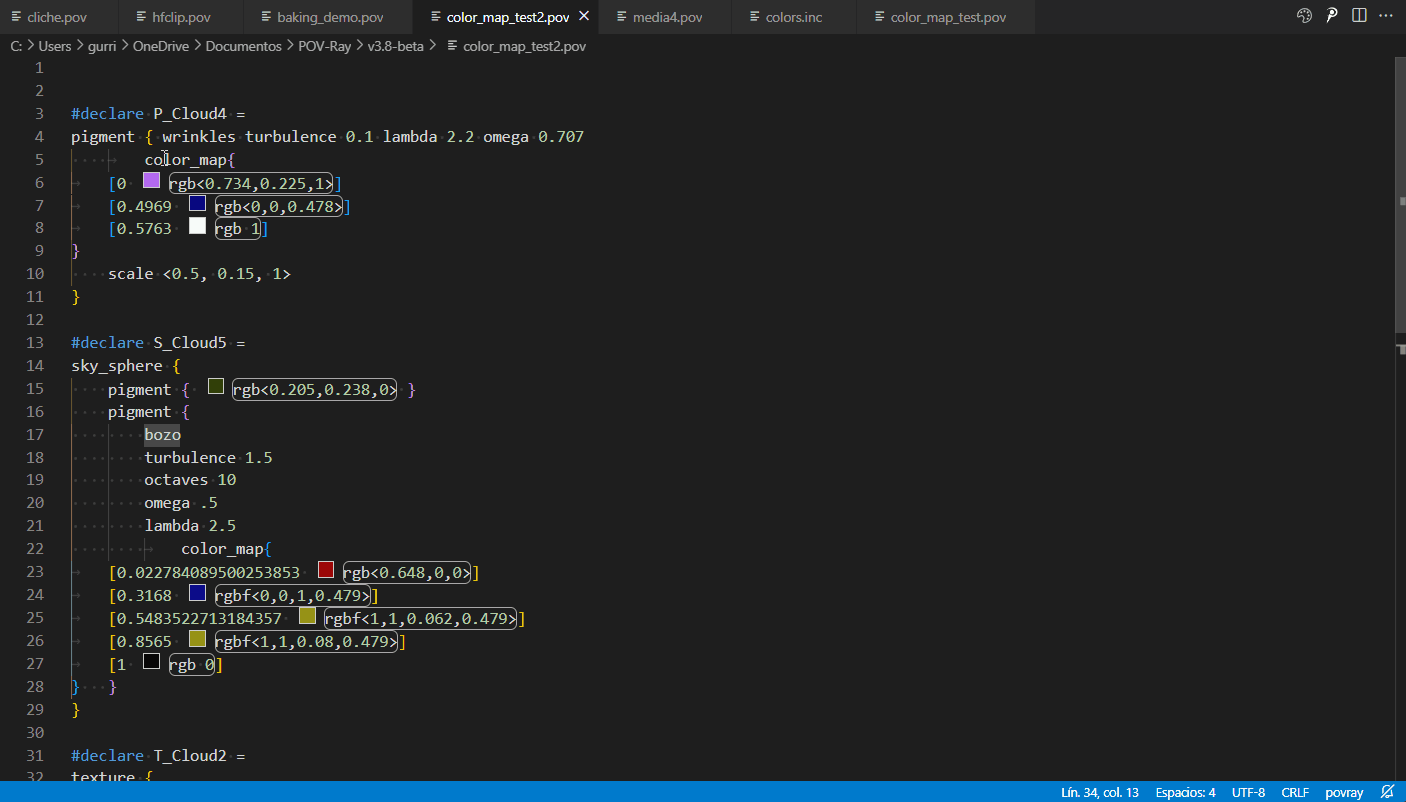
Preview of colors in the scene file
-
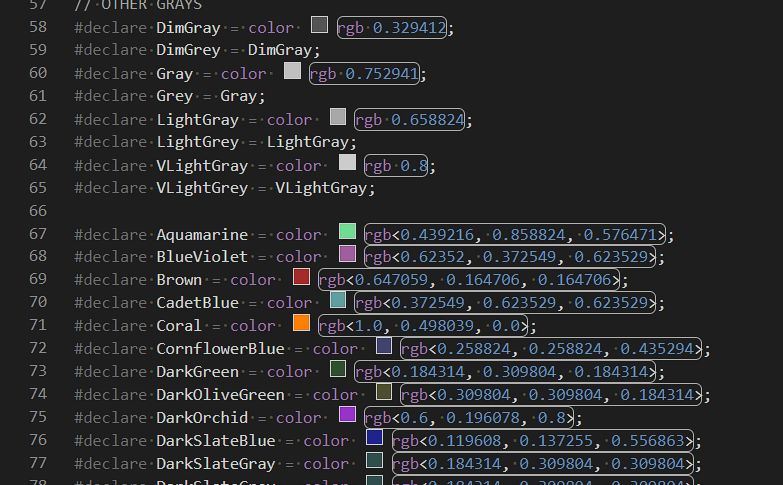
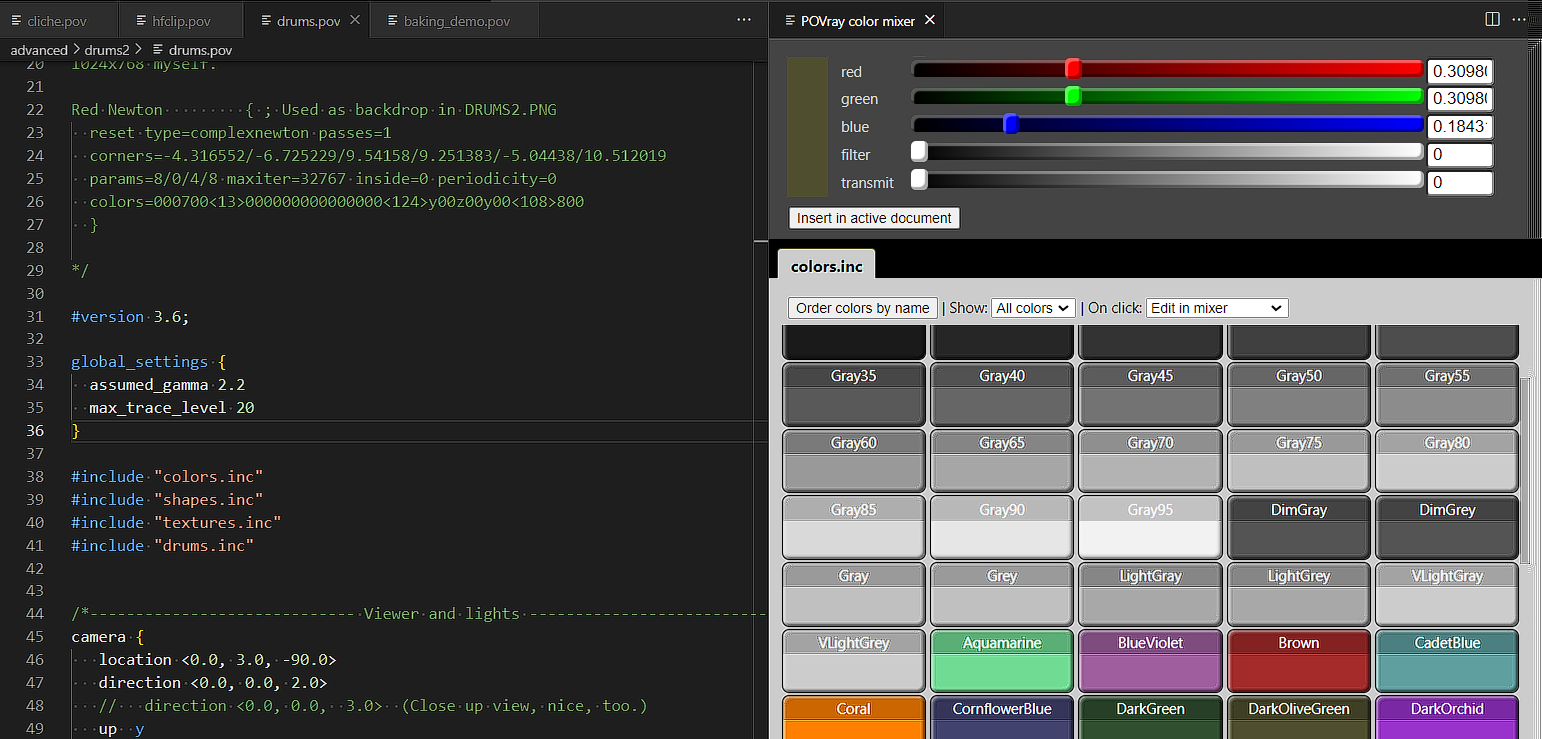
Color editor and browser for colors declared in "colors.inc" if the library path is stablished in the configuration
-
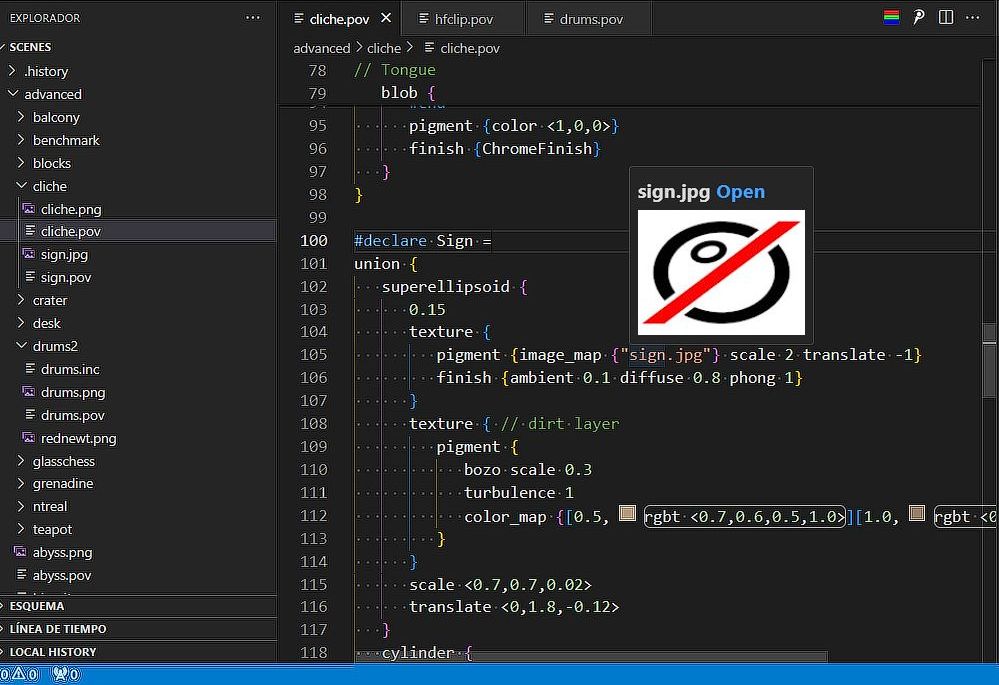
Preview of images on hover for image_map and height_field
-
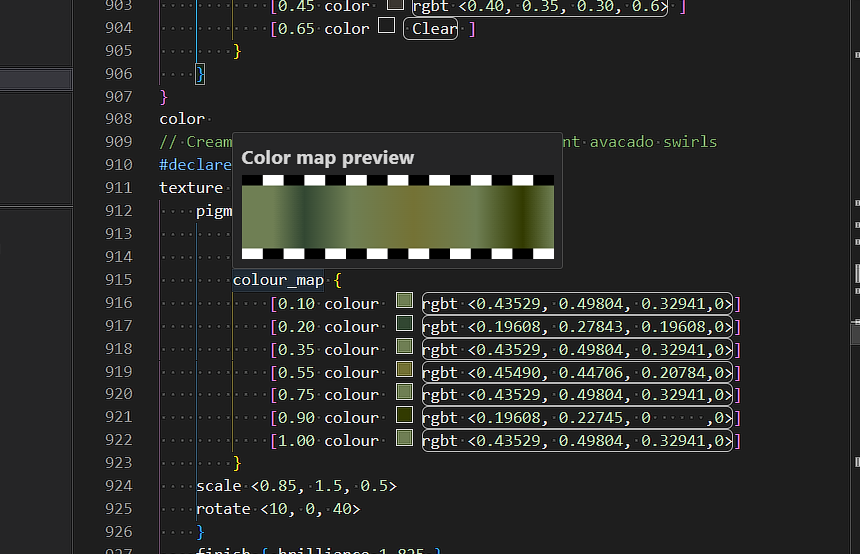
Preview of color_maps on hover
 <<<<<<< HEAD
 -
Viewer/editor for color_maps
 =======


19fb9eaf4d847bcddabe15ce9d02824e85b70c49
This extension does not install POV-Ray. You need to install it yourself. (Docker support suspended pending further testing)
- Please check the extension settings to configure the POV-Ray engine path.
You will need to install POV-Ray for your specific OS and you will need to make sure that it can be run via the commandline from your terminal.
sudo apt install povray
For the best experience on Windows, install the Windows Subsystem for Linux (WSL) and Ubuntu for Windows. Then configure VS Code to use C:\\Windows\\System32\\bash.exe as the integrated shell. Once you have WSL and Ubuntu working, you can install the povray package for Ubuntu exactly the same as above.
Download and run the POV-Ray installer for Windows:
http:https://www.povray.org/download/
Make sure the full path to pvengine.exe is added to your PATH Environment Variable so that it can be run from Powershell or the Windows command line.
You may also have to turn off Script I/O Restrictions in the POV-Ray Options.
Download the unofficial Command line POV-Ray 3.7.0 final for Mac:
http:https://megapov.inetart.net/povrayunofficial_mac/finalpov.html
Using the terminal, unzip the downloaded file and move the extracted files into ~/povray :
unzip PovrayCommandLineMacV2.zip && mv PovrayCommandLineMacV2 ~/povray
Create a povray symlink in /usr/local/bin to run Povray37UnofficialMacCmd :
ln -s ~/povray/Povray37UnofficialMacCmd /usr/local/bin/povray
Modify the POV-Ray Extension Settings in VS Code to set the Library Path to ~/povray/include
Forked from: https://github.com/jmaxwilson/vscode-povray
POV-Ray Scene Description Language syntax highlighting adapted from the atom-language-povray project by 羽洲.
POV-Ray Logo by SharkD.