If you have already set up your SAP BTP account for SAP Build Apps by using the Get Started with SAP Build Apps - Quick Account Setup link the mission overview or in the previous tile, you can skip this tutorial.
Otherwise, use the following steps to set up your account. As an alternative you could also use the provided Terraform script.
The quick set up below does not offer the Mobile Services configuration, so if you intend to Build Your App and Install it on a Mobile Device, you should use the detailed setup below.
In this section you will use a booster to (create and) set up a subaccount for using SAP Build Apps. To do this, you must be administrator of your global account on SAP BTP. You can start the booster by selecting the booster icon at this tile.
You can also start the booster from the SAP BTP Cockpit:
- Logon to the SAP BTP Cockpit and select your global account.
- Select Boosters and search for Get Started with SAP Build Apps - Quick Account Setup
- In the overview page press Start
-
After starting the booster choose the Identity Provider you are using for the user authentication of your global SAP BTP account. If you are using a Custom IAS Tenant you have to set the URL for the tenant. Then press Launch

-
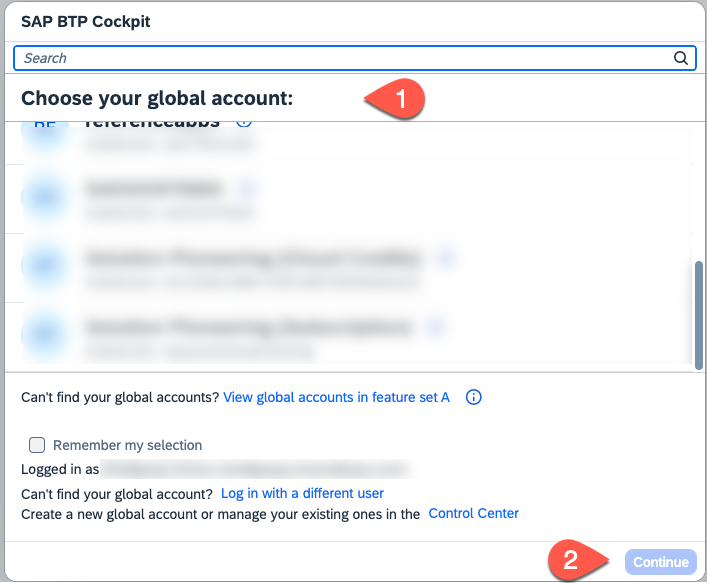
If you have access to mulitple global accounts select the one that you like to use for this installation.
-
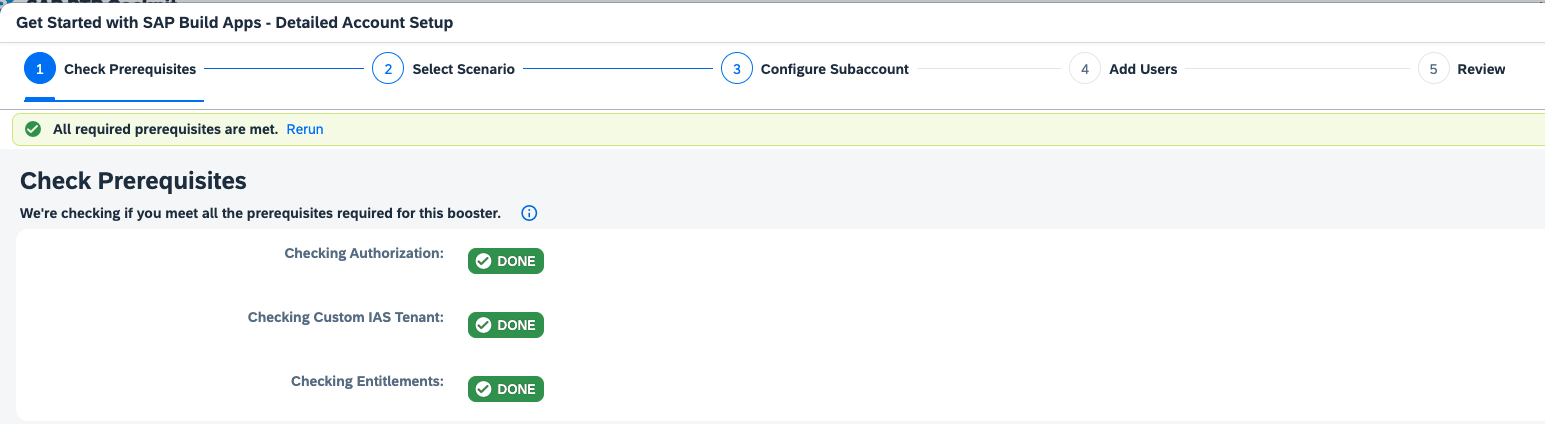
The prerequisites will be checked. By choosing the pencil icon you can change the naming of the subaccount and the plan of the service entitlements. If you are fine with those settings choose Setup my Account. If you like to use an existing subaccount or need to add additional users select Switch to Detailed Setup - see next section

-
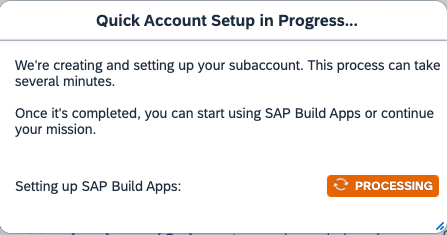
The setup will take a couple of minutes.
-
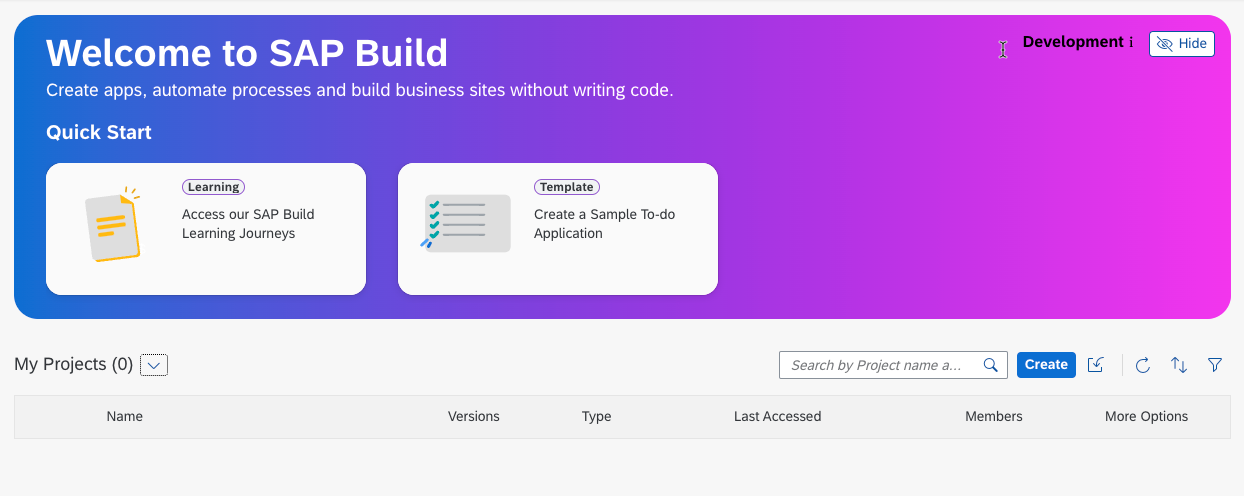
Upon successful setup, you can Open SAP Build Apps.

-
The SAP Build lobby appears.


After the Setup, you need to enable the Identity Authentication for SAP Build Work Zone - see here
-
When the prerequisites are checked successfully, press Next.
-
Select Create Subaccount or choose Select Subaccount if you want to set up an existing subaccount and press Next.

-
Set SAP Build Apps and SAP Build Workzone, standard edition. For testing purpose you can choose the free service plan, for productive usage take the standard plan. Set Mobile Services with the resources plan.

-
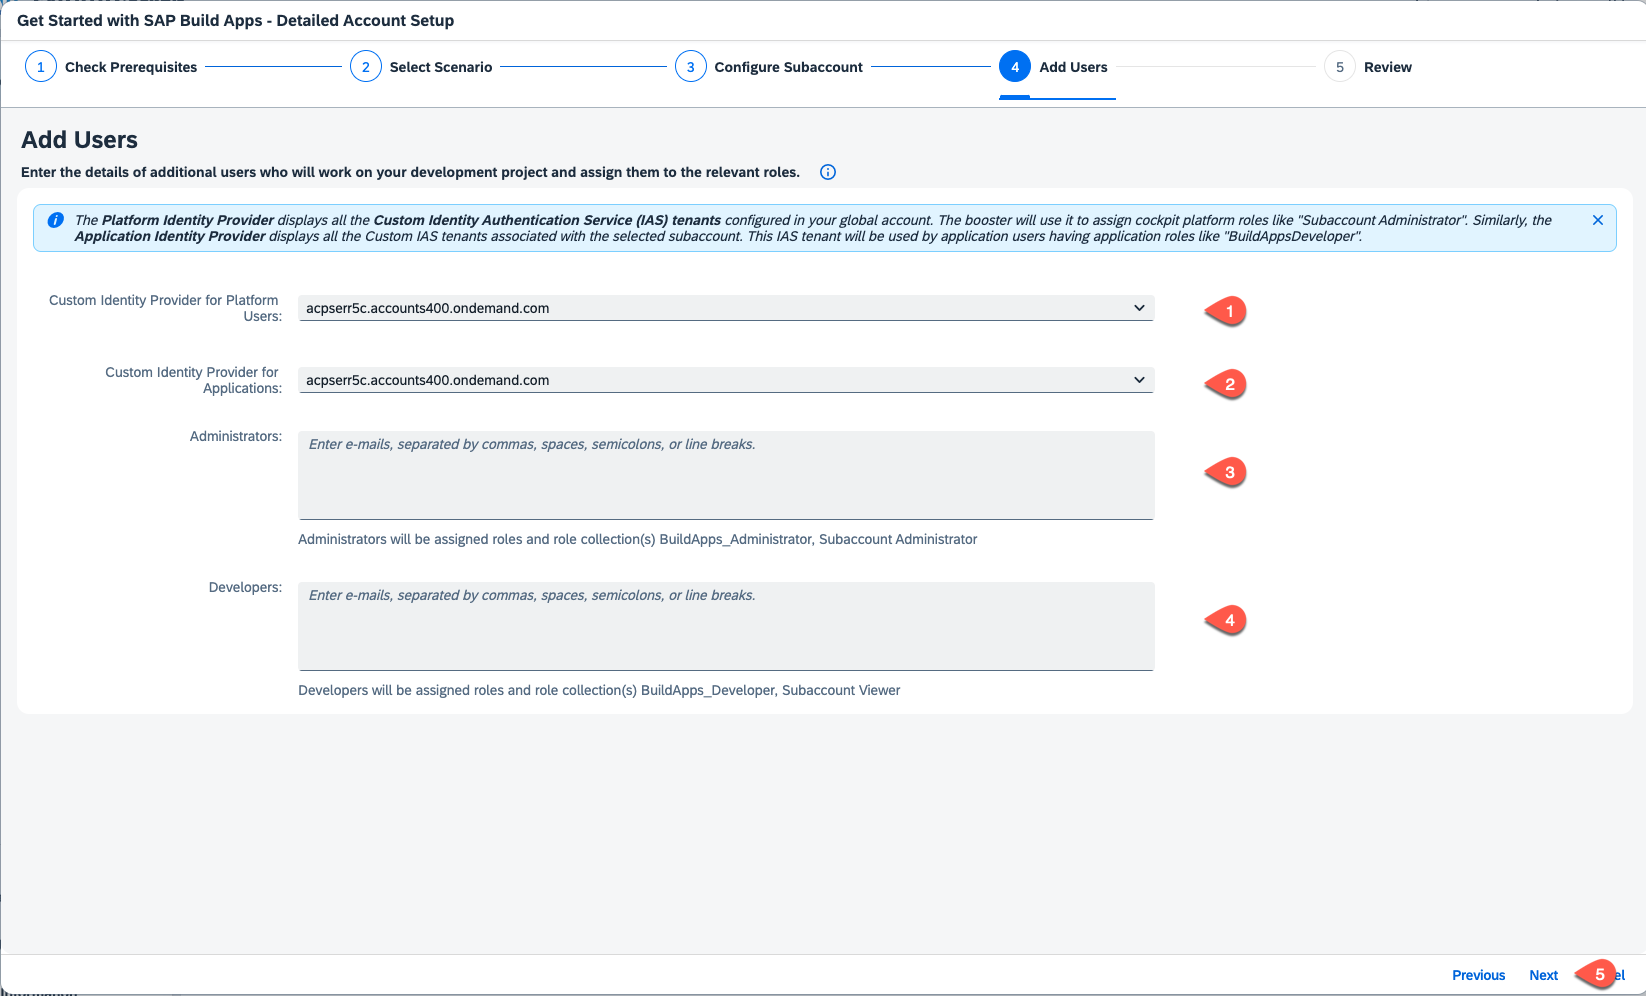
In the section Custom Identity Provider for Applications, select the tenant you want to use. Optionally, add additional administrator and developer users, then press Next.
-
Check your settings and press Finish.
-
Choose Navigate to subaccount, which will open the subaccount on another tab. Come back to this tab and press Close.


In the next step you have to enable the Identity Authentication for SAP Build Work Zone.
By default SAP Build Work Zone, advanced edition uses the SAP Authentication and Trust Management service (XSUAA) for identity authentication. This section contains the steps that you have to fulfill to switch to SAP Cloud Identity Services - Identity Authentication as the authentication mechanism.
Note: This is a one-time setup which impact all SAP Build Work Zone assets that are used in the same subaccount. But the steps needs to be made for each SAP BTP subaccount where SAP Build Apps applications are being deployed.
-
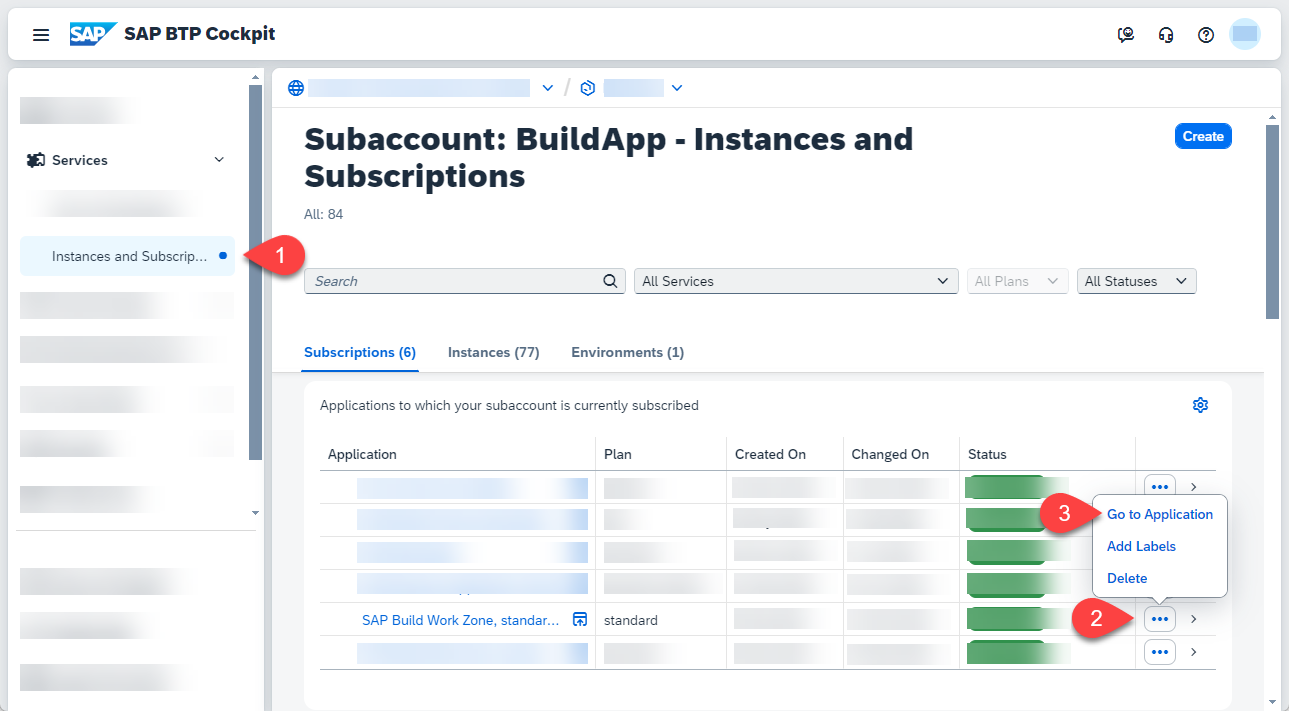
Select Instances and Subcriptions. Click on the ... of the SAP Build Work Zone, standard Edition and press Go to Application.
-
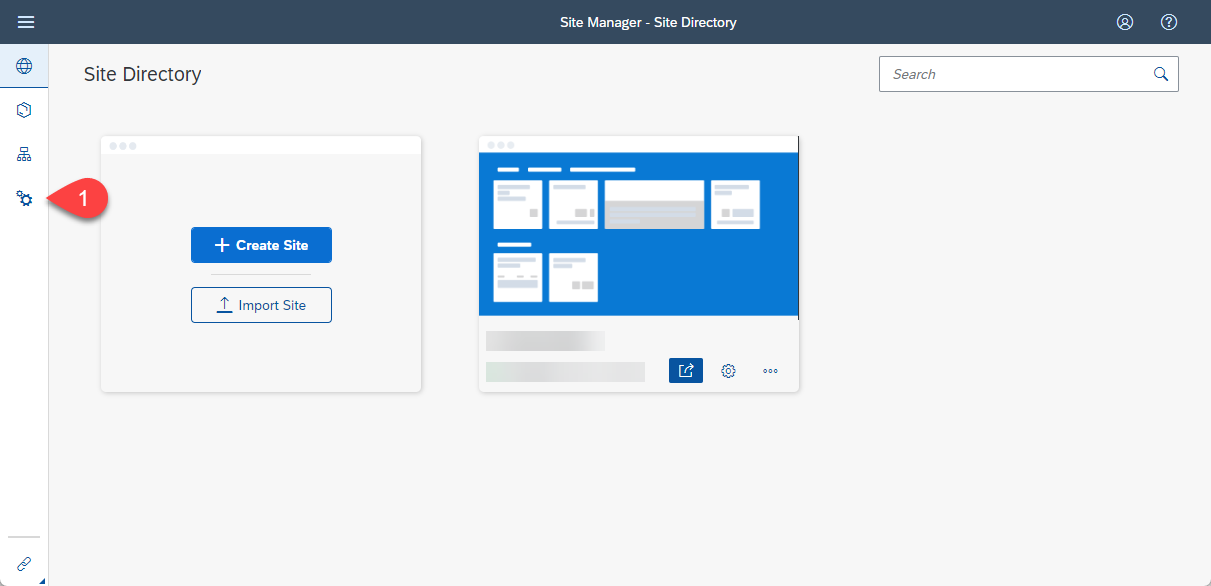
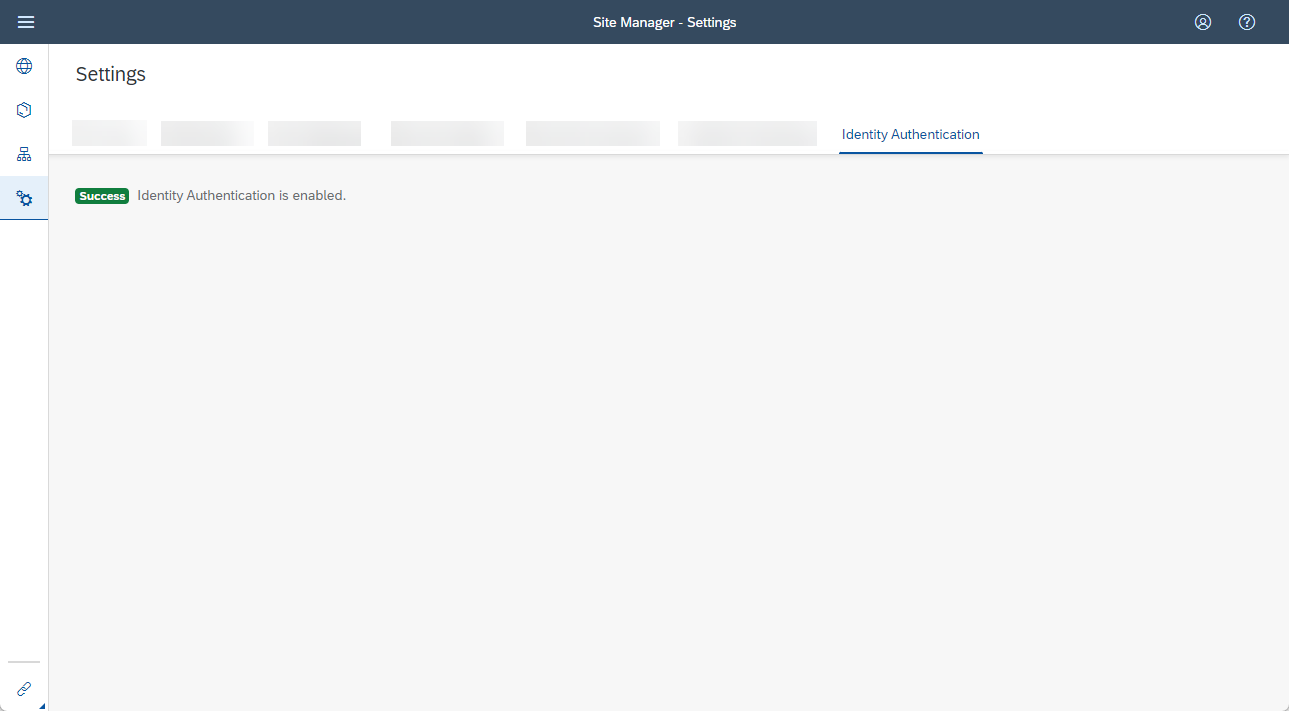
This will open the Site Manager. Click on the Settings on the side panel.
-
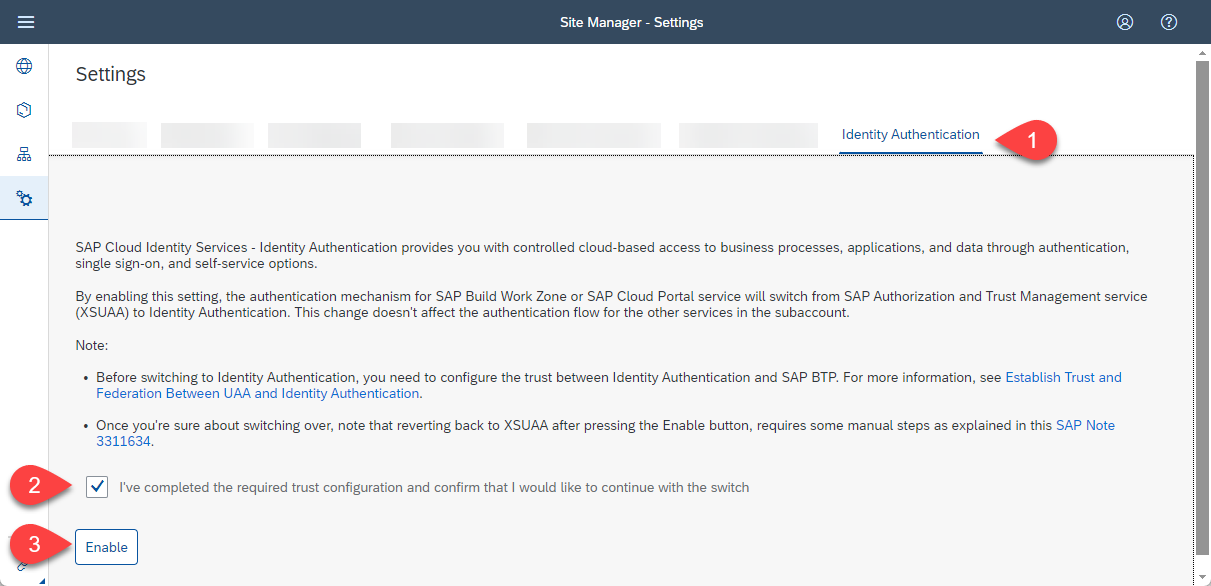
Choose the Identity Authentication tab. Then confirm that your subaccount has an active trust configuration with SAP Cloud Identity Services - Identity Authentication. Press Enable.
-
The switch can take up to 15 minutes to take effect. When the switch is done, you will see a success message.


Further information you can find in SAP Help Portal: Post Booster Configuration
-
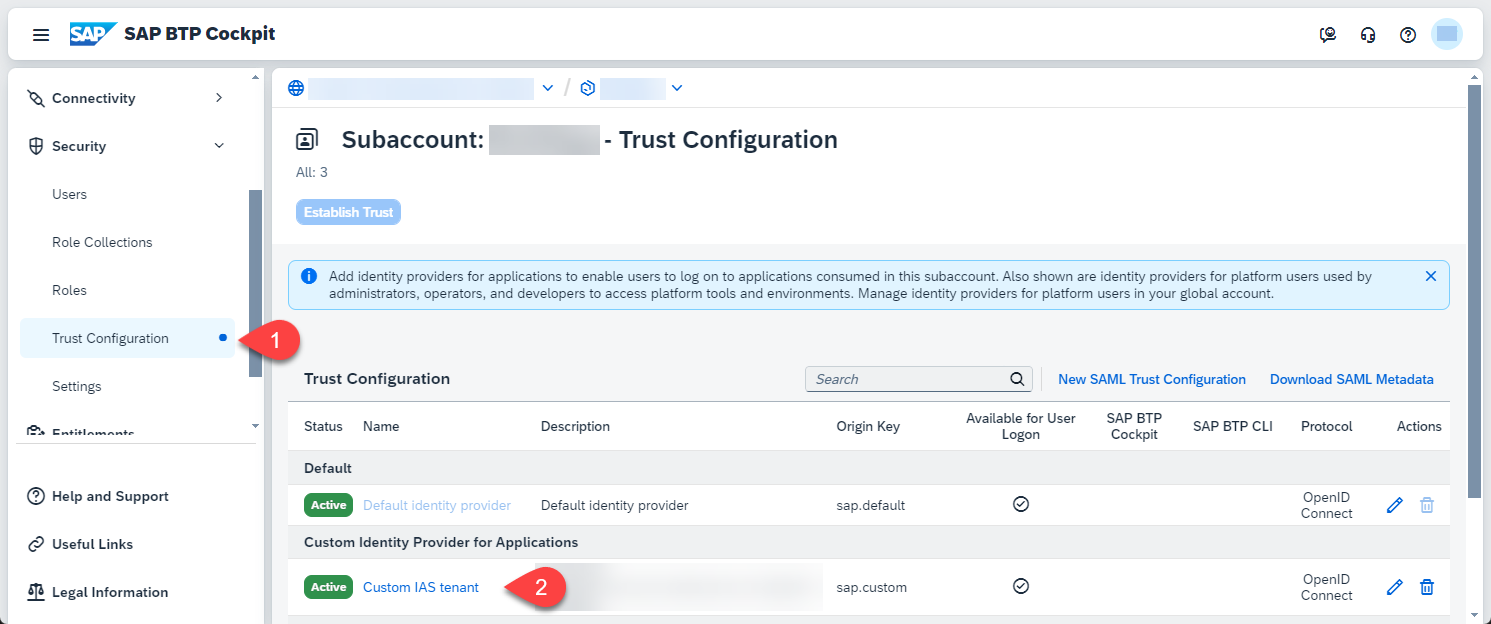
To open your Cloud Identity Services choose Trust Configuration and click on your Custom IAS tenant.
-
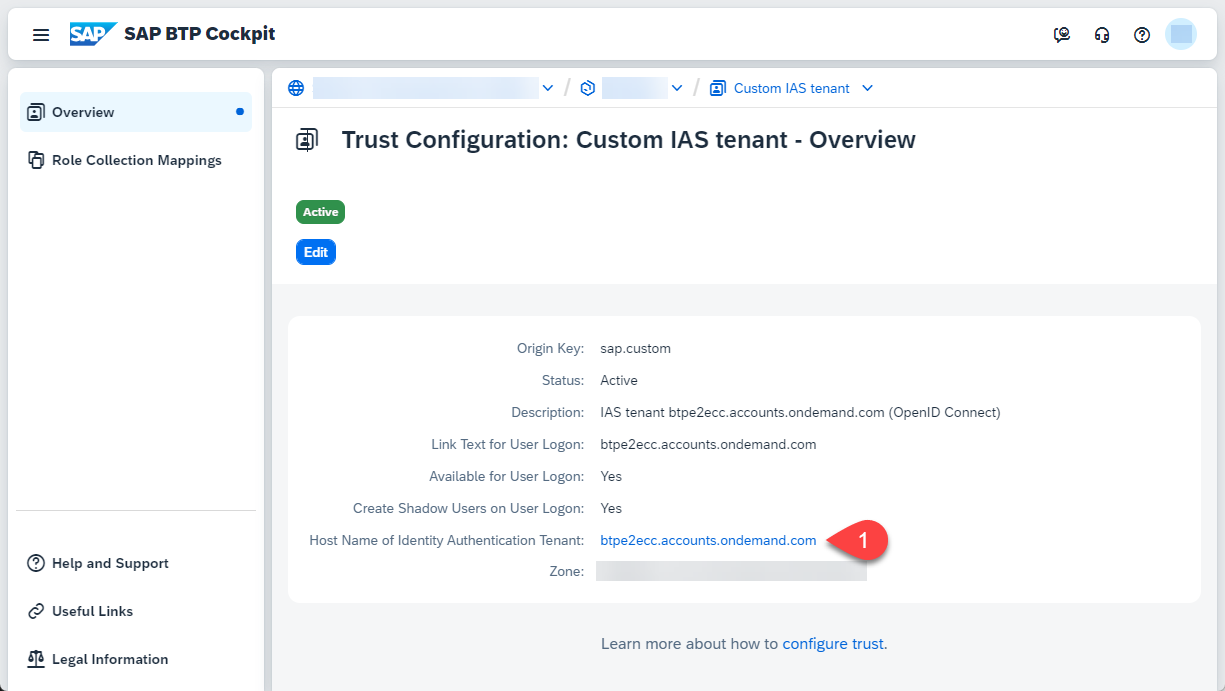
Click on your Identity Authentication Tenant
-
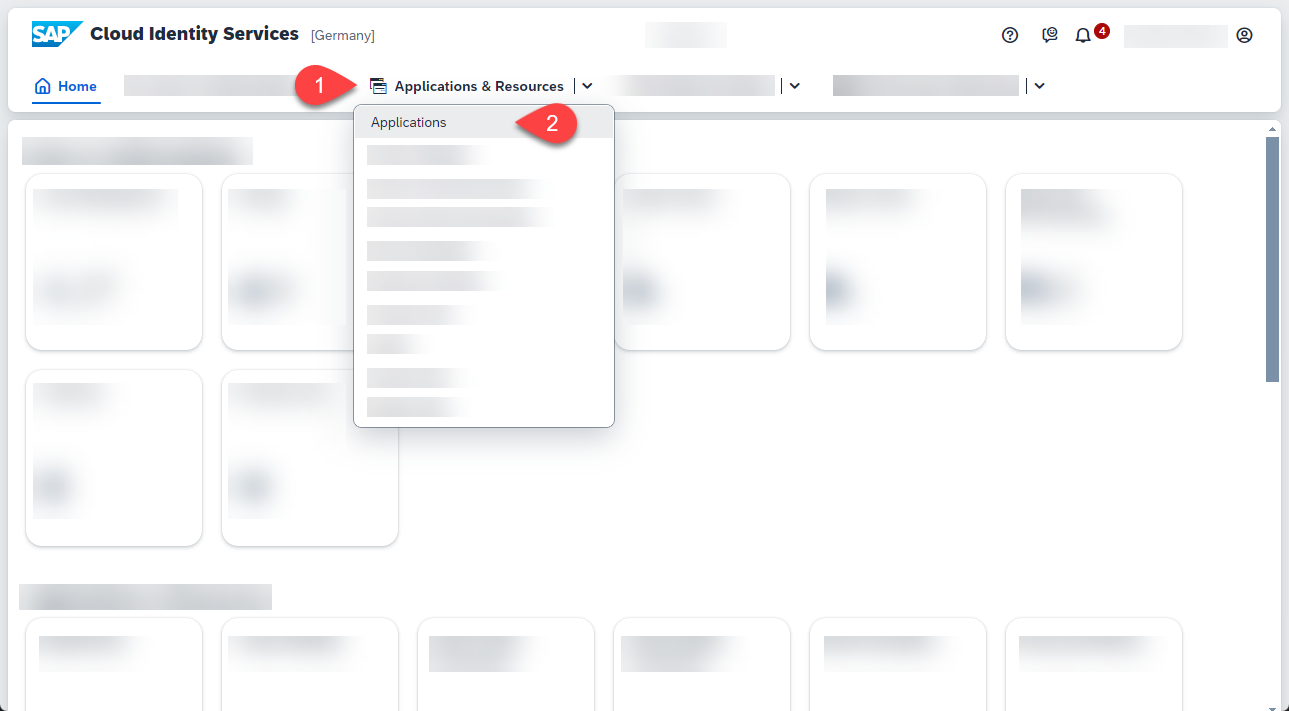
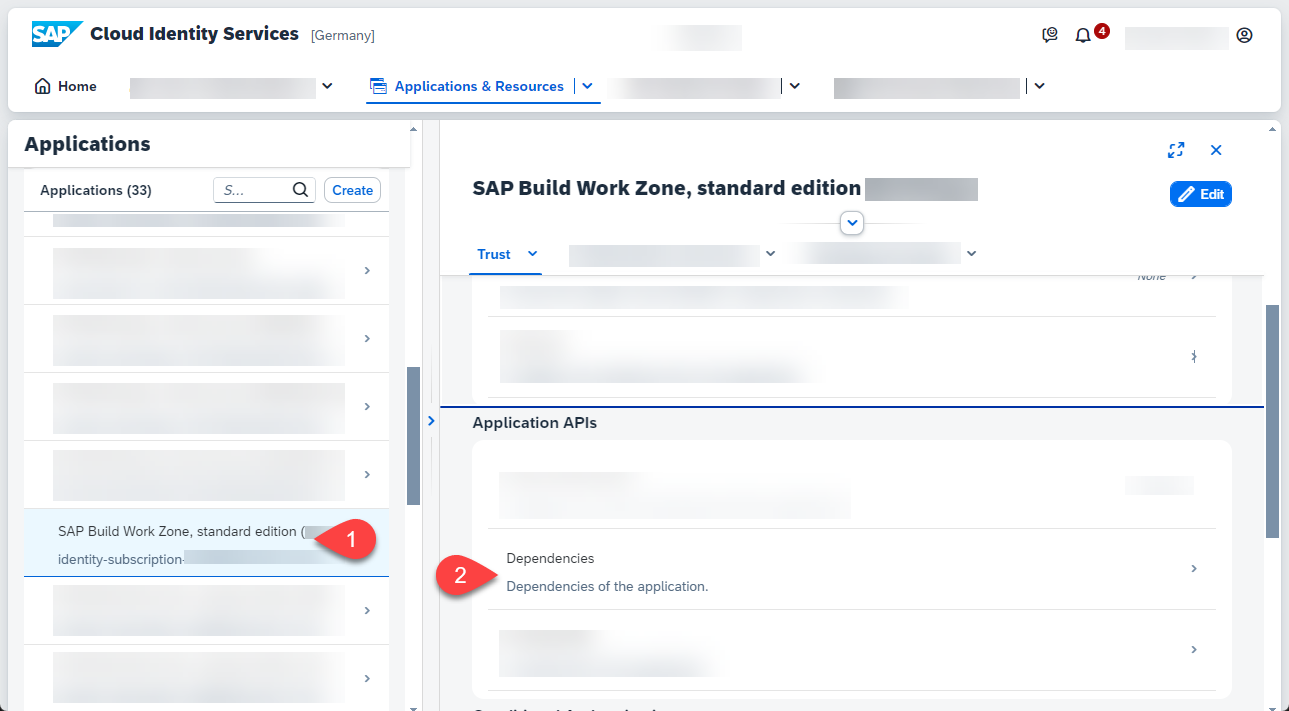
This will open your Cloud Identity Services Site. Click on Applications & Resources and choose Applications.
-
Choose SAP Build Workzone, standard edition on the left pane and then Dependencies
-
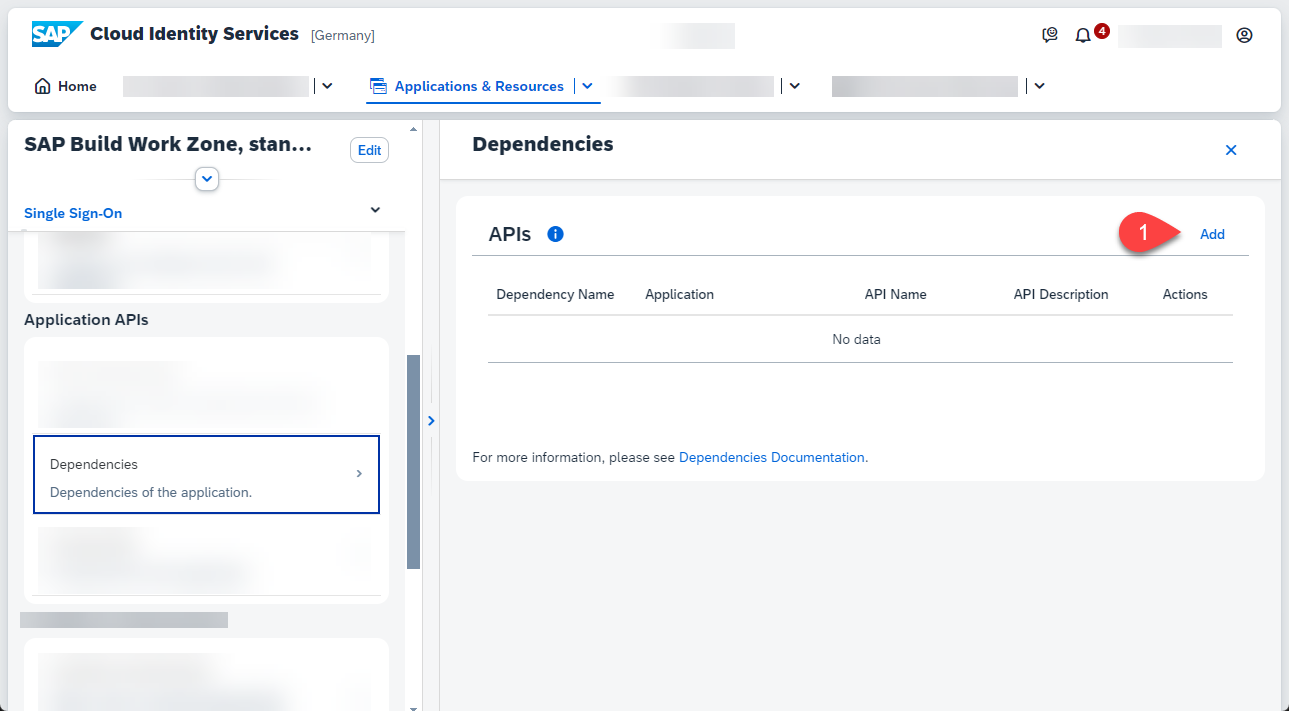
Click Add to add a new Dependency.
-
Enter sap-build-apps-api for the Dependency Name. Important: the name is case sensitive. At the end click Save.


Further information you can find in the SAP Help Portal: Deployed Applications