Django Raceway is a fictional motor-circuit in the UK with an extensive pedigree in racing and caters to those who love high-speed thrills and the smell of petrol and burnt rubber first thing in the morning!
Django Raceway, as a B2C business, aims to deliver personalised trackdays to motorsports enthusiasts at a state-of-the-art track with many challenging configurations. Users can register for an account, book track days, hire cars and book tuition to improve their car control and lap times. They can also request bespoke trackdays on behalf of a company or group, contact the business directly or sign up to a motorsports newsletter.
This is the right place for you if you are: - Looking to take your own car on a highly technical track - Looking to try out different driving experiences to command different kinds of sports cars - Looking to hire a car or reserve a bespoke track day for an event or group.
This is my fifth and final portfolio project for my Diploma in Software Development through Code Institute, where I am specialising in E-Commerce applications.

Link to live site: https://django-raceway.herokuapp.com/
- Wireframes
- UX
- Features
- Future Implementations
- Technologies
- Testing Link
- Bugs and Issues
- Deployment
- Peer Reviews
- Credits
I used Balsamiq Wireframes to make mockups for the website and design how I initially imagined the site would look.
Desktop Wireframes
Note! It should be mentioned at this point that during development, I decided to include the 'Middle Nav' seen in the home page here, at the top of every other page, as the user experience of having to click on the Django-Raceway Logo to navigate to other pages was proving quite frustrating and slowed the ability to navigate the site efficiently. It was a poor early design choice on my part, but a fairly straightforward solution to resolve it. I have not changed the original wireframes as I wanted to maintain my early/original design thinking, and explain instead why I made a certain change from a development standpoint.
Also missing here is the Newsletter Page. I originally intended this to be solely included in the footer right up until the end of development. However, after rendering the mailchimp form in the footer, I really didn't like the design and opted to keep the sign up link in the footer instead, which takes the user to the newsletter sign up page. This is shown in the features section further down.
The Checkout Page was also very different in practice, where I went a completely different route with Stripe in the end vs how I had originally planned to design the checkout, with hard coded forms. The practicality of my idea was not suitable for my project, and I opted instead to go with a Stripe solution for a more seamless checkout experience.


Note! I moved the 'Explore' buttons on to the bottom right corner of the images to keep the site looking neater


Note! The 'Explore' buttons were missing here and added in later in development as I decided I wanted to give the user the ability to explore more information about it. The icons and captions at the bottom of the page were dropped as I didn't feel they added anything of substance to the page since I was giving detail through the Explore buttons.


Note! I ended up adding the image of the specific trackday here as I felt it gave the user a chance to get a closer look at the layout of the trackday, matched with the specific trackday they had chosen. I removed the direct checkout button at the bottom of the page as well.


Note! This is how I originally designed the basket to look. In production, I changed this quite a lot. I didn't got with a SKU/Unique order number in the end here and I also shifted the edit/delete buttons around to be incorporated into the table of each order. I also added a VAT calulated price into summary for users to get a better idea of the real cost to them.

Note! I ended up going with a Stripe Checkout page provided by them and so as a result the layout of the checkout page is vastly different. I didn't know about this from Stripe at the time of designing it, and so I actually intended for these forms to be somewhat hard coded in an html file as per below.

Note! The order table was moved entirely into its own page, and as a result, I dropped the order review from the page in the final project.
I also felt that having a return home and a view basket button were a bit redundant as the user's basket. will be empty at this point and the user can just click the site logo in the nav to return home. Alternatively, they can navigate to another page from the middle nav bar.

Note! I removed the ability to store card info from the scope of the project as this is not good practice. Furthermore, I had security concerns regarding how I would implement this and did not think it was a risk worth taking.
Another change I made was to put the Order History into its own nav tab separate from the profile page.
I did this to make the pages nicer to look at and less cluttered. The Order history table is then free to expand in size as more and more orders get made by each user.

As per above, credit card section removed from the scope.
Also, the delete profile button was removed from the scope of this project. It is something I may add back in for a future update/feature.


Mobile and Tablet Wireframes
Note! All the above notes apply here, I have not commented them again to avoid unnecessary repitition.


At the start of the project, even though I had the wireframes as versions of how I wanted the site to look, I more often than not made early mockup versions of the pages to quickly get the framework of the pages set up and to test whether I might like to do something another way or differently from the wireframes.
Here is an early example of my home page, mocked up at the very start of the project.
Key differences here include a carousel (which I would end up keeping) and the middle nav bar placed at the top of the page.

I started the project with the home page and nav bar, before installing django allauth and getting the base templates for that. From there, I began working one by one on each of the pages with purely static but fairly detailed to ensure I was happy with how things would look and could decide early-on if I wanted to make changes.
Here is an early mockup of my basket page. It was around this time that I made the decision to stray from my original wireframe and make aesthetic changes to the design of the page.

Django Raceway is a Business-to-Consumer (B2C) E-commerce Trackday compan, specialising in providing multi-layout trackdays and offering high-standards of driving tuition and driving experience packages. This website is where users can browse the different driving products on offer via dedicated pages, add them to their basket and proceed to checkout in very simple and intuitive steps. Users are also able to very quickly and easily get in touch with the business with an easy to access contact form page and a trackday request form to book more bespoke trackdays for more bespoke clients.
-
Site/Business Goals:
- Create a functioning e-commerce solution for a trackday/motorsports company selling trackdays/experiences/tuition to consumers (B2C)
- Provide site visitors with an easy to navigate site to view trackday products and a simple means to book them
- To promote motorsports in the UK with a state-of-the-art motor circuit and tuition/experience packages
- To grow the company through increased exposure to users who prefer to book trackdays online
-
Target Audience:
- Experienced driving enthusiasts looking for a controlled track environment to explore the capabilities of their cars
- Novice/Intermediate drivers looking to improve their driving skills through tuition courses
- Driving enthusiasts who would like to hire a car for a trackday
- Customers who want to gift an experience package to some one
- Customers who want to buy an experience package to test different cars before buying one themselves
- Track day enthusiasts looking for a new motorsports venue to try out
- A club/group/company organising a trackday event, looking to request a bespoke trackday package tailored to their needs
Who: I am marketing predominantly towards a motor-enthuasiast and motorsport-orientated, with an extra scope of marketing towards those who are looking for driving experiences and to improve their driving skills through tuition. What: I am selling trackdays, tuition courses and experience packages, designed to cater towards this audience. I therefore make it very accessible and clear on my site, so that the audience can go. directly towards what they are looking for. I include images of cars, both driving and off the track, designed to excite the site viewer into wondering what it's like to drive. It was equally important to make clear titles and key pieces of information available for the site viewers to see on which ever respective page/product they are viewing. How: Based on my B2C model above, I decided single payments were the best payment option for the products I'm offering. I can update users on new products and general news through an opt-in mailchimp newsletter subscription and I have created a Facebook page which users/clients can view and follow to keep up to date through a social network.
Software developers play a role in making sure their website can be easily found through search engines, including the likes of Google Search. Therefore, when implementing SEO (Search Engine Optimisation) tools, the best means available to you are through descriptive and relevant keywords, sitemaps.xml and robots.txt files.
Keywords and sitemap/robots
-
I included keywords and more through the use of
<meta>tags in my base.html document. This allowed me to define keywords, an author, a site description and a viewport. For the keywords themselves I thought about short and longer words and phrases respectively that might be looked for, in the framework of the target audience defined. above. -
I started with fairly obvious short words including: trackdays, motorsport, motorcircuit, trackday, racing, racetrack,
-
I then expanded in to short phrases, including: trackdays in England, trackdays in the uk, trackday experiences, driving tuition
-
I have included a sitemap.xml file in the root directory, which allows search engines to crawl through my site and make content more discoverable.
-
I have a robots.txt file which provides the location of the sitemap and also defines any folders/files which are prohibited from search engine crawlers.
To plan tasks to implement for my website, I used Github Projects, which is a Kanban style board to track your project progress. You can track user stories, epics, ideas, to-do items and you can all see what tasks have been completed.
I would also assign labels to different tasks, including sprints, milestones, and priority rankings (Must-have, Should-have, Won't-have, etc.). This would allow me to prioritise tasks and functionality accordingly.
You can see my project board here
- User Story: Configure Django Project
- As a Developer I can install Django so that I can initiate my workspace.
- User Story: Home Page
- As a Site User I can view a home page so that I can have a starting point from which I can navigate the site.
- User Story: Create an Account
- As a Site User I can create an account so that I can access user-verified-only benefits and store personal information for future orders.
- User Story: Header/NavBar
- As a Site User I can use a Nav Bar so that I can Navigate to the desired page.
- User Story: Gallery
- As a Site Visitor I can view a gallery of images so that I can get a visual understanding of what a track day looks like.
- User Story: About Page
- As a Relevant User I can perform action so that I can perceived benefit.
- User Story: Contact
- As a Relevant User I can perform action so that I can perceived benefit.
- User Story: Footer
- As a Site User I can view a footer bar so that I can view Policies, FAQs or subscribe to a motorsport newsletter.
- User Story: Trackday List Page
- As a Site User I can visit a booking page so that I can view available/upcoming track days and proceed with a booking.
- User Story: Trackday Request Form
- As a Site User I can use a request form so that I can request a bespoke track day booking outside of the current available options.
- User Story: Car Hire
- As a Site Visitor I can view a selection of cars so that I can choose a car I might want to hire at an upcoming trackday.
- User Story: Login/Logout
- As a Site User I can log in and log out so that I can keep my account and details secure.
- User Story: Book a Trackday
- As a Site User I can select the track day I want and visit a booking page so that I can book my track day with any extras I would like to add.
- User Story: Book an Experience
- As a Potential Customer I can view a separate experiences page so that I can order a slightly different product to a pure trackday (perhaps as a gift).
- User Story: Book a Tuition
- As a Potential Customer I can view a tuition page so that I can book a day to learn core driving skills.
- User Story: Basket
- As a Site User I can add to and view a basket/cart so that I can view and check my order and make any updates or removals as required before checking out.
- User Story: User Profile
- As a Registered Site User I can save payment details in my account profile so that I can checkout faster in future.
- User Story: FAQs
- As a Site User I can view an FAQs page so that I can see if there are any answers to questions I might have.
- User Story: Policies
- As a Site User I can find a policies so that I can understand the terms and conditions of the site.
- User Story: Checkout
- As a Site User I can checkout so that I can proceed with my order/booking.
- User Story: Booking Success page
- As a Site User I can view a booking success page after purchasing so that I can confirm I have successfully ordered and view a summary of my purchase.
- User Story: Booking Failure Page
- As a Site user I can view a Booking failure page so that I can so that I can be informed of the failure and that I will be shown that I have not been charged.
- User Story: Booking Cancel
- As a Site User I can cancel a checkout so that I can go back to my basket if I have changed my mind or am not ready to checkout yet.
- User Story:
- As a Site Admin I can add trackdays from a management page so that I can easily update the trackday list from the front end.
- User Story:
- As a Registered Site User I can check my order history in my user profile so that I can review my past orders.
- User Story:
- As a Site User I can sign up to a newsletter so that I can get informed about new products or business updates.
- User Story:
- As a Software I can write automated and manual tests so that I can check my code works reliably and as expected.
- Epic: Install Django
- As a Developer I would like to install Django so that I can begin working on my project.
- Epic: Initial Deploy to Heroku
- As a Developer I would like to deploy to heroku early so that I can confirm my configuration is wired up correctly.
- Epic: AWS
- As a Developer I would like to create an AWS S3 bucket so that I can store my static files and media.
- Epic: Site Owner Objectives
- As a Site Owner I would like to run an informative and engaging track day website so that I can encourage driving enthusiasts to book track days and hire cars as part of a successful B2C business model.
- Epic: Login/Logout
- As a Site User I would like to Login and Logout so that I can keep my account secure.
- Epic: Basket
- As a Site User I would like to View a Basket so that I can check my orders before checking out.
- Epic: Stripe Checkout
- As a Site User I would like to checkout so that I can purchase the items I came to buy.
- Epic: Mailchimp Newsletter
- As a Site User I would like to Sign up to a mailing list so that I can get new information from the business, including new products or promotions.
- Epic: Testing
- As a Software Developer I would like to Create Manual and Automated tests so that I can check the quality and functionality of my code.
Below is a comprehensive list of the site features and their relations to the user stories from the Kanban board:
-
A Nav Bar/Header that:
- is split in two with a top nav where the user can find profile info, login/logout functionality and the basket
- has a middle nav which serves as the main navigation of the site
- contains a company logo that redirects to the home page when clicked on


User Story: As a Site User I can use a Nav Bar so that I can Navigate to the desired page.- Acceptance Criteria:
- A Responsive fixed-top header that contains a title, user icon and basket icon on desktop and a title and triple line menu icon on mobile/tablet
- A Secondary Nav bar is displayed under the hero image on desktop, this is moved in to the collapsable triple line icon on mobile/tablet
- Nav bar is clean and consistent with the theme and overall design scheme
-
A Home Page that:
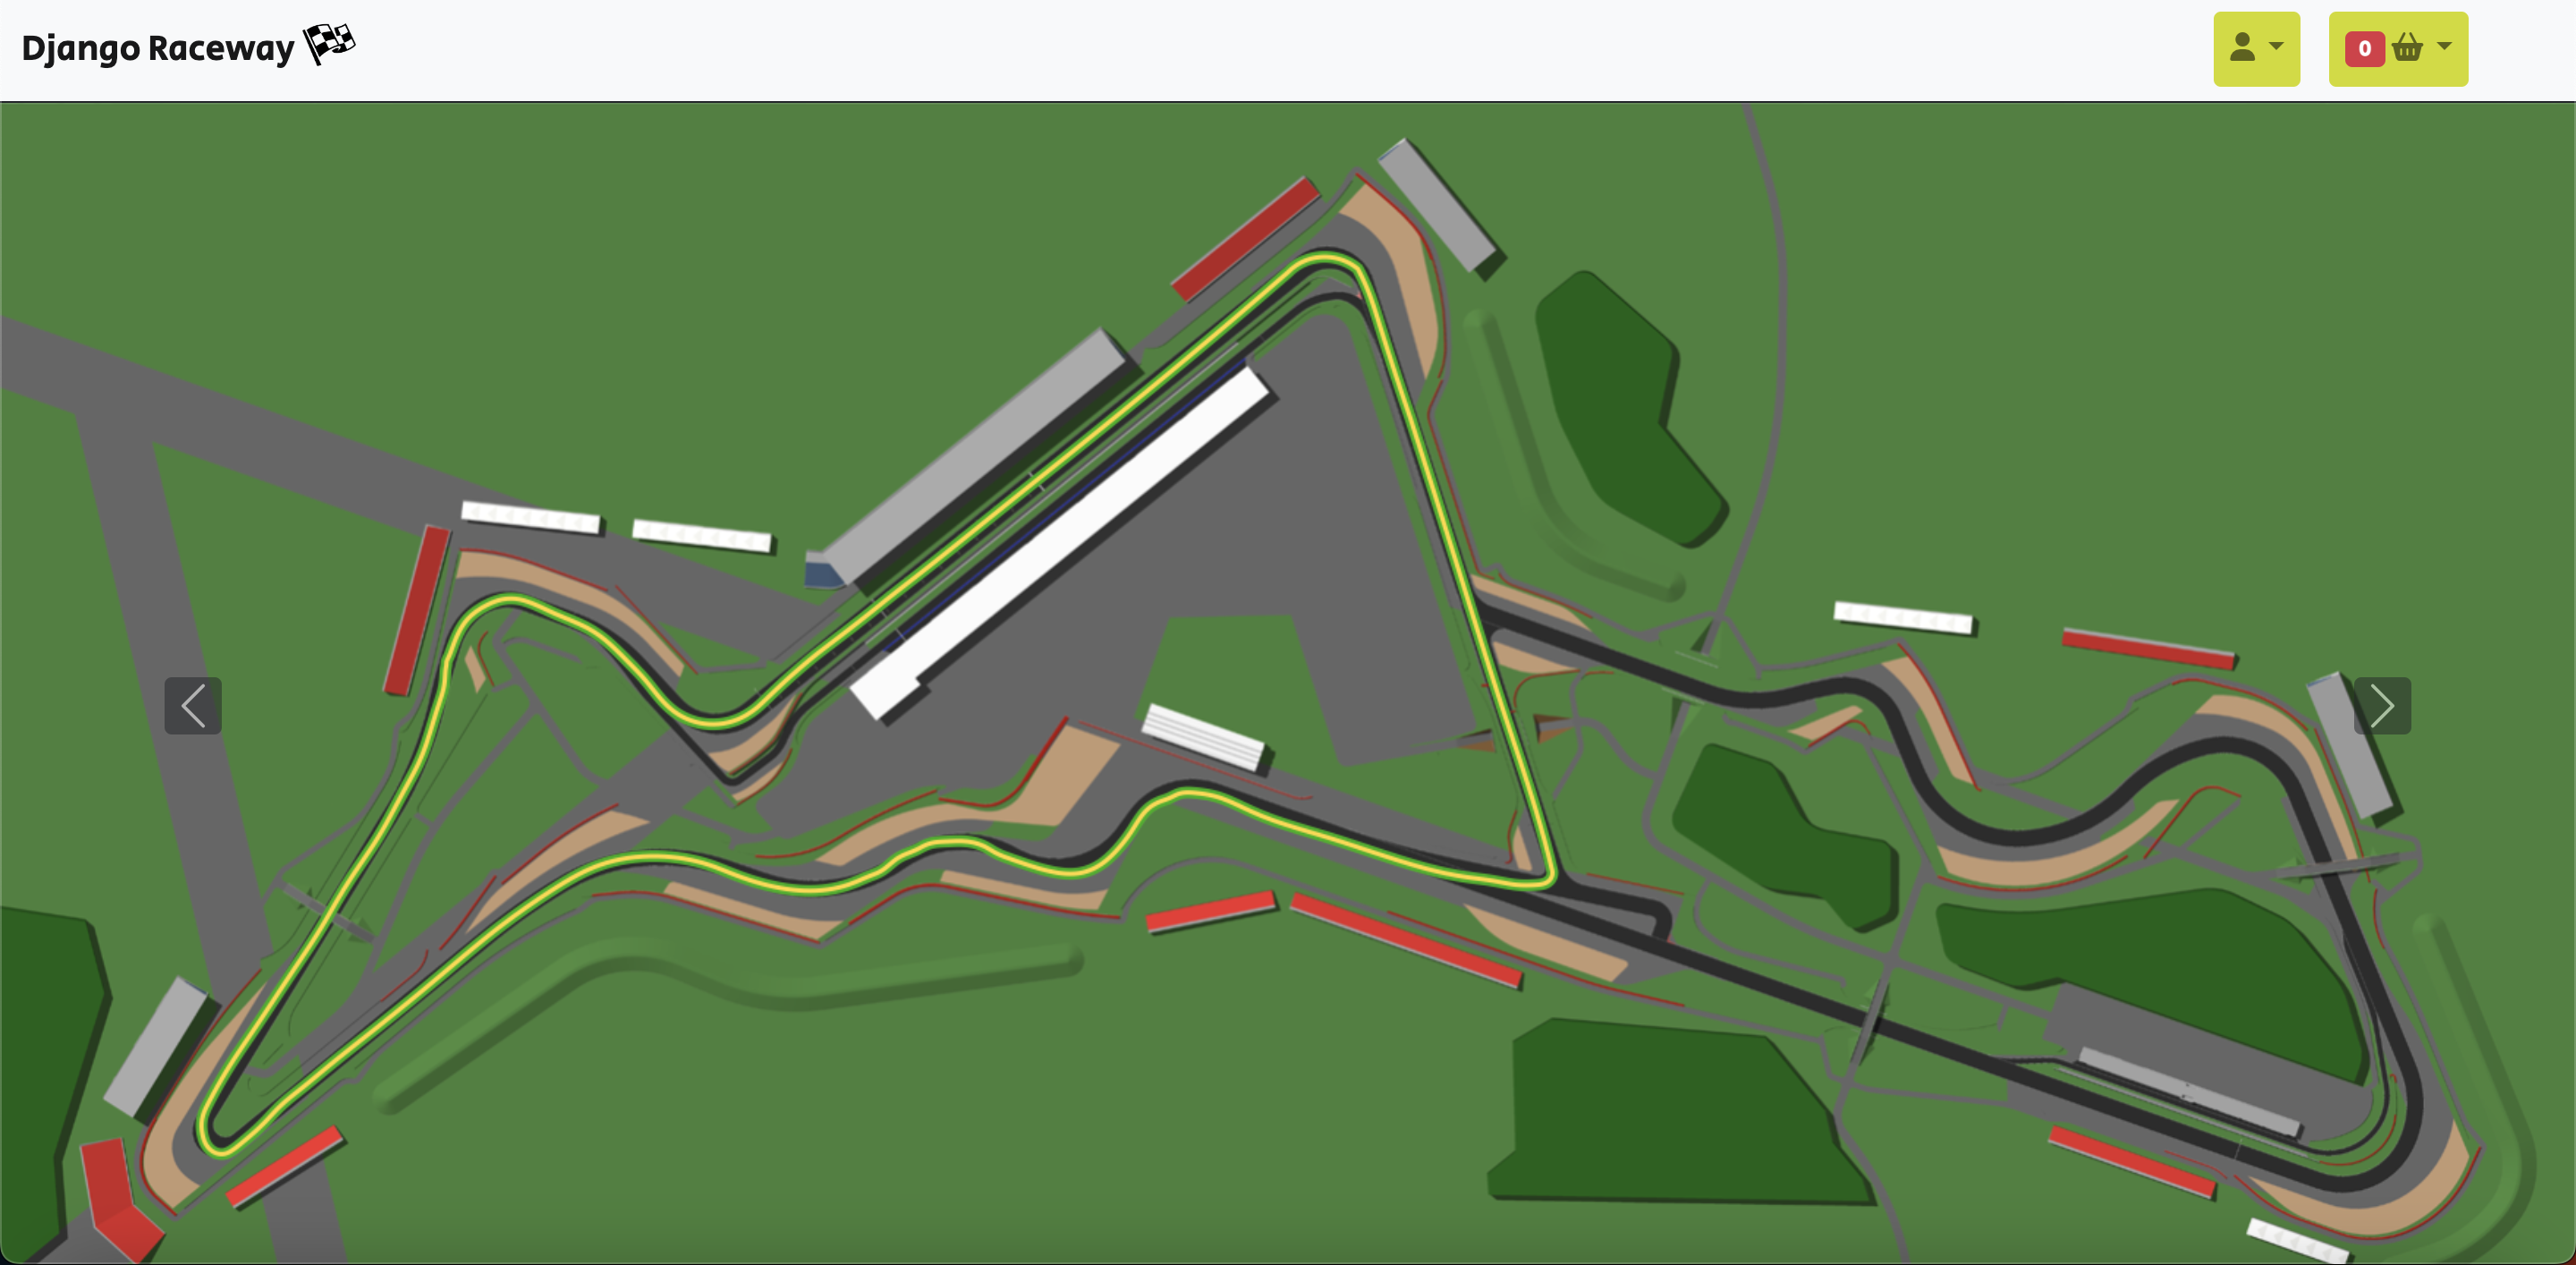
- Contains a carousel of track layout images
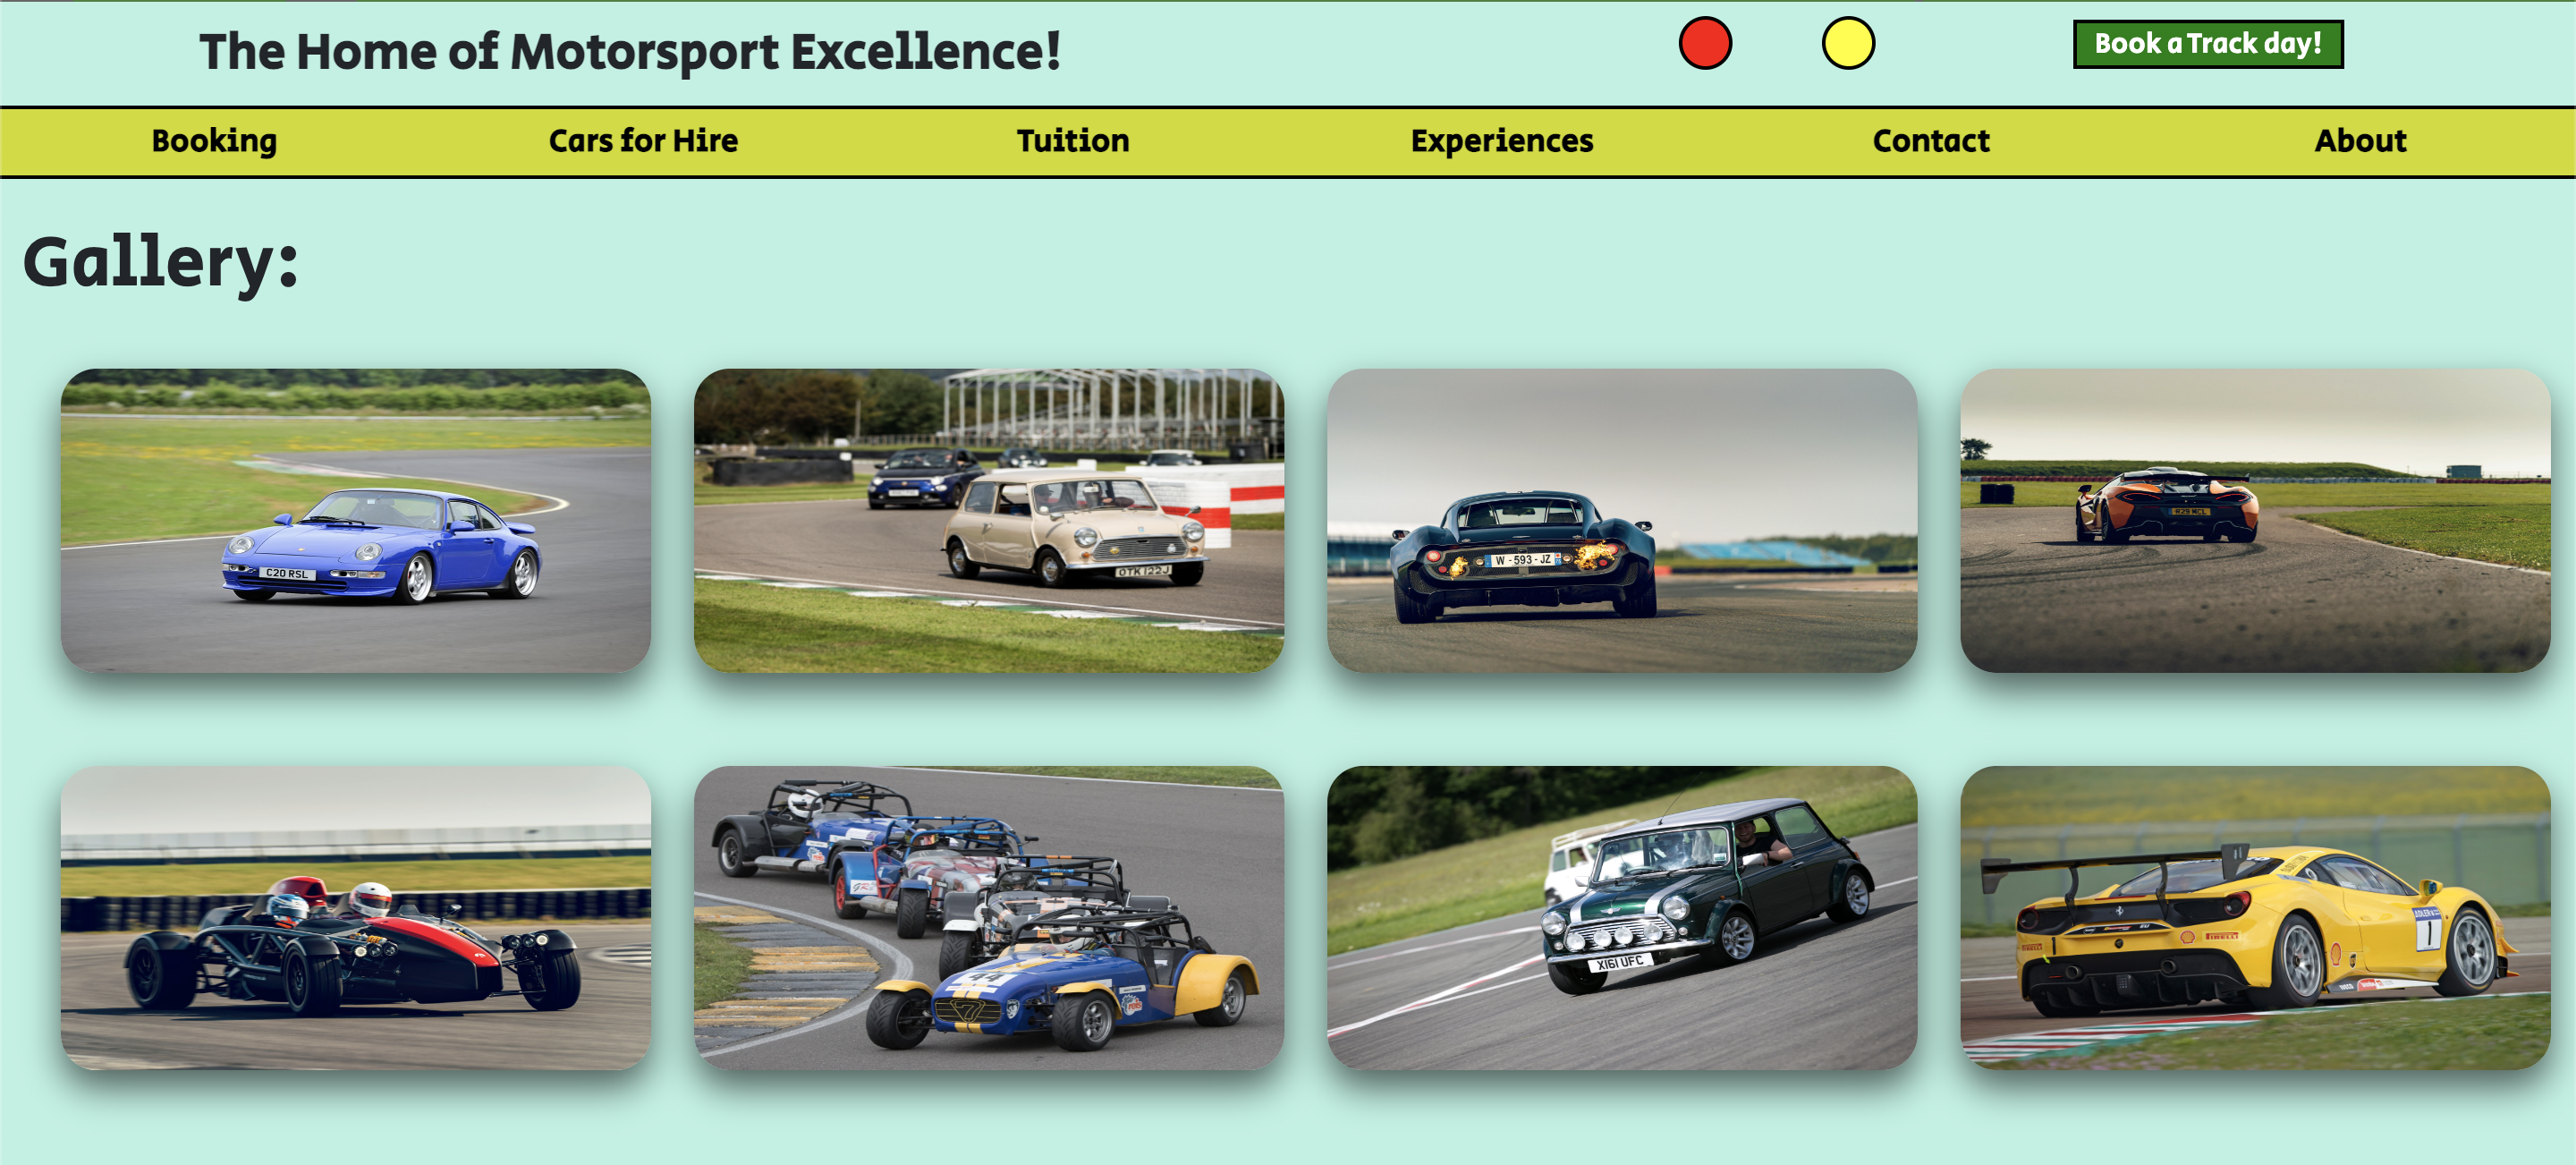
- Contains a gallery of cars on track designed to showcase the action packed nature of track driving
- hosts the middle nav beneath the carousel to encourage the user to scroll down the home page and see more content
- serves as the entry page and point of reference for everything on the site
User Story: As a Site User I can view a home page so that I can have a starting point from which I can navigate the site.- Acceptance Criteria:
- Home Page features a Nav Bar, Main body with Hero image and Footer
- Has a consistent theme and colour scheme
- Most Pages can be navigated to directly from this one point
- Theme of site and target audience easily identifiable from the home page alone
-
A Page Footer that:
- Contains Policies and FAQs links
- Contains a prompt to sign up to the Django Raceway Newsletter
- An up-arrow button to return to the top of the page

User Story: As a Site User I can view a footer bar so that I can view Policies, FAQs or subscribe to a motorsport newsletter.- Acceptance Criteria:
- Footer contains links to the Policies and FAQs
- Contains a place to sign up for a newsletter
- Button to return to top of the page
- Responsive and consistent theme with the Nav Bar
-
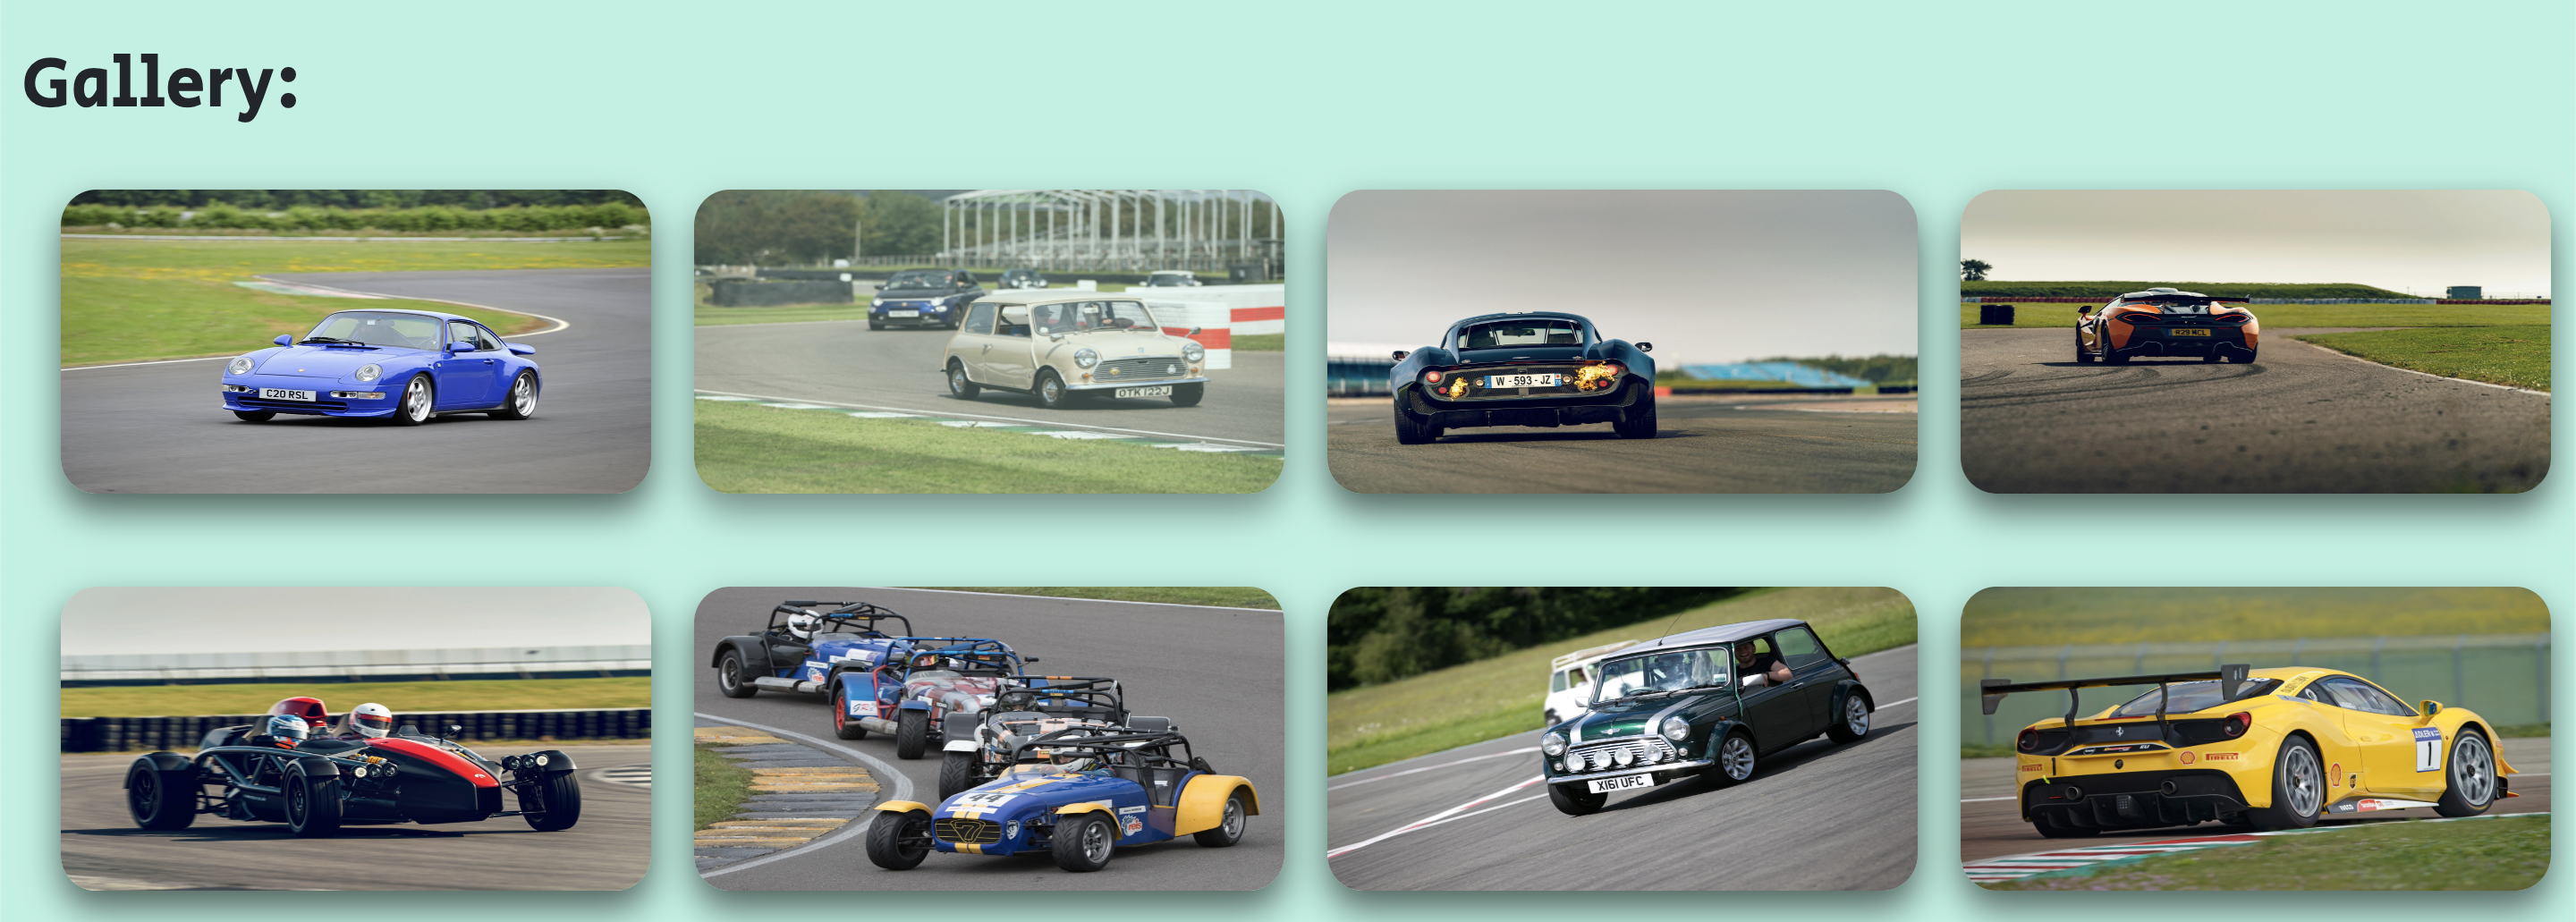
A Gallery that:
- Contains 8 High Quality images of cars driving on track
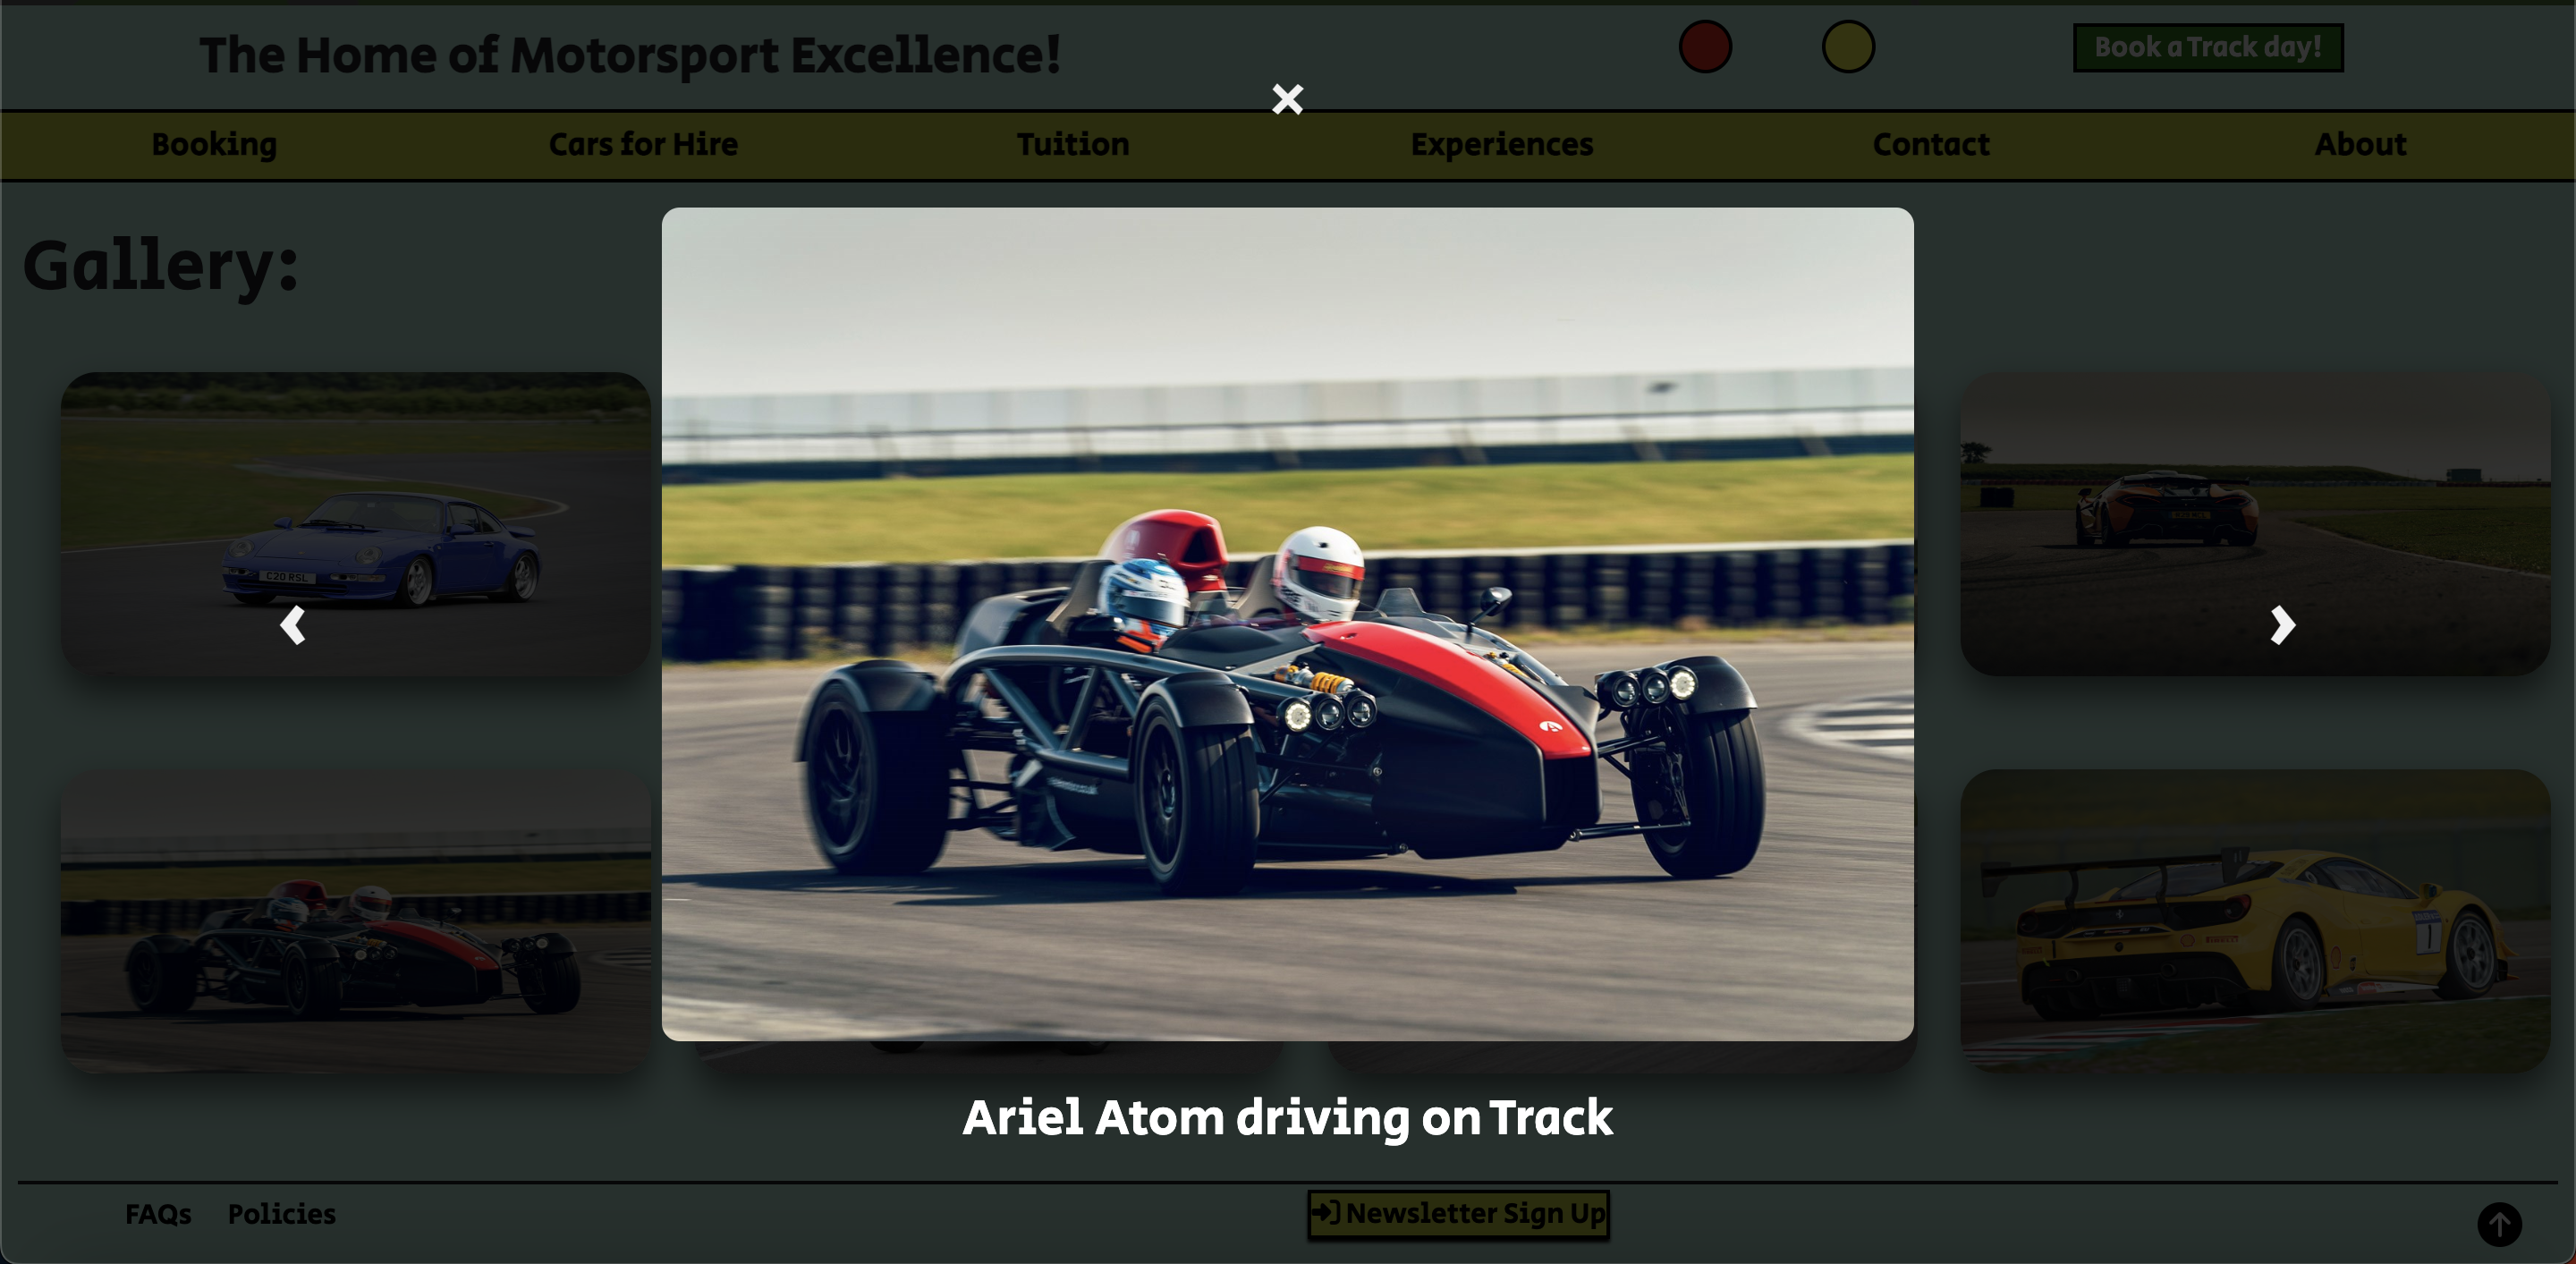
- Can be clicked on to open, moved to previous or next images, or closed with an 'x'
User Story: As a Site Visitor I can view a gallery of images so that I can get a visual understanding of what a track day looks like.- Acceptance Criteria:
- Gallery contains images of cars on track, to give user an idea of a track day visually
- Either a carousel or collection of neat images on the home page
- High quality images should be chosen
- Can be clicked on to expand and view, can be closed with an 'x' button
-
Allauth Authentication features that:
- Can allow users to sign up for an account
- Can allow users to login to their account after creating one
- allows users to logout of their account for account safety
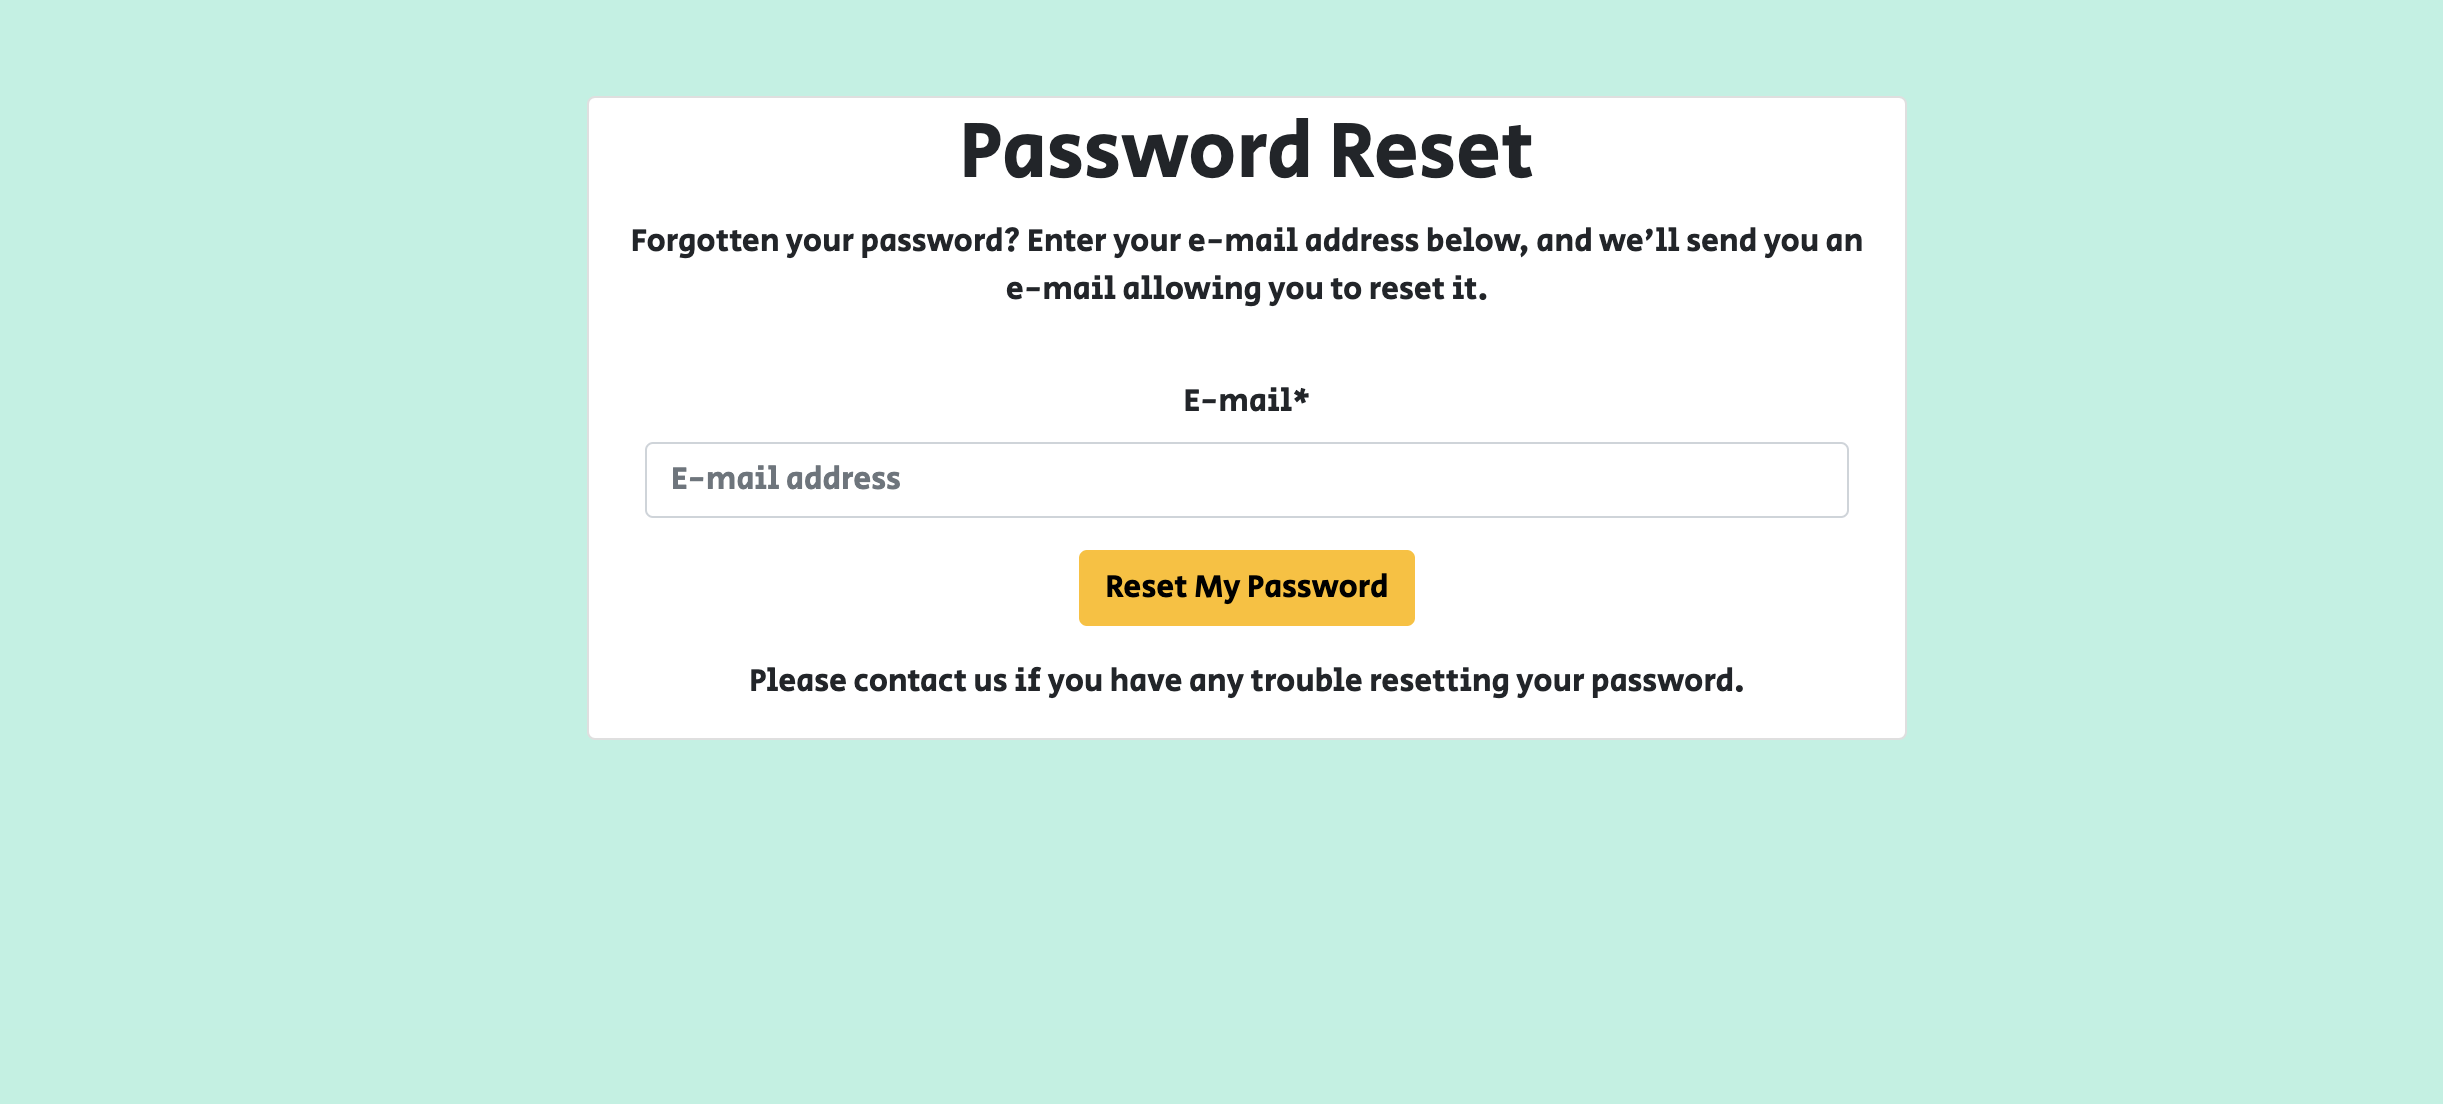
- allows users to reset their password if they have forgotten through a supplied email address
- can keep users signed in with a checkbox option
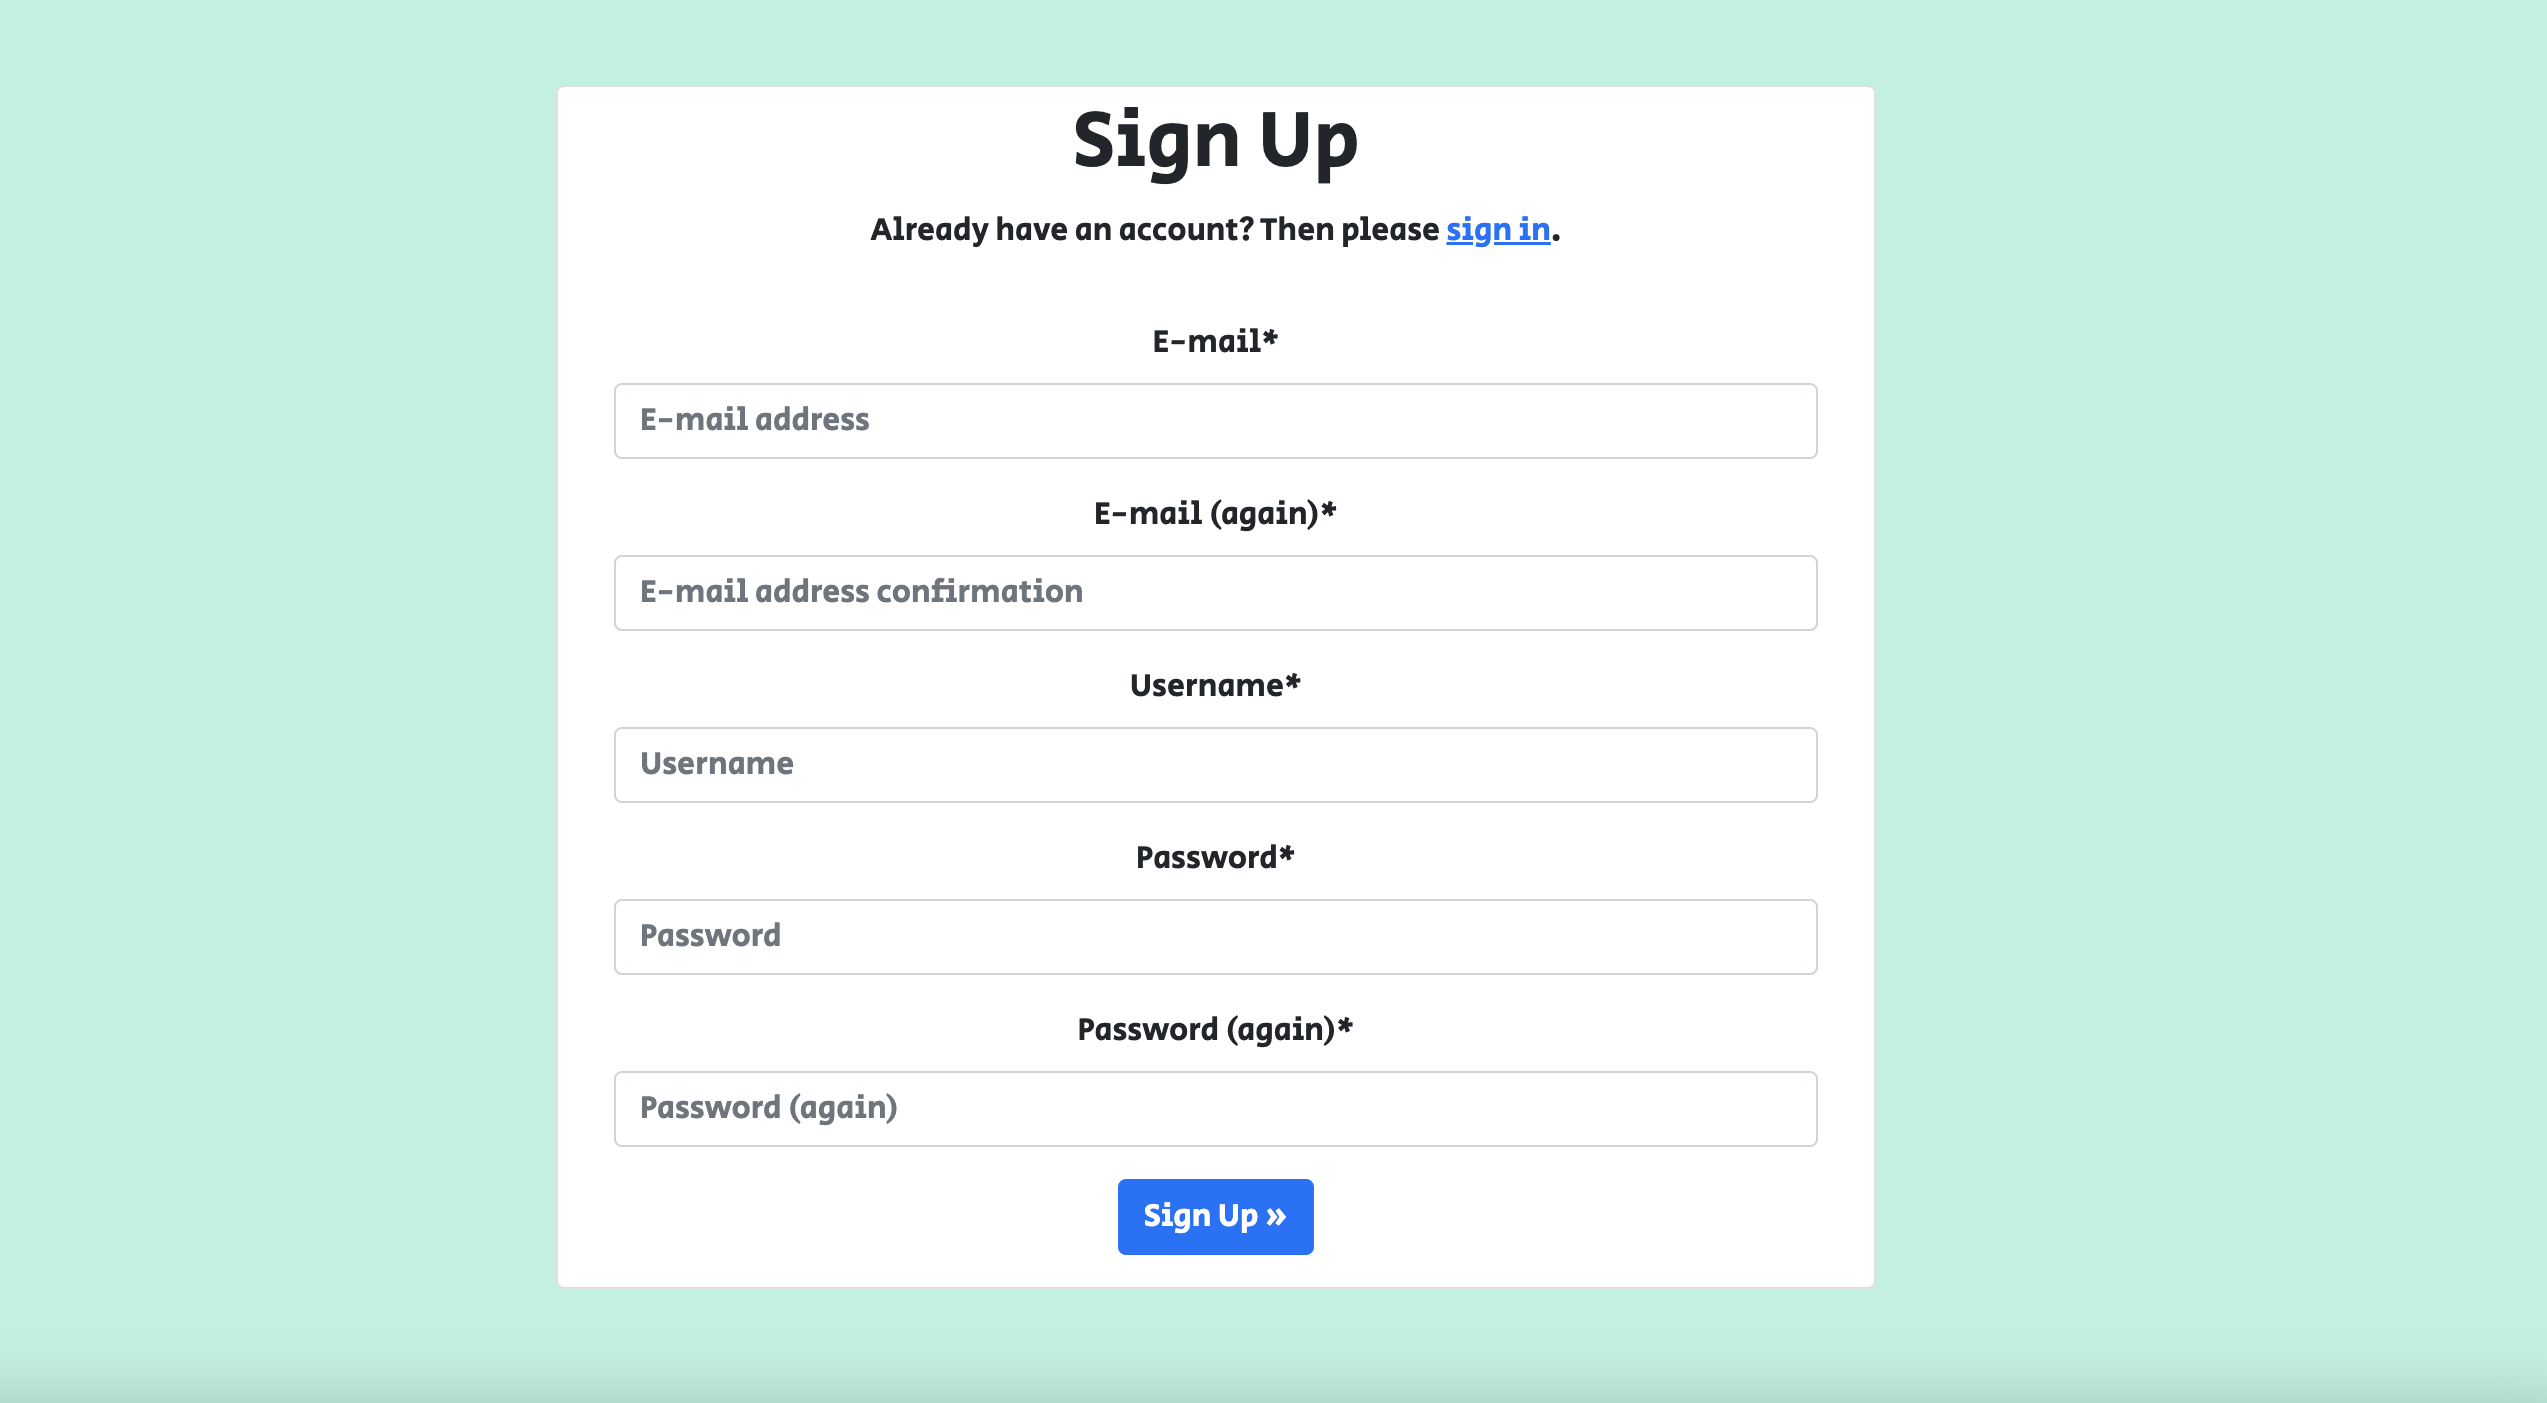
User Story: As a Site User I can create an account so that I can access user-verified-only benefits and store personal information for future orders.- Acceptance Criteria:
- When a site visitor is not signed in, a sign up/create account link in the nav can be found where they are redirected to a page to create an account
- Upon account creation, they will be asked to verify through their email address that they will have had to provide.
- No more info than is required will be asked for on sign up.


User Story: As a Site User I can log in and log out so that I can keep my account and details secure.- Acceptance Criteria:
- When Users are logged out, there will be an option in the primary nav for them to log in, where they will be redirected to the login page
- When a user is active and already logged in, they will have an option to log out from the same place in the nav where they logged in
- By logging in, users will have some more exclusive access and abilities, such as storing/saving billing details, account info and viewing order history.
-
An About Page that:
- Describes the history of the circuit to curious site visitors
- Inspires site visitor confidence in an experienced and responsible trackday/motorsports business
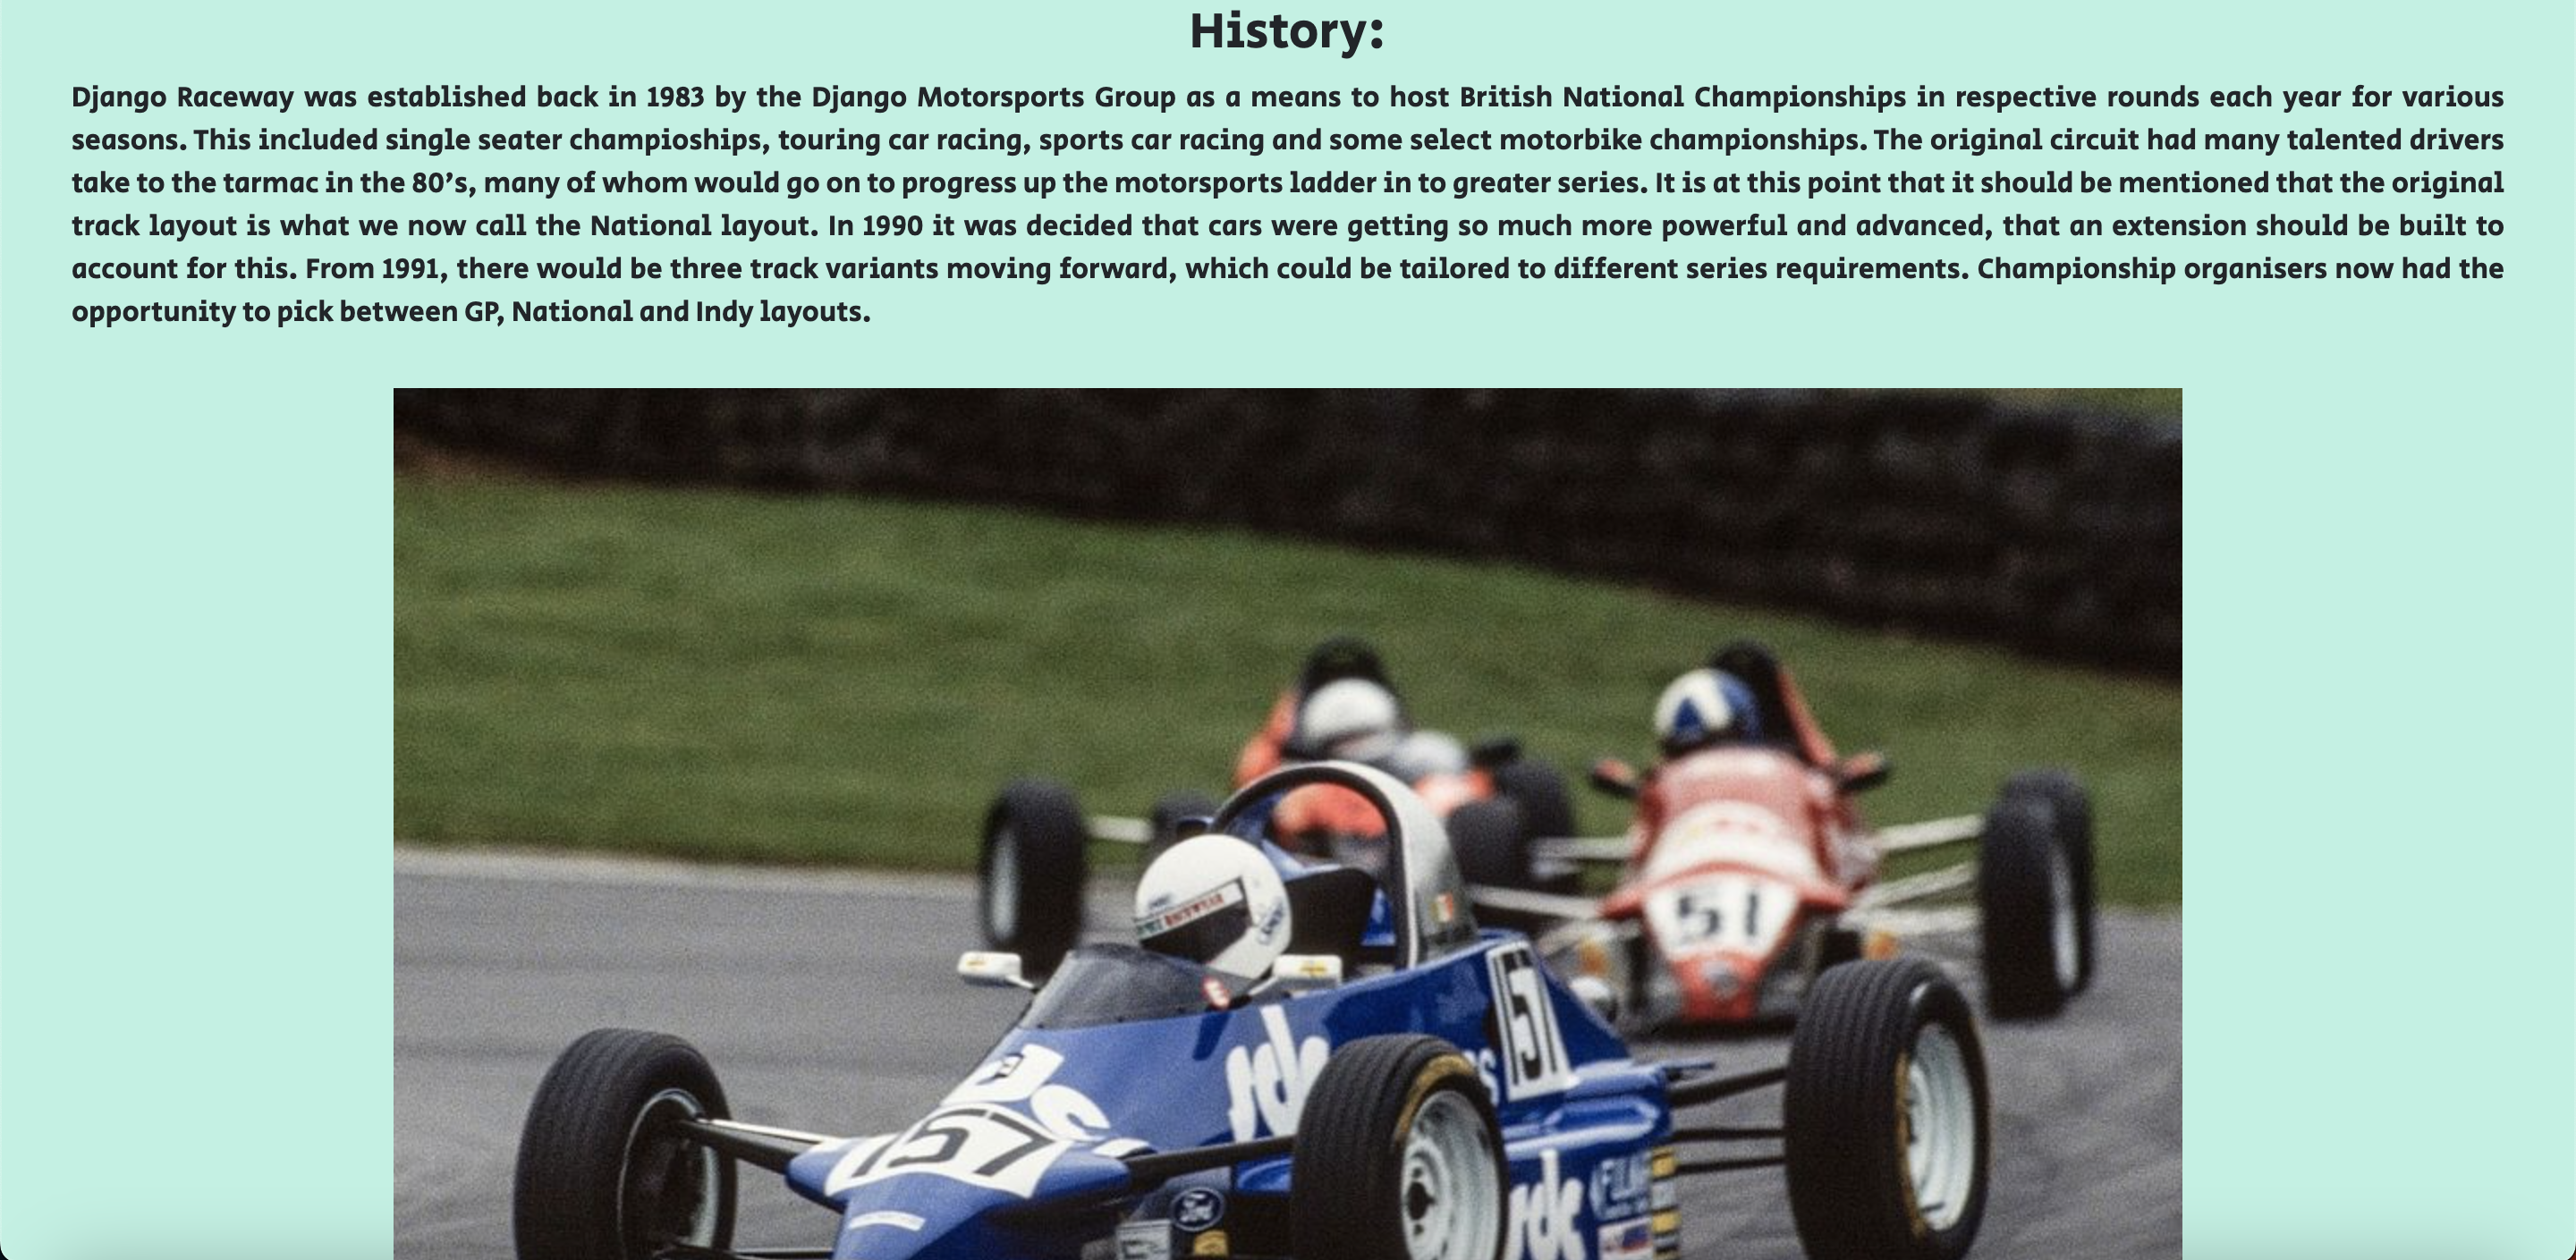
User Story: As a Site User I can open an about page so that I can learn more about the company and its history.- Acceptance Criteria:
- About page can be viewed and visited from the Nav
- Contains information and stats about the track itself
-
A Contact page that:
- Provides users with a simple form to fill out
- Asks for a full name, email, query type and a message
- informs the user when their message has been sent successfully
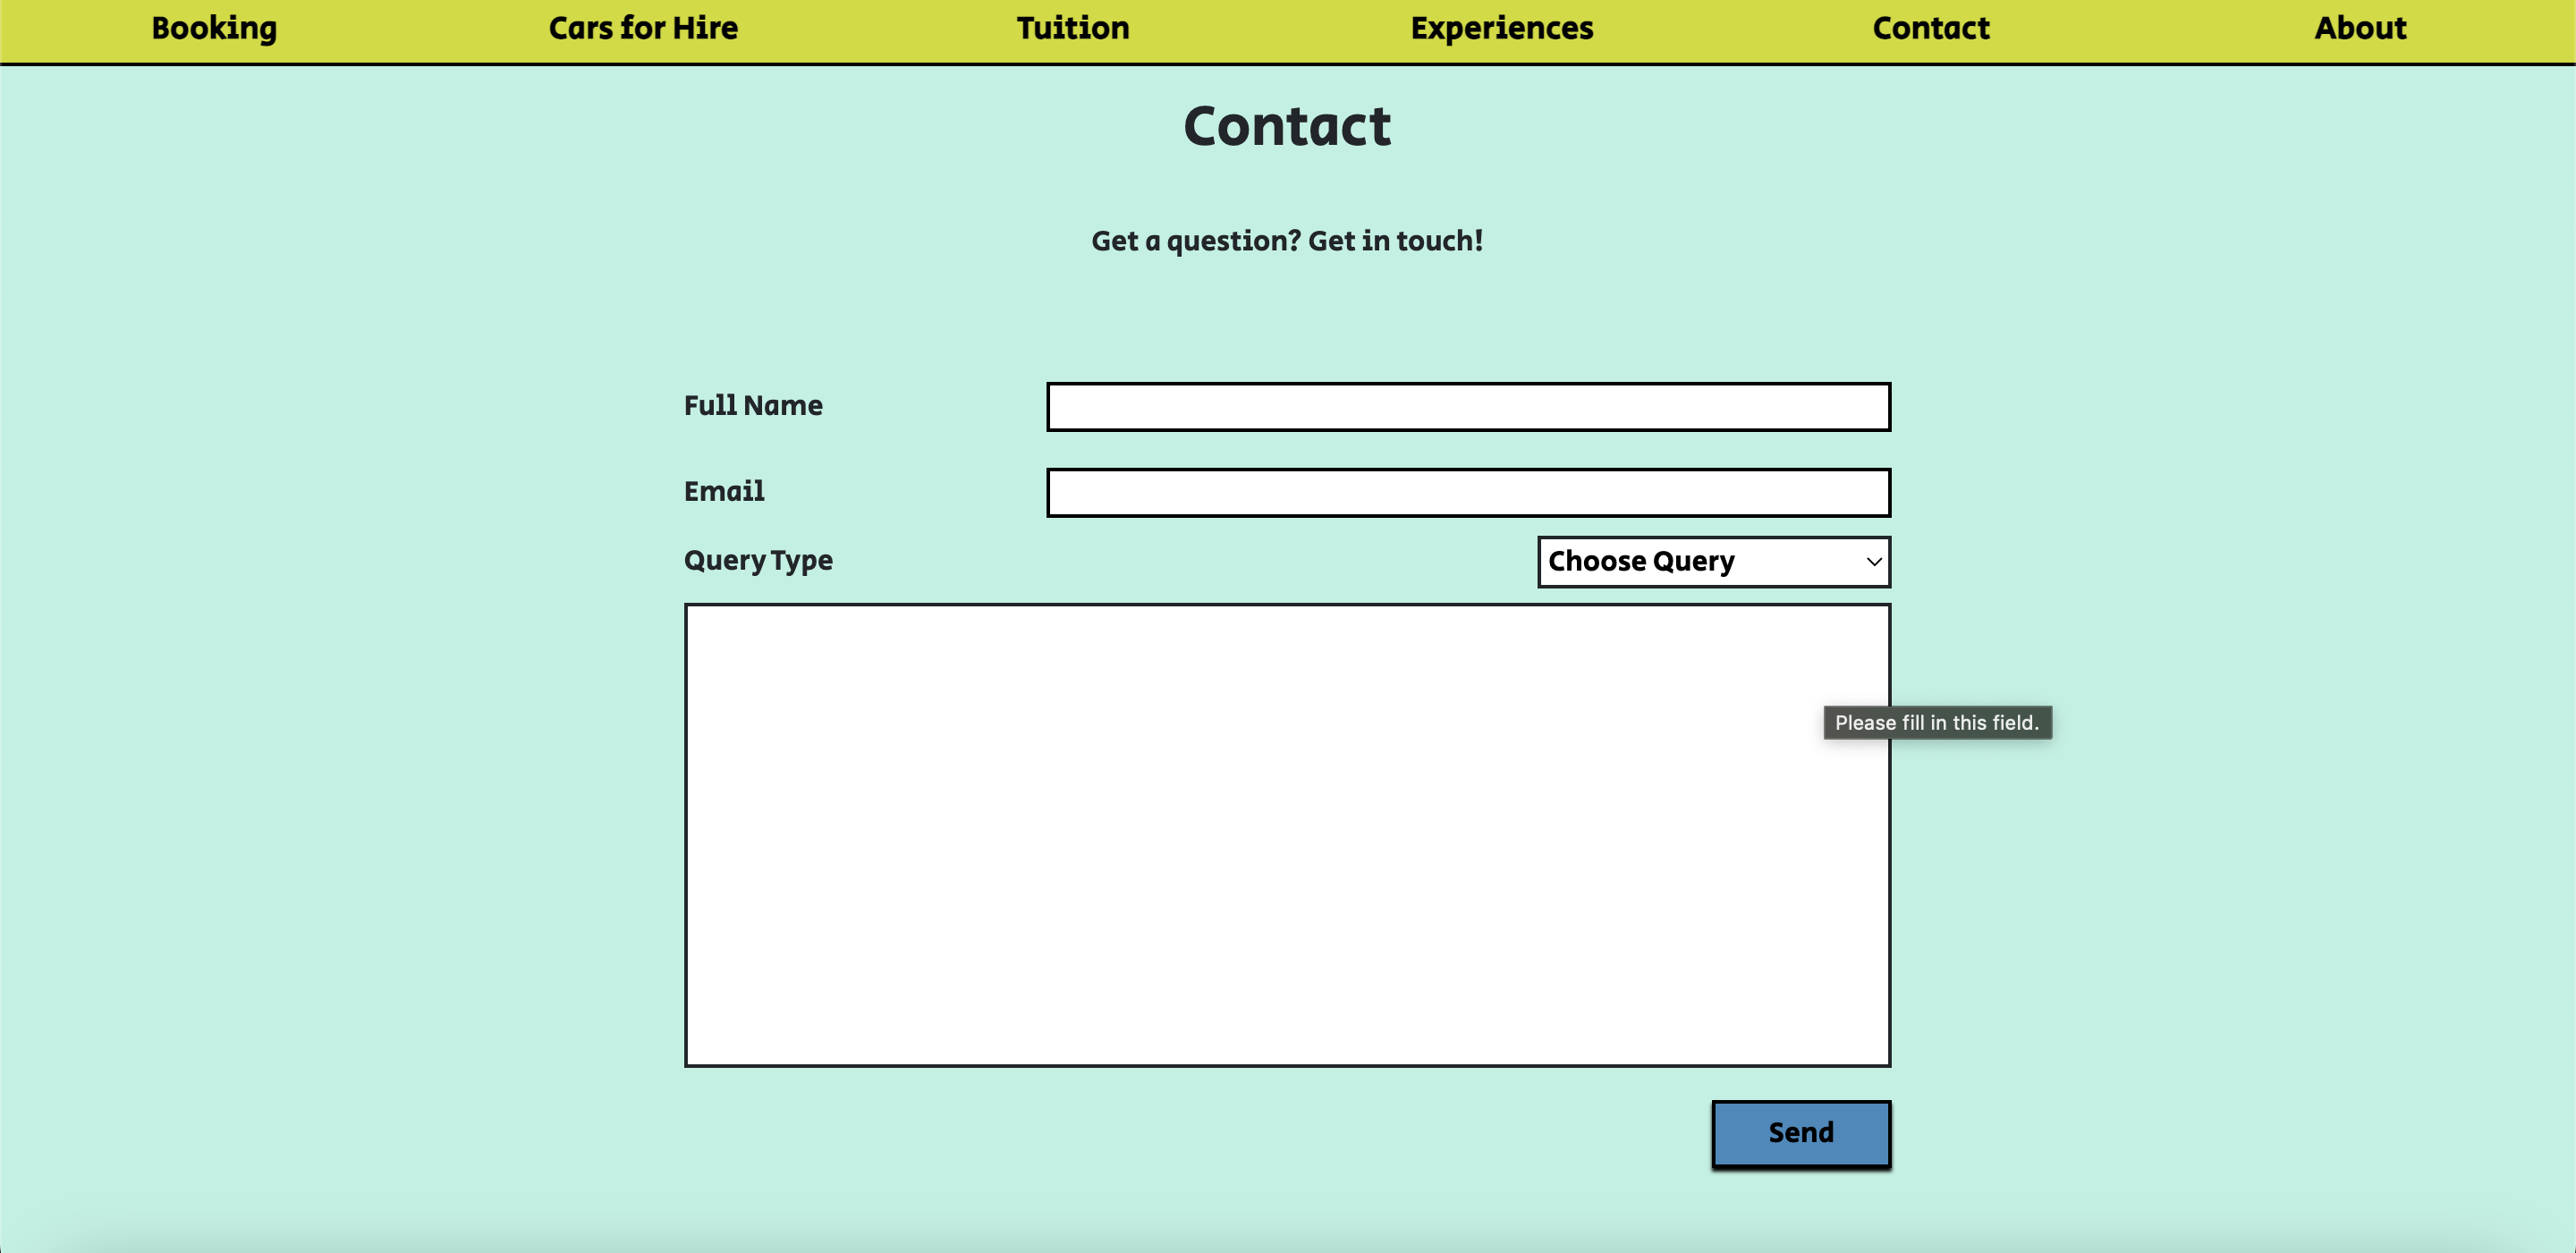
User Story: As a Site User I can submit a contact form so that I can get in touch with the business regarding questions I have.- Acceptance Criteria:
- Contact page can be located from the Navigation menu
- Contact form is intuitive to navigate and use
- User is notified with a success message that their message has been successfully sent when they submit there form
- User is notified if they don't fill in all required forms or fill them in incorrectly
-
A Track day list page that:
- Displays the different track configurations available
- Shows current trackdays up for booking in a table below, with information such as variant and base price displayed
- Contains the links to the booking and request pages respectively
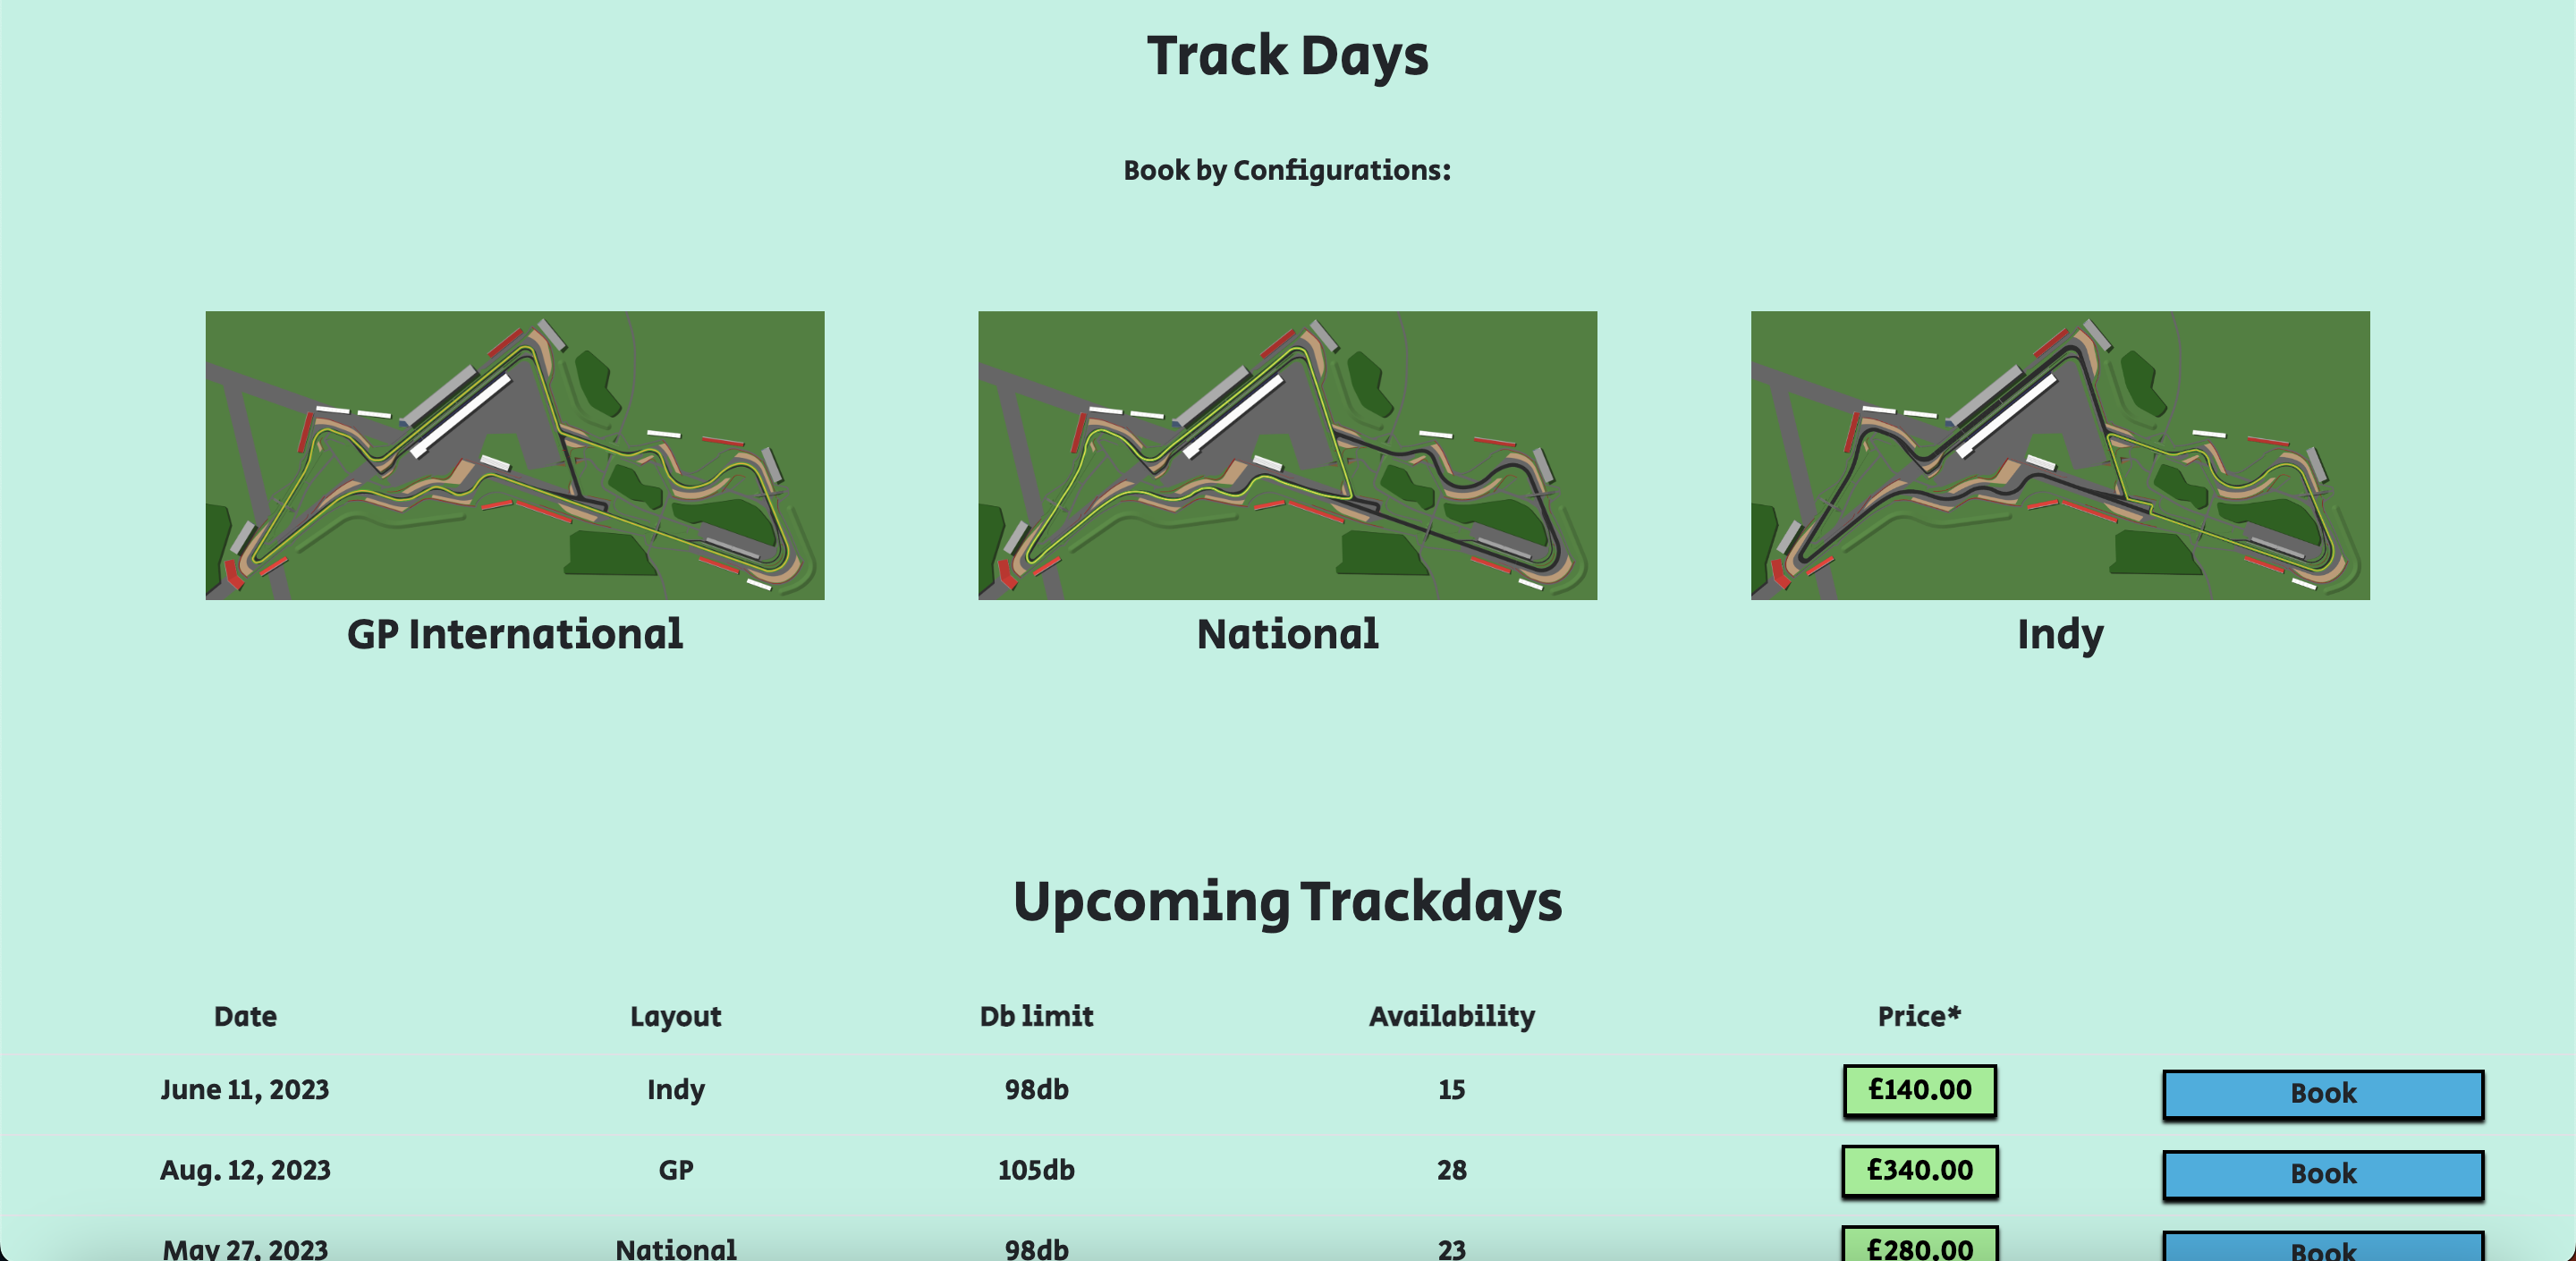
As a Site User I can visit a booking page so that I can view available/upcoming track days and proceed with a booking.- Acceptance Criteria:
- Different track configurations clearly visible above list of upcoming track days
- List displays key info such as date, layout, db limit, availability and price
- Each list item will have a button which links to the specific booking page where customers can view and add packages and extras to their track day
-
A Track day booking page that:
- re-affirms the specific trackday details to the user
- allows the option of selecting extras such as car hire and paddock hire
- users can add their trackday of choice to their basket through the add to basket button at the bottom of the page
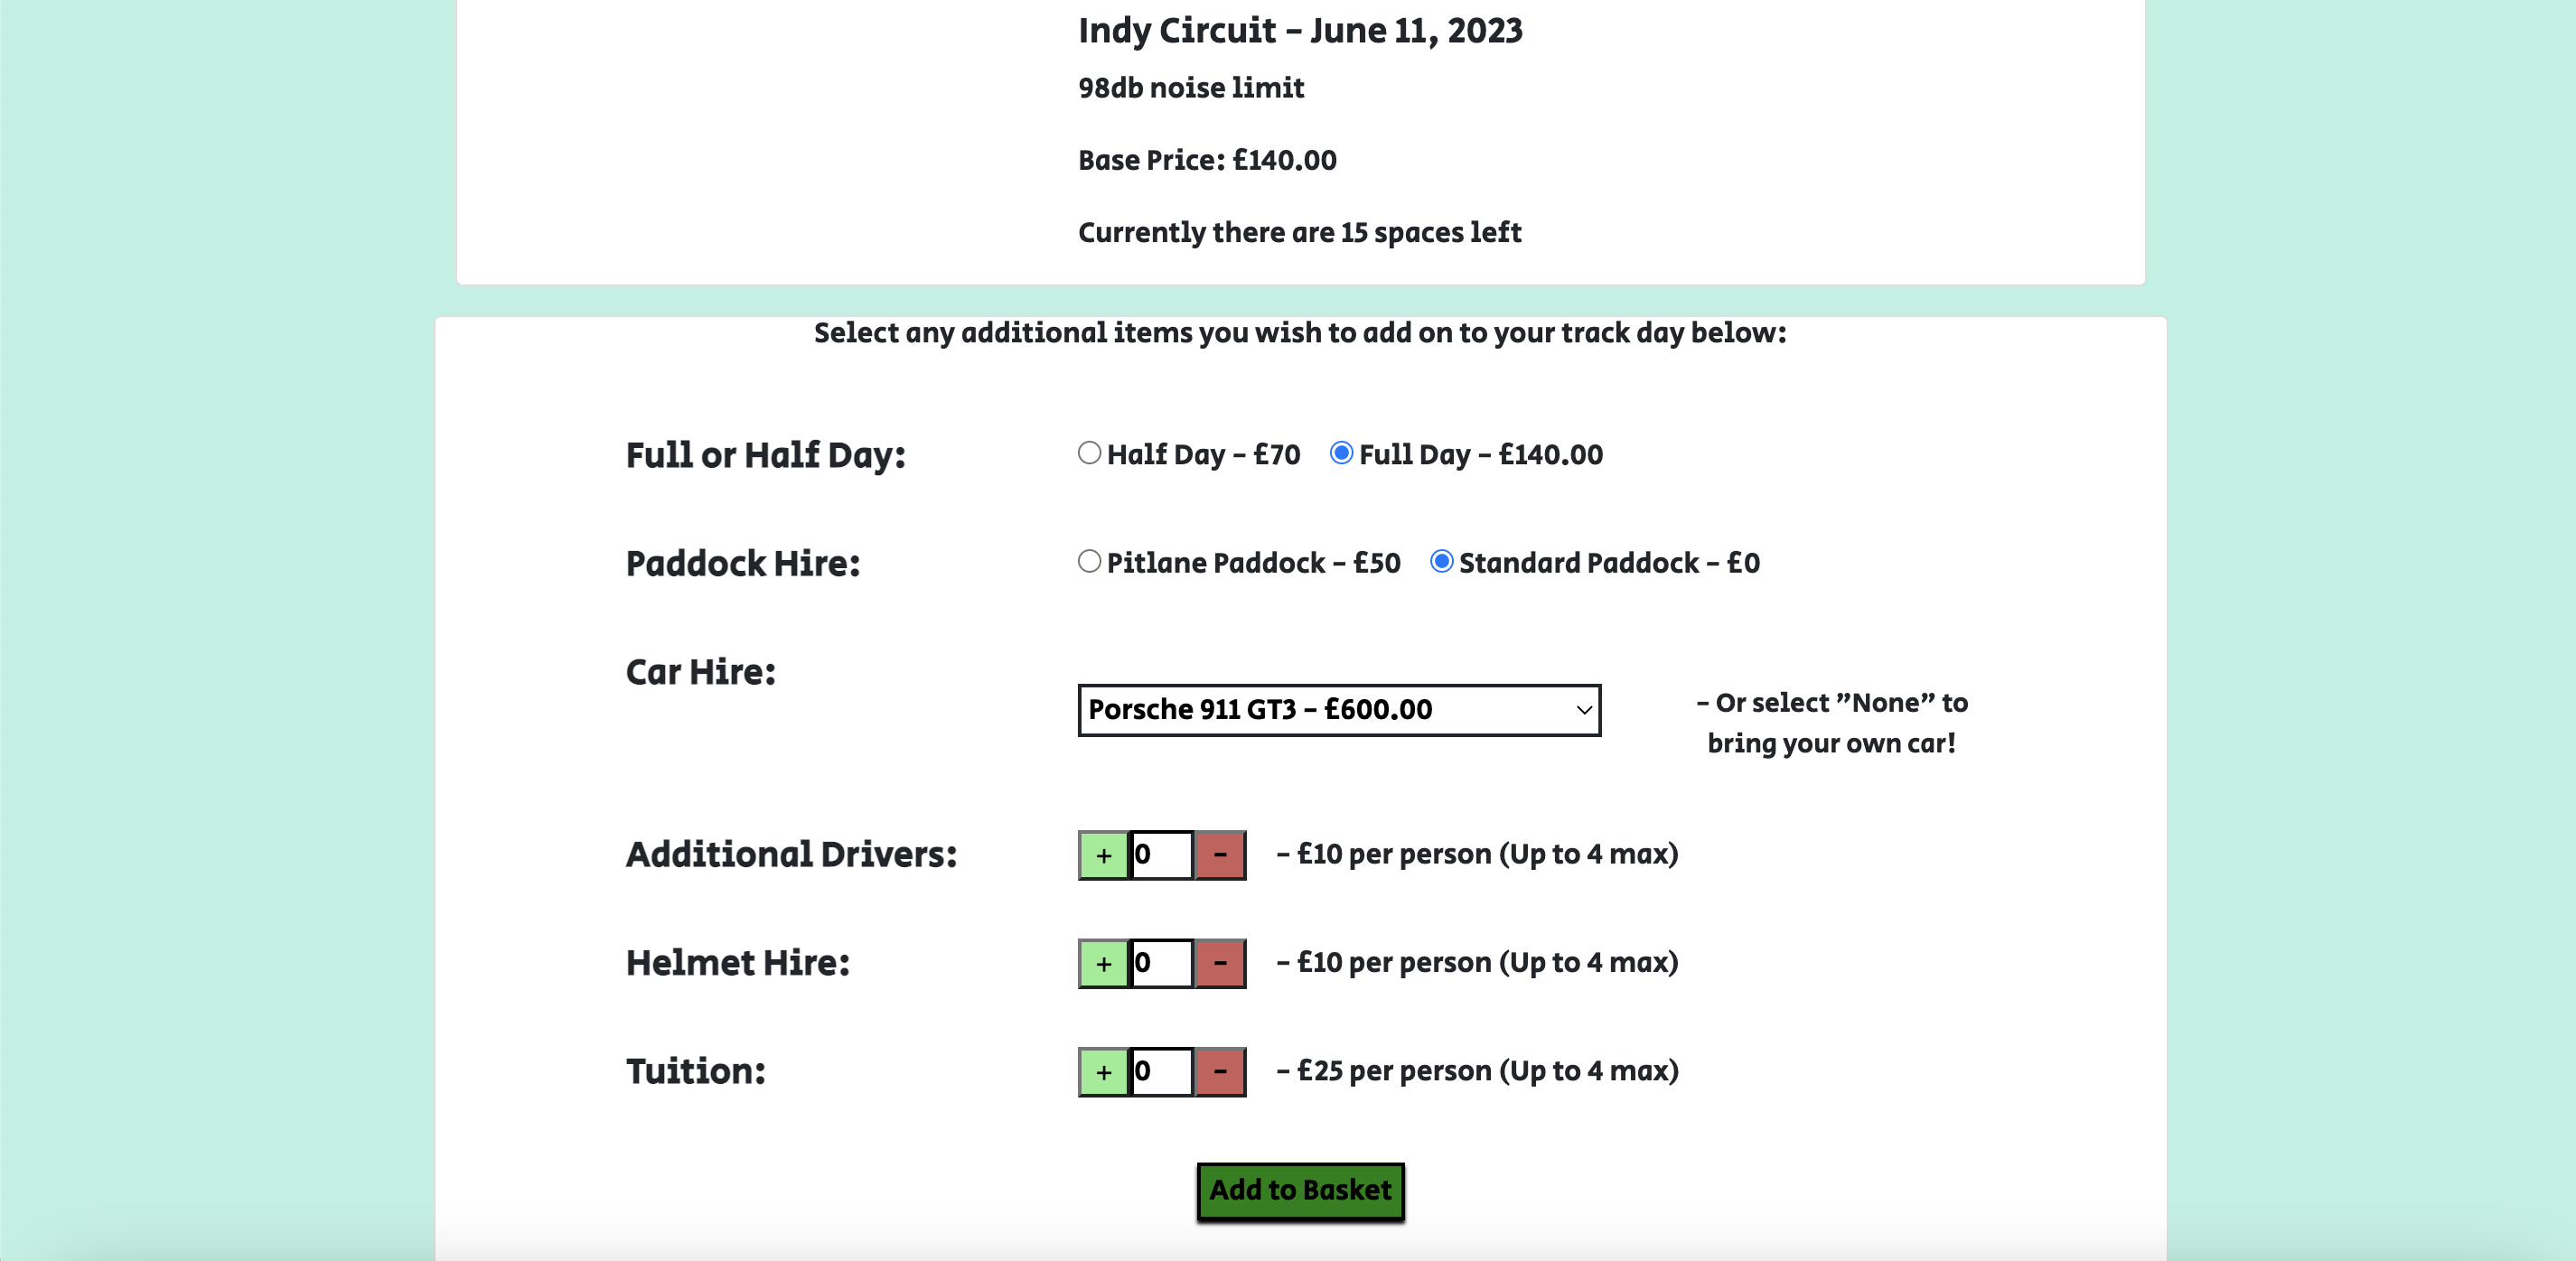
User Story: As a Site User I can select the track day I want and visit a booking page so that I can book my track day with any extras I would like to add.- Acceptance Criteria:
- Booking page follows directly after selecting from the track day list page
- Optional extras are presented on the booking page with clear and up front pricing
- When the user is satisfied with their selections, the user can add to cart and proceed to checkout
- User can only book 1 trackday at a time
-
A Track day request page that:
- contains a form for users to fill in to request a trackday
- informs users when the form has been successfully submitted
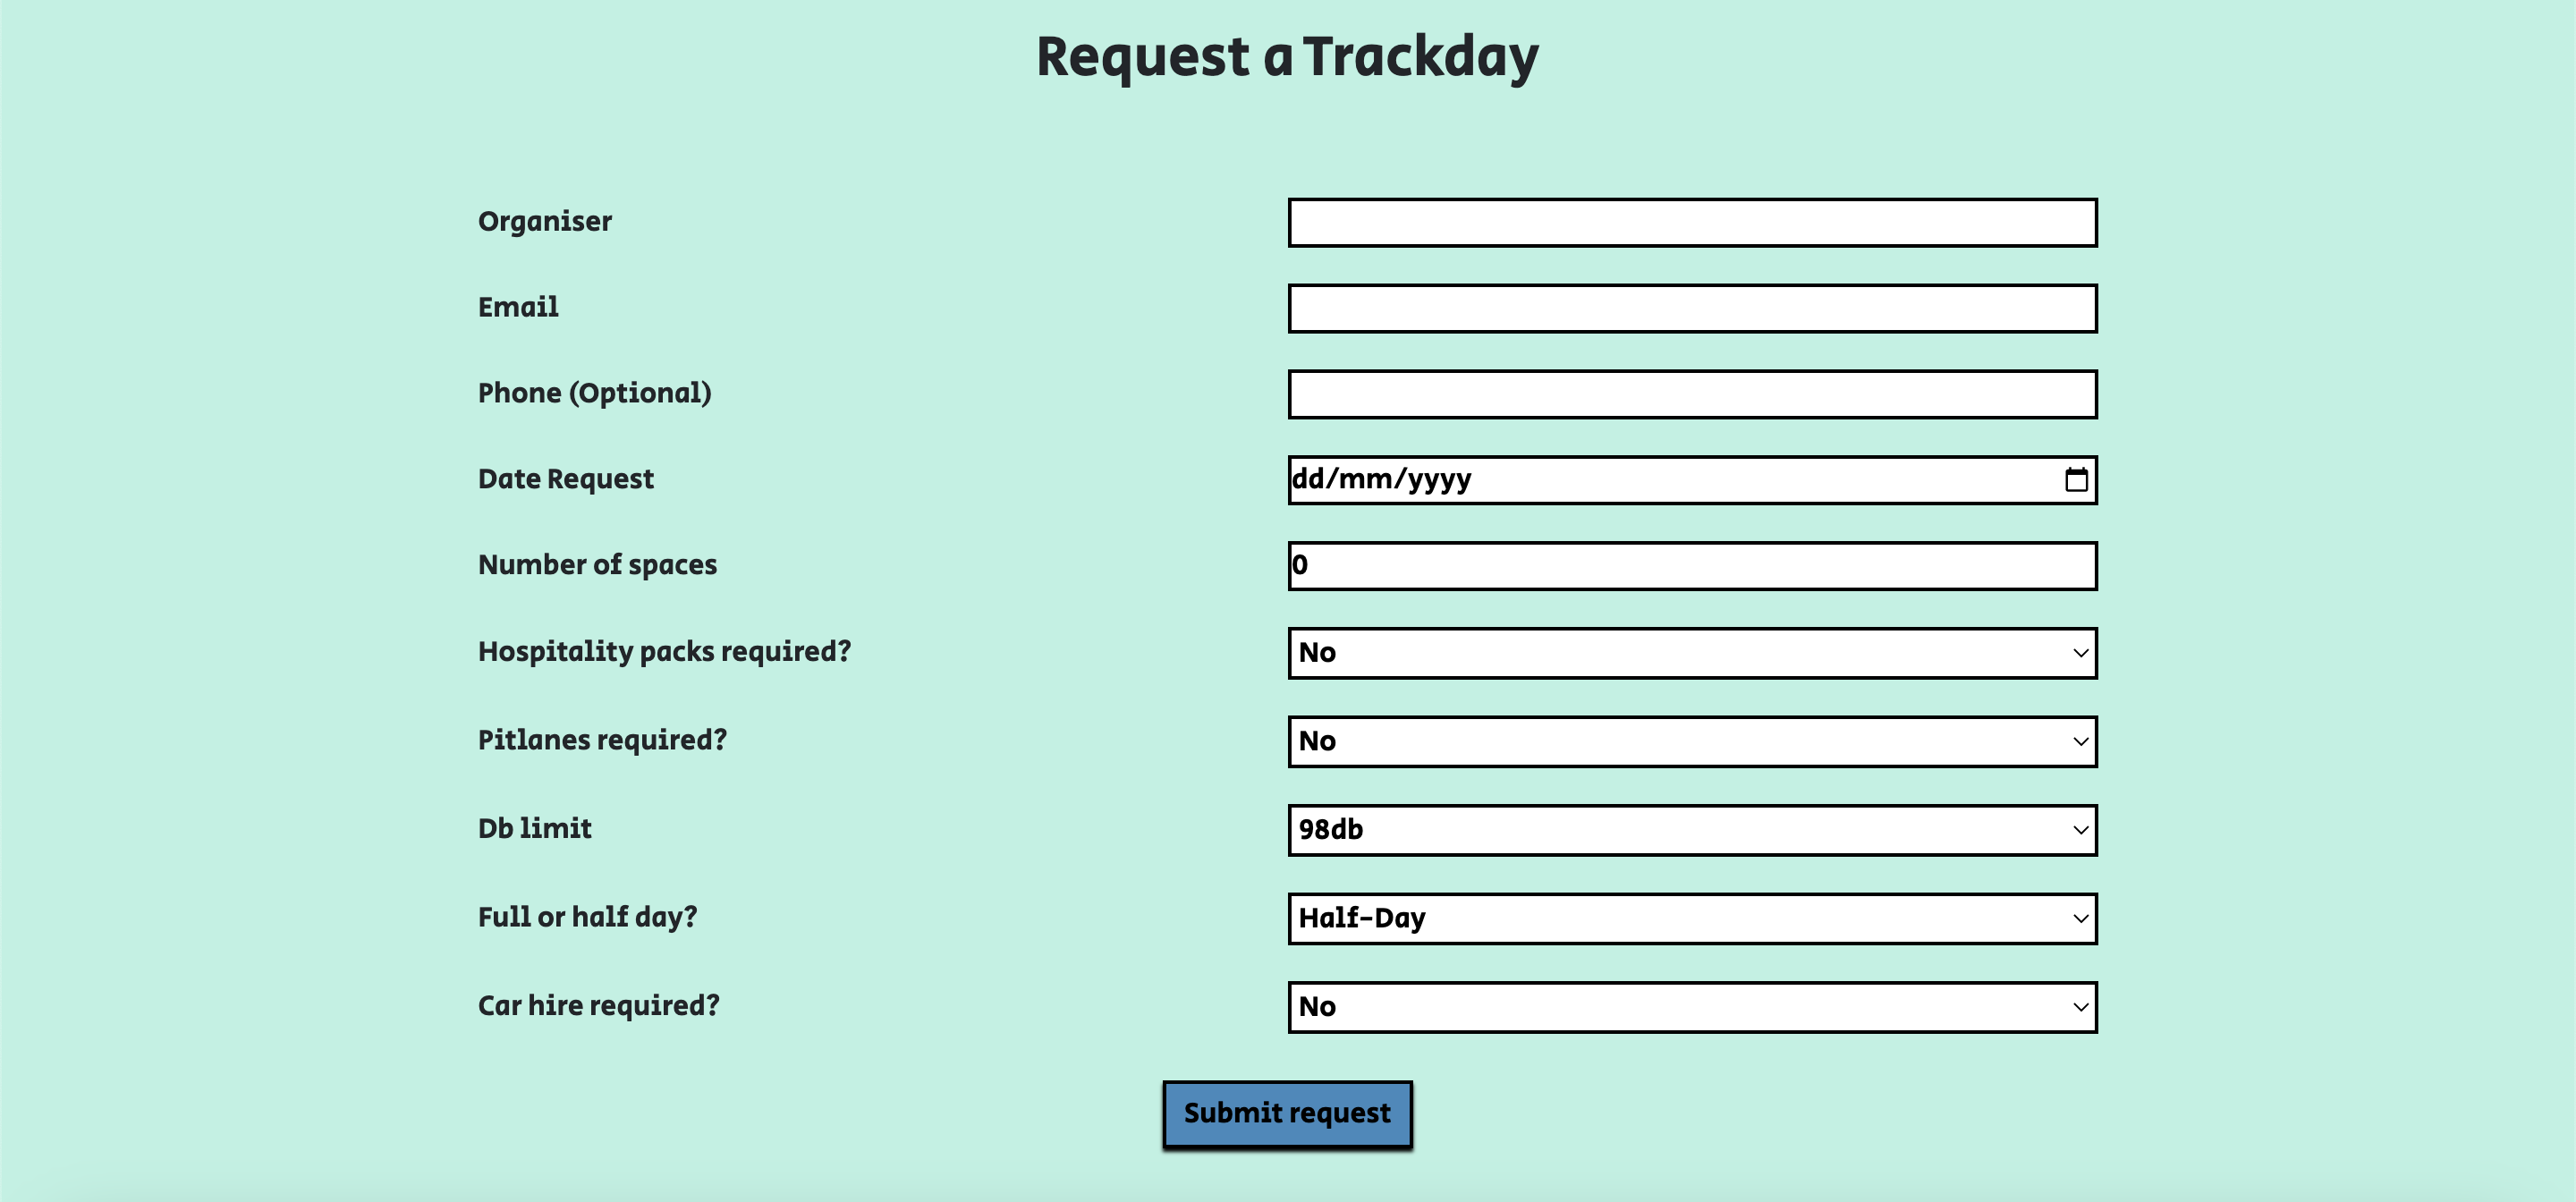
User Story: As a Site User I can use a request form so that I can request a bespoke track day booking outside of the current available options.- Acceptance Criteria:
- Page with form that allows users to send a request to the site owner with information regarding a bespoke track day
- The request is stored on the database for the site owner to see
- User can select different options based on their requirements for their track day request
- The user is notified of a the form success, or failure, after they click the submit button.
-
A tuition list and details page that:
- displays a list of courses on offer, around a Bronze, Silver, Gold standard of course difficulty
- each course package can be explored through the 'Explore' buttons
- the details page contains a description and itinerary of the day
- price and booking button at the bottom of the page
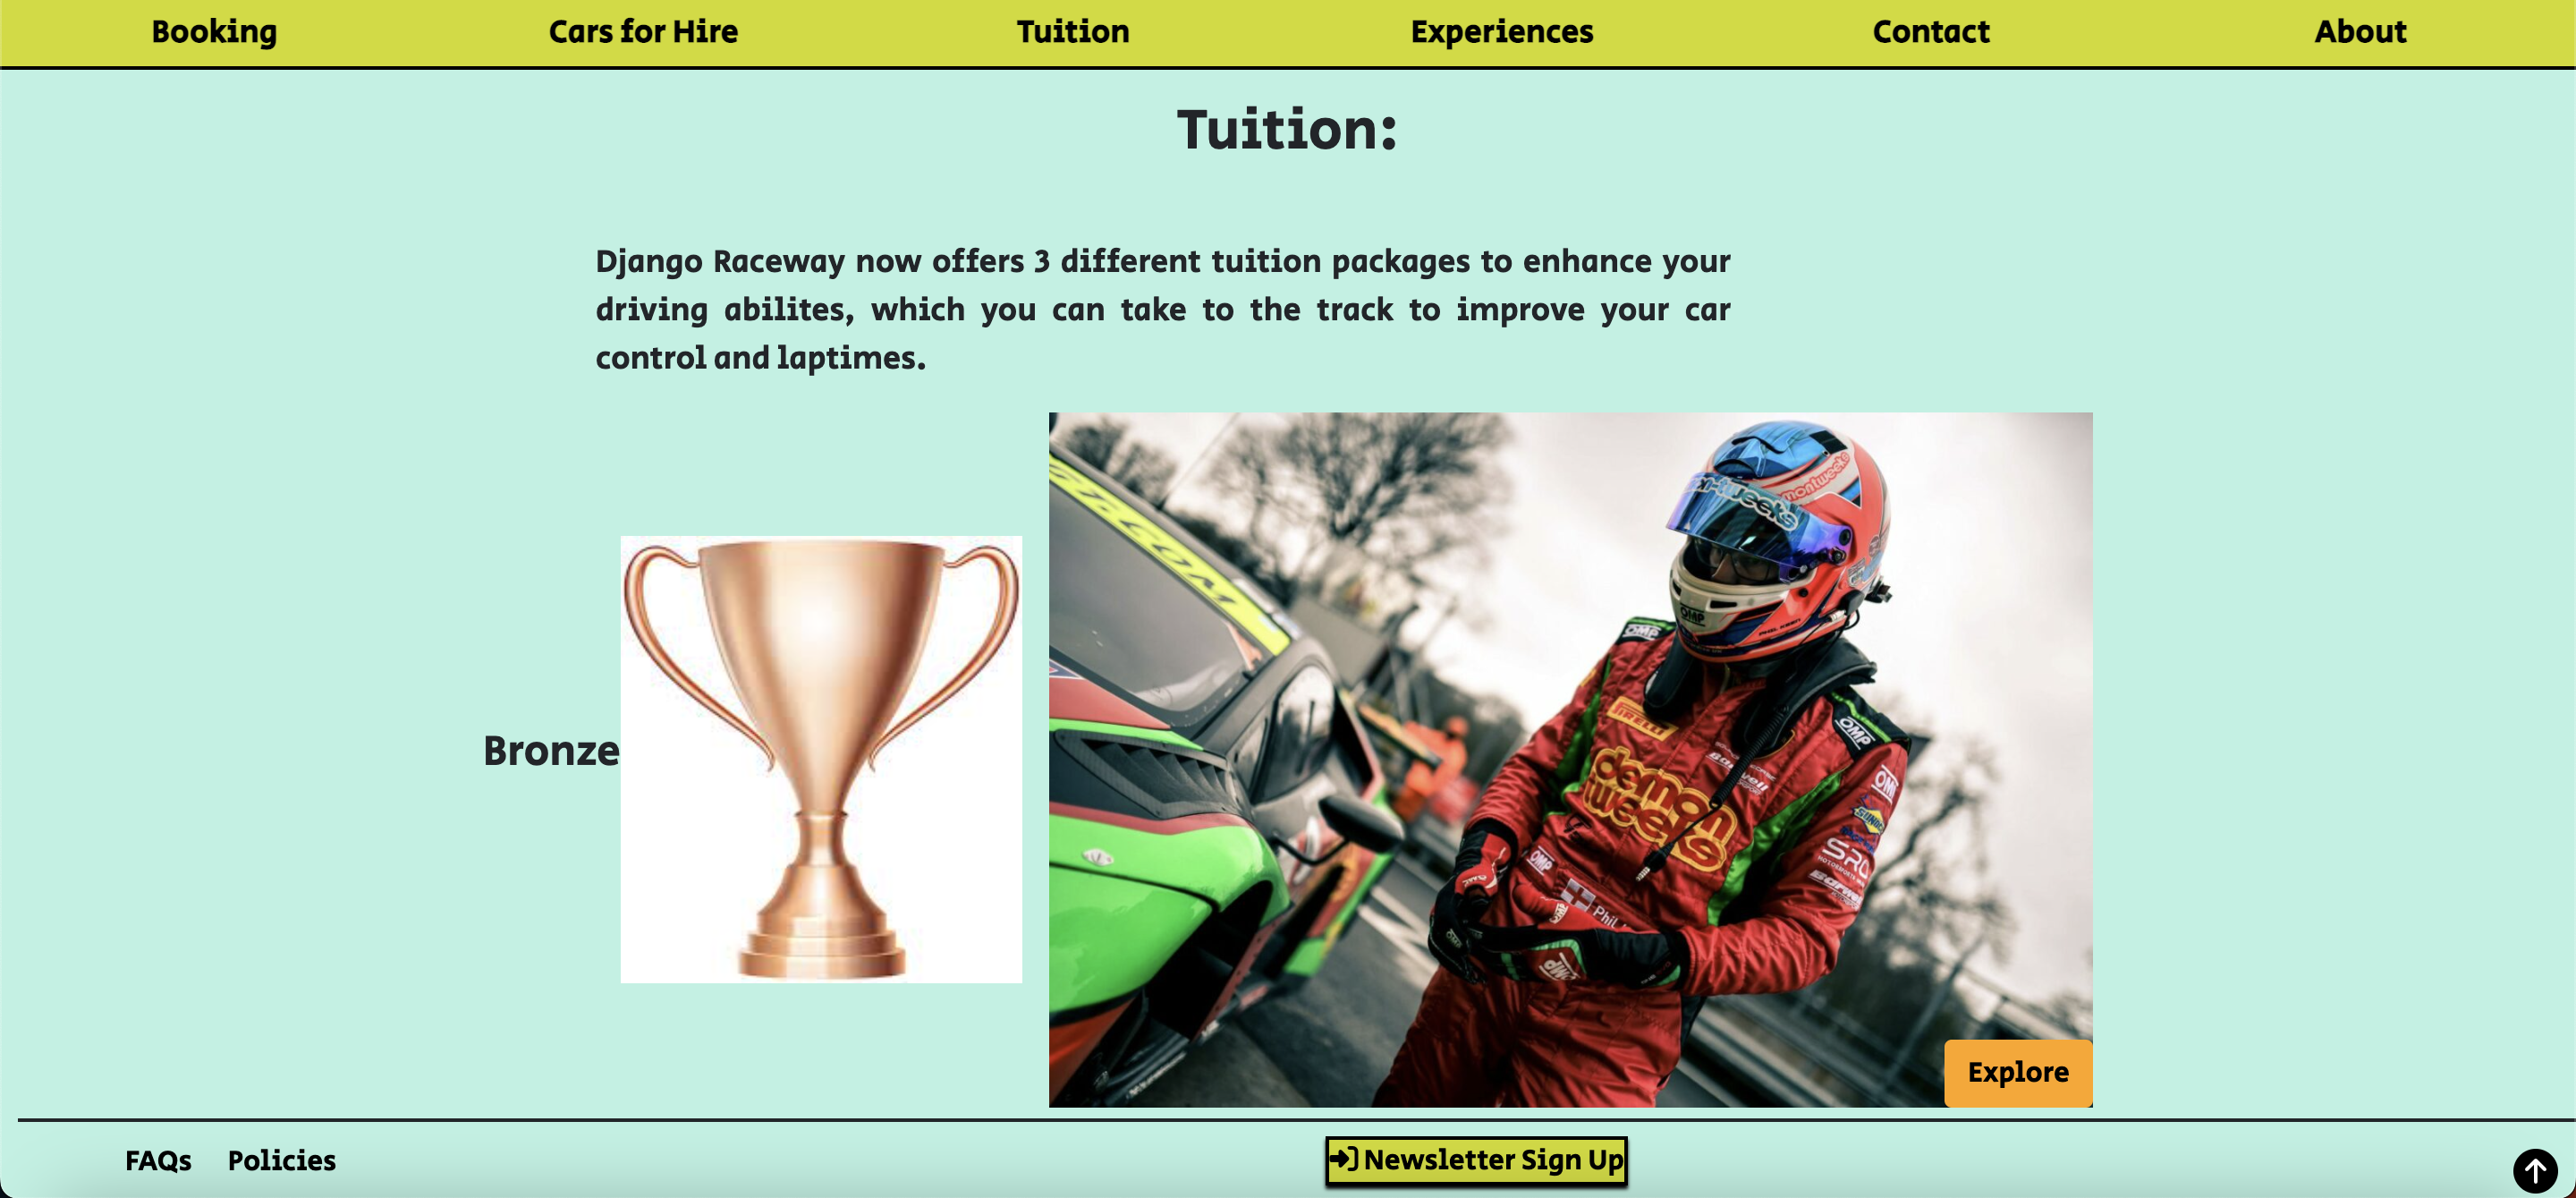
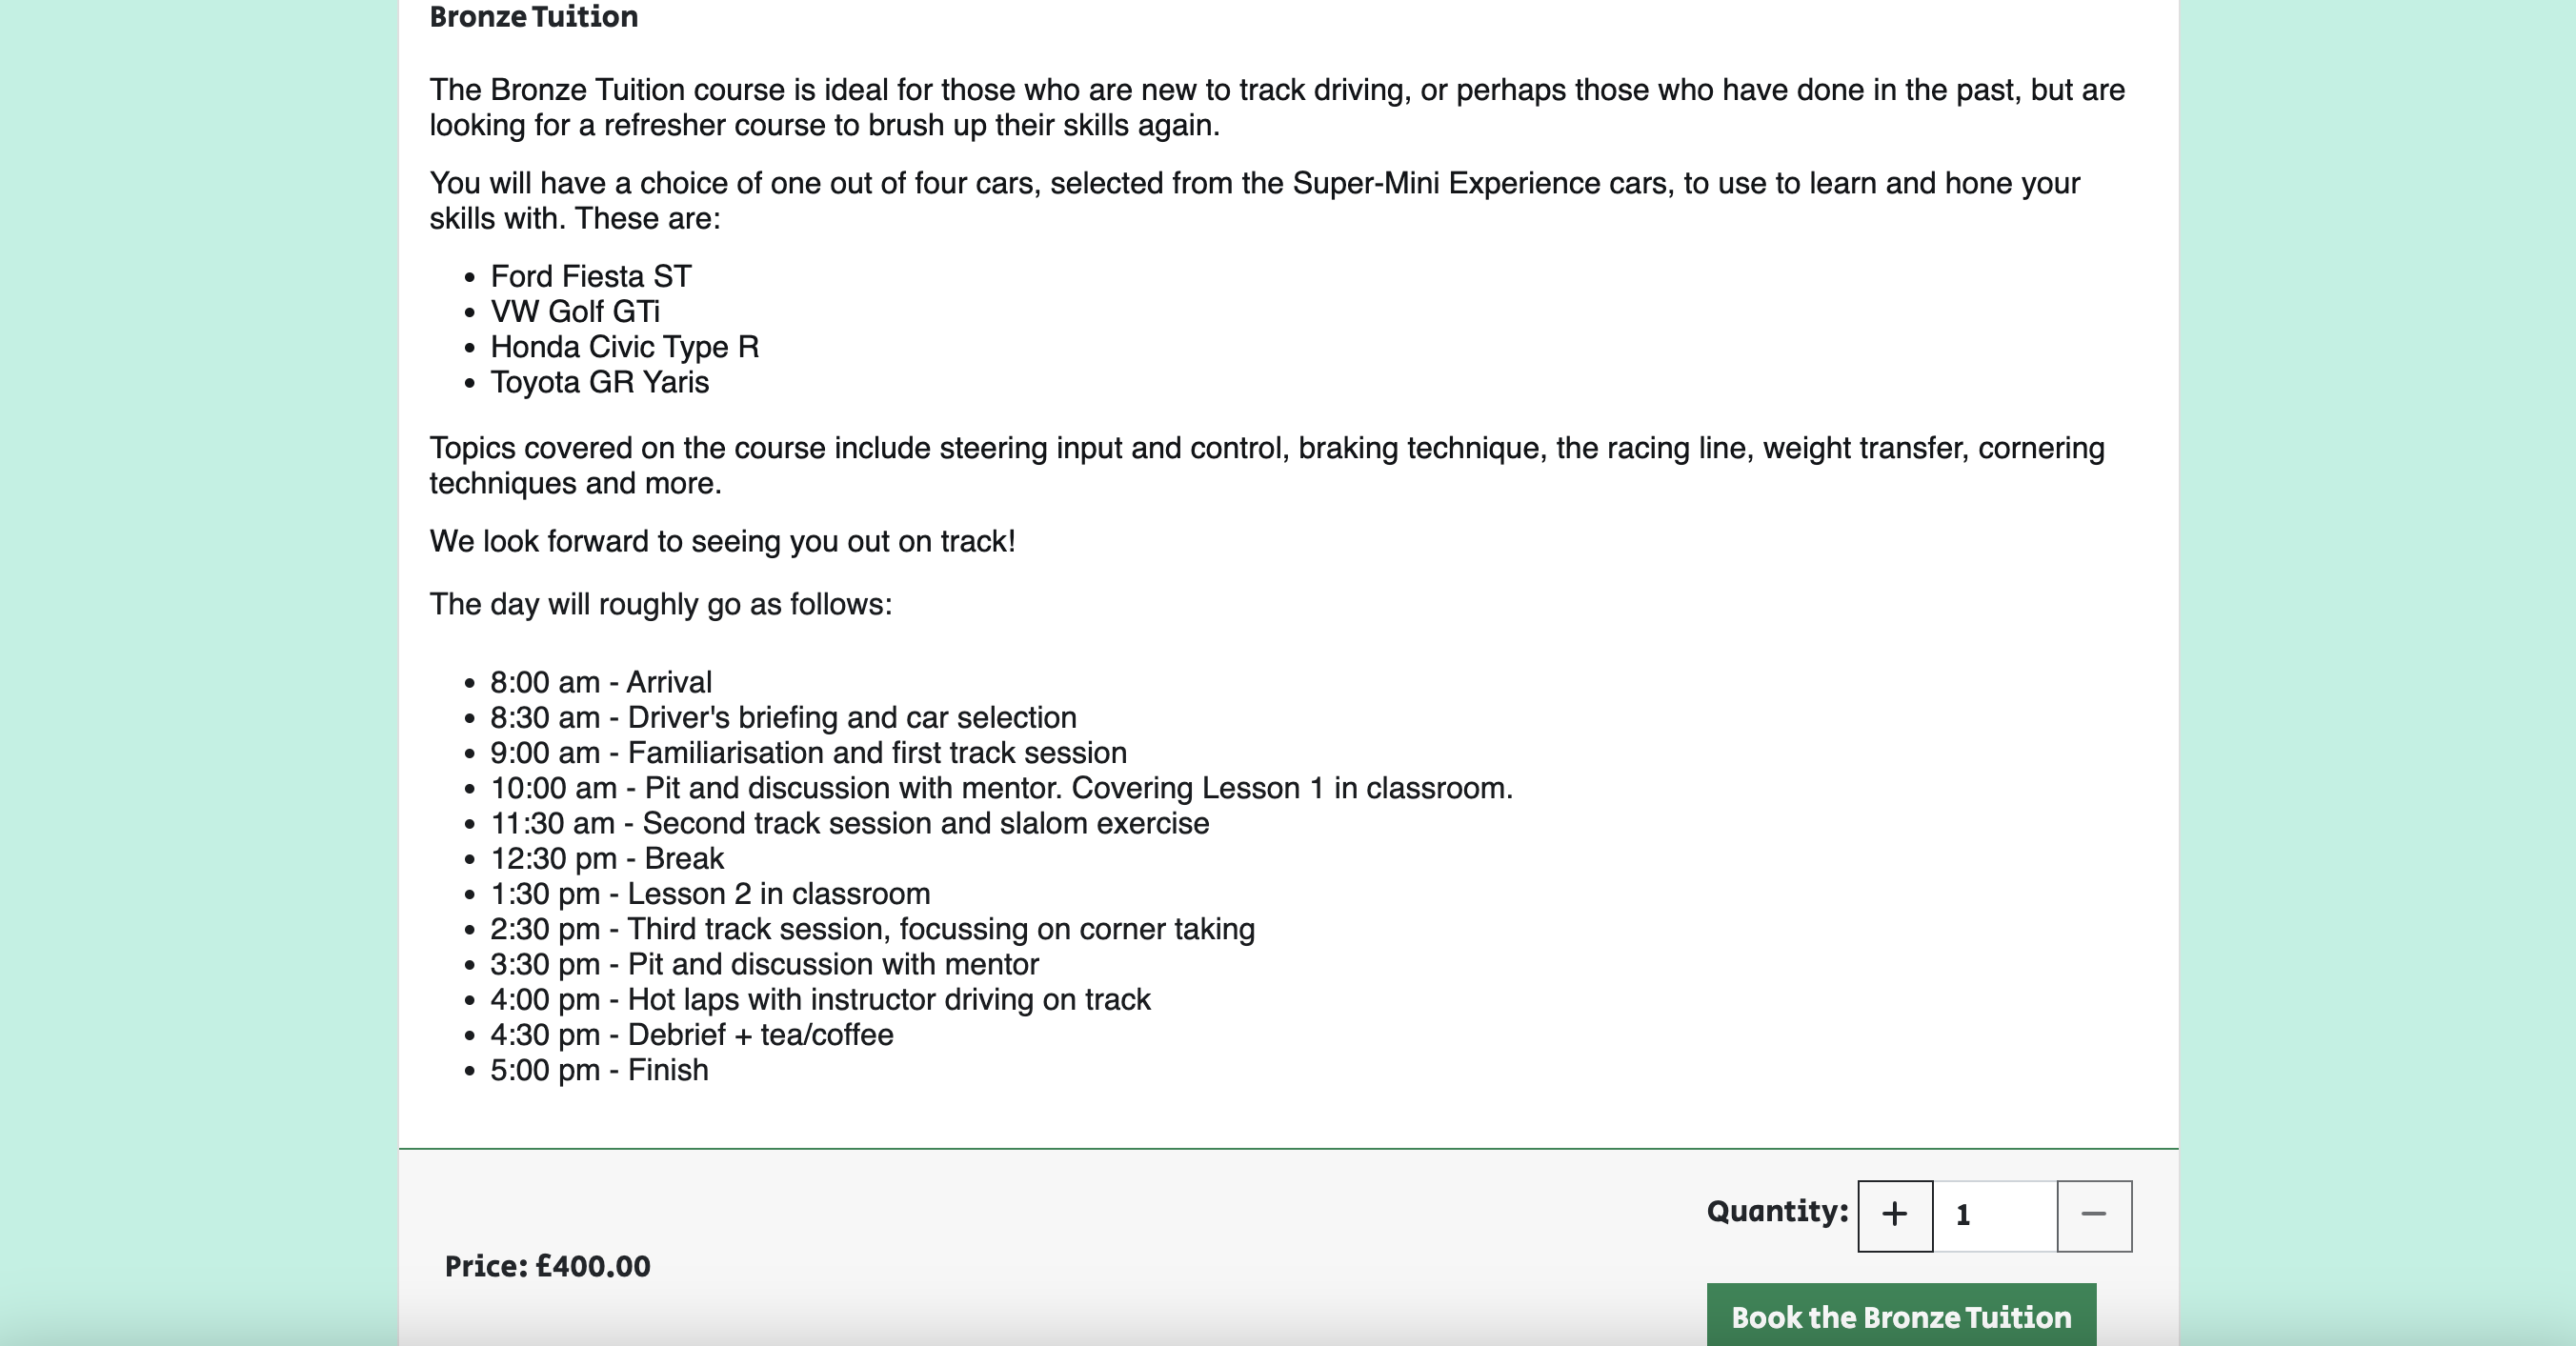
User Story: As a Potential Customer I can view a tuition page so that I can book a day to learn core driving skills.- Acceptance Criteria:
- 3 key tuition packages - Bronze, Silver and Gold Tuition. Must be very clear which package is which and why silver costs more than bronze and why gold costs more than silver.
- Operate in the same way as the experiences page, with "Explore more" buttons that take you to a new page with more details and specifics
- Can be booked as standalone items just like the experiences packages
- Can choose quantity from a quantity selector at the bottom of the page
- Can add to basket through a single click button
-
An experiences list and details page that:
- displays a list of different experience packages
- each can be explored through the 'Explore' buttons
- the experience details and itinerary are displayed in the details page
- price and booking button at the bottom of the page
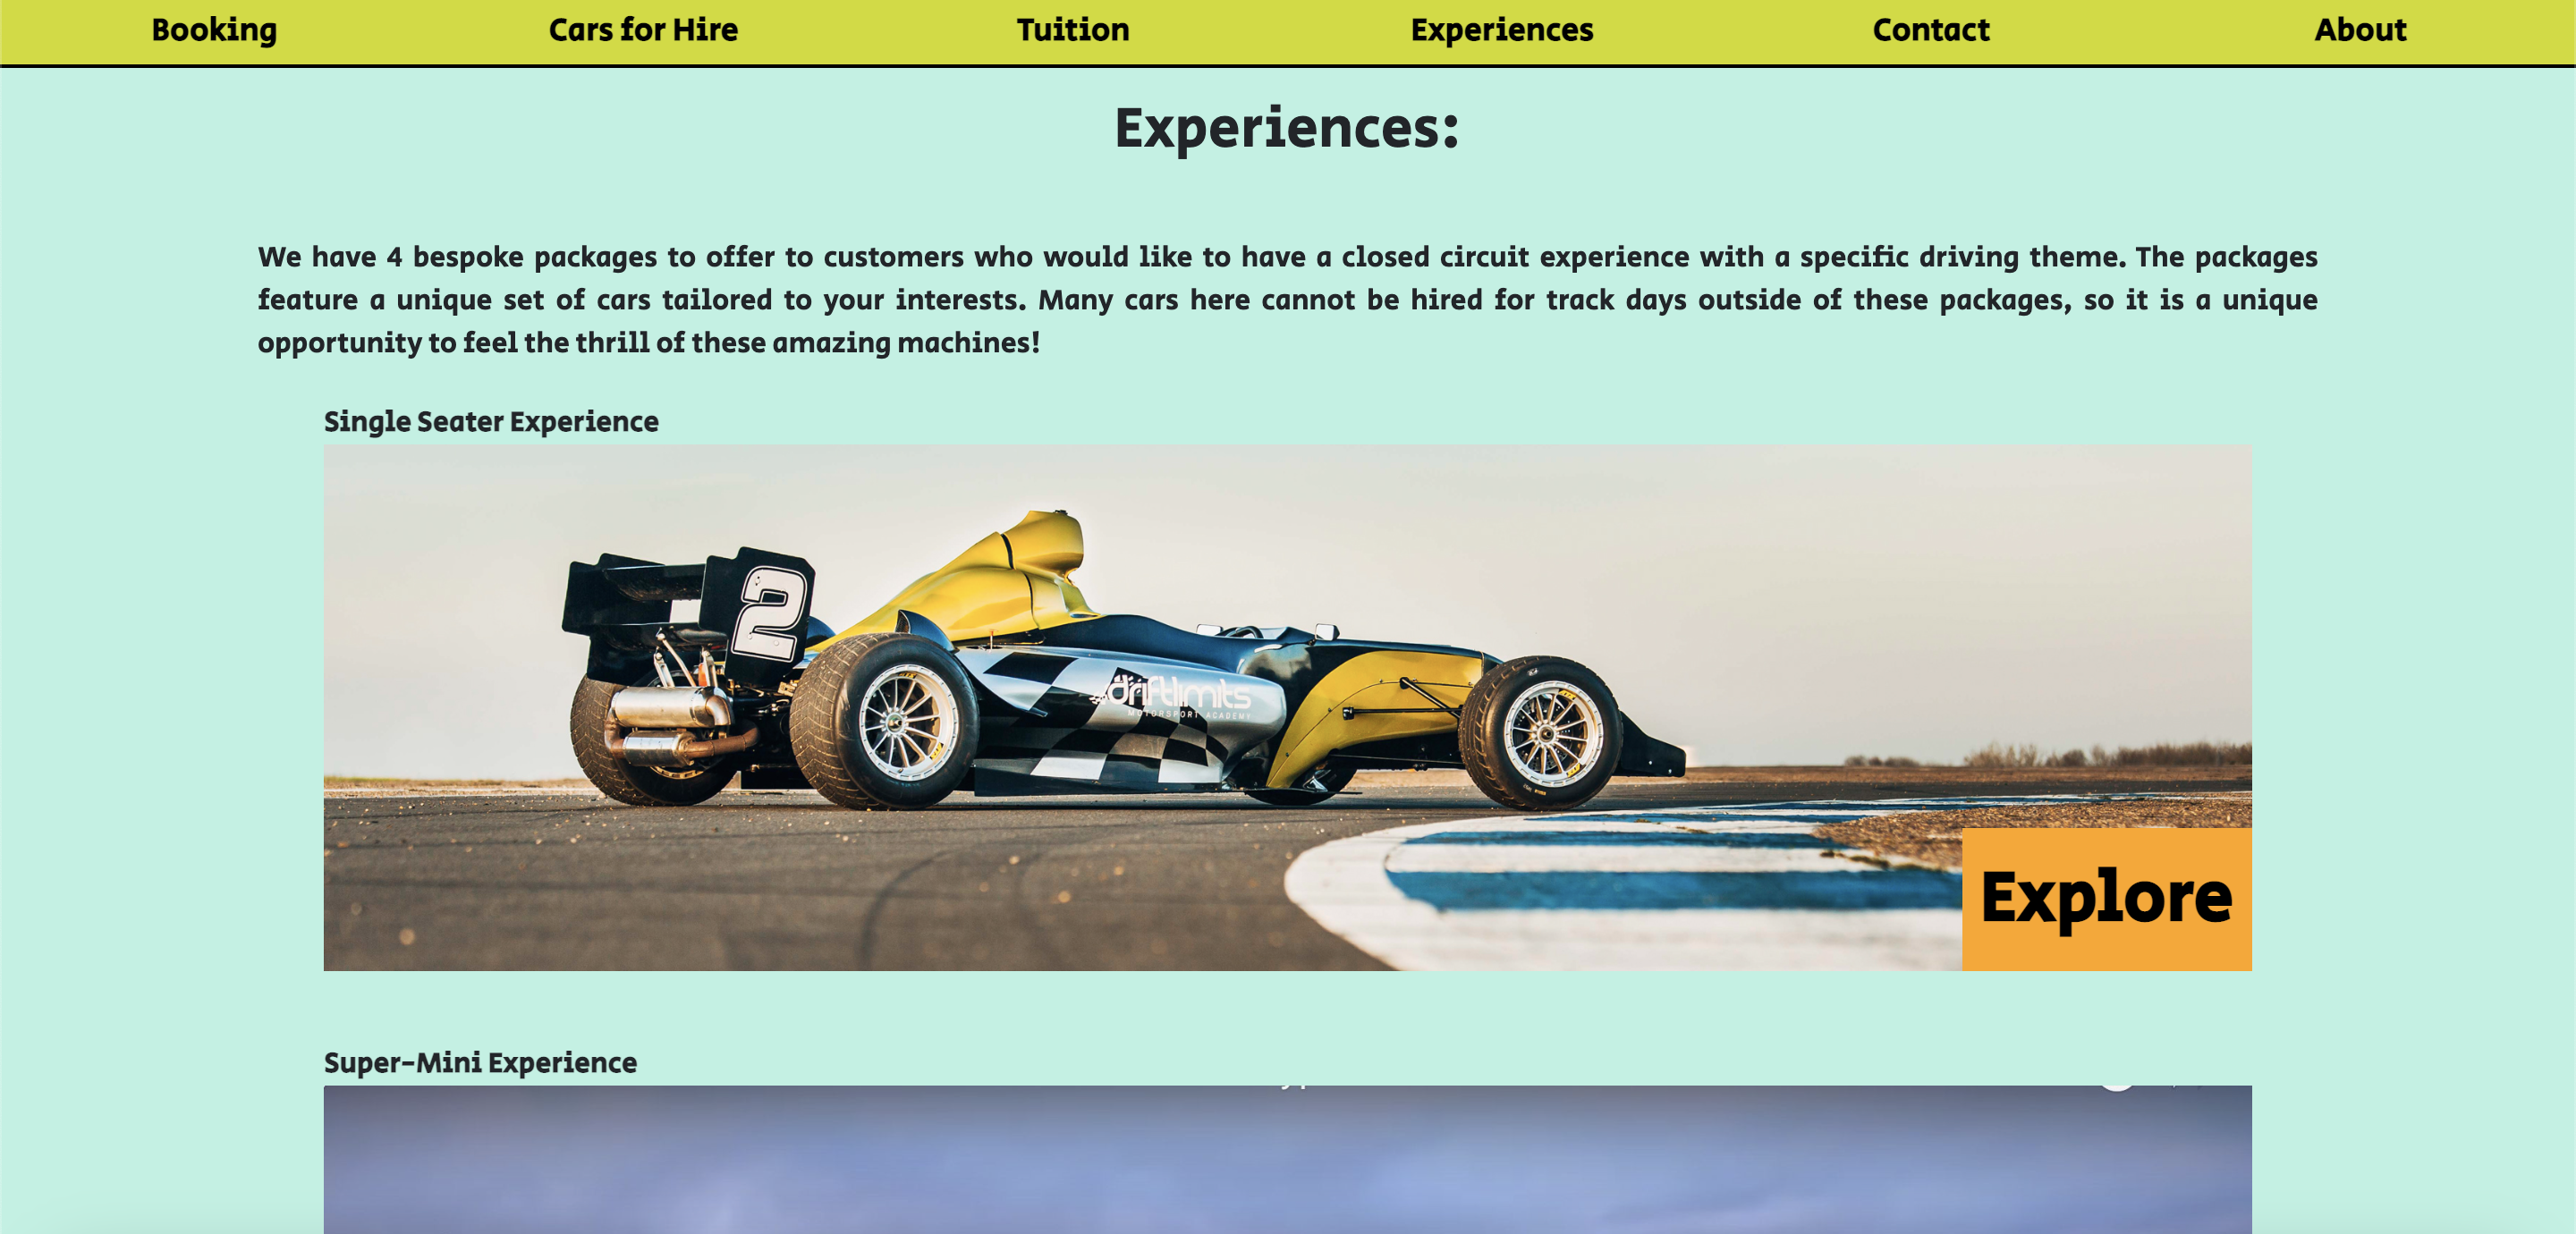

User Story: As a Potential Customer I can view a separate experiences page so that I can order a slightly different product to a pure trackday (perhaps as a gift).- Acceptance Criteria:
- Experiences Page has high quality landscape images that match the title of the experience package
- There are "explore buttons" that can take the user to a page to see more info
- Can be navigated to from the Nav bar
- Can choose quantity from a quantity selector at the bottom of the page
- Can add to basket through a single click button
-
A car hire page that:
- shows a visually appealing list of cars for hire on the trackdays
- includes car images and statistics in cards
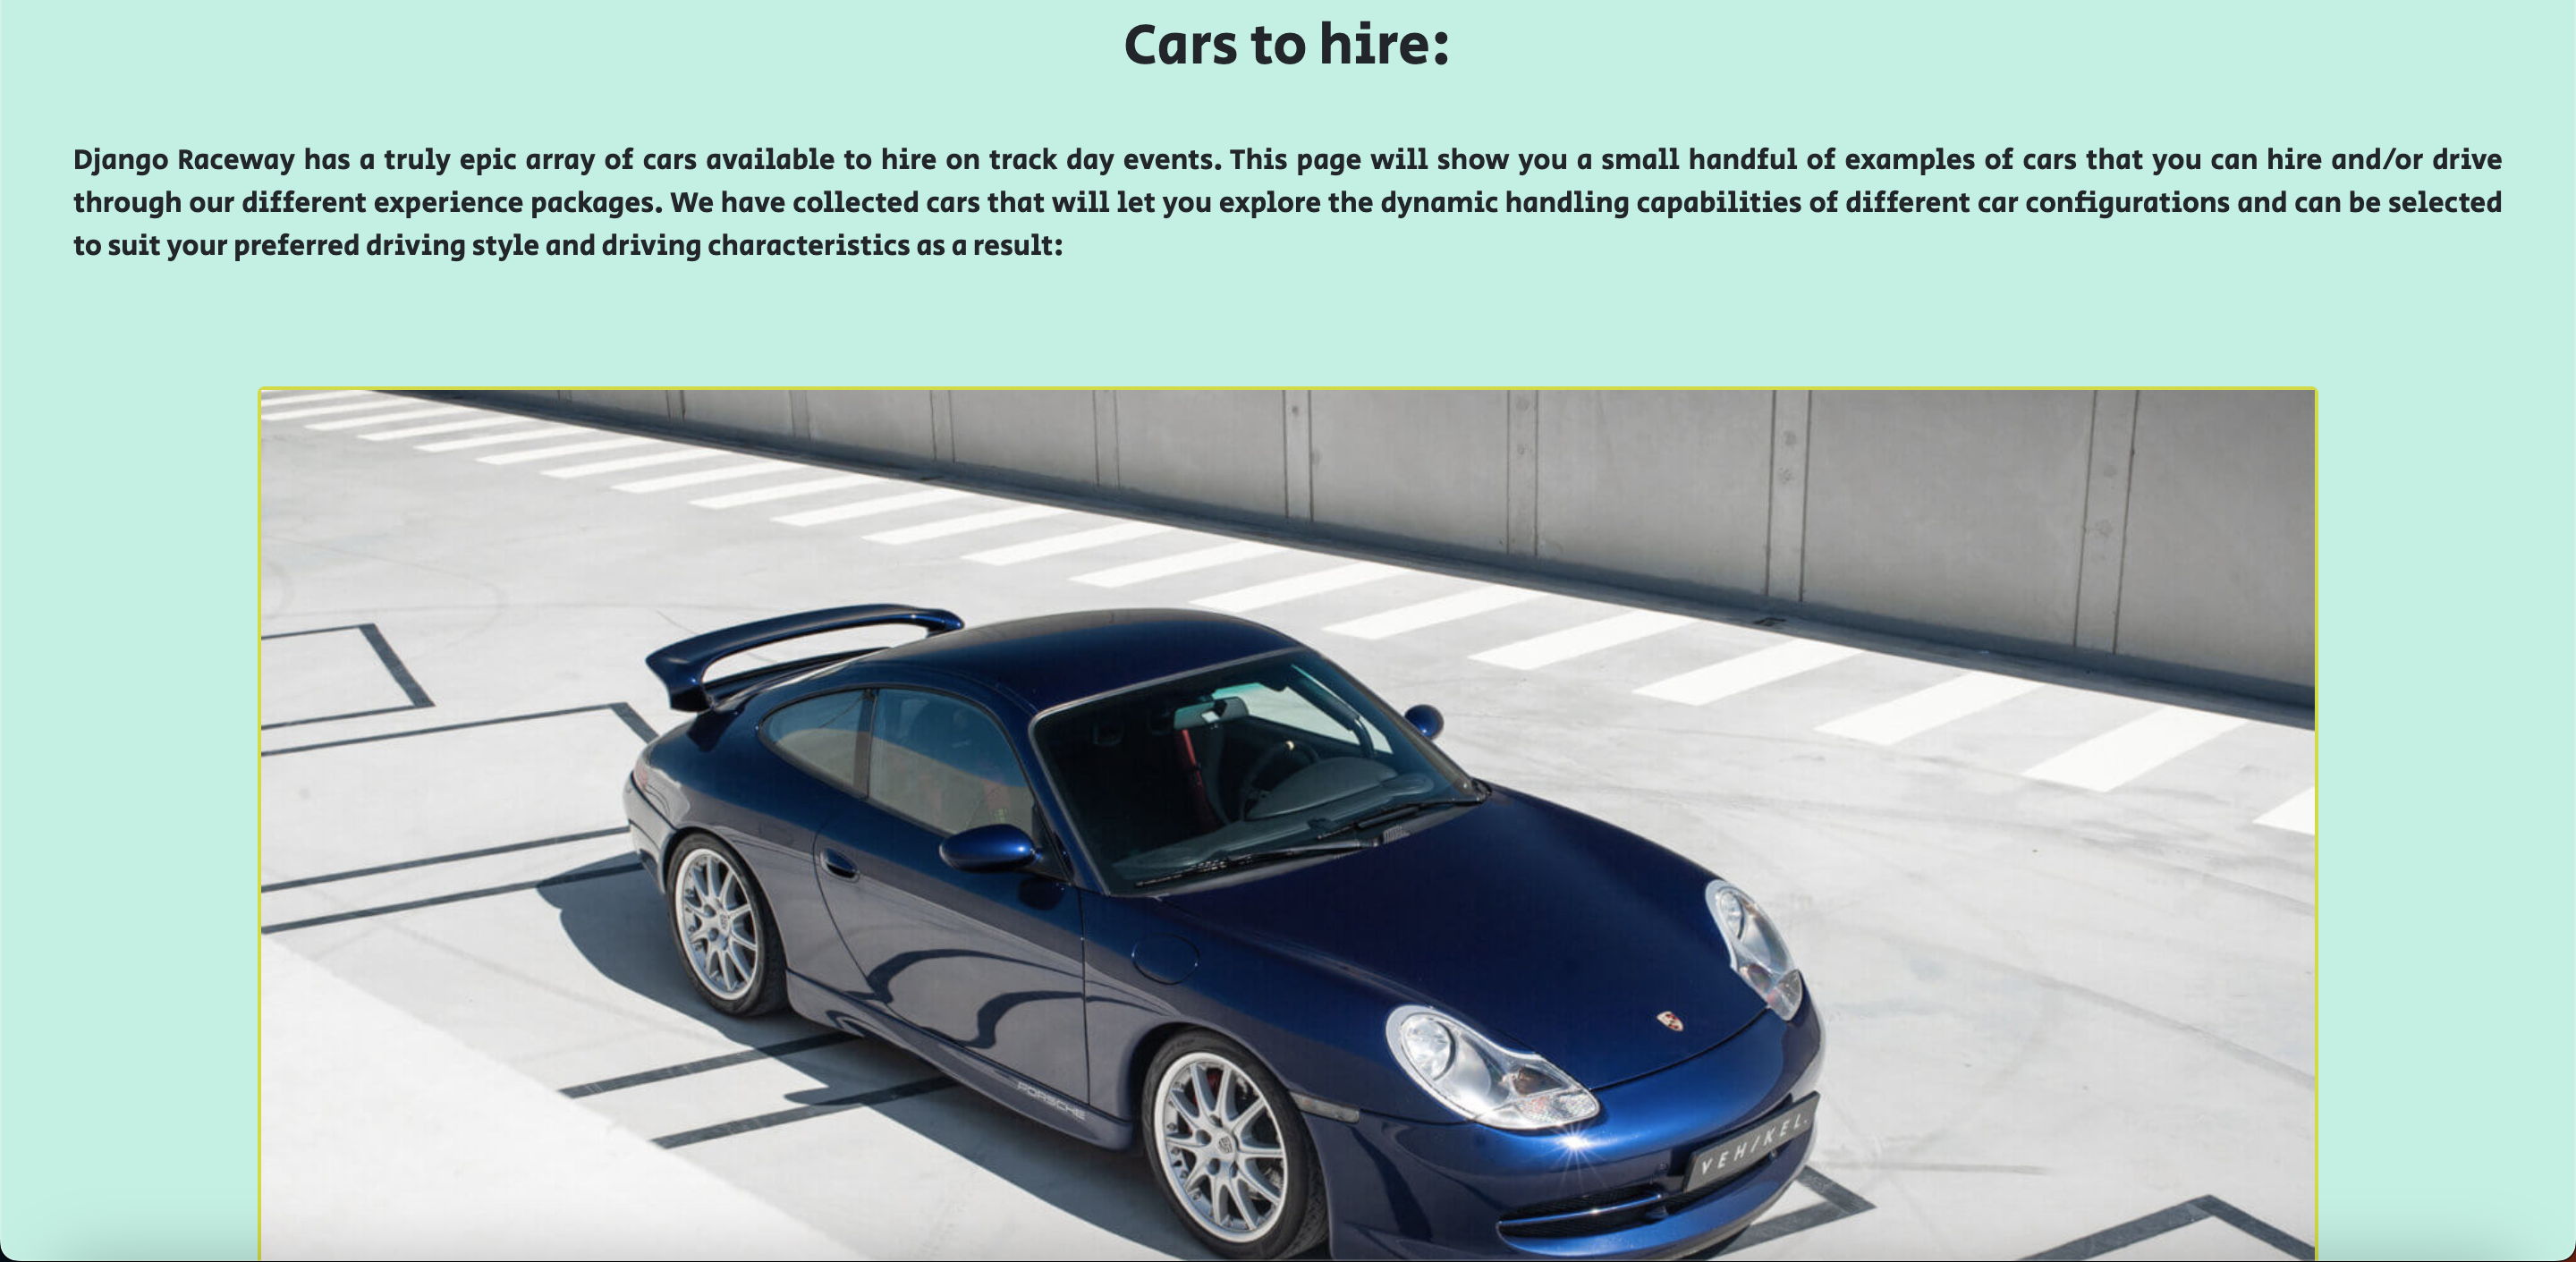
User Story: As a Site Visitor I can view a selection of cars so that I can choose a car I might want to hire at an upcoming trackday.- Acceptance Criteria:
- Selection of cars with key stats on the database, such as power and torque
- A dedicated page where site users can view the cars on offer including a presentable way to display info and stats to them
- Car hire: specific car can be selected via form option on trackday booking page
-
A user profile page that:
- provides an editable form for users to insert billing information
- this section is based on the idea of setting billing information for a future feature of a gift store, where deliveries can be sent to a specified address
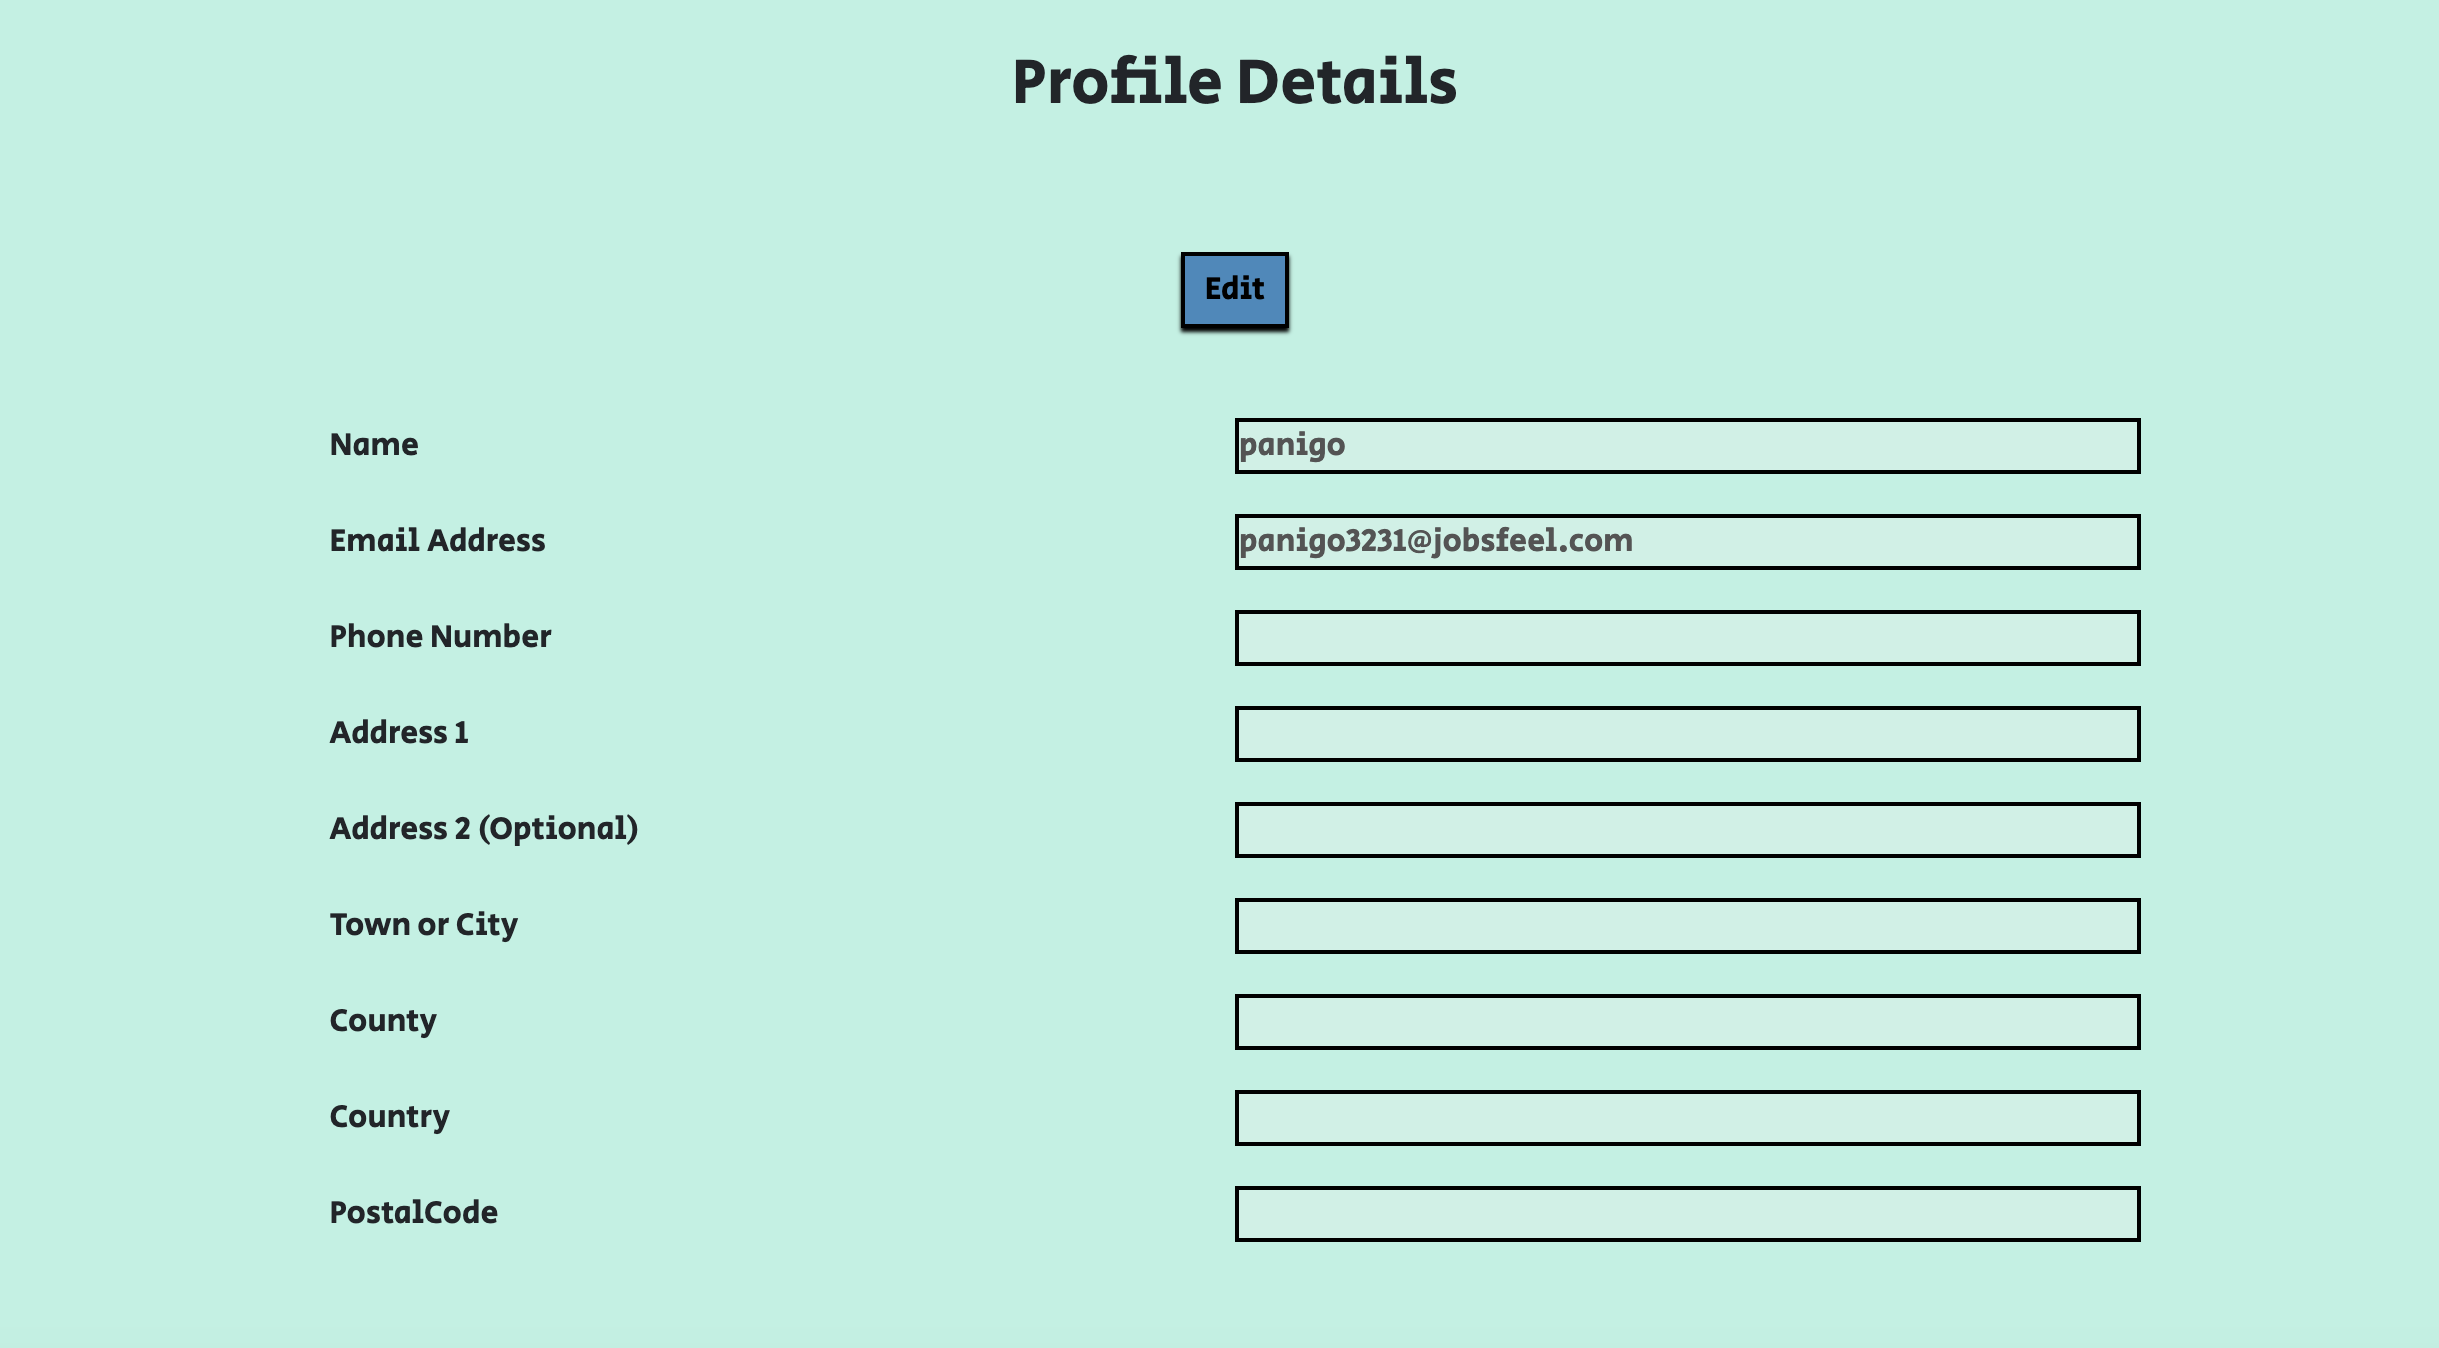
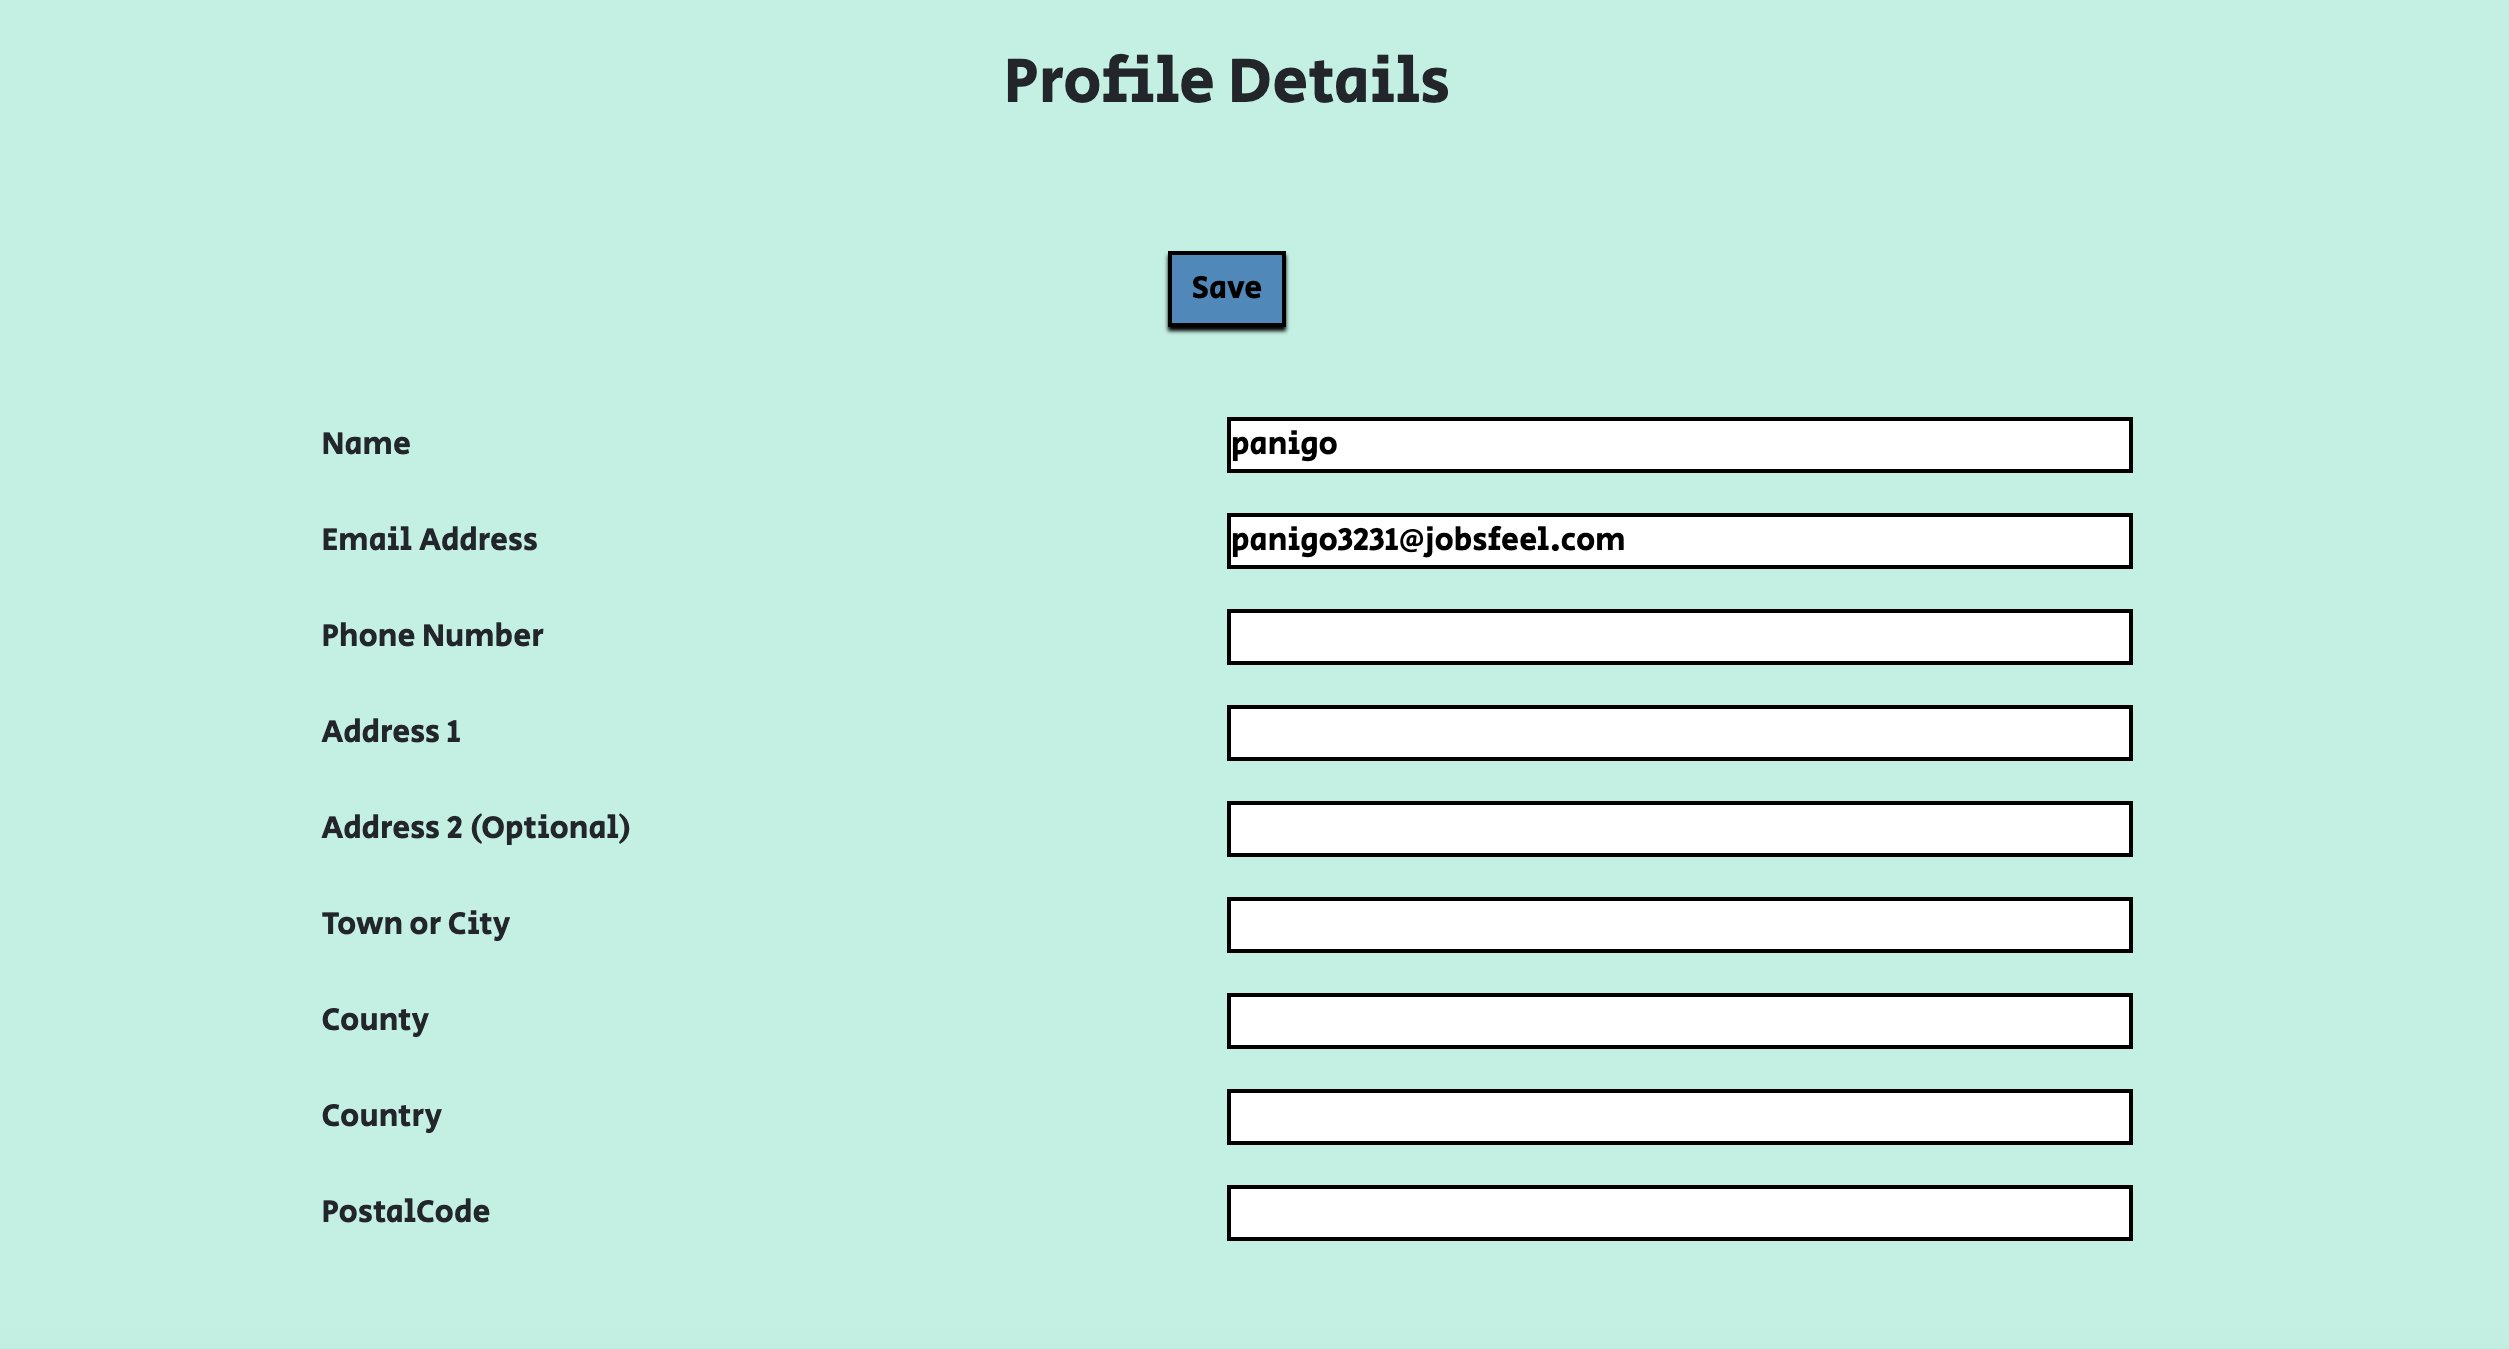
User Story: As a Registered Site User I can save details in my account profile so that I can speed up buying/delivery processes in future.- Acceptance Criteria:
- Registered User can access a profile page
- The user can store billing information manually through updating/submitting a form.
-
FAQs page that:
- Contains a list of commonly asked questions that new trackday drivers may want answers to
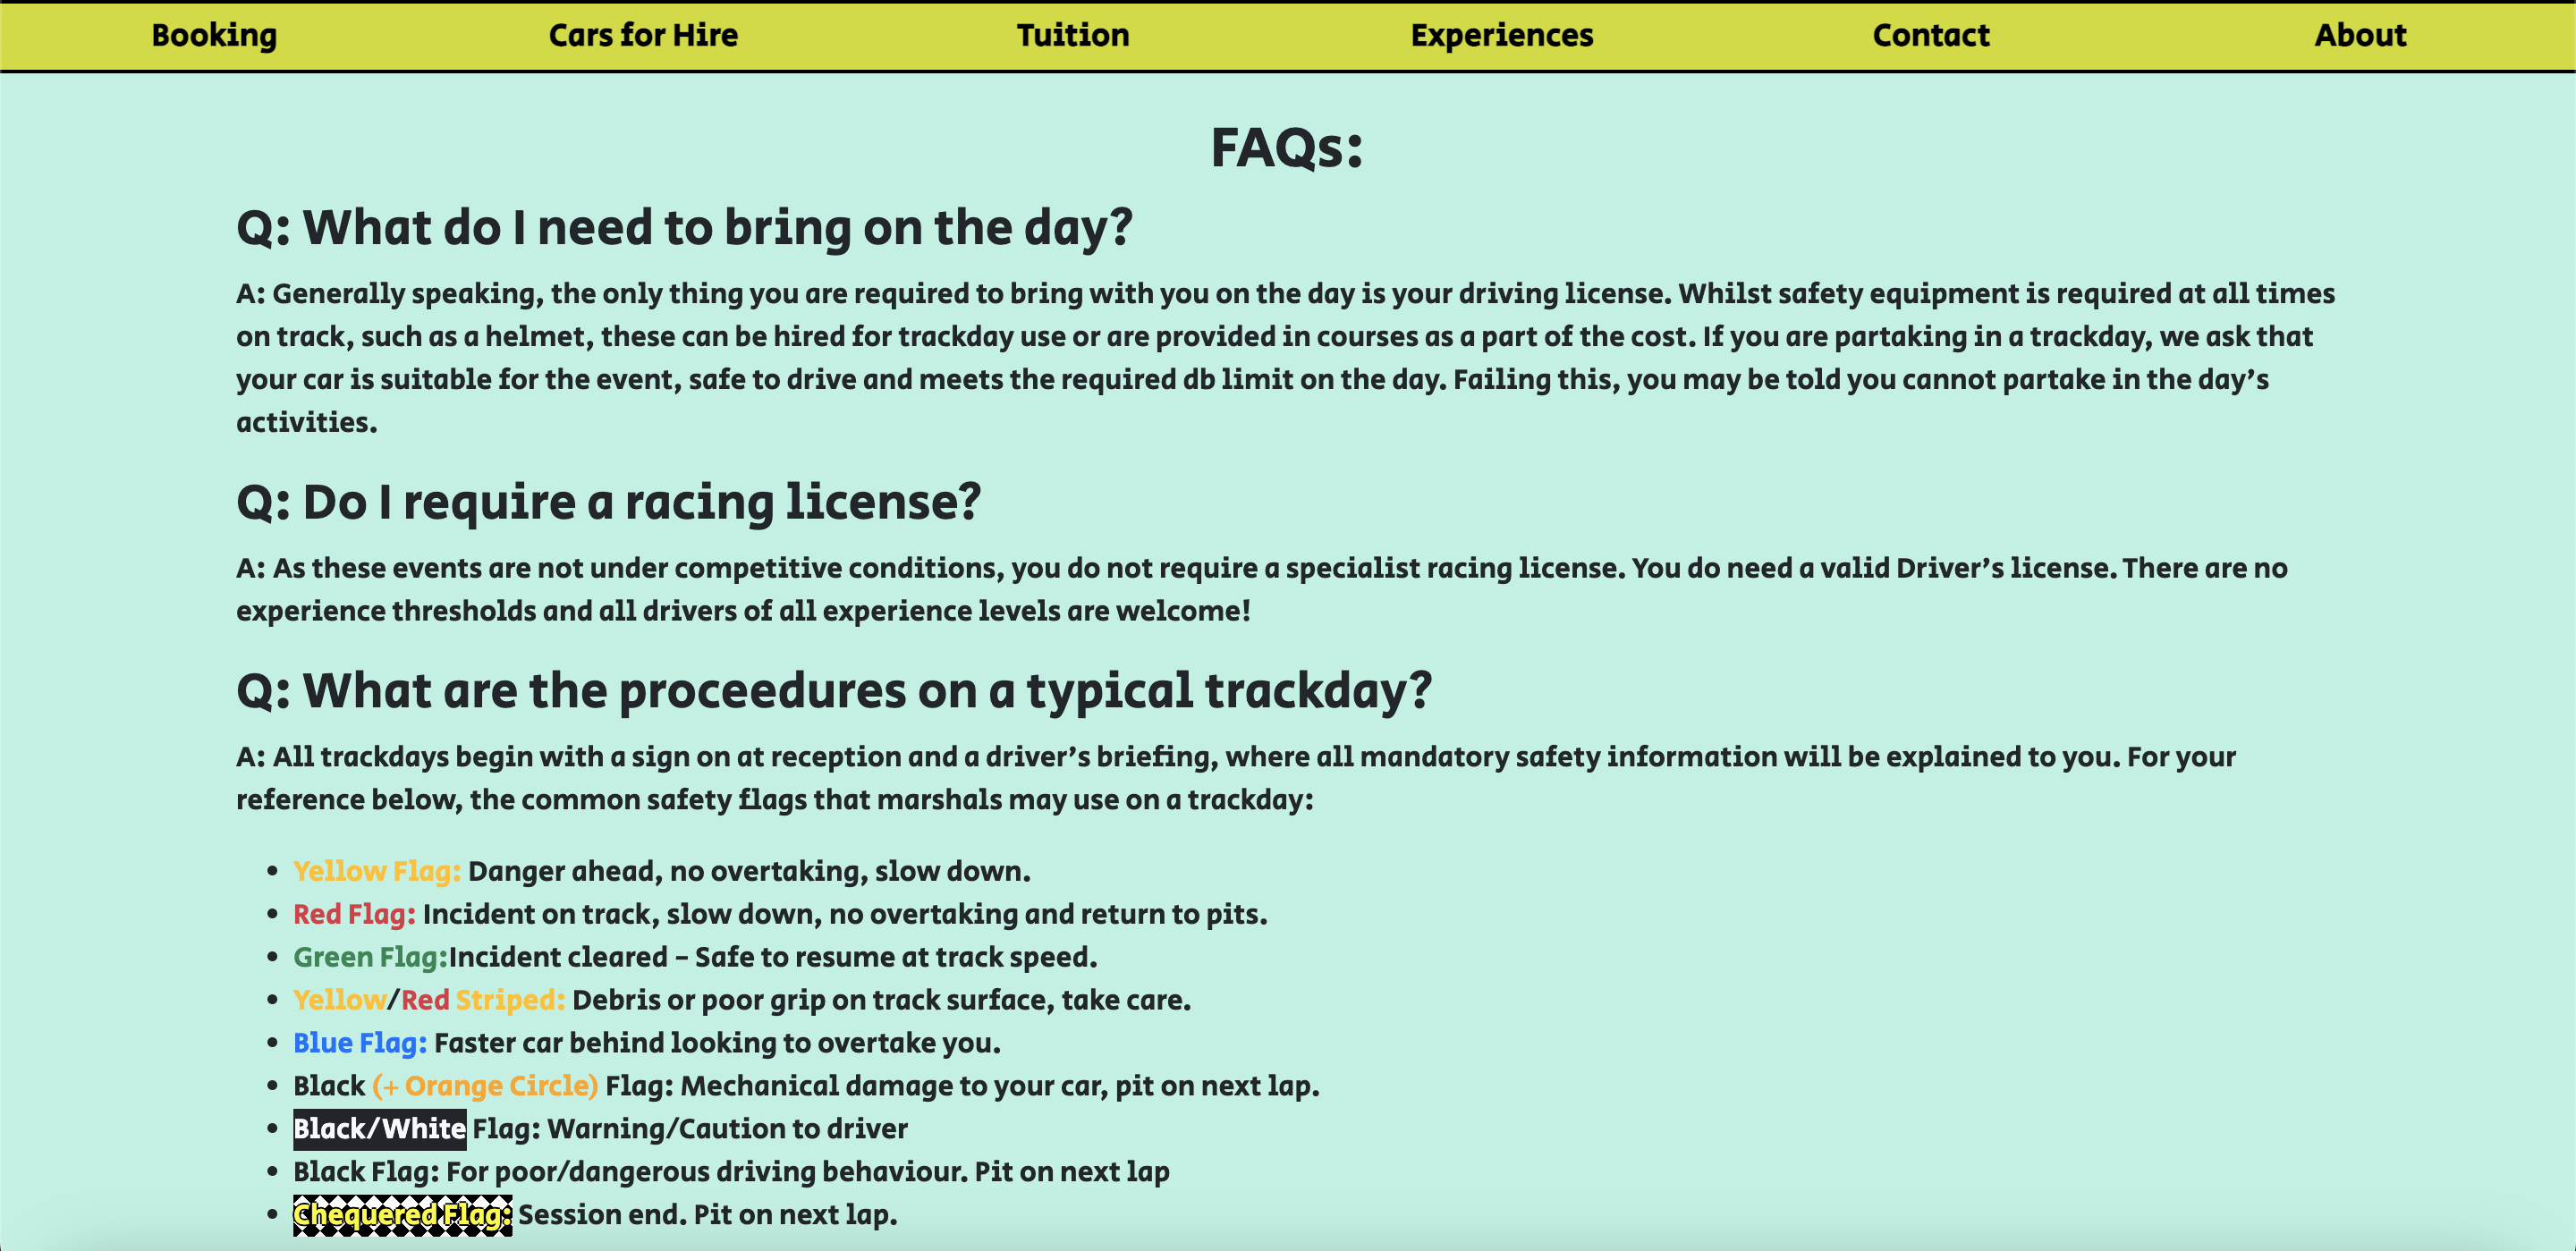
User Story: As a Site User I can view an FAQs page so that I can see if there are any answers to questions I might have.- Acceptance Criteria:
- Link to page accessed from the Footer.
- Page will contain question and answer statements based on questions first time track day users may have.
-
Policies page that:
- describes the company policies to users concerned about privacy and data protection
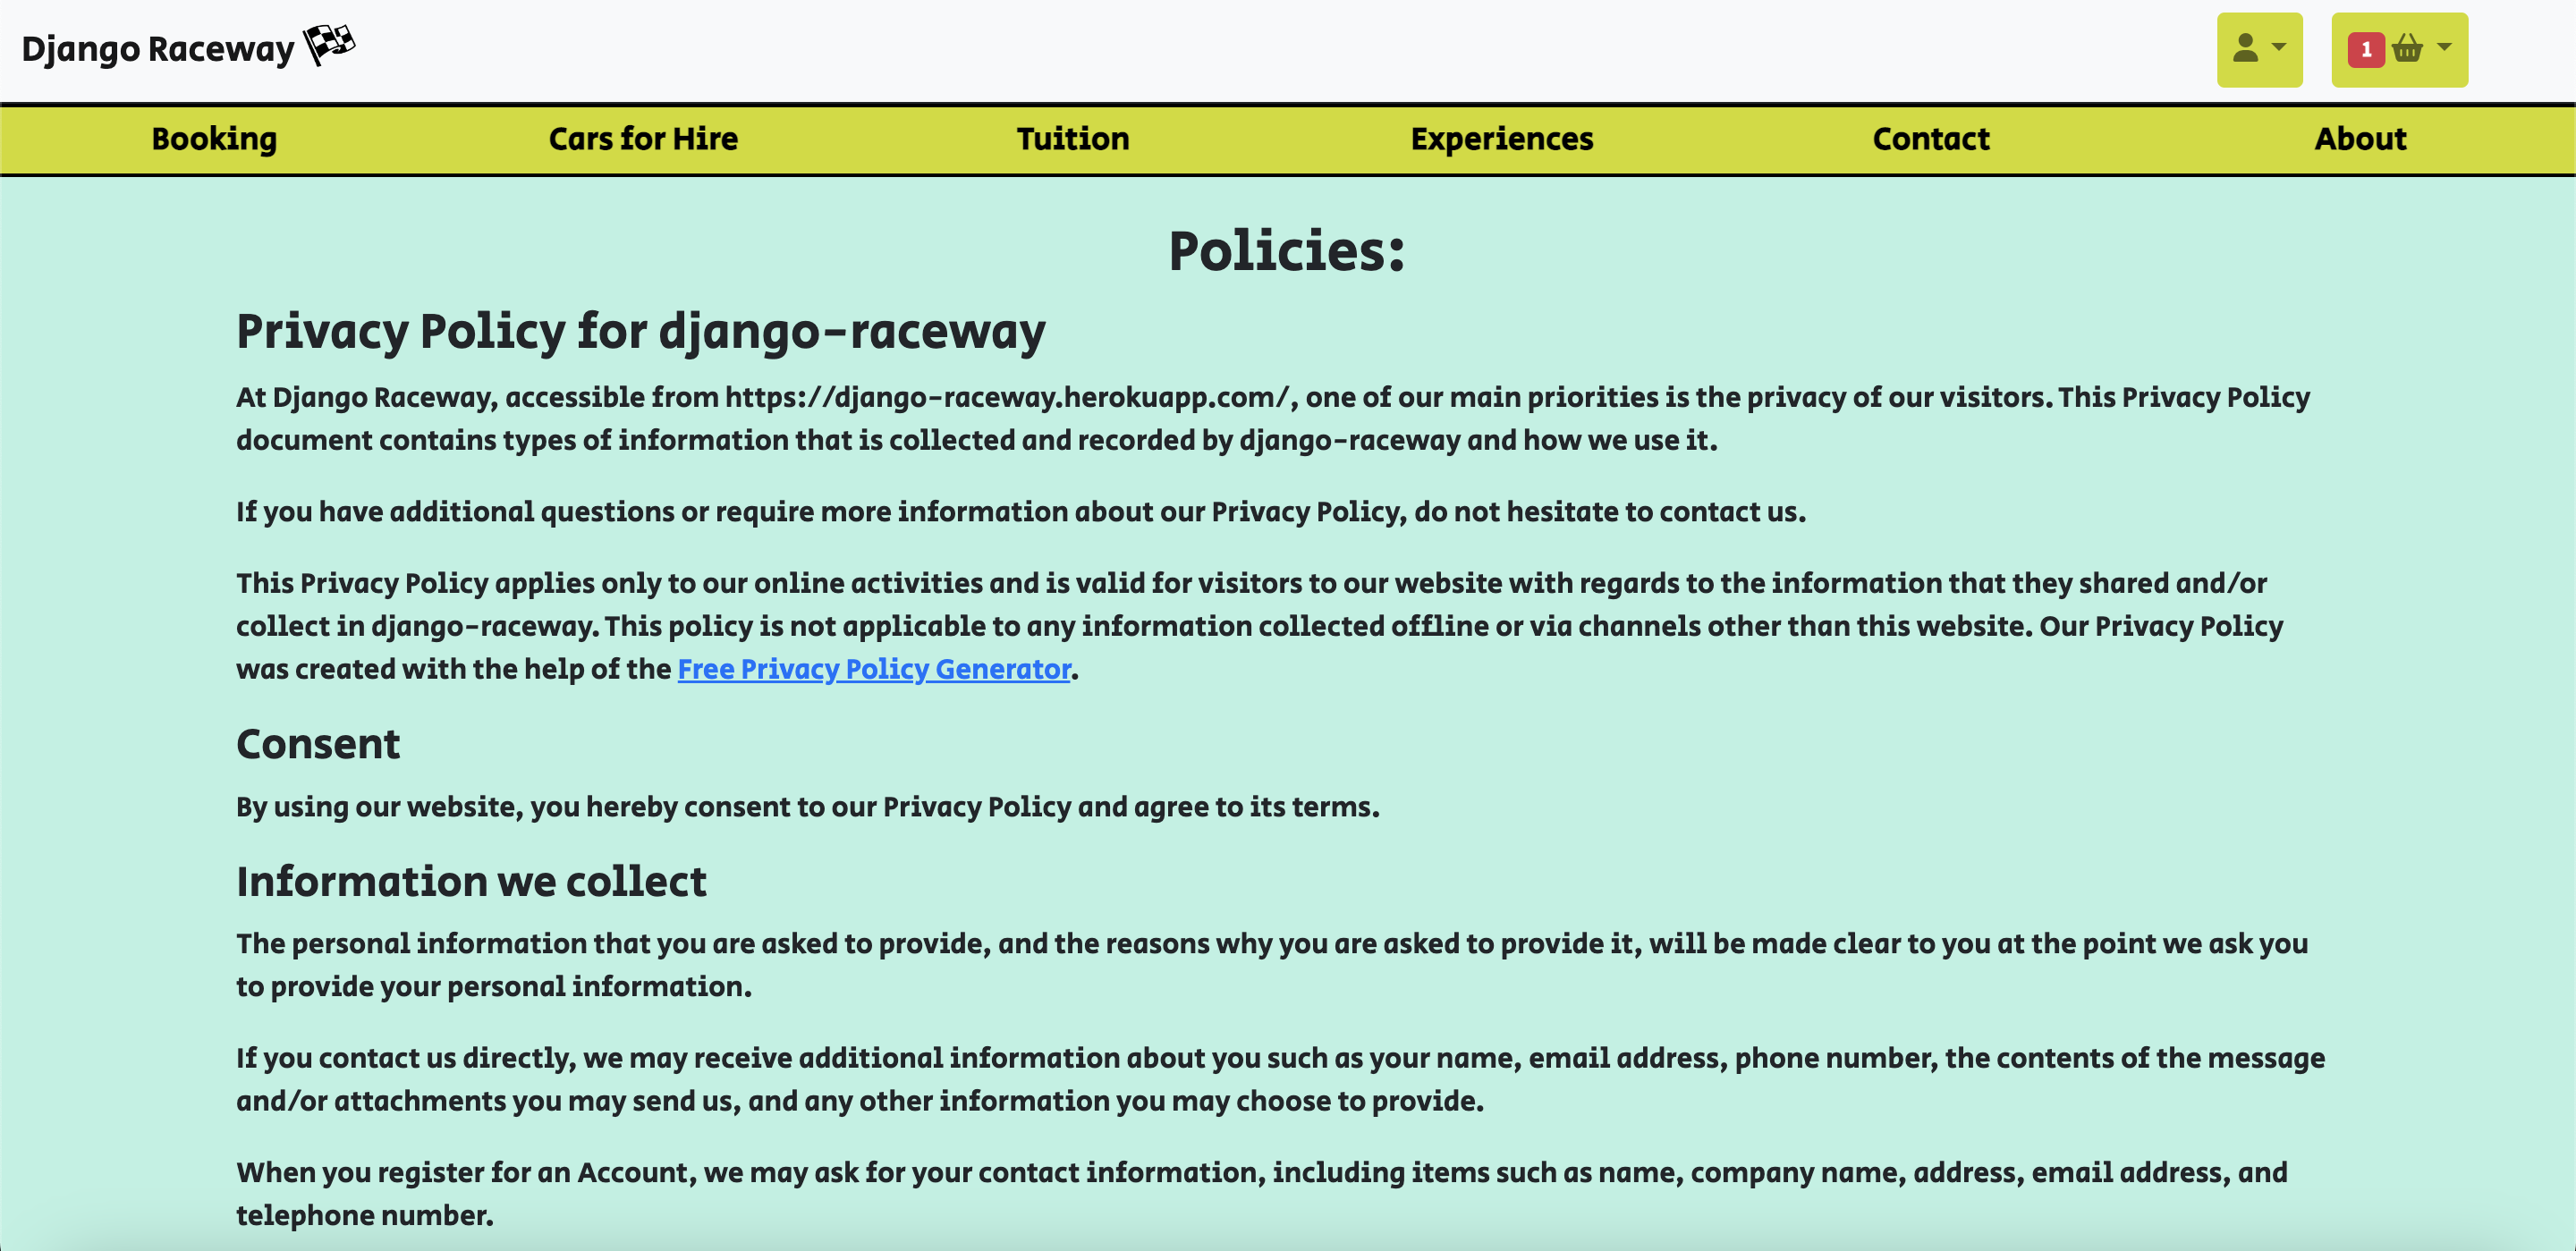
User Story: As a Site User I can find a policies so that I can understand the terms and conditions of the site.- Acceptance Criteria:
- Link to page accessed from the Footer.
- Page contains relevant information about buying and cancellation policies.
-
A basket that:
- Shows users their orders in a neat table format
- allows users to edit quantities, delete items from the basket and also proceed to checkout
- Has a total cost summary is available including a VAT amount for transparent total costs
- contains a return to home button to allow users to continue browsing before checking out
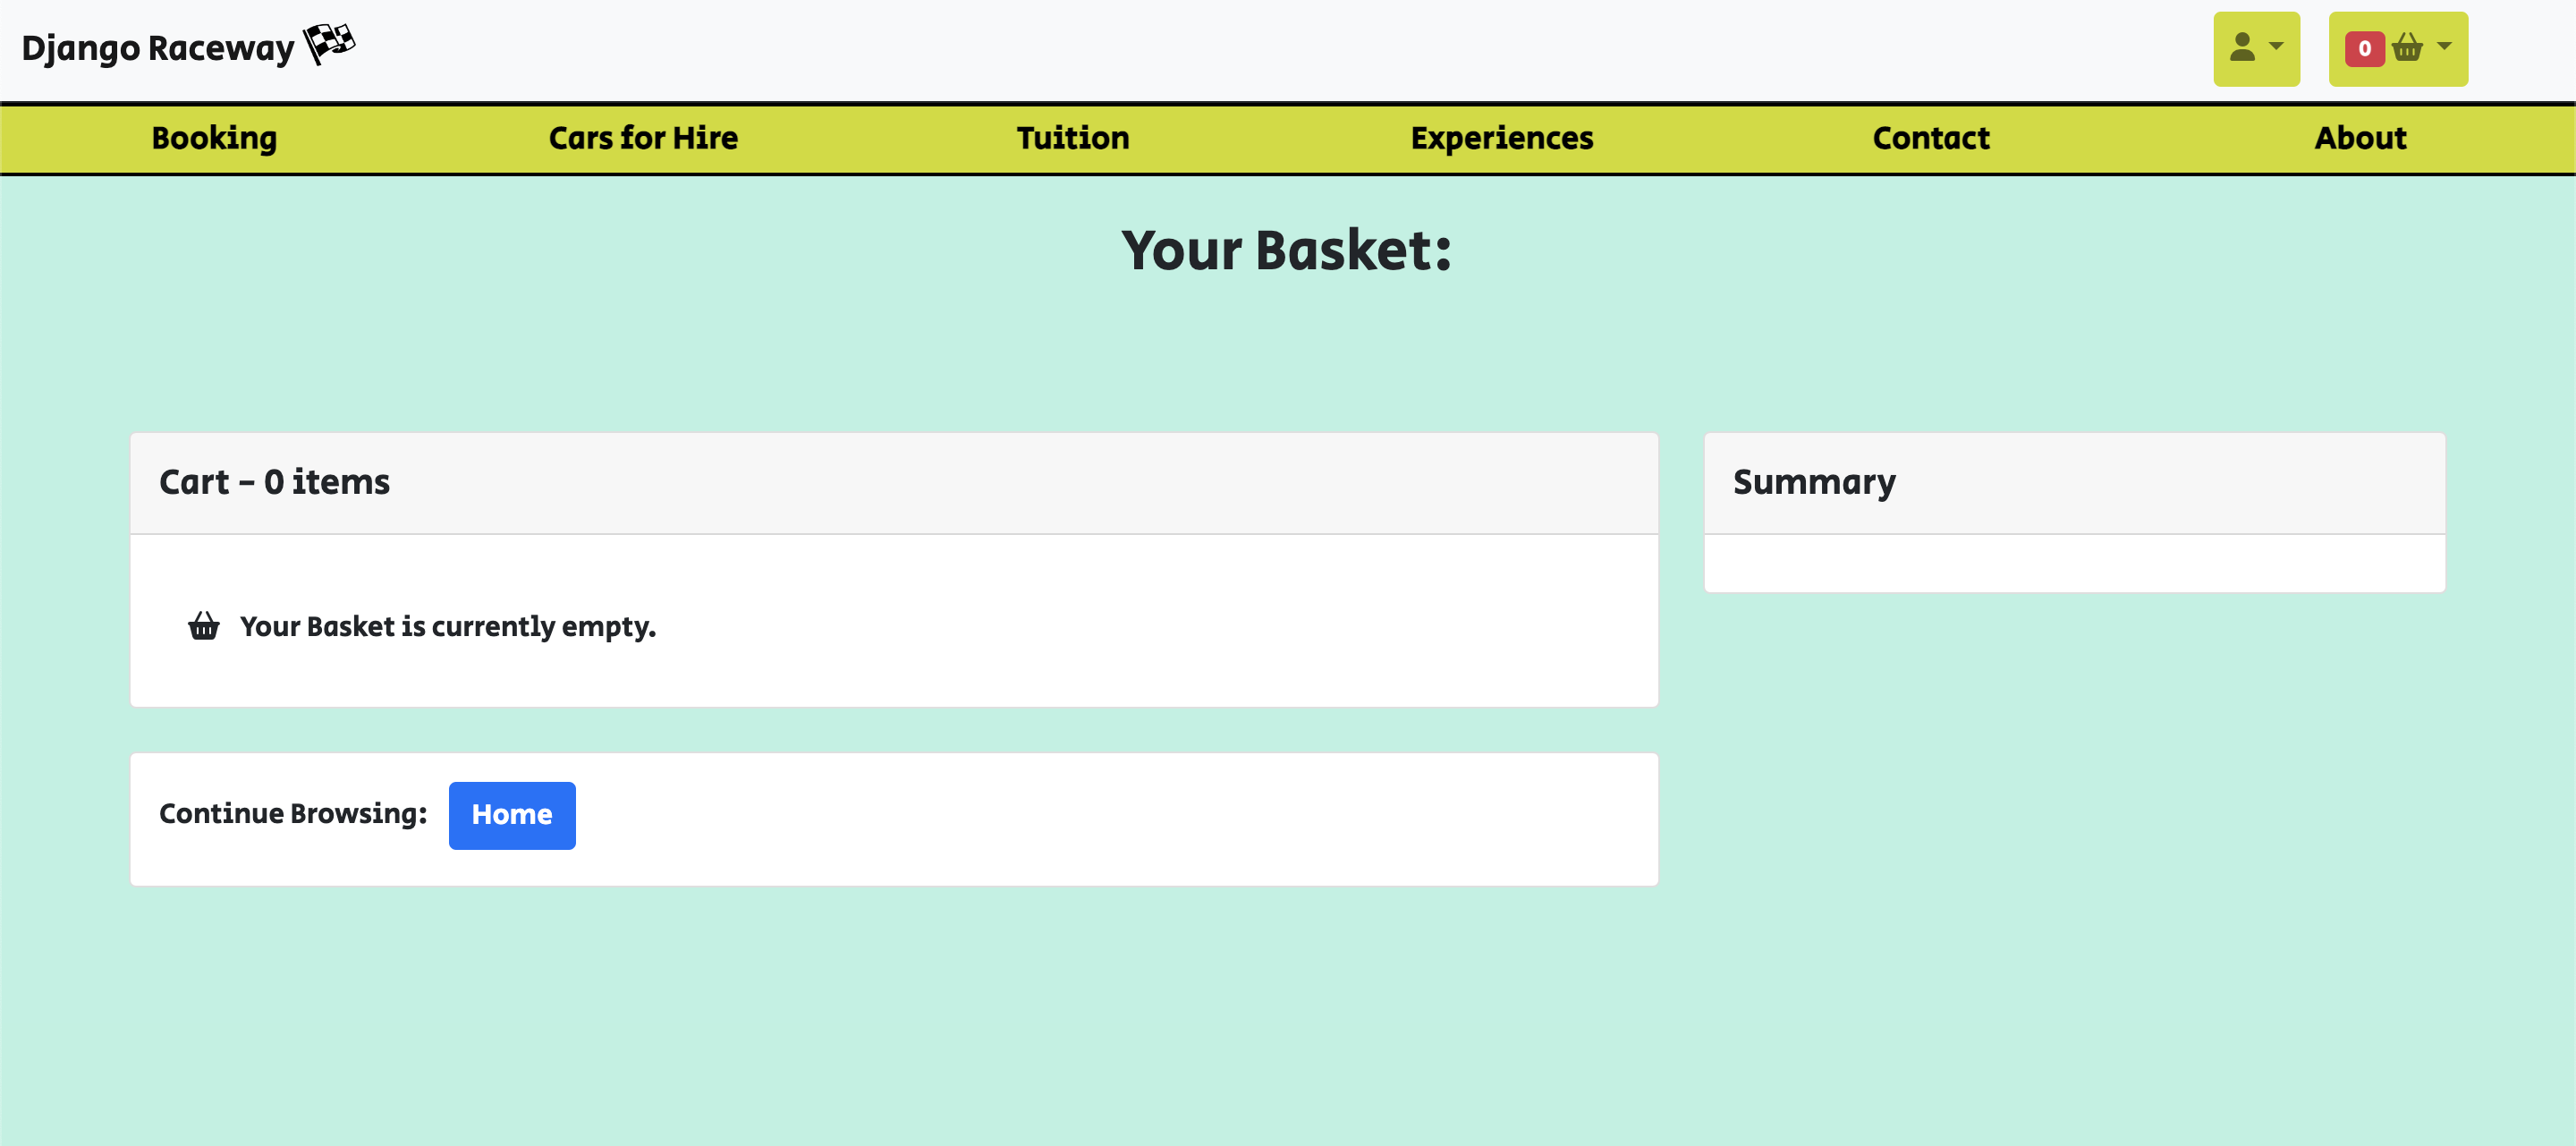
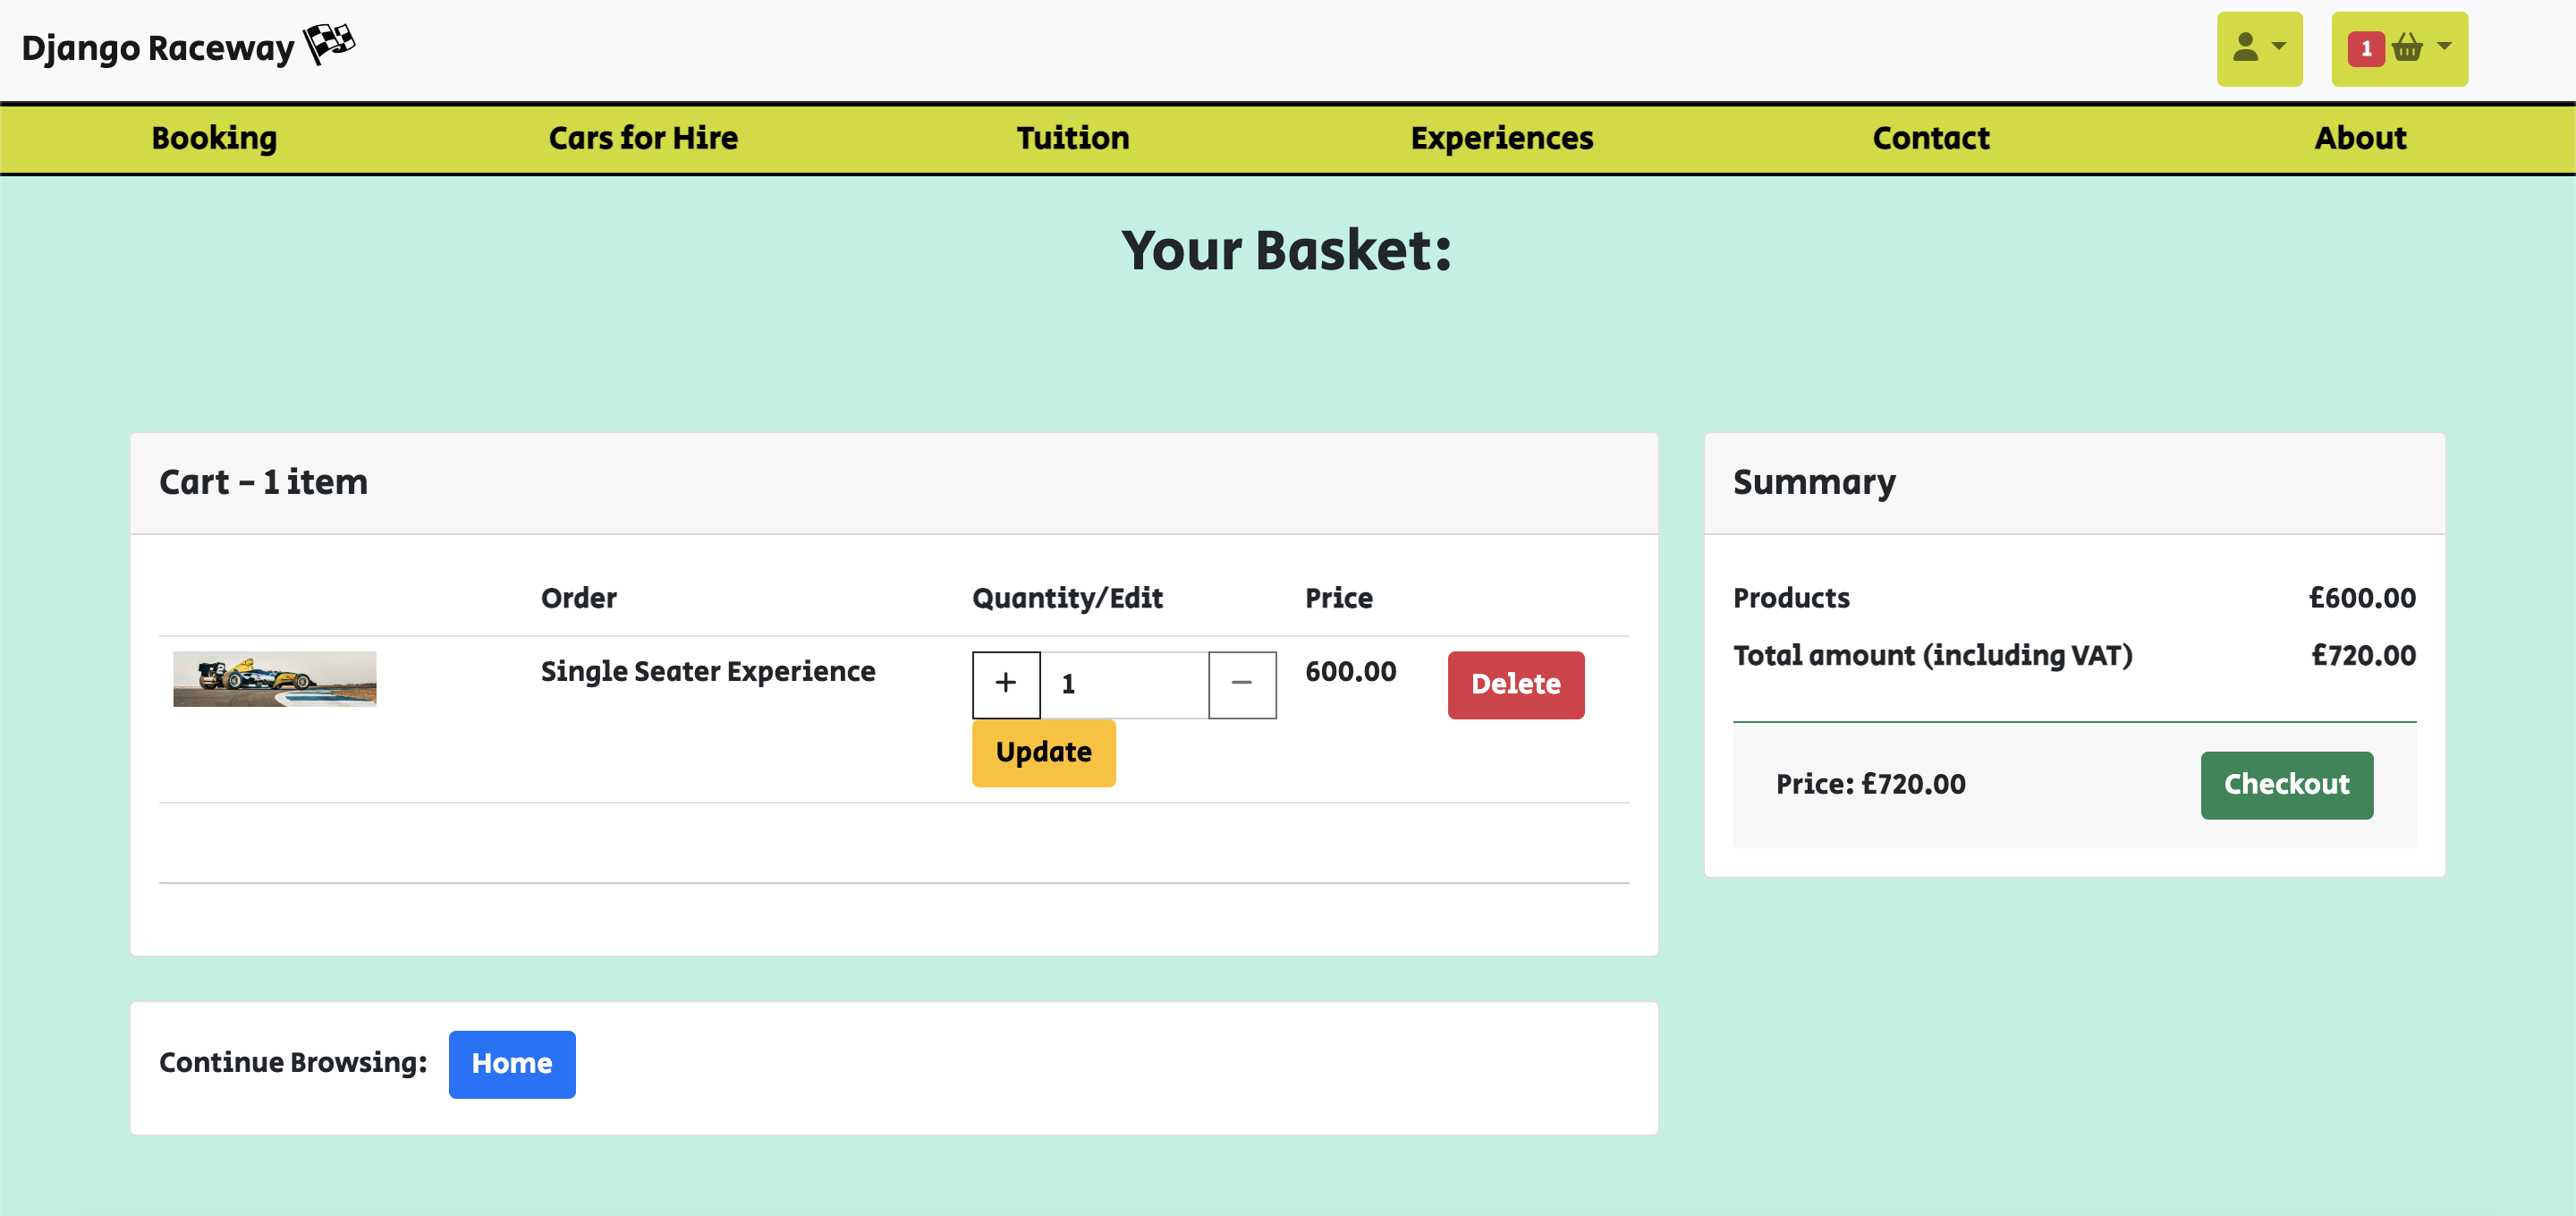
User Story: As a Site User I can add to and view a basket/cart so that I can view and check my order and make any updates or removals as required before checking out.- Acceptance Criteria:
- Booking Orders can viewed in a cart page, where they can be reviewed, modified, deleted entirely or purchased following a click on a checkout button
- Items can be stored for later if they are not ready to purchase yet and want to browse further or come back later
- A checkout button is very clearly visible to the site user
- Site users can view the total cost of the order they are making before proceeding with a purchase
-
A checkout page that:
- Allows users a quick and easy checkout process through stripe
- contains a small form to fill out, where card info and an email address need to be supplied

User Story: As a Site User I can checkout so that I can proceed with my order/booking.- Acceptance Criteria:
- Payments are handled by Stripe
- You can checkout as a guest
- A confirmation email is sent as well as clear indication on the site that your order went through successfully or not via on-screen messages
-
A newsletter sign up that:
- directs users to a signup page from the footer link
- allows users to sign up by simply supplying their email address in the form
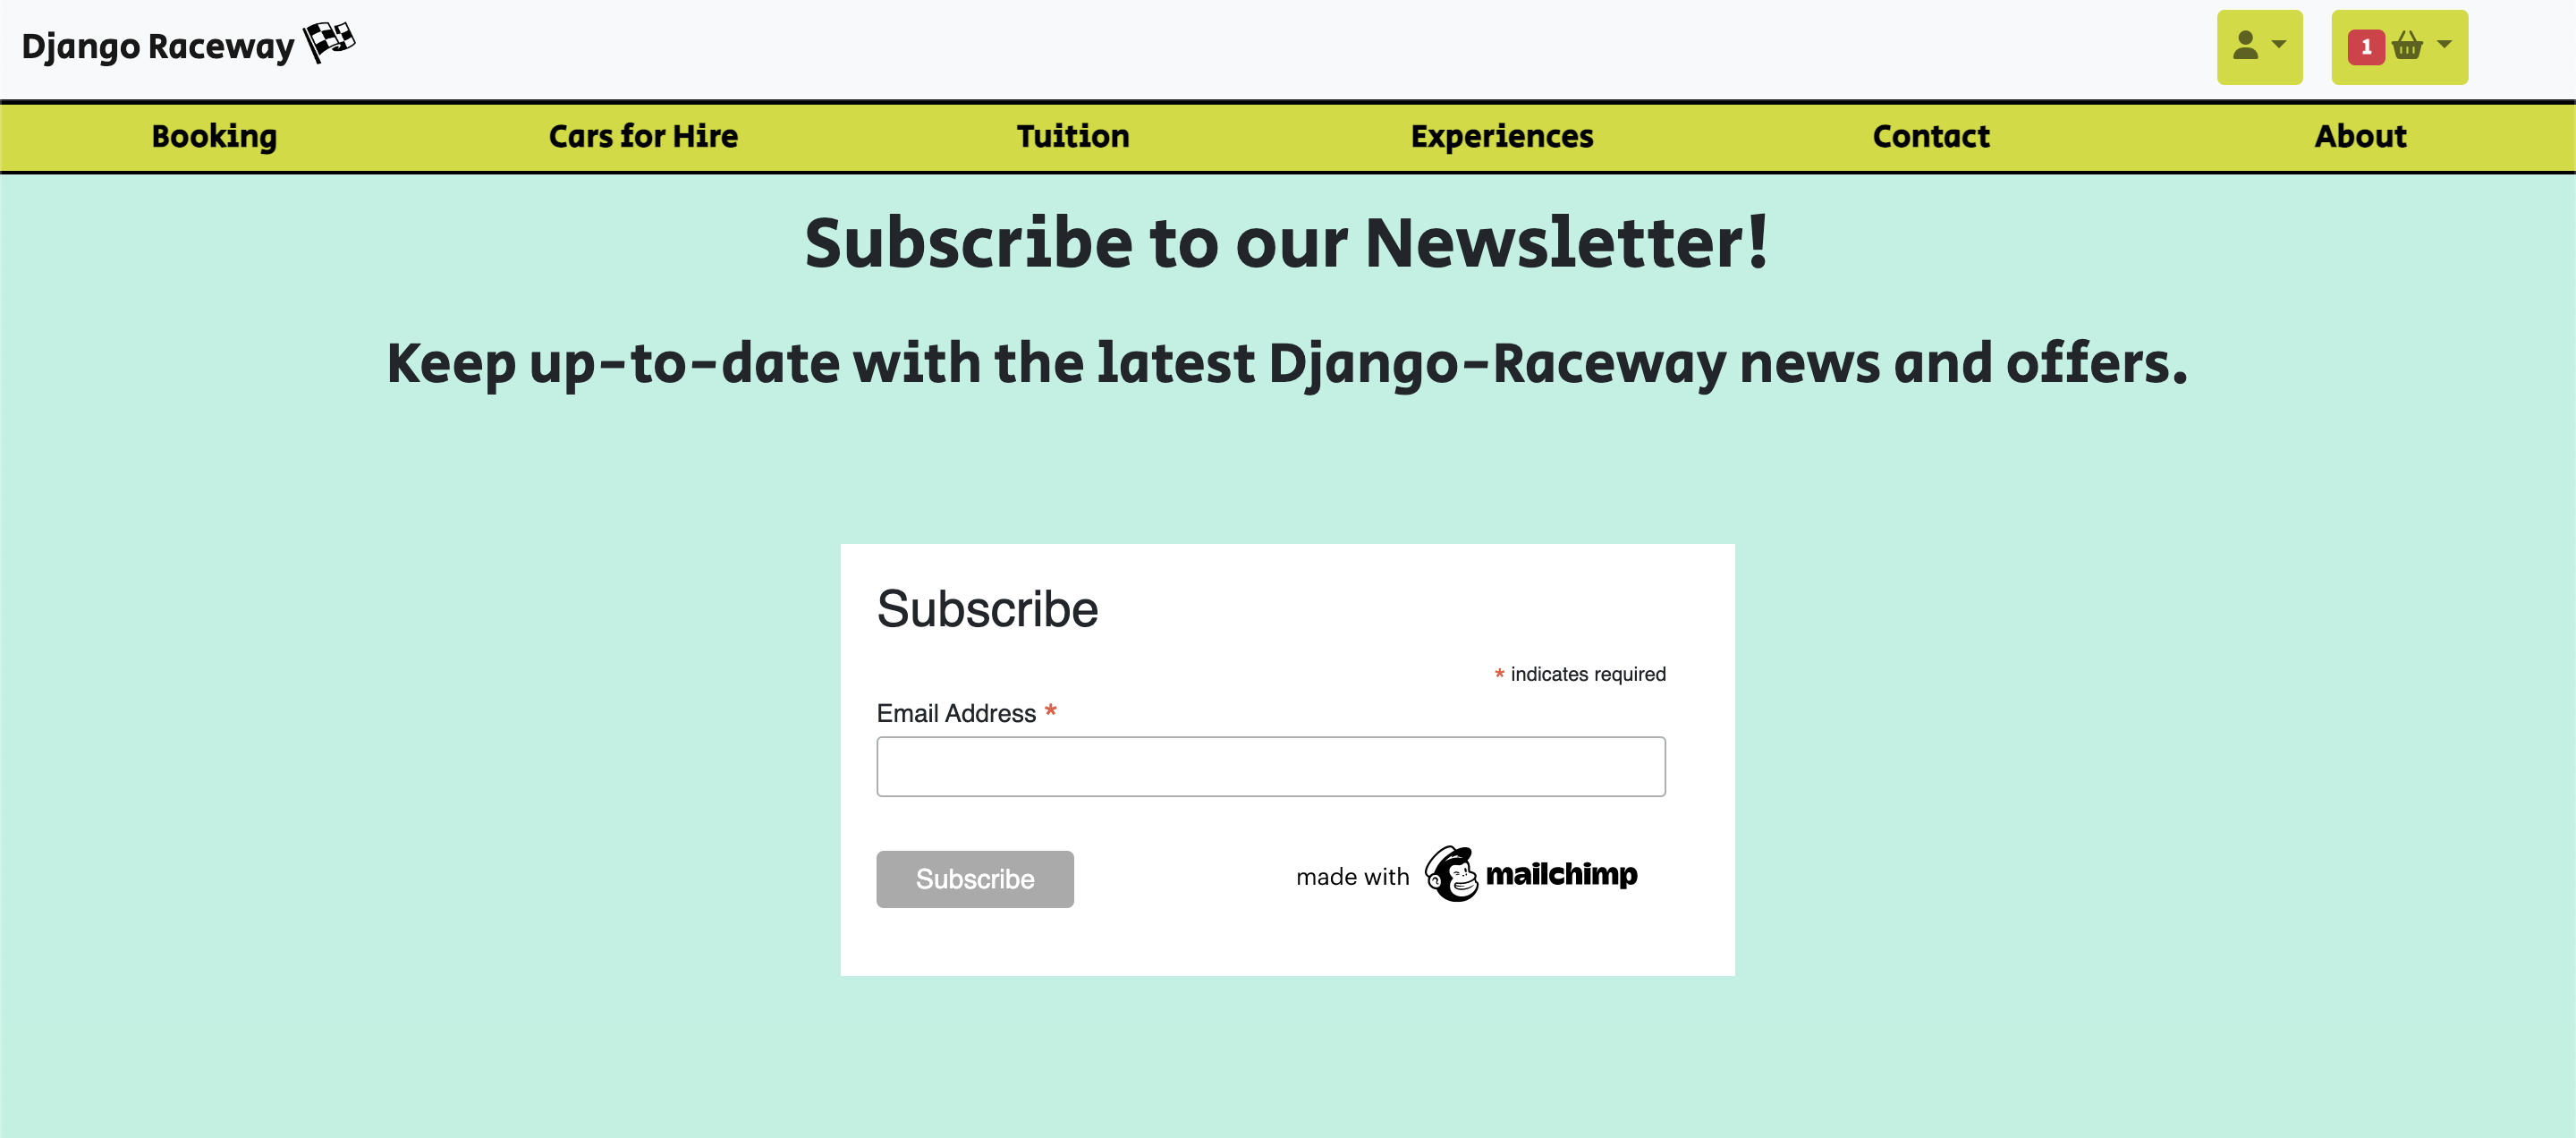
User Story: As a Site User I can sign up to a newsletter so that I can get informed about new products or business updates.- Acceptance Criteria:
- MailChimp will be the provider used for the site
- Sign up at the bottom of the page in the footer takes user to newsletter page
- Only requires an email address to sign up
-
An Admin-only management page that:
- is accessed through a superuser exclusive link
- opens a page for admins to add new trackdays
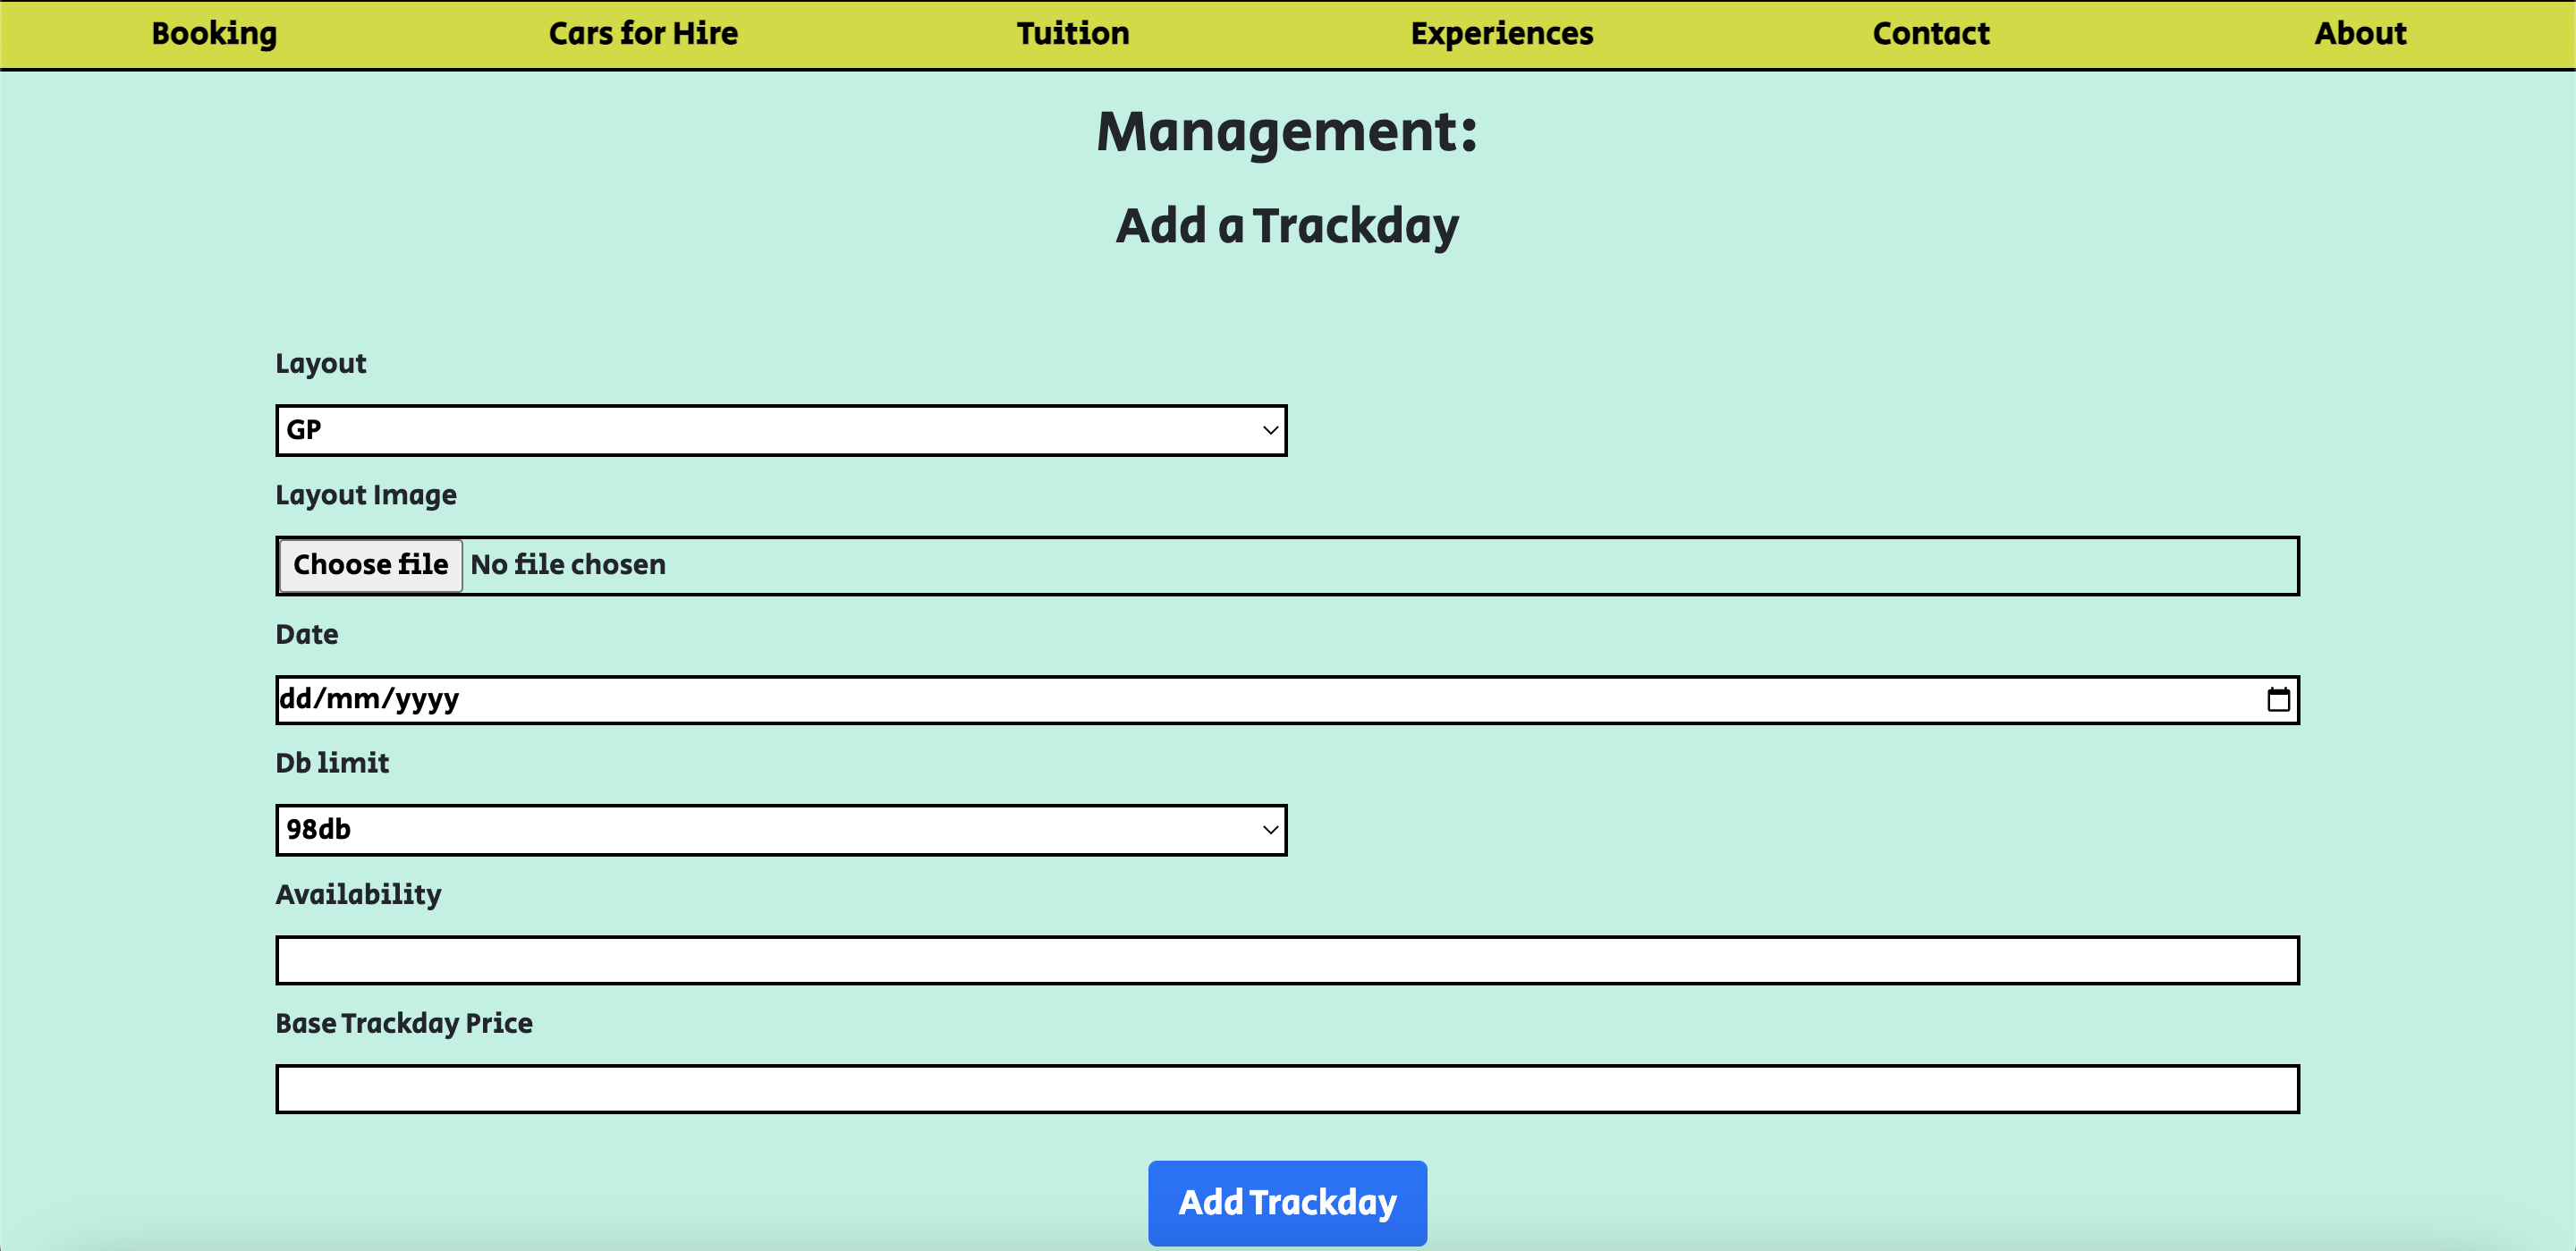
User Story: As a Site Admin I can add trackdays from a management page so that I can easily update the trackday list from the front end.- Acceptance Criteria:
- Superuser/Admin only access
- Trackdays can be added to the database from a form on the page
-
A custom error 404 page that:
- will appear if the user looks for a page that doesn't exist
- will encourage the user to return to the home page through a home page button clearly displayed

-
An Order History Page that:
- Is available in the nav bar for users to see their order history and view their receipts
- Is displayed neatly in a table in chronological order
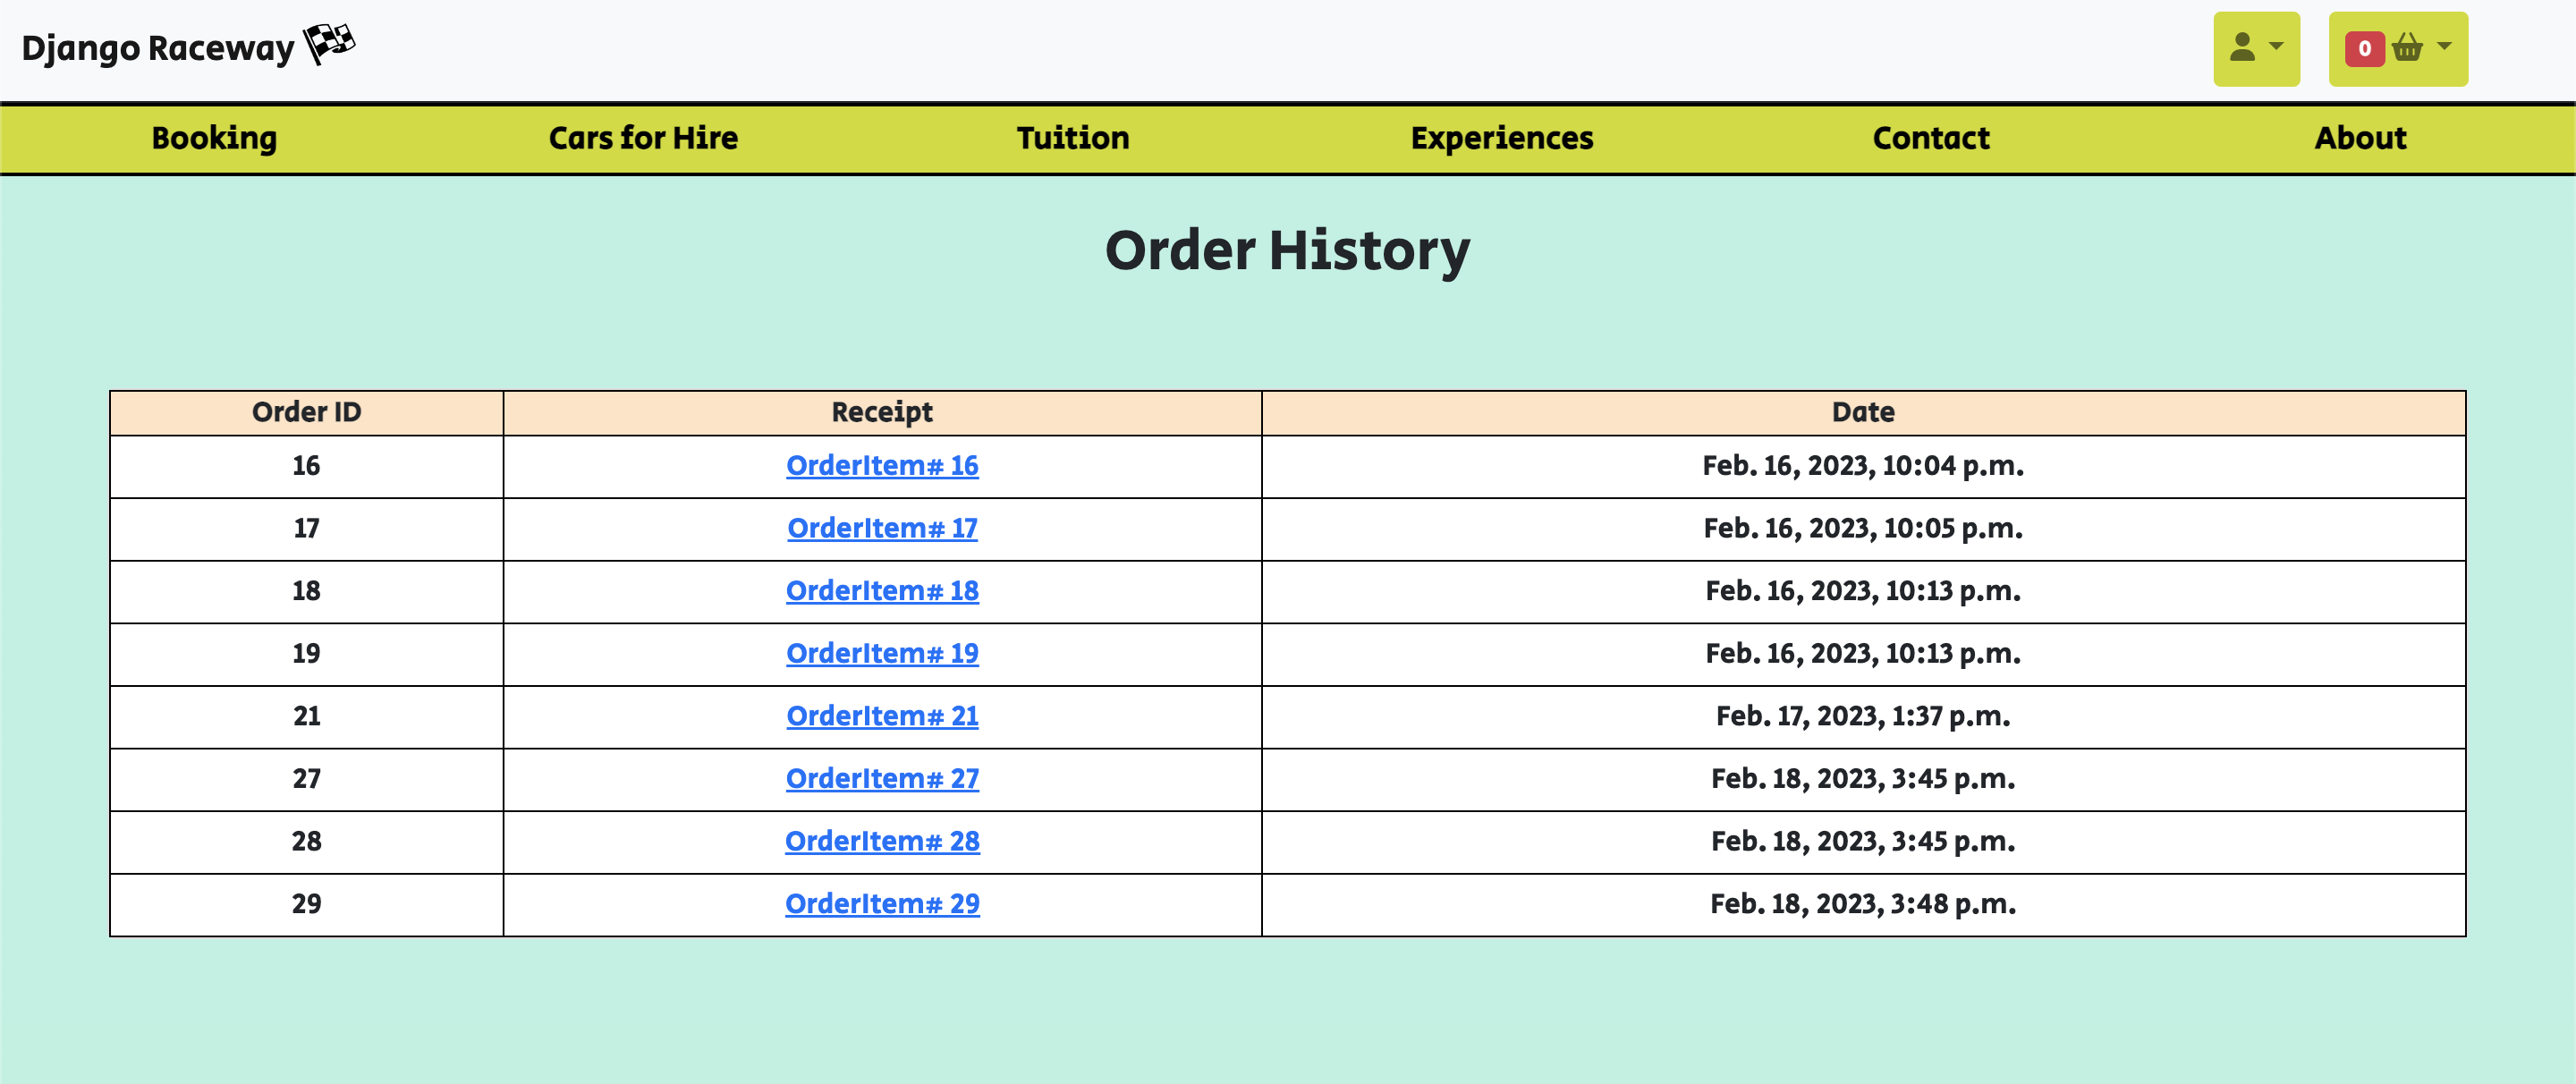
User Story: As a Registered Site User I can check my order history so that I can review my past orders.- Acceptance Criteria:
- Table available in the Order History page where authenticated users can see past orders
- Stripe Receipts are included in the table


Django Raceway's Site features vibrant and colourful designs, inspired by racing car liveries both past and present. I use a lot of greens, blues and red/oranges that bare a resemblance to an automotive/racing colour.
#b8f2e2 is the main background colour you see on the site, followed by #cedc00 for the main nav bar and some of the key buttons on the main site pages.
The light blue colour for the background is inspired by the classic Gulf Blue historic racing livery. I have always liked this colour and I was keen to use it in the site design as it's quite a light colour. The Green for the main nav and some buttons is inspired by Aston Martin Racing Greens. Again the nice thing about the colour is that it is quite a light colour and so complements other colours on the site.
See the main colour palette below:

I made use of a lot of standard Bootstrap 5 colour as well for many buttons and toasts on the site. The usual Success Green, Warning Yellow, Primary Blue, Info Blue and Danger Red colours are implemented all across the site. They give great visual feedback to users and so I think they are a fantastic out-of-the-box solution to add relevant colour quickly.
The structure of the site is based around 2 naviation menus. A top nav, where users access account or authentication related content and basket/checkout functionalities (+ the site logo, which also returns users to the home page), and a middle nav which serves as the main point of reference for the rest of the site. Both nav bars can be found on all pages, and the home page is the exception only in nav placement, with the middle nav actually being placed in the middle of the home page. I really wanted to have a carousel of track layouts as the 'hero' image for the home page, with a nav menu beneath it. I'm very glad I stuck with this design feature.
There is a footer which houses two text links (to the FAQs and Policy pages), a Newsletter sign up button and an arrow button to take users to the top of the page. I wanted to include the arrow button in the footer to prevent users needing to scroll up to the top of the page on 'taller' pages.
A lot of the other content contains some form of bootstrap card type design, such as the car hire page, experience and tuition detail pages and the trackday booking page. It puts key info in a defined container, which focuses users towards the places where you want them to. I made use of 3 separate card-like containers in the basket page to house and separate different info, where I would ideally like users to focus on different info separate from each other.
The main fonts across the website are 'Secular One', sans-serif;
I used this checkered flag icon as my main site logo and my favicon for the site:

Django Raceway has a Facebook page, where users can follow and like the page, interact with posts to keep up to date with the latest news at Django Raceway.
As a part of the business marketing strategy and a key foundation of any website's online marketing, a Facebook page provides the means to update users on a popular social media platform with the latest news relating to the business.
In time, engagement will increase with followers gained and interactions through comments, reviews, likes and shares. It serves the site/business goals of growing the business and shining a positive light on motorsports and promoting motorsports in the UK. The Facebook page will increase the reach of the business to new potential customers and engage with existing clients.

- Ability to add more than one trackday to the basket. Due to a bug I had to limit each user to adding just one trackday to the basket at a time. This will be addressed in a future update.
- I would like to implement a gift/merchendise store section where users can buy motorsport/django-raceway inspired clothing, lifestyle items, track day gear (gloves, shoes, racesuits) and would use the profile section's user default address information to be able to send items to users should they wish to have them delivered instead of collected in-store. Due to time constraints I was not able to get around to this idea, but I intend to build this section and feature in to the site in future versions.
- I will eventually develop the management page to be able to add, edit and delete trackdays, tuition courses and experiences. Due to time constraints, I was not able to do this in this version. I will implement this functionality in a future update.
- I will further develop the edit button for the trackday items in the basket in future. Due to complexity and time constraints, the edit button removes the item from your basket and redirects you back to the trackday list page to redo your trackday booking. This is not the most pleasant user experience, I accept, and I will work to included a proper functioning edit button for trackdays in the basket in a future update.
I used DBeaver to map out an ER Diagram for my Database Schema:

In total, I have included 9 models, which are:
- Trackday
- TrackdayBooking
- TrackdayRequest
- Experiences
- Tuition
- UserProfile
- Contact
- OrderItem
- Cars
Full list of technology implemented below:
- HTML5 - Latest iteration of Hypertext Markup Language
- CSS3 - Latest version of Cascading Style Sheets
- Bootstrap 5.0.2 - A styling framework used to speed up layout and styles.
- Django Framework - Main, Python based framework on which this project is based.
- Python 3.8 - Version of Python installed on Gitpod
- Javascript (Vanilla)
- JQuery (In conjunction with Boostrap)
- Git - used for version control
- Stripe - APIs that handles the payments on the project
- AWS S3 - for storing static files such as media
- HEROKU - used to host my website
- Github - used to host the code from my repository
- Gitpod IDE - used to write the code for the project
- VSCode IDE (for local testing) - used to write and store code on a local machine (as opposed to cloud)
- ElephantSQL (Hosted my PostgreSQL database)
- PostgreSQL (RDBMS) - The Regional Database Management System used for the data/backend of the project
- Django Summernote - for styling the text boxes in the admin page with a WYSIWYG (what you see is what you get) editor.
- Django Crispy Forms - for neatly styling form layouts
- Pillow - A PIL (Python Imaging Library)
- GMail - for sending real email from gmail to users in production
- SendGrid - also for sending real emails to users in production
- DBeaver - for importing data and mapping out ER diagrams from connected databases
- asgiref==3.5.2
- boto3==1.26.22
- botocore==1.29.22
- crispy-bootstrap5==0.7
- dj-database-url==0.5.0
- Django==3.2
- django-allauth==0.51.0
- django-countries==7.2.1
- django-crispy-forms==1.14.0
- django-storages==1.13.1
- django-summernote==0.8.20.0
- gunicorn==20.1.0
- jmespath==1.0.1
- oauthlib==3.2.2
- Pillow==9.3.0
- psycopg2==2.9.5
- PyJWT==2.6.0
- python-http-client==3.3.7
- python3-openid==3.2.0
- pytz==2022.6
- requests-oauthlib==1.3.1
- s3transfer==0.6.0
- sendgrid==6.9.7
- sqlparse==0.4.3
- starkbank-ecdsa==2.2.0
- stripe==5.1.1
- For mailing purposes, we use need to use an SMTP Server.
- SendGrid is a cloud-based SMTP provider that allows you to send email without having to maintain email servers. SendGrid manages all of the technical details, from scaling the infrastructure to ISP outreach and reputation monitoring to whitelist services and real time analytics - Definition from SendGrid itself.
- SendGrid is a free mailing server.
- It provides 100 emails per day included in the free account.
- After creating an account, and following the documentation, SendGrid provides an API key to use in our env.py file.
- We create a function where we write the logic that is provided in the documentation.
- SendGrid is able to send emails to and from the specific email addresses of the client and user.
Due to the size of the testing required, this can be found here: Django Raceway Testing
-
AWS Config: I was unable to deploy on Heroku thanks to a missing Variable in my User Groups that was spotted by Alan from Tutor Support.
-
I tried to use a for loop for my admin.py file to automate and speed up model registration. Whilst it sounded like a good idea in principal, it prevented me from adding list_display field options once they had been registered. I unregistered and re-registered the models to be able to do this.
-
I had some early trouble getting my contact model to work correctly - I realised I had put incorrect 'name' attributes in my contact view. I also made changes in my contact model that required me to flush the database and remove previous migrations and to migrate again after.
-
Bootstrap 5 toasts: I attempted to modify the bootstrap 4 toasts from the Boutique Ado walkthrough, whilst I was using Bootstrap 5.0.2 - This didn't work, and thanks to a snippet of code from Alan from Tutor support I was able to get it working again.
-
I had an error when selecting "None" as an option for cars where even when I set the form value to 0 it was throwing an error. I realised it was because I was using a Car model for the options, it was not able to just store 0 as a value for a 'car'. The solution to this was to create a "None" car in the database, and to hide it from the front end car hire section. It is only visible from the trackday detail page and it has an assigned value of 0.
-
I had some increment/decrement issues when two or more different items were added to the basket. I realised my ids were too similar to be used across potentially several different items and so I had to go about making it even more unique.
-
I encountered Migration History conflicts twice in development. The way to resolve this was to clear the affected migrations histories from the migrations of all the apps. Then, to fake an initial migration and to makemigrations and migrate after that.
-
I had an issue where my urls where too similar for my delete urls in the checkout app. The 'pattern' of the url was too similar and django was only picking up on one of the delete urls. The way to resolve this was to break the pattern with a specific key word in front of the item's id (e.g /experiences/ or /tuition/).
-
I was unable to view my checkout success page for quite some time on my live server and couldn't work out why. I kept getting a 'localhost access denied' error message and it wasn't clear to me what the root cause was. After searching for this message online, I found a couple of common causes to troubleshoot - I checked my firewall was not blocking anything, and then I tried to run the server on an incognito tab to see if it was my browser cache that was causing the issue. The incognito tab worked perfectly and so it was my caches that were causing the problem.
-
For some reason, the profile link in the nav bar (which appears to you once you log in) can appear to be unclickable sometimes. I have not yet found out why this is happening, but if you refresh the page, it resolves the issue every single time. You may not even experience this issue at all, or may experience it randomly and then it won't happen again for a long time. I have also found out this can happen to the login link if you sign out. Again, refresh the page or click the Django Raceway logo and this will work as normal.
-
My Unique Constraint in my trackday model seems to work randomly at times and not at all at others. I'm still working on why this is, but seeing as only the admin/superuser can add trackdays and will know when trackdays are happening before adding them, I don't forsee this as a critical issue at the time of writing.
-
Sometimes you may need to clear your cache to access frequently visited pages, especially the checkout page, I have found. This can be mitigated entirely by using an incognito tab in your browser.
- Please make sure you have all of the following before beginning with the below steps:
- A Github account and configure either Gitpod or VSCode (Or both)
- A Heroku account
- An AWS account
- A Stripe account
- An ElephantSQL account
- A SendGrid Account
- Another Email Account, such as GMail
- Version control was done through the Gitpod CLI, using the following key commands to push updated code to Github:
git add ,- to add all new files or file changes in preparation to commit in next step.git commit -m ""- add your commit message inbetween the two quoatation marks, this explains the changes of your lastest version.git push- this is the command that pushed your code up to your github repository.
- Instructions for forking a respositoty:
- To fork a chosen repository, look towards the top right of the page, between the watch/unwatch tab and the star tab, and select the "Fork" tab.
- By default, forks are named the same as the parent repository, however, you can change this as you see fit. You are also able to add an optional description.
- Choose which branch you want to copy if you need to. Only the default branch is copied by default setting.
- Click the green "Create Fork" button, and you will now have a forked repository to use.
- Instructions for cloning a repository:
- To clone a repository, first you will need to select your chosen repository and look for the green "Code" button (located next to the "Go to file" and "Add file" buttons).
- Next, copy the URL for the repository. By default this is a HTTPS link, however, you can copy an SSH key or by using the Github CLI.
- After you have the URL, you are going to want to go to the terminal of your machine and cd (change directory) to the folder where you want to save your working directory to be.
- In the terminal, type
git clonefollowed by the url link you copied earlier. - Press enter and hopfully you will have successfully cloned the repository locally.
- You will also need to make sure you have installed all the required packaged of the project. To do this, paste this code in to the terminal once your workspace is set up:
pip install -r requirements.txt - You will also need to make an env.py file to run the project. Populate it with the required information, though make sure you include this file in the .gitignore file. The contents of the env.py file should NOT be made public.
- For further reading, I would highly suggest the Github Docs: Github Docs Link
-
Make sure you have a Heroku account before beginning with these steps.
-
You should also make sure you have an AWS account with S3, and a Stripe Account for payments. These should then be configured for your project.
-
Once logged in to Heroku, navigate to the personal dashboard and look for the 'New' dropdown button at top right hand corner of the page.
-
In the drop down, select "Create new app - you will be taken to a page where you will be able to name the app and select a region. Once you have filled this information in, click the "Create app" button. Your app is now created.
-
To pair an ElephantSQL (PostgreSQL) Database to your project, as I did to mine, see steps for this in the next section below. Alternatively, you can use a Heroku Postgres database.
-
Next, you should navigate to the Settings tab to set up the config vars. Scroll down slightly to the button that reads "Reveal Config Vars" and click it to open it. We are going to need to add/remove the following information:
- DATABASE_URL: this should have been automatically generated by Heroku for you, but make sure it is populated already. If you are using another service such as ElephantSQL, simply place that database url in here instead. Click add.
- USE_AWS: should be set to True. Click add.
- AWS_ACCESS_KEY_ID: should be set to your AWS access key, click add.
- AWS_SECRET_ACCESS_KEY: should be set to your AWS secret key, click add.
- EMAIL_HOST_PASS: In conjuntion with whichever email app provider you use. In my case, GMail and they provide you with a unique pass code to enter in to your config. Click add.
- SEND_GRID_API: Should be set to your SendGrid API Key. Click add.
- EMAIL_HOST_USER: this will be your email address. Click add.
- SECRET_KEY: This should be a secret password, do not publish this anywhere. Click add.
- STRIPE_SECRET_KEY: Set to your Stripe Secret Key. Click add.
- STRIPE_PUBLISHABLE_KEY: Set to your Stripe Publishable key. Click add.
- API_KEY: insert your stripe api key here. Click add.
- DISABLE_COLLECTSTATIC: Should have been set to 1 during development. You will REMOVE this for full deployment. Click the 'x' to remove it. However, if you set up a dynamic DEBUG variable in settings.py, like so:
DEBUG = 'DEVELOPMENT' in os.environ, you can remove it earlier.
-
After this, head to the Deploy tab and scroll down to the Deployment Method section and select "Github"
-
Next, in the "App connected to GitHub" section, look up your account and repo to pair it to the heroku app (click connect).
-
Head to the bottom of the page where you will see a section called "Manual Deploy". Select the 'main' branch in the drop down and click the 'Deploy Branch' button.
-
Wait for the deployment to complete, and when prompted, click the "View/Open App" button to see the launched site.
- The site has been shared with friends and family to get feedback and constructive criticism.
- I have also had my project reviewed by my course mentor in 3 stages of the development cycle.
- I had the London C.I group review my site and give their thoughts on the project.
The preliminary set up and an assisting walkthrough came in the form of following Code Institute's Boutique Ado walkthrough e-commerce project. Repository can be found here: Boutique Ado - Code Institute
I used the Bootstrap v5.0.2 framework to handle a lot of the heavy lifting of site styling and layout. The following from the documentation helped me:
- Navigation:
- Carousel:
- Cards:
For general Bootstrap tips and information, I frequently referred to the GetBootstrap documentation, the mdbootstrap documentation and the W3Schools bootstrap documentation.
Favicons were generated on Favicon.io - I converted one of the checkered flag images I have (see images below) into a favicon using their site.
I made use of Icons from Font Awesome using their free student plan. All icons used in this project have come from here.
Validator code for preventing previous dates from being set for creating trackdays found on stackoverflow: Prevent past dates being set
I found the code for storing phone numbers in my models from stackoverflow as well: Phone Number Validator
I made a mock up of my checkout page using the template provided by mdboostrap - With this I was better able to visualise what I needed in my checkout page and how I wanted it to look.
Some of the logic for my increment/decrement buttons on the track day detail page were inspired by answers from this stackoverflow thread: Stackoverflow js +/-
CSS for a checkerboard pattern that I used in my FAQ's Page: Checkerboard Pattern
I used this Privacy Policy generator to make a section of the content on my Policies Page: Django Raceway Privacy Policy
The site home page: Privacy Policy Generator
Very useful tips and instructions for reseting DB migrations and faking initial migrations to prevent issues: Simpleisbetterthancomplex migrations reset
Used this mockup software to generate a responsiveness hero image at the top of the readme file.
I used this very helpful guide for importing the data from my ElephantSQL database into DBeaver to map out my database Schema: Amis Technology Blog
I generated my sitemap.xml using this site
I generated my robots.txt file using this site
-
Many Thanks to my C.I Mentor Daisy McGirr, who has been guiding me and advising me through this project as well as all projects since PP2 - Her input in our mentor sessions has been instrumental in getting me this far and so I have to say I massive thank you to her for that!
-
Thanks to Monika Hrda, for support with helping with the idea for a constraint on my trackday model and reminding me about the debug var in my settings.py file.
-
Ben Dawson, for taking calls with me to discuss our P5 ideas at the project inception stage, and hosting check-in calls with me to see how we were getting on at different stages in our projects.
-
Alan from C.I tutor support - helped me work out an issue with my AWS configuration where I was stuck and sat in front of my screen for over 3 hours! He is so patient, understanding and methodical and has also helped me to debug an issue I was having with my bootstrap 5 toasts. Thanks Alan!
-
Ed from Tutor Support - Also a member of the London C.I group, he helped me when I wasn't able to extract string values from my model choices. He introducted me to the get_FOO_display() method from the Django Docs, which did exactly what I was looking for. Thanks Ed!
-
Scott from Tutor Support - Helped me with a bug with my add to basket functionality and explained why it was going wrong when he found it out himself. He is incredibly patient and kind and taught me a lot about dictionaries! Thanks Scott!
-
I would like to thank my good friend Abubakar for motivating me when I was stuck in parts of the project, and giving me tips and advice regarding Stripe, which has lots of experience with. I look forward to working with Abubakar on our own projects in future. If nothing else, I enjoy talking all things coding and coding problems with him, and we've had great chats about Software Development, future careers and AI.
-
Main Track image on which I drew the 3 layouts: Track Design Original
-
I visited Coolors to generate a visualised colour palette.
-
Photographs in the Gallery:
- Porsche Trackday pic
- Caterhams Trackday pic
- Track car pic
- Ariel Atom pic
- McLaren pic
- Ferrari pic
- All Mini Pictures taken were given to me with permission from the photographer.
-
About section images:
-
Car hire images:
- Ariel Atom 3
- Porsche 996 GT3
- Renault Megane RS
- Radical Rapture
- Lotus Image
- Nissan GTR Image
- For the "None" option "car" I had a default-no-image from here: no image icon
-
Experiences page images:
-
Tuition page:
This is my fifth and final project with Code Institute. A Full-Stack E-commerce trackday business, selling trackdays and experience/tuition packages online and developed using the Django Framework, AWS, Heroku and Stripe. Written with HTML5, CSS3, Python 3.8 and Javascript (Vanilla, JQuery, AJAX).
This marks the end of a year long journey with C.I, from someone with zero background in software development to someone who has created a Github portfolio of 5 graded projects to proudly display the development in my own learning and new-found abilities.
I thoroughly look forward to continuing to practice, grow and develop existing coding skills as well as learn new languages in due course. I'd like to thank everyone who has helped me along the way, because it certainly would not have been possible without your support, teaching and encouragement.