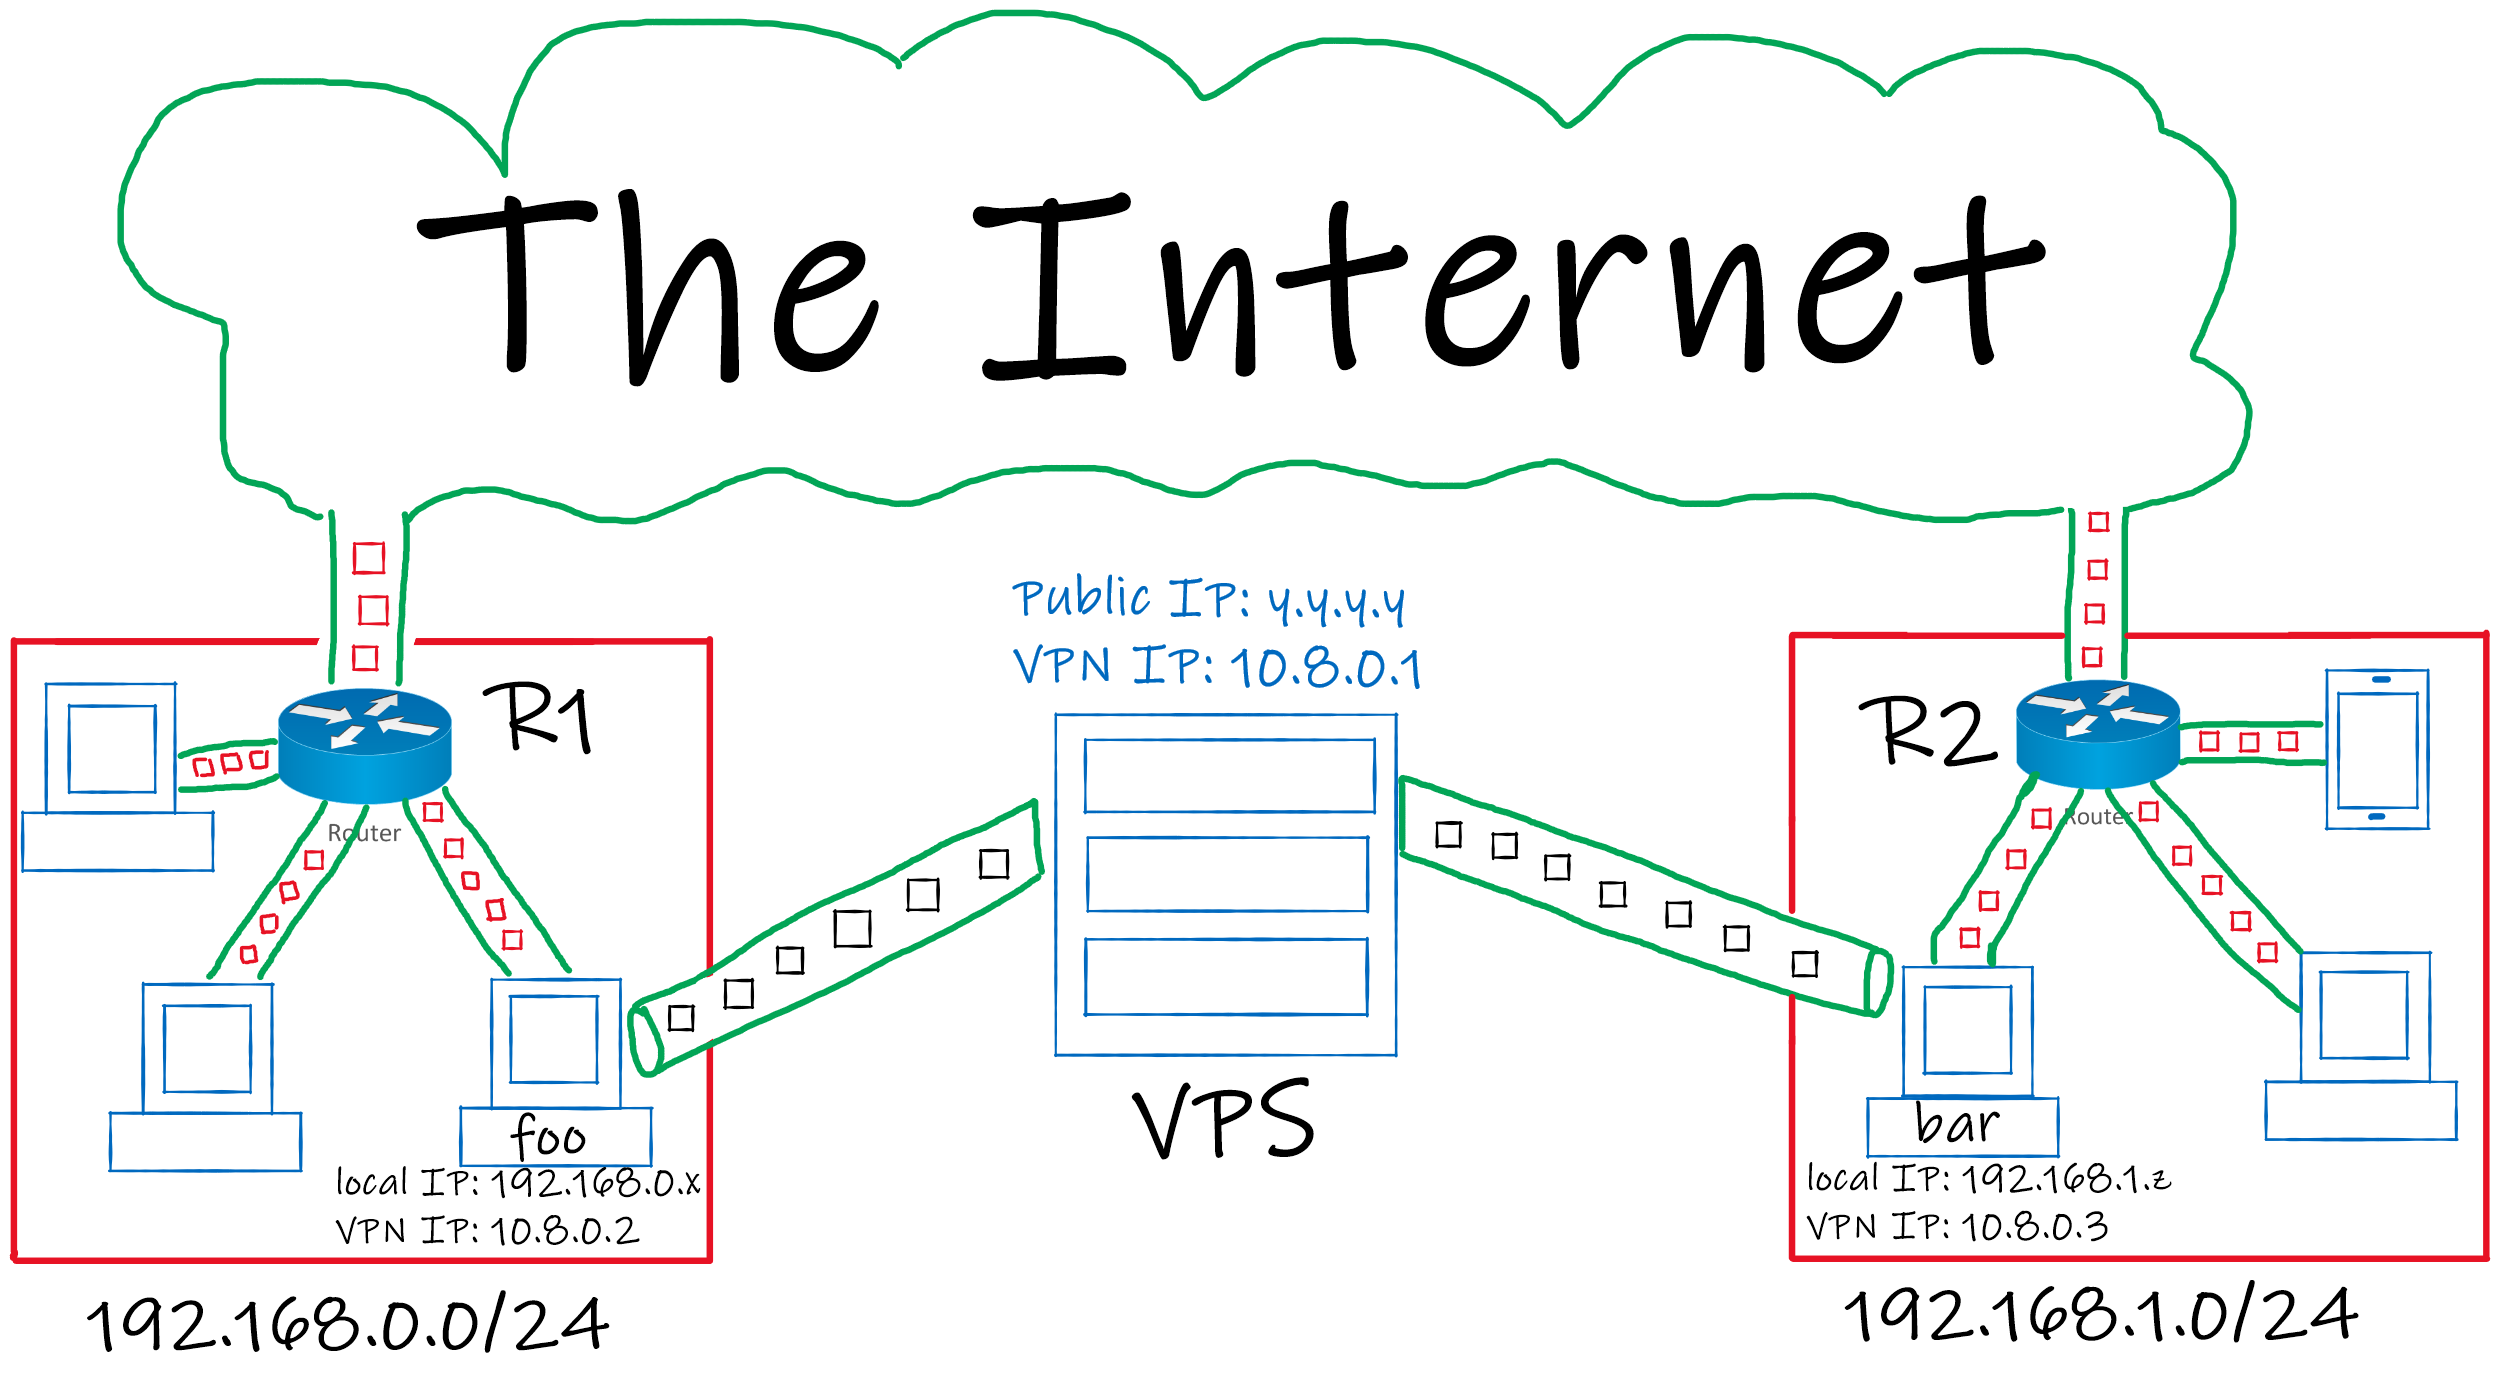
A Site to Site topology connects 2 (or more) networks together using VPN.
To achieve this, in most cases you can make this connection directly between the networks (with the help of port forwarding) but in some cases those networks can be behind a Carrier-Grade NAT CG-NAT, this repo is here to help you in this situation.
At the end of this tutorial we will have 2 networks connected together.
We will use a VPS to run a VPN Server that is publicly accessible, then we can connect to that server from foo (a local machine inside site a) and bar (a local machine inside site b) and with some tweaks we can make any machine in site a communicate with any machine in site b and vice versa.
-
first, install
WireGuardfrom the package manager.Ubuntu / Debian :
sudo apt install wireguardArch :
sudo pacman -S wireguard-toolsif you've chosen a different distro you can always seek guidence from WireGuard's website.
-
then, generate public and private keys using this command:
wg genkey | tee privatekey | wg pubkey > publickeyyou will have those keys generated in the current folder (directory).
-
Use
middle_server/wg0.conffile as a template and copy it to/etc/wireguard(may require root privileges). -
Allow port
51820udp on the firewall to accept connections from anywhere.
- Install
WireGuardon your machine. - Generate public and private keys using the same command (if you are using windows don't use
cmd, usepowershellinstead to generate the keys). - Use
foo/wg0.conffile as a template and copy it to/etc/wireguard(if you are using windows import the config file into the WireGuard application). - If
foois not the default gateway of its network then it's required to add static routes to the gateway (R1in the figure):- to forward
192.168.1.0/24(site bnetworkg address) packets tofoo. - to forward
10.8.0.0/24(VPN network address) packets tofoo.
- to forward
- Install
WireGuardon your machine. - Generate public and private keys using the same command (if you are using windows don't use
cmd, usepowershellinstead to generate the keys). - Use
bar/wg0.conffile as a template and copy it to/etc/wireguard(if you are using windows import the config file into the WireGuard application). - If
baris not the default gateway of its network then it's required to add static route to the gateway (R2in the figure):- to forward
192.168.0.0/24(site anetwork address) packets tobar. - to forward
10.8.0.0/24(VPN network address) packets tobar.
- to forward
After configuring the machines you can now establish a connection using this command:
sudo wg-quick up wg0
(if you are using windows press the Activate button on the WireGuard application).
If everything is configured properly then site a and site b can communicate with each other as a single network.
If you're having any issues connecting to the VPN server even though you're sure everything is configured properly then one of the reasons is that your country is probably applying Deep Packet Inspection DPI which gives them the power to distinguish WireGuard traffic and drop it.
