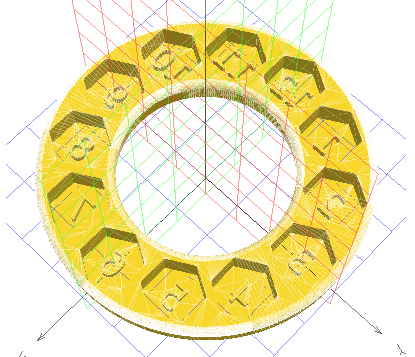
This is a project to build clock. Driven by a ESP32C3, using a 3D printed light diffuser and a NeoPixel LED ring, this clock will display the hour and minute as shadowed numbers in glowing hexagons.
- 24x NeoPixel Ring
- A different ring could be used with if the Clockface Generator Notebook is appropriately configured.
- QT Py ESP32C3
- Pretty much any of the ESP32 QT Py's could run the firmware since it only needs 2 GPIO and an internal clock
I had been playing with lithophanes a lot (such as those from the Lithophane Maker) and became enamored with how a thick-but-not-too-thick light difuser could cause an image to disappear without a backlight. The effect made static surfaces able to pop with hidden messages. I made some concept pieces out of wood that confirmed the basic idea. And then, toying with a NeoPixel ring one day, the idea of a light diffuser based clock came together.
Hidden Clockface Model
- Print Hidden Clockface, Clock Stomach and Embedded Button
- Load clock.upy firmware onto Micropython formatted QT Py ESP32C3
- Solder 3-wire connector cable from 24x NeoPixel Ring to the 5V, GND, and M0 pins of the QT Py ESP32C3 * Guarantee NeoPixel ring works and responds to both short and long button presses.
- Glue 24x NeoPixel Ring to Clock Stomach
- Place QT Py ESP32C3 into Clock Stomach slot and solder-plasticweld the Embedded Button into place -- MINDFUL OF BUTTON PLACEMENT --
- Solder/plasticweld Hidden Clockface to Clock Stomach in front of 24x NeoPixel Ring
- Short press (<200 milliseconds) adds a 3 minute modifier to the internal time
- Long press (>200 milliseconds) adds a 1 hour modifier to the internal time

