This project is dormant (reasons). Feel free to fork it and take over maintenance.
The intent of this package is to be an example to build your own RStudio / Shiny app for Sandstorm.
The package is done with vagrant-spk, a tool designed to help app developers package apps for Sandstorm.
You can follow the following steps to make your own package or to contribute.
You will need to install:
- Vagrant
- VirtualBox
- Git
git clone https://github.com/sandstorm-io/vagrant-spk
git clone https://github.com/JamborJan/rstudio-sandstorm
export PATH=$(pwd)/vagrant-spk:$PATH
cd rstudio-sandstorm
vagrant-spk vm up
vagrant-spk dev
This version of the app is not yet usable via http:https://local.sandstorm.io:6080/.
Note: when you want to fork this repo and create actual app packages for the app store you would need either the original app key or create a new one and make your own app.
You can share files between the host box's repository folder and guest box's /opt/app folder.
To test stuff it makes sense to not stop the services in setup.sh and use them via ports described in Vagrantfile. This is currently the case and you can access the services without starting an app instance:
RStudio: visit http:https://localhost:8787 in a web browser & login with:
login: ruser
password: ruser
You can run this to start a Shiny Test app:
if (!require('shiny')) install.packages("shiny")
shiny::runGitHub("shiny-examples", "rstudio", subdir = "001-hello")
Shiny Server: visit http:https://localhost:3838 in a web browser.
This example shows how to train and use a classifier for short text snippets e.g. customer feedbacks from a survey.
Ensure that the RTextTools Package is enabled (bottom left side of the main window the 3rd tab).
-
Create a CSV file
You will need to use a CSV file. We linked the repos base path to /vagrant in the vagrant box. So you can copy your CSV file in the repos base path to access it within the box. For this test you can use a file with two columns: "class" and "text". The text column obviously contains your texts which you want to analyze. The class column will be used for two things later: first we want to train our algorithm with manually pre-classifyed data. When this is done our algorithm can classify data on it's own and will write the class it finds here. So for now we need a file where both columns are filled in.
Ensure you save your text file with UTF8 encoding. This is a common problem when creating your files from Microsoft Excel.
-
Read the training CSV file
You can read your CSV file with the
read_datafunction into thedataobject. Ensure to enter the right name of your file and the right delimiter e.g. semicolon or the pipe symbol.training_data <- read_data("/opt/app/example_data/classification/training_data.csv",type="csv",sep=";") -
Process your file
Now you can process your data. It would be ridiculous to believe I can describe in this small README how you should do text analytics, you need to know what you do or should grab a book and study. So I do only one thing here: I show the commands explained in the quick guide of RTextTools so that you can quickly run through the steps and see the result.
First we create a document matrix. Note:
training_data$textis the name of the object where you have imported your data before and the column name you want to analyze. You can set also a language. The other options are copy & paste from the quick start guide.training_doc_matrix <- create_matrix(training_data$text, language="english", removeNumbers=TRUE, stemWords=TRUE, removeSparseTerms=.998)Now we create a container from that. The matrix is referenced. Again we see
training_data$classwhich references your data and a column labeling your text and thus classifying it.trainSize=1:20means the first 1'000 lines will be used for training andtestSize=21:30means these lines will be used for verifying.virgin=FALSEindicates that we are dealing with pre-classifyed data.training_container <- create_container(training_doc_matrix, training_data$class, trainSize=1:20, testSize=21:30, virgin=FALSE)There are several algorithms available, for pros and cons I refer to my previous statement: buy books and study :-) I only show one example with a simple algorithm from the quick guide from the RTextTools guys. So we use the support vector machine algorithm (SVM).
SVM <- train_model(training_container,"SVM")And now it is getting interesting :-)
-
Read the CSV file for classifying and pre process it Same as before for the training. Now we have a CSV with only one column "text".
classify_data <- read_data("/opt/app/example_data/classification/classify_data.csv",type="csv",sep=";")Now we do the matrix again:
classify_doc_matrix <- create_matrix(classify_data$text, language="english", removeNumbers=TRUE, stemWords=TRUE, removeSparseTerms=.998)and the container but this time we have a virgin file. So
trainSizeis null andtestSizeis all.classify_container <- create_container(classify_doc_matrix, classify_data$class, trainSize=NULL, testSize=1:4, virgin=TRUE) -
Classify data Now you run the trained classifyer
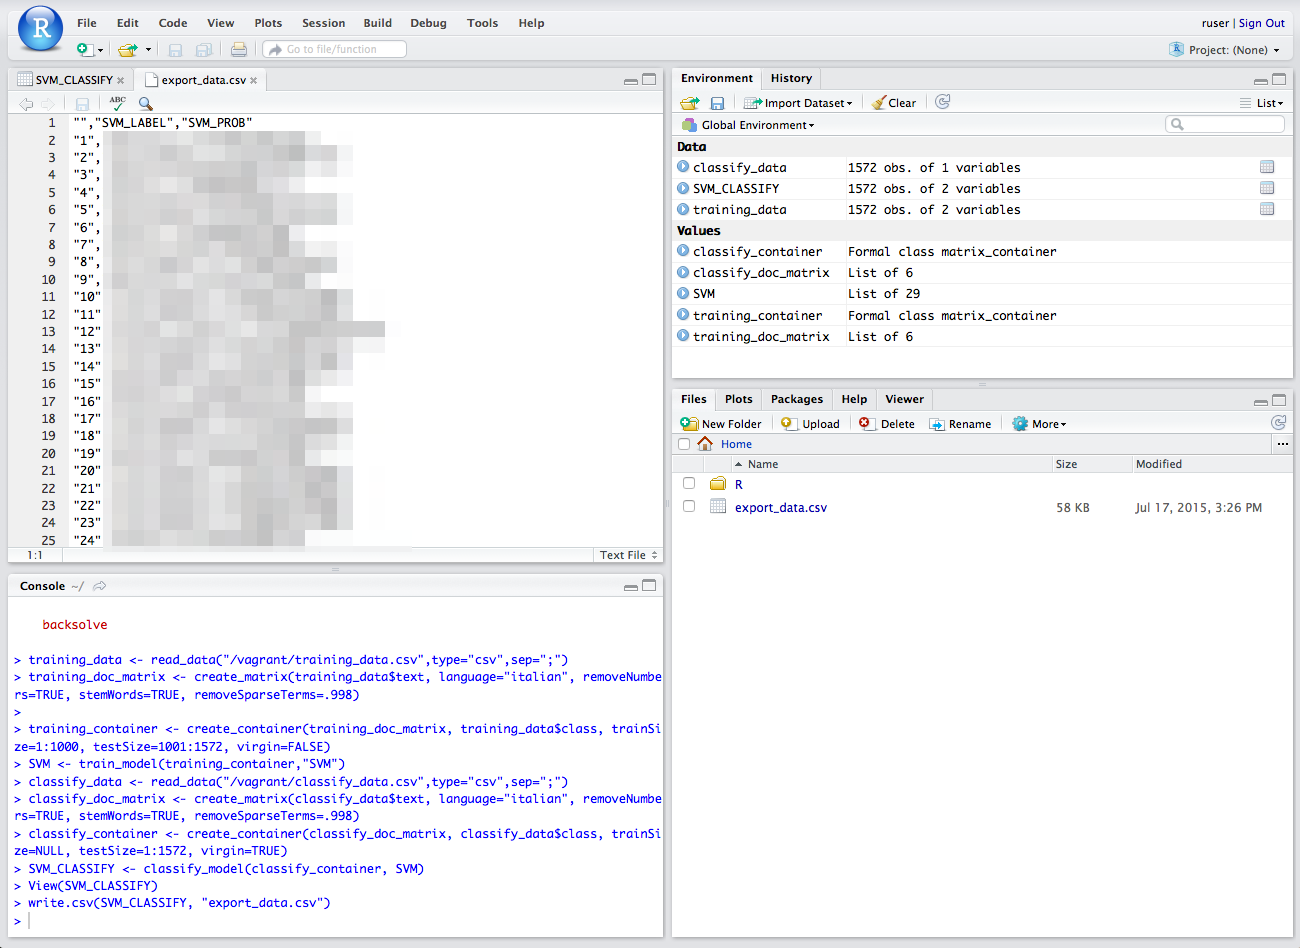
SVMwith your data.SVM_CLASSIFY <- classify_model(classify_container, SVM)And you get as a result the label for every single line with a probabilty that the result is right.
View(SVM_CLASSIFY) -
Export data As I am running out of time right now I couldn't make this smoother.
You can export the file from RStudio to the firtual machine
write.csv(SVM_CLASSIFY, "export_data.csv")Then open the files section (first tab on the bottom right part of the main screen). You see the file there and can click on it. It is displayed in the upper left part of the main screen and you can copy and past the content.
Merging the results with original texts must be done manually so far. I have to check that in detail later.
This example shows how to use deep learning algorithms to analyze long texts.
Ensure that the deepnet Package is enabled (bottom left side of the main window the 3rd tab).
... examples will follow ...
