You will need to have docker installed on your system and the user you want to run it needs to be in the docker group.
Note: The image is a multi-arch build providing variants for amd64, arm32v7 and arm64v8 and also, an legacy amd64 Build for old Synology Kernels. - the correct variant for your architecture needs to be tagged e.g :amd64, :arm32v7, :arm64v8, :legacy
To learn how to manually start the container or about available parameters (you might need for your GUI used) see the following example:
docker run \
  -d \
  -e USER_ID="99" \
  -e GROUP_ID="100" \
  -e TIMEZONE="Europe/Berlin" \
  -e UPDATE="yes" \
  -e MOSQUITTO="yes" \
  -e INFLUXDB="yes" \
  -p 3000:3000 \
  -p 1883:1883 \
  -p 8080:80 \
  -v {SOLARANZEIGE_STORAGE}:/solaranzeige \
  -v {INFLUXDB_STORAGE}:/var/lib/influxdb \
  -v {GRAFANA_STORAGE}:/var/lib/grafana \
  -v {PVFORECAST_STORAGE}:/pvforecast \
  -v {WWW_STORAGE}:/var/www \
  --name=Solaranzeige \
  --restart unless-stopped \
  --tmpfs /tmp \
  --tmpfs /var/log \
  takealug/solaranzeige:tag
The available parameters in detail:
| Parameter | Optional | Values/Type | Default | Description |
|---|---|---|---|---|
USER_ID |
yes | [integer] | 99 | UID to run Solaranzeige as |
GROUP_ID |
yes | [integer] | 100 | GID to run Solaranzeige as |
TIMEZONE |
yes | [string] | Europe/Berlin | Timezone for the container |
-p |
no | [integer] | 3000:3000 | Map Grafana Listenport inside this Container to Host Device Listen Port (Bridge Mode) |
-p |
no | [integer] | 1883:1883 | Map Mosquitto Listenport inside this Container to Host Device Listen Port (Bridge Mode) |
-p |
no | [integer] | 80:8080 | Map Apache2 Listenport inside this Container to Host Device Listen Port (Bridge Mode) |
UPDATE |
yes | yes, no | no | Turn On / Off automatic Update for Solaranzeige each restart inside this Docker |
MOSQUITTO |
yes | yes, no | yes | Turn On / Off mosquitto service inside this Container |
INFLUXDB |
yes | yes, no | yes | Turn On / Off influxdb service inside this Container |
Frequently used volumes:
| Volume | Optional | Description |
|---|---|---|
SOLARANZEIGE_STORAGE |
no | The directory to persist /solaranzeige with Crontab Settings to |
INFLUXDB_STORAGE |
no | The directory to to persist /var/lib/influxdb to |
GRAFANA_STORAGE |
no | The directory to to persist /var/lib/grafana to |
PVFORECAST_STORAGE |
no | The directory to to persist /pvforecast to |
WWW_STORAGE |
no | The directory to to persist /var/www to |
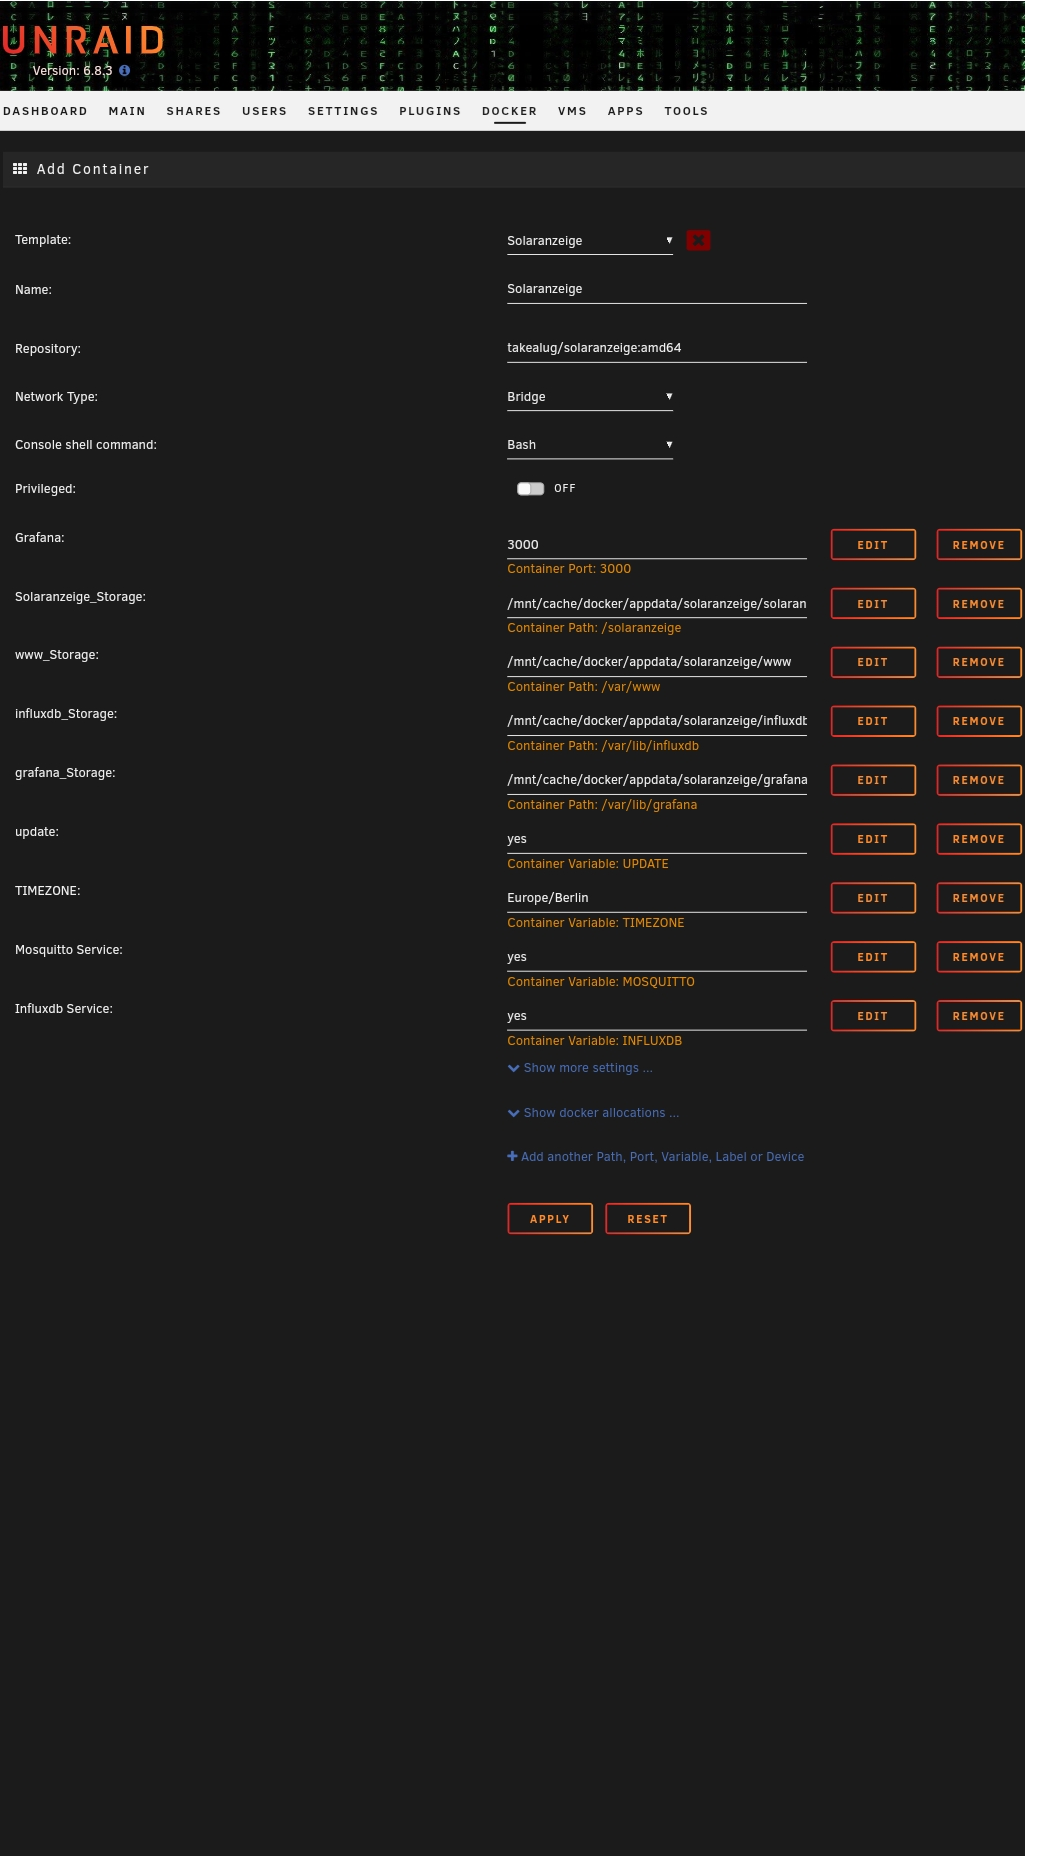
When passing volumes please replace the name including the surrounding curly brackets with existing absolute paths with correct permissions.
Note:
INFLUXDB_STORAGEpersist the Database for Grafana. Note:GRAFANA_STORAGEpersist Grafana settings and Dashboards. Note:WWW_STORAGEpersist logfiles and all script-files from solaranzeige.de. Note:PVFORECAST_STORAGEpersist PVForecast data from https://github.com/StefaE/PVForecast
Inside this Container you need to run /solaranzeige/setup connect to the Container e.g
docker exec -ti Solaranzeige /solaranzeige/setup
Note: For initial Setup instructions see https://solaranzeige.de/phpBB3/viewtopic.php?f=5&t=305
Please, after you finish your Initial Setup, restart this Container, and select your Grafana - Dashboard
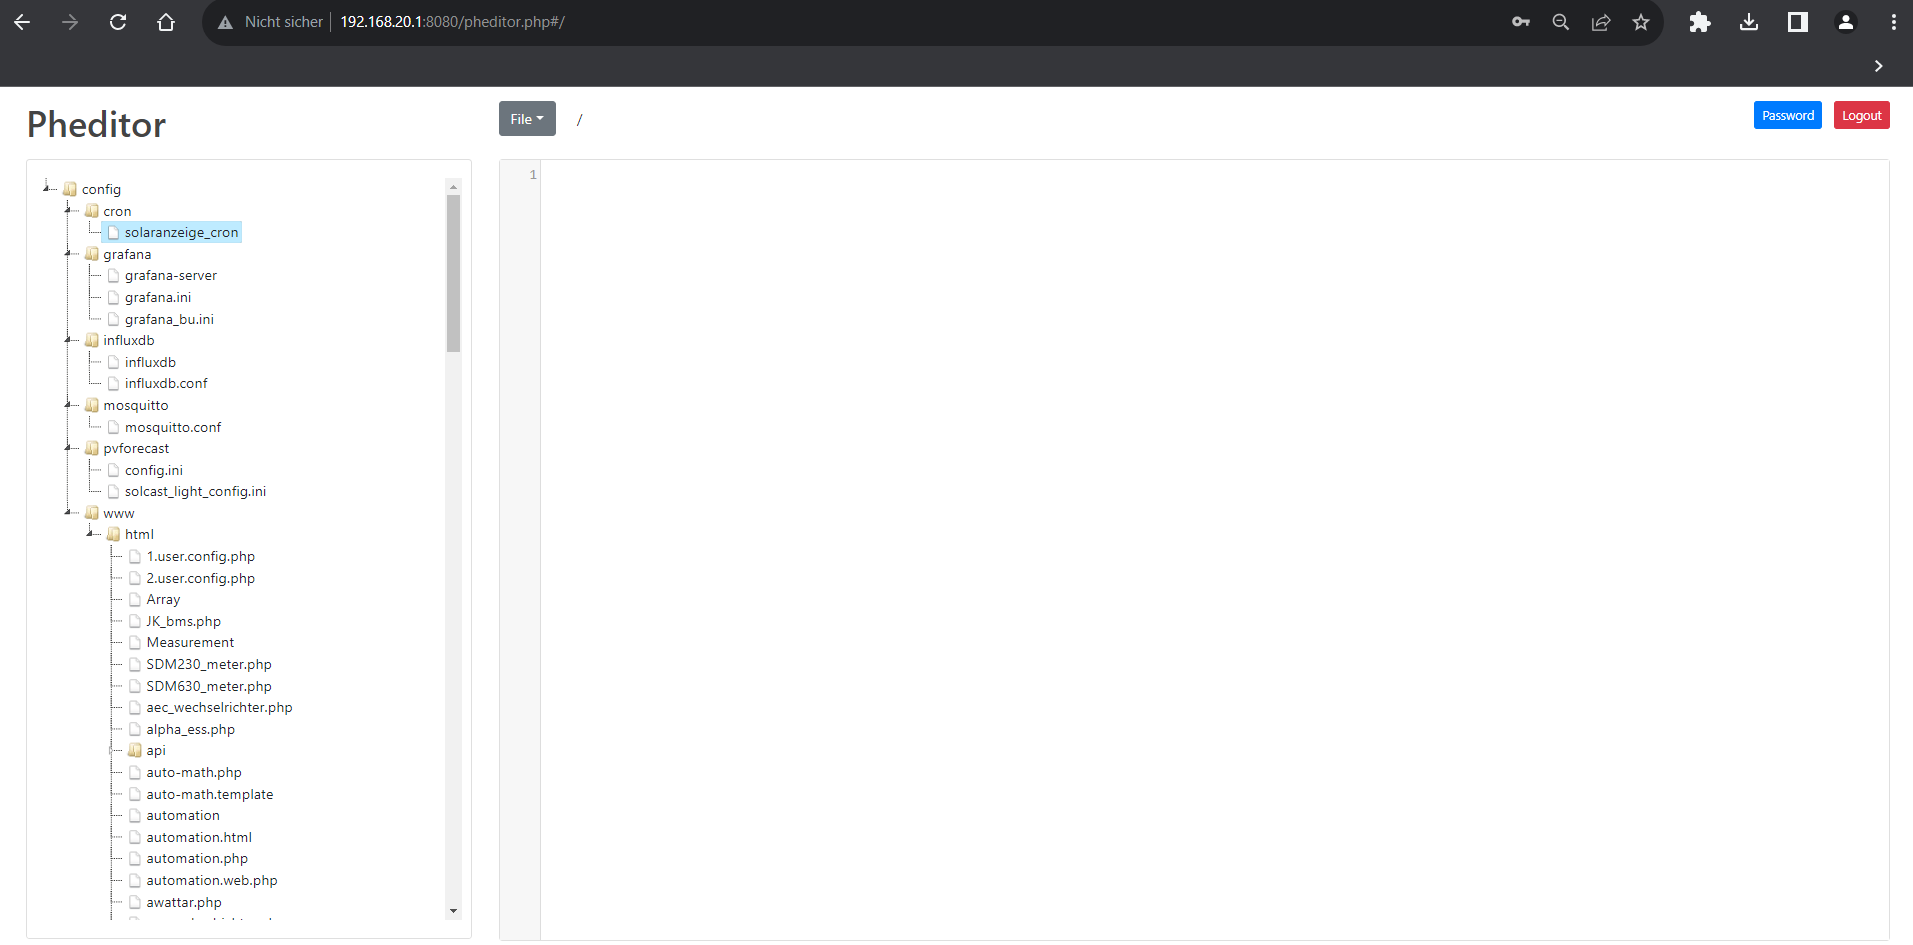
Just edit your Persist {SOLARANZEIGE_STORAGE}/solaranzeige_cron File and restart your Container dont forget to add an empty Newline at the End of this File.
Open your Webbrowser and open Solaranzeiges "Quick Access" e.g. IP:8080 and use "File Editor" , standard password is "solar" after saving, please restart your Container to take effect.
If you like my Work, please 
Note: An Template for Unraid can be found here : https://raw.githubusercontent.com/DeBaschdi/docker.solaranzeige/master/Templates/Unraid/my-Solaranzeige.xml Please safe it to into \flash\config\plugins\dockerMan\templates-user, after that you can use this Template in Unraids Webui. Docker > Add Container > Select Template and choose Solaranzeige