This repository is the basis for our Introduction to the ChipFlow platform tutorial.
- PDM must be installed.
- openFPGAloader is required to use a board.
- macOS: Easiest way is
brew install openfpgaloader. - Linux/Windows: Easiest way may be via the OSS CAD Suite.
- macOS: Easiest way is
- Clone this repository to your local environment.
- Run
make initto install the dependencies.
Build local simulation binary:
make sim-buildBuild the software/BIOS which will run on our design.
make software-buildNow that we have our simulation and a BIOS, we can run it:
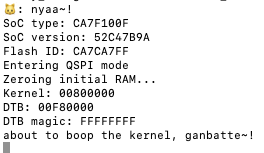
make sim-runYou should see something like this:
Build the design into a bitstream for the board:
make board-buildBuild the bios, and program BIOS into the board's flash:
make software-build
make board-load-software-ulx3s
Load SoC onto board (program its bitstream):
make board-load-ulx3sYour board should now be running. You can connect to it via its serial port:
- Find the serial port for your board, using
ls /dev/tty.*orls /dev/cu.*. You should see something like/dev/tty.usbserial-K00219for your board. - Connect to the port via the screen utility, at baud 112200, with the command:
screen /dev/tty.usbserial-K00219 115200. - Now, press the
PWRbutton on your board, which will restart the design. - Within screen, should now see output like:

- To exit screen, use
CTRL-A, thenCTRL-\.
make silicon-rtlilYou should now have an build/my_design.il.
make silicon-prepare