Hungry Chef is a food blog web site where users can find recipes and cookbooks created by other users. The goal of the Hungry Chef is to bring food lovers closer and provide them with a place where they can post their ideas, discuss in comments and get inspired! (Developer: Matej Car)
- As a user I can view a paginated list of recipes so that I can pick one to read
- As a user I can view a selection of random recipes so that I can pick and read the one I like
- As a user I can click on a recipe so that I can read the whole recipe
- As a user I can view the comments on individual recipes so that I can read other user's opinions on recipes
- As a user I can register for an account so that I can interact with content and post recipes
- As a user I can view and select a category of recipes so that I can view recipes in category
- As a user I can search the recipes by keyword so that find relative recipes
- As a user I can view the number of likes so that I can see which recipe is most popular
- As a user I can view other people cookbooks so that I can get ideas
- As a registered user I can post a comment on a recipe so that I can be involved in the conversation
- As a registered user I can like/unlike the recipes so that I can interact with the content
- As a registered user I can login so that I can access my content
- As a registered user I can logout so that other users cannot access my account
- As a registered user I can access my profile so that I can edit my details and upload a profile image
- As a registered user I can delete my comments so that the comments are no longer visible
- As a registered user I can edit my comments so that I can update my comments
- As a registered user I can create a cookbook so that I can add recipes that I like
- As a registered user I can add a recipe to my cookbook so that I can easily find the recipes
- As a registered user I can edit my cookbook so that I can change the list of recipes
- As a registered user I can delete my cookbook so that my cookbook is no longer visible
- As a registered user I can like/unlike the cookbooks so that express my opinion
- As a registered user I can post a comment on a recipe so that interact with a user that posted
- As a registered user I can add the recipe on the blog so that other people can see and share their opinion
- As a registered user I can edit my recipe so that update my recipe
- As a registered user I can delete my recipe so that it is not visible to other users
- As a registered user I can see messages to know if my actions were successfull or not
- As a site admin I can approve/disapprove the comments so that I can decide if the content is relevant
- As a site admin I can create, read, update, and delete recipes so that I can manage my content
- As a site admin I can delete or update user's comments so that I can manage my content
- As a site admin I can delete or update user's cookbooks so that I can manage my content
- As a site admin I can create draft recipes so that I can finish writing the content later
- As a site admin I can create, update and delete categories so that I can manage my blog content
-
GitHub Projects were uset to create kanban board, and Issues were used to create User Stories and Epics which helped me move through the project and organize tasks.
-
Using GitHub Issues, I was also documenting bugs in order to make sure that they are not forgotten.
-
User Stories were organized in Epics which helped me to build the project section by section.
-
Agile Methodology and GitHub Projects helped me a lot in organizing my own work on this project, but I still very often found myself adjusting and adding User stories.
Link to GitHub Project can be found here
-
this feature is present throughout entire project except on a page where user is prompt to define his profile role for using the app, and since the incentive is to pick the role as its vital part of a user functionality of the web app I decided to not incude this feature in this part of the project.
-
page logo is also a link to home page. Other than that, navbar consists of links to: Home page, About Us, Recipes, Cookbooks, Categories, and Contact Us pages.
-
authenticated user has his username visible on the navbar which is a link to profile page.
-
unauthenticated user can see links to Register/Login instead of username.
-
this feature also contains search bar to quickly search recipes by keyword.
-
this feature contains the carousel for aesthetis, and top recipes. The Carousel is present throughout the whole project.
-
Top recipes are listed based on number of likes. This way users are able to see few best recipes straight away.
-
Users are also able to see recipe card that contains number of likes and comments.
-
This feature contains a quote from Hungry Chef, Contact information and copyright.
-
This feature si present throughout the whole project
-
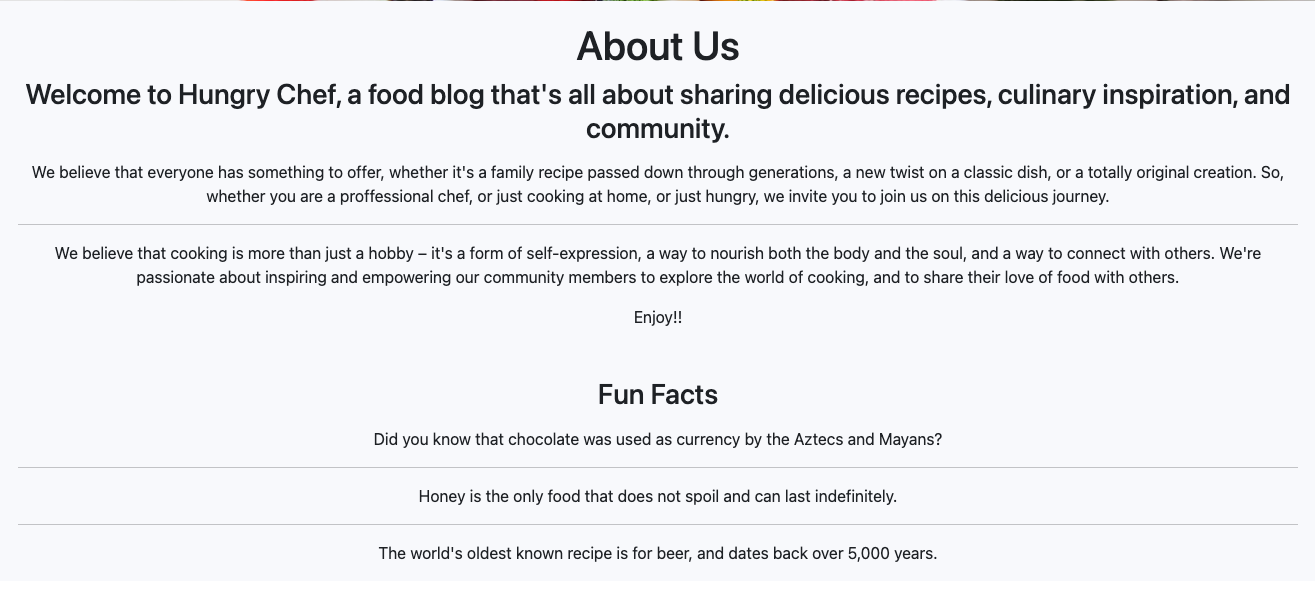
This feature gives more information to users regarding the blog.
-
This feature also contains fun facts regarding food.
-
This feature lists all recipes on blog.
-
This feature allows authenticated users to create recipe. unverified users will not be able to see this option.
-
This feature also contains recipe cards with picutres, author name, recipe title, date posted, number of likes and comments.
-
This feature allows users to access the recipe details.
-
This feature allows user to see all recipe details and comments section.
-
authenticated users will be able to like and comment posts.
-
if authenticated user is owner of recipe, he will be able to see Edit/Delete buttons
-
This feature allows authenticated users to create their own recipe.
-
unverified users are not able to access this page.
-
Before recipes are posted, they must be approved by admin.
-
This feature allows authenticated users to edit their own recipe. Users are not able to edit other users recipes.
-
unverified users are not able to access this page.
-
This feature allows authenticated users to delete their own recipe. Users are not able to delete other users recipes.
-
unverified users are not able to access this page.
-
This feature allows authenticated users to interact with recipes and leave their comments.
-
Before comments are posted, they must be approved by admin.
-
Users are able to edit and delete their own comments.
- This feature allows authenticated users that are owner of comments to edit them.
- This feature allows authenticated users that are owner of comments to delete them.
- This feature allows users to change pages on recipes and cookbooks pages.
-
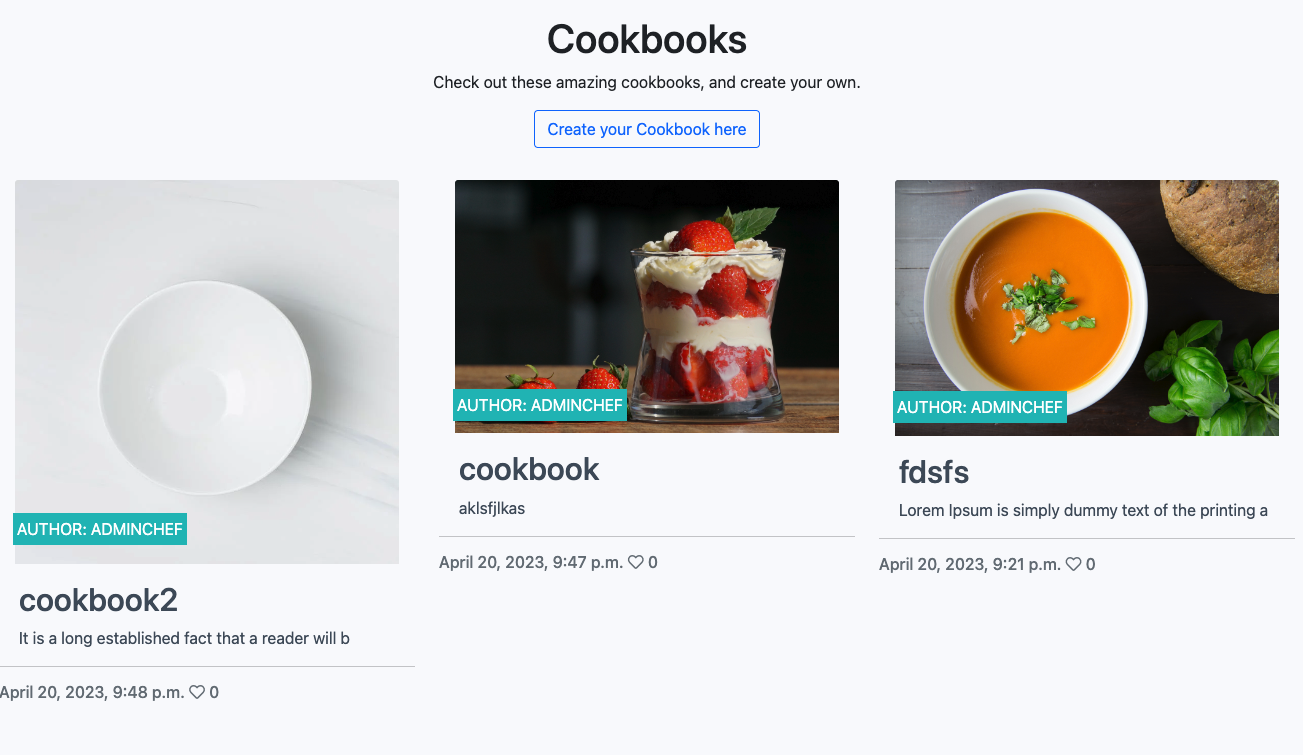
This feature allows users too see cookbooks that other users created.
-
Users are able to see cookbook picture, author, title, description, date created and number of likes.
-
Authenticated users will see a button to create their own cookbook.
-
unverified users will not be able to see the button to create cookbook.
-
This feature allows authenticated users to create cookbook.
-
Before cookbook is posted, it must be approved by admin.
- This feature allows authenticated users to edit their own cookbook.
-
This feature allows users to see categories that admin set.
-
Admin is able to create, edit and delete categories through admin panel.
-
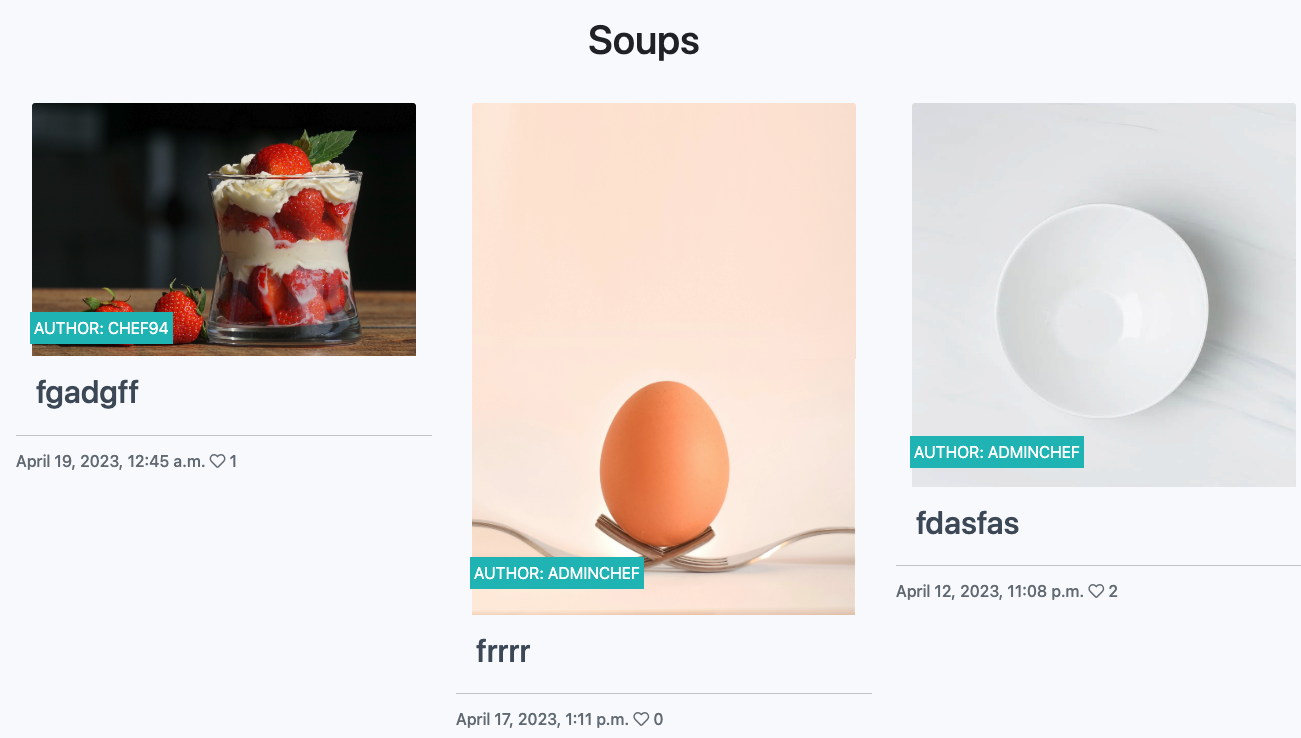
This feature allows users to pick a category of food that they desire and see all recipes in that category.
- This feature lists all recipes in chosen category.
- This feature is a form that allows users to contact owner of the Hungry Chef and give feedback or query.
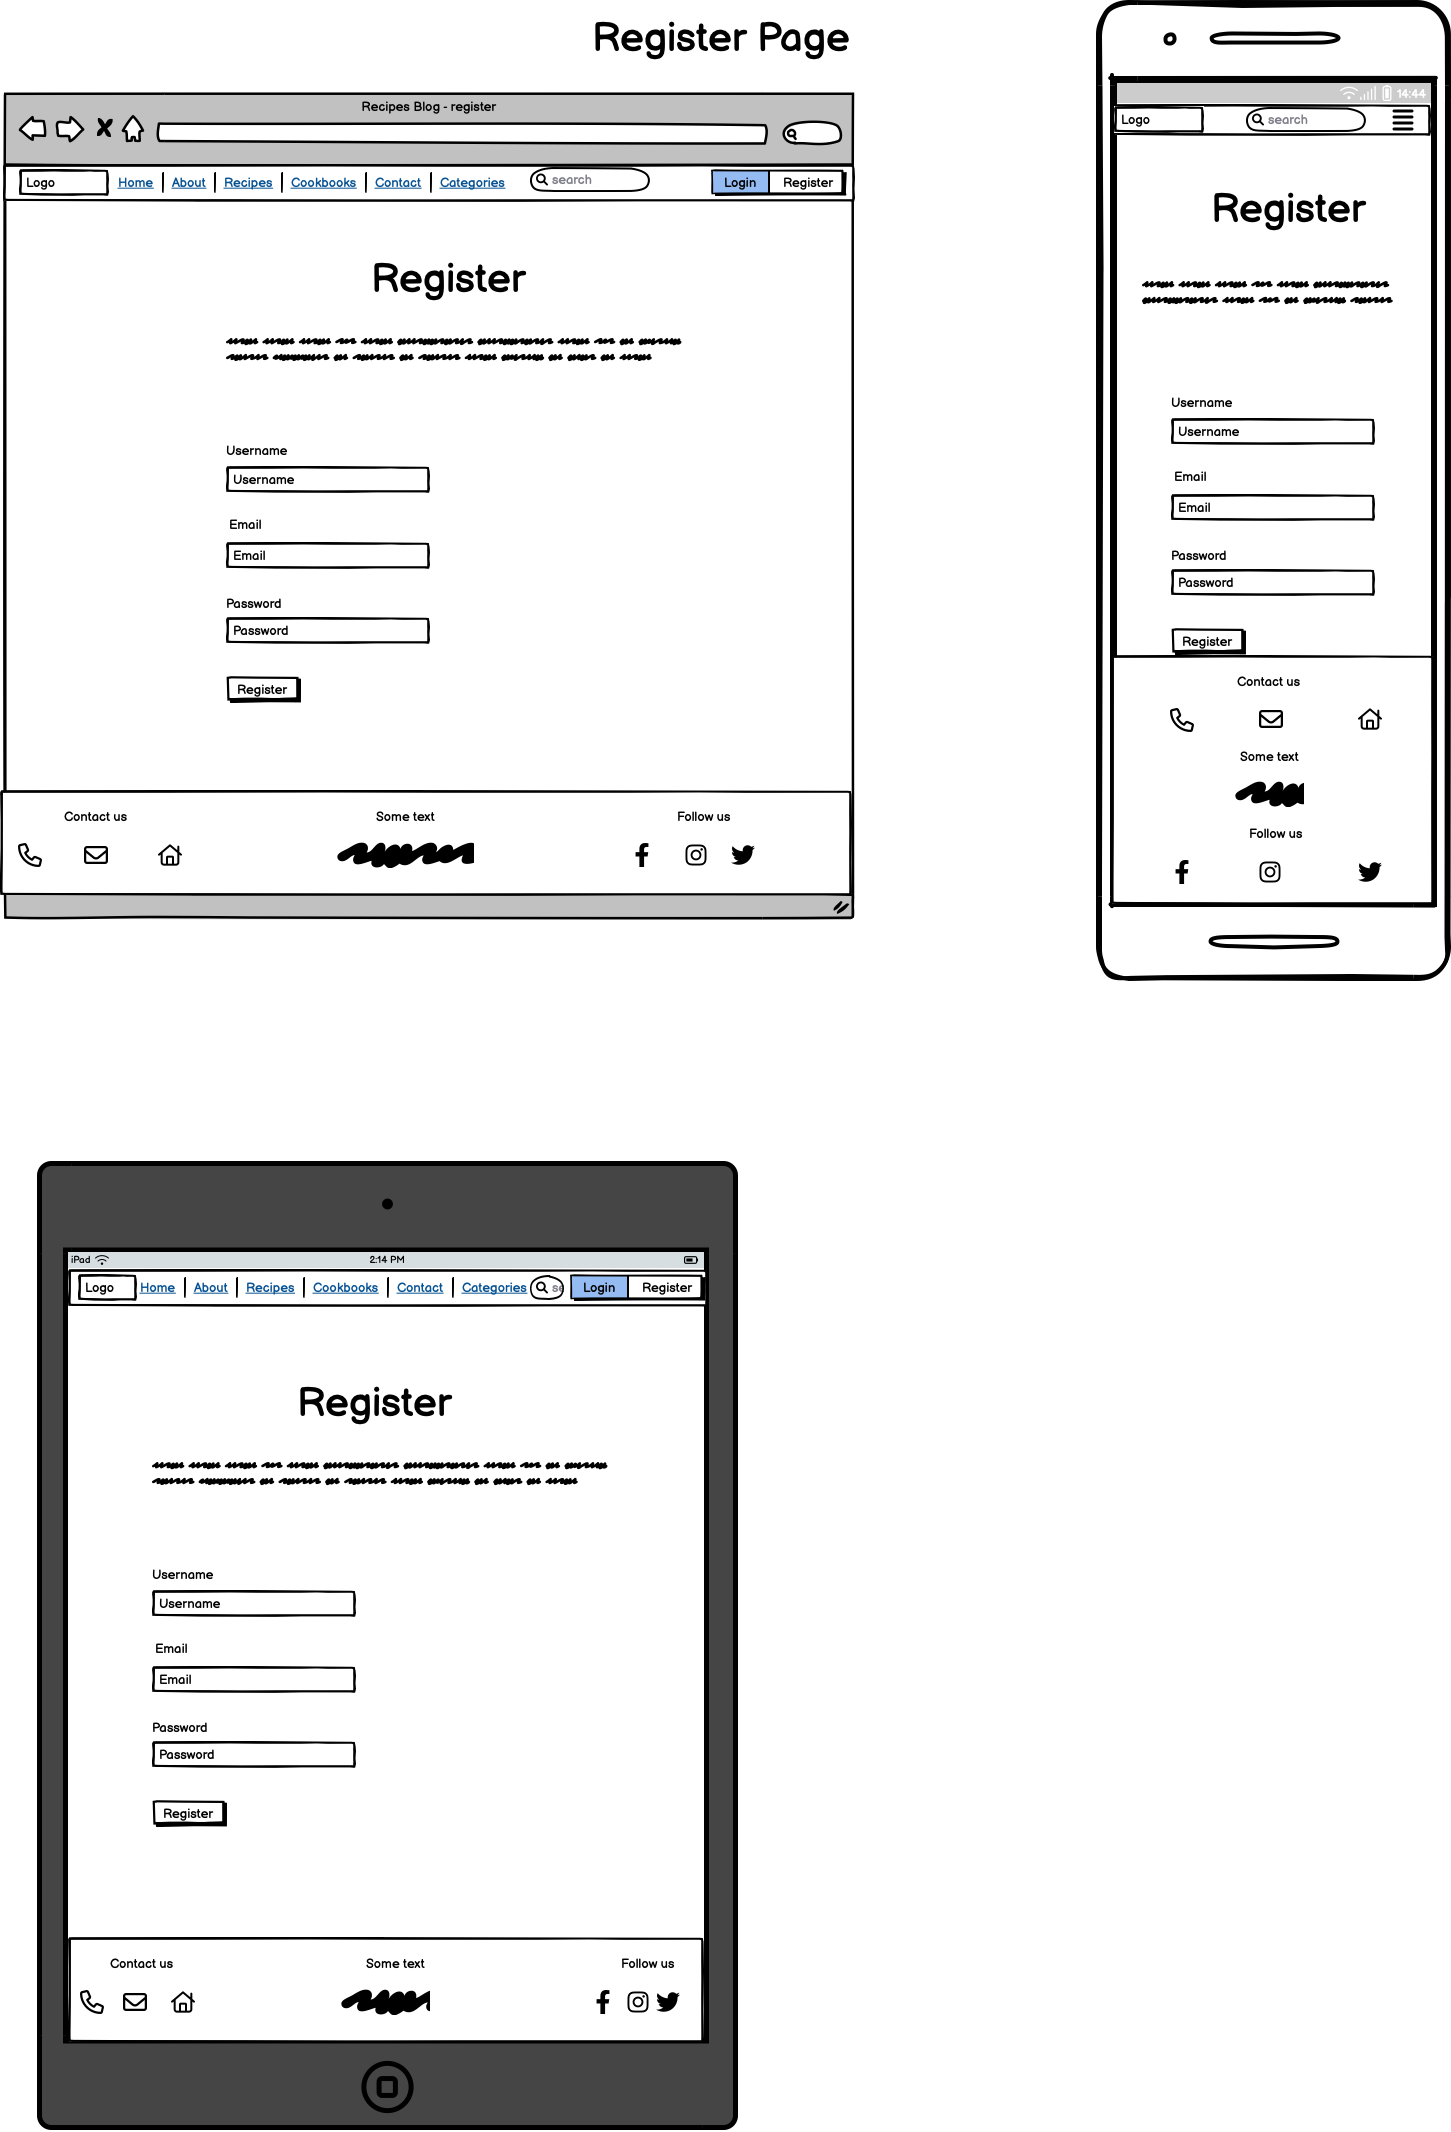
- This feature allows users to register for a profile to be able to post recipes, create cookbooks and comment.
- This feature allows existing users to login to be able to interact with content.
-
This feature allows registered users to update their profile bio or image.
-
unverified users are able to see profile pages of other users.
- This feature allows authenticated users to edit or delete their profile.
- This feature allows all users to search for recipes by keywords.
- Messages are available for all user actions to inform users on success of their actions.
-
Categories drop-down list in Nav-Bar
- This feature would give users faster access to wanted categories.
-
Comments on Cookbooks
- This feature would give authenticated users option to express their opinion on other users cookbooks.
-
Add to Cookbook button
- This feature would be possible for authenticated users that have cookbooks.
- This feature would allow users to add recipes to their cookbook without having to go to edit cookbook.
-
Text formatting for recipes and cookbooks
- This feature would create a much better look for blog
Coolors.co was used to create following colour pallette.
- Green and Red colour were used for Hungry Chef logo and White colour was used for rest of the project.
Google Fonts was used for fonts in this project.
- The fonts that I was using are Roboto and Lato
-
Using Github Issues I created a templates for User Stories and Epics which I was using to organize my work.
-
As it was my first time using Agile approach, I found myself very often adding new user storiesm abd adjusting existing user stories in different epics.
- As a visual representation of the project's status, I was using Kanban Board. Here is the link
- The Moscow prioritization technique is used to prioritize project requirements based on their importance and urgency. I was using Moscow to aid myself in determining priorities in project and also to label the bugs in code that I did not have time to address at that moment.
For creating data diagram I was using Lucidchart
- For creating wireframes I was using Balsamiq.
-
Languages:
- HTML
- CSS
- Javascript
- Boostrap
- Python
- Django
-
Libraries & Technologies:
-
Other:
- all validation can be found here
-
project was tested during and post development on following devices:
- MacBook Pro
- Samsung S21
- Huwei P20
- HP Laptop
-
Project was tested during and post development on following browsers:
- Chrome
- Brave
- Firefox
- Safari
- Automated testing was conducted utilizing the "unittest" module from the Python standard library, which is integrated with Django's unit tests.
Integrity Bug
-
When submitting new post, the following error was returned:
-
duplicate key value violates unique constraint "blog_recipe_slug_key" DETAIL: Key (slug)=() already exists.
-
After some research, I added 'slugify' method to the recipe model and redirected the user to the recipes page.
Admin Post Deletion
- When the admin is deleting comments from the page view, the wrong comment is deleted.
Users not able to upload profile/recipe images
-
When users try to upload new images to profile or recipe, the image is not saved.
-
With mentors help and cloudinary documentation, edit profile and edit recipe views and forms were adjusted to properly upload to cloudinary and in database.
Number of likes on Cookbooks not displayed
-
Number of likes on cookbooks not displayed on cookbook cards or detail on cookbooks.html and cookbook_detail.html
-
After some research i realised i forgot to def number_of_likes in models.py for cookbook.
Edit Cookbook
- When user follows the link to Edit Cookbook, the title says 'Edit recipe' as the same form is used for updating recipe and cookbook.
- During the initial phases of development, Hungry Chef was deployed on Heroku. To avoid any potential deployment issues near the app's release, I made sure that the database and static files were accessible right from the start of the project.
-
To generate a managed PostgreSQL database, please proceed to ElephantSQL and either sign up or sign in to your account. Once you've logged in, click on the 'Create New Instance' button.
-
Name your database and select the 'Tiny Turtle' payment plan. Then, click on 'Select Region'
-
Select your preferred region and create the database instance. After creating the instance, navigate to the instances page and click on the name of the database you selected earlier. Then, in the details section on the following page, copy the PostgreSQL URL.
-
Before deploying to Heroku there are a few things to have ready ElephantSQL Database url, SECRET_KEY variable(generate key different from provided one), CLOUDINARY_URL variable(after logging in the Cloudinary website copy the 'cloudinary url' from your account dashboard as the value of a variable )
-
Create env.py (at the root level of your project) This file contains the above mentioned variables in a form of:
-
os.environ['DATABASE_URL'] = 'value of ElephantSQL Database url'
-
os.environ['SECRET_KEY'] = 'value of secret key' secret key could be generated here
-
os.environ['CLOUDINARY_URL'] = 'value of 'cloudinary url' from your
account dashboard' cloudinary url can be found here
-
First, sign up or sign in to your Heroku account. Next, create a new app from the Heroku dashboard.
-
Choose a unique name for your app and enter the region.Then, click on the 'Create App' button. Once your app has been created, select the 'Settings' tab from the dashboard and navigate to 'Reveal Config Vars'. From there, paste the:
- ElephantSQL Database URL into the DATABASE_URL environment variable.
- SECRET_KEY variable into the SECRET_KEY environment variable.
- CLOUDINARY_URL variable into the CLOUDINARY_URL environment variable.
- add DISABLE_COLLECTSTATIC variablewith value of 1 (for initial deployment, later this variable can be removed)
- add variable named PORT with value of 8000
-
Select Deploy option from the 'tabs'
-
From Deployment method section choose Connect to GitHub and click on it
-
Find your github repository by name and connect
-
At the bottom of the page choose either automatic deployment manual deployment(deploy by branch)
-
Click on the option you want, and you should be able to see the boiler process. and after a while, your app should be deployed.
-
Login or Signup to Github
-
Navigate to the GitHub repository link https://github.com/Carvu94/CI-PP4-Recipes-Blog
-
Click on the Fork button in the top right corner
-
Copy of the repository will be in your own GitHub account.
-
Go to the GitHub repository https://github.com/Carvu94/CI-PP4-Recipes-Blog
-
Locate the Code button above the list of files (next to 'Add file') and click it
-
choose a preferred cloning option by selecting either HTTPS or GitHub CLI.
-
Open Git Bash
-
Change the current working directory to the one where you want the cloned directory
-
Type git clone and paste the URL from the clipboard ($ git clone https://github.com/YOUR-USERNAME/YOUR-REPOSITORY)
-
Press Enter to create your local clone
- Glassmorphism
- Stack Overflow
- Code Institute Walkthrough Projects
- Codemy.com
- Code Institute Walkthrough Projects
- Special Thanks to my mentor
- Thanks to my girlfriend, family and friends for support
- Thanks to Code Institute and fellow students on Slack channels


.png)