This repository contains the microcontroller code for DevOps hardware.
Note: this repository imports history (using filter-repo) from Tachyon-FW. Commits prior to Oct 17, 2021 may reference data (eg, issue and pull request numbers) from that repository instead.
Quick References
PlatformIO is a cross-platform (in every sense of the term: multiple OSes, multiple frameworks, mulitple chips across multiple vendors) build tool that handles the details of setup for you.
Note: PlatformIO extensions are also available for other IDEs such as Eclipse, if you're more familiar with them. VSCode is our baseline supported IDE since it's a free and open-source*, cross-platform (Windows / Mac / Linux), and full-functioned C/C++ IDE that works pretty well.
* VSCode and open-source
While VSCode is open-source, the VSCode binaries from Microsoft have a proprietary license and are not direct builds of the open-source repositories. See VSCodium for more details, if this matters to you.
As PlatformIO is currently not available on the VSCodium package manager, you will need to download the .vsix and install it. It may also depend on C/C++ support for VSCode, and you'll have to download the .vsix and install it.

Follow the official instructions.
Installation tl;dr preview for most users: install VSCode (if you don't have it already), and install the PlatformIO extension from the Extensions tab on the left side.

Getting Started with VSCode: Once VSCode is installed, follow these steps to get started.
-
Open the project, by clicking "Open Project" from the PIO Home page, then navigate to where you cloned this repo (platformio.ini should be in this folder).

-
If this isn't visible, you may need to select the PlatformIO tab on the left side, then navigate to PIO Home > Open.

-
-
If the project loaded correctly, you should be able to see the list of targets on the PlatformIO tab on the left side:

-
You may need to wait for VSCode to finish building the index before you see anything.

-
-
Expand one of those targets (such as datalogger shown above) to see the available options.
-
Click "Build" to compile firmware for that target, without uploading to the board.
Common operations are also available on the bottom toolbar.

For example, the check mark also performs a build.
-
To upload and run in debug mode, navigate to the Debug tab on the left side:

From the dropdown, select the "skip Pre-Debug" configuration (as indicated in the picture).
The normal (non skip Pre-Debug) configuration unnecessarily compiles the firmware twice and takes more time to launch. You only need to set this once, and this configuration applies for all debug launches.
Then, click the green arrow to start debugging.
You can also start debugging by going to main menu > Run > Start Debugging. The menu item should also show the associated hotkey.
Although there is also an Upload option, that seems broken and its usage is not recommended.
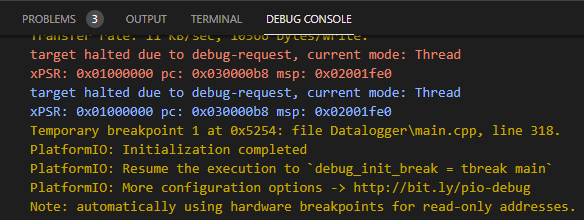
You may need to switch to the Debug Console to see the compile and upload progress:
-
When upload completes (and debugging starts), it will breakpoint (pause the microcontroller) by default right before entering
main. From the debug controls toolbar , you can resume, pause, and single-step through code.
Mouse-over the buttons for descriptions and hotkeys.
, you can resume, pause, and single-step through code.
Mouse-over the buttons for descriptions and hotkeys.Step-over runs the current line of code (even if it's a function call), then pauses at the beginning of the next line. Step-into steps into the function at the current line of code, pausing at the beginning of the first line in that function. The microcontroller can be paused at any point while the microcontroller is running.
Pausing in debug does NOT pause the watchdog timer (if the code uses it). The microcontroller may unexpectedly reset in this case.
-
You can also open the serial monitor, from the PlatformIO tab on the left side. This opens a terminal that shows the serial output from the microcontroller.


Follow the official instructions.
tl;dr for most users: download a Python installer script and run it.
Once you have PlatformIO installed (and pio working on the command-line), you can run PlatformIO commands while in the repository folder.
To build all binaries, run:
pio run
To build a specific board, such as datalogger, run:
pio run -e datalogger
See the [env:...] sections at the end of platformio.ini for available targets.
To upload binaries, run (with the target board connected to your computer via a programming dongle):
pio run -e datalogger --target upload
Avoiding conflicts with VSCode
If you also have VSCode with PlatformIO installed and want to be able to use both: you can configure VSCode to use the system version of PlatformIO (as opposed to its own copy) to avoid conflicts. In VSCode > main menu > File > Preferences > Settings, go to Extensions > PlatformIO IDE configuration, then uncheck "Use Builtin PIOCore" (and optionally uncheck "Use Builtin Python").
If you already know git: You can skip this section and check out the repo. Make sure to initialize submodules.
This repository uses Git submodules as a way to bring in external dependencies while both tracking the version used and allowing easier updates. Other than the initial clone and updates described below, it is unlikely you will need to significantly interact with the submodule system for routine development. However, there is plenty of documentation on submodules available on the Internet for those who wish to know more.
GitHub Desktop provides a graphical user interface (GUI) for basic and common git operations, like pull, commit, and creating and switching branches. Submodules are handled automatically for you. Windows and Mac only.
GitHub Desktop is recommended if you prefer or are more familiar with graphical user interfaces, rather than command-line tools. The basic operations supported by GitHub Desktop are sufficient for almost all routine CalSol development.
- Download and install GitHub Desktop.
- Clone this repository to desktop using the "Clone or download" button on the web interface. It should automatically launch GitHub Desktop.
- In the GitHub Desktop interface, you can sync the repository (push new changes to GitHub if you have the appropriate permissions, as well as pull updates from GitHub) using the "Sync" button.
Command-line git is as powerful as git gets, but has a steeper learning curve. If you intend to do software development professionally, you may eventually or occasionally need the more advanced operations provided by command-line git, even if they may not be useful for CalSol.
-
Install Git:
- For Windows: Download and install git, checking the "Use Git from the Windows Command Prompt" at the end of the install if you want to run git from outside Git Bash - such as from the Windows Command Prompt or PowerShell.
- For Mac:
Download and install homebrew, then
brew install git
- For Linux:
sudo apt-get install git
-
Clone (download a copy of) the repository:
git clone --recursive https://github.com/CalSol/Devops-FW.git
In general the link to the repository can be found on the GitHub website for that repository.
-
To pull new remote updates into your local repository from GitHub:
--initshould only be used to initialize the repository submodulesgit pull git submodule update --init --recursive- Note that
git pulldoes not update your submodules' working directory. The subsequentgit submodule updatecommand does that, and the--initand--recursiveoptions ensure new submodules are cloned and submodules-within-submodules are handled. - When doing commits, if it indicates that a submodule directory changed that you didn't actually change, you may have forgotten to do a
git submodule update. Git will see that the (outdated) working directory submodule is pointing to a different commit than the one in HEAD, and interpret that as a change.
- Note that
-
Using
giteffectively has a learning curve, but as Git is everywhere now, it's worth learning. Make sure you're familiar with Git commands likecommit,pull,push,merge,rebase, andcherry-pick.
PlatformIO places built binaries (.bin and .elf files) in .pio/build/<board name>.
These are some errors (and likely causes) you may get when trying to deploy code:
This could indicate the programming dongle isn't connected to your computer:
Error: unable to find a matching CMSIS-DAP device
This could indicate that the board being flashed isn't connected to the programming dongle:
Error: Error connecting DP: cannot read IDR
Flashing via OpenOCD is done for you through PlatformIO upload and debug operations, which is the recommended way of deploying firmware. This section contains reference commands if you need to run OpenOCD manually. This is not necessary for most people.
To run OpenOCD from the command line, you may have to separately download and install it. See the official installation instructions, which inculdes instructions for official and unofficial package managers. As Windows does not have a standard package manager and OpenOCD does distribute pre-built Windows binaries, you may need to rely on community projects like xPack OpenOCD.
openocd -f interface/cmsis-dap.cfg -f target/lpc1549_openocd.cfg -c init -c halt -c "flash erase_sector 0 0 last" -c "flash write_image .pio/build/your_board/firmware.bin" -c "reset run" -c exit
Replace your_board with the target firmware you're trying to flash.
openocd -f interface/cmsis-dap.cfg -f target/lpc1549_openocd.cfg -c init -c halt -c "flash read_bank 0 dump.bin" -c exit
Optionally, replace dump.bin with a different filename you want to dump firmware to.
SYSMEMREMAP - if the first 512 bytes are corrupt
The LPC1549 has a SYSMEMREMAP register at 0x40074000, and if set to 0x00 the first 512 (0x200) will be that of the boot ROM instead of user flash. The LPC1549 OpenOCD script should automatically configure this register on
init, but if you do any kind of reset post-init, this may be reset to the wrong value. Per the LPC1549 reference manual, this register needs to be set to 0x02 to be in User Flash Mode, where the first 512 bytes are not remapped and map directly to flash.You can manually set the register with this OpenOCD command:
mww 0x40074000 0x02. You can also read the register with this command:mdw 0x40074000
OpenOCD Sanity Check
You can do a simple sanity check by launching OpenOCD with just the interface and target configuration:
openocd -f interface/cmsis-dap.cfg -f target/lpc1549_openocd.cfg -c init -c exitIf all worked well, you should see something ending with (may differ with different chips):
Info : CMSIS-DAP: Interface ready
Info : clock speed 10 kHz
Info : SWD DPIDR 0x2ba01477
Info : lpc1549.cpu: hardware has 6 breakpoints, 4 watchpoints
If you get errors, check out the troubleshooting section above.
OpenOCD Interactive Console
OpenOCD by default runs as a telnet server in the foreground, waiting for interactive commands from socket connections:
openocd -f interface/cmsis-dap.cfg -f target/lpc1549_openocd.cfgYou can connect to the interactive console by opening a telnet connection to
localhost:4444. From there, you can run commands like flashing:halt flash erase_sector 0 0 last flash write_image .pio/build/your_board/firmware.bin(remember to replace
your_boardwith the target firmware you're trying to flash)When you're ready to start the target microcontroller, run:
reset runWhen you're done, you can stop the OpenOCD server with:
exitThis is only a small subset of commands available through OpenOCD. Check out the commands section of the official OpenOCD documentation for more.