![]()
A PID (Proportional, Integral, Derivative) Controller is a type of closed feedback loop that uses an algorithm to get an output that gets to the desired position quickly, doesn't overshoot, and can resist transient errors.

PID was created for applications such as heating (to get to a desired temperature), robotics (getting a motor to a specific velocity), and cruise control for a car. The set point of a PID controller is the value you want to achieve, and the process value is the value read from the environment. PID gains are the constant values to tweak the reactions of the system (kP, kI, and kD). For a more in depth explanation of PID, see this YouTube series.
RoPID implements the PID algorithm into Roblox! It can be used for custom BodyGyros, BodyPositions, and BodyVelocities, as well as, you guessed it, cruise control for your cars or even as dynamic GUI animations. PID is super useful for vehicles to get just the right amount of handling. Unlike any other PID module, RoPID has built in integral windup clamping (to stop drastic changes in output) as well as a few utility modules to assist with the PID process.
The script for each of these can be found in the Examples Folder of the repo.
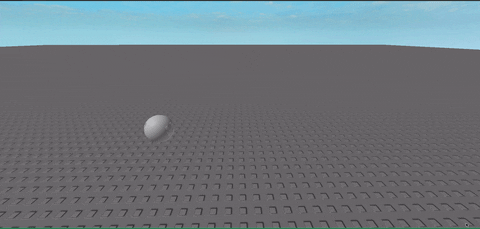
Ball rolling with a constant velocity (uses base RoPID module)
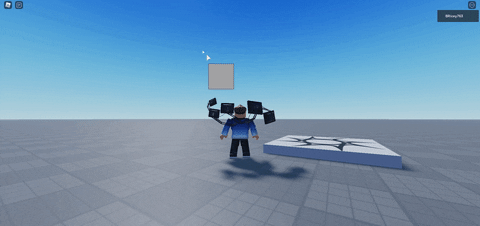
GUI frame following mouse, but with dynamic movement (uses Vec2 Util module)
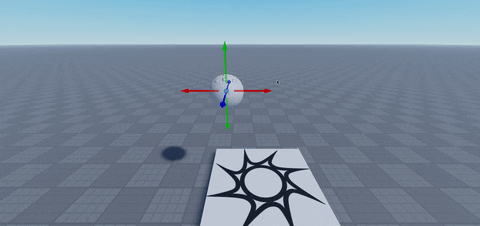
Ball following goal part (uses Vec3 util module)
I created a submarine in this video using RoPID. It's a good example of the module in use. The uncopylocked place is here.
- Get the Roblox Model and put it wherever you want (ReplicatedStorage recommended)
- Go to the GitHub Repo and either download the zip or add a git submodule, then sync the
srcdirectory into your place using a tool like Rojo
First require the module and create a new controller.
local RoPID = require(game:GetService("ReplicatedStorage").RoPID)

local goal = -- Some number as the goal for the controller

local controller = RoPID.new(10, 4, 3.5, -1000, 1000) -- Some typical gains
Then you must call the Calculate() method to update the controller and get your result. You could do it in a loop, but it is recommended to use RunService and connect to the Stepped or Heartbeat event.
game:GetService("RunService").Stepped:Connect(function(elaspedTime, deltaTime)
  local proccessValue = -- Value to be read from game
  local output = controller:Calculate(goal, proccessValue, deltaTime) -- Don't forget the delta time parameter!
end)
You can use your output variable to change the force of a VectorForce or maybe a position of a GUI.
RoPID.Is(obj: any): boolean

RoPID.Compound(num: number, ...: number): RoPID[]
  > Creates a bunch of PID controllers at once.
    WARNING: No support for this in Tuner

controller = RoPID.new(kP: number, kI: number, kD: number, min: number?, max: number?)
  > Creates a new controller. kP, kI, and kD are the gains. If you want to turn one of them off, just
    pass in zero. Notice min and max are optional.

controller:Calculate(setPoint: number, processValue: number, deltaTime: number): number
  > Given the set point (the goal position), the proccess value (the acutal position),
    and deltaTime (the time between each call), it uses the standard PID algorithim to
    get an ouput. Remember to pass in Delta Time!
Along with the base PID module, there are a few extra utility modules that provide extra features. You can access these modules like so:
local RoPID = require(game:GetService("ReplicatedStorage").RoPID)
local utilModule = require(RoPID.Util.[moduleName])
Tuner is responsible for debugging gains for your PID controller. It uses a folder with some attributes to edit the gains in runtime. They do not persist, so make sure to write them down before you close a session.
API:
tuner = Tuner.new(name: string, controller: RoPID | Vec3 | Vec2, parent: Instance?)
  > Creates a new folder in parent (or workspace, if parent is nil) with attributes
    denoting each gain (kP, kI, kD) and bound (min, max). When you change the attribute
    values, the gains and bounds of the controller change as well.

tuner:Destroy()
  > deletes the folder
Usage:
local RoPID = -- Path to RoPID
local Tuner = require(RoPID.Util.Tuner)

local controller = RoPID.new(1, 1, 1, -10, 10)

local tuner = Tuner.new("MyFavoriteTuner", controller) -- Workspace is fine for most applications
-- Go to Workspace.MyFavoriteTuner and edit the attributes!Most of the time you are dealing with Vector2s and Vector3s in Roblox, not just a one dimensional number. These util modules create a PID controller for each axis (X, Y, and potentially Z) and allow you to use the same gains for each. These modules are also compatible with the Tuner.
API: (This is the API for Vec3, but they are almost identical except for the dimension)
Vec3.Is(obj: any): boolean

Vec3Controller = Vec3.new(kP: number, kI: number, kD: number, min: number?, max: number?)
  > Same as RoPID constructor, but makes 3 instead of one

Vec3Controller:Calculate(setPoint: Vector3, proccessValue: Vector3, deltaTime: number): Vector3
  > Same as RoPID, but uses Vector3s for sp and pv
This module is heavily inspired by AeroGameFramework's PID module