Introductory documentation for a quick-start project on API testing with RestAssured.
- RestAssured-API-Test-Starter
- Introduction of RestAssured
- Project structure
- Project dependency
- Building a REST Assured API test project from 0 to 1
- Advanced Usage
- Reference
REST Assured is a Java testing framework for testing RESTful APIs that enables developers/testers to easily write and execute API tests. It is designed to make API testing simple and intuitive, while providing rich functionality and flexibility. The following are some of the key features and uses of REST Assured:
-
Initiating HTTP requests: REST Assured allows you to easily build and initiate HTTP GET, POST, PUT, DELETE and other types of requests. You can specify the request's URL, headers, parameters, body, and other information.
-
Chained Syntax: REST Assured uses chained syntax to make test code more readable and easy to write. You can describe your test cases in a natural way without writing tons of code.
-
Assertions and Checksums: REST Assured provides a rich set of checksums that can be used to validate API response status codes, response bodies, response headers, and so on. You can add multiple assertions according to your testing needs.
-
Support for multiple data formats: REST Assured supports a variety of data formats, including JSON, XML, HTML, Text and so on. You can use appropriate methods to handle different formats of response data.
-
Integration with BDD (Behavior-Driven Development): REST Assured can be used in conjunction with BDD frameworks (such as Cucumber), allowing you to better describe and manage test cases.
-
Simulate HTTP Server: REST Assured also includes a simulation of an HTTP server, allowing you to simulate the behavior of an API for end-to-end testing.
-
Extensibility: REST Assured can be customized with plug-ins and extensions to meet specific testing needs.
Overall, REST Assured is a powerful and easy-to-use API testing framework that helps you easily perform RESTful API testing and provides many tools to verify the correctness and performance of an API. Whether you are a beginner or an experienced developer/tester, REST Assured is a valuable tool for quickly getting started with API automation testing.
- src
  - main
    - java
      - (The main source code of the application)
  - test
    - test
      - api
        - (REST Assured test code)
          - UsersAPITest.java
          - ProductsAPITest.java
        - TestConfig.java
          - TestConfig.java
    - resources
      - (configuration files, test data, etc.)
  - (other project files and resources)
- build.gradle (Gradle project configuration file)
In this example directory structure:
- src/test/java/api directory is used to hold REST Assured test classes, each of which typically involves tests for one or more related API endpoints. For example, UsersAPITest.java and ProductsAPITest.java could contain tests for user management and product management.
- The src/test/java/util directory can be used to store tool classes that are shared among tests, such as TestConfig.java for configuring REST Assured.
- The src/test/resources directory can contain test data files, configuration files, and other resources that can be used in tests.
- build.gradle is the gradle project's configuration file, which is used to define the project's dependencies, build configuration, and other project settings.
- src
  - main
    - java
      - (The main source code of the application)
  - test
    - java
      - api
        - (REST Assured test code)
          - UsersAPITest.java
          - ProductsAPITest.java
        - util
          - TestConfig.java
    - resources
      - (configuration files, test data, etc.)
  - (other project files and resources)
- pom.xml (Maven project configuration file)
In this example directory structure:
- src/test/java/api directory is used to hold REST Assured test classes, each of which typically involves tests for one or more related API endpoints. For example, UsersAPITest.java and ProductsAPITest.java could contain tests for user management and product management.
- The src/test/java/util directory can be used to store tool classes that are shared among tests, such as TestConfig.java for configuring REST Assured.
- The src/test/resources directory can contain test data files, configuration files, and other resources that can be used in the tests.
- pom.xml is a Maven project configuration file that is used to define project dependencies, build configurations, and other project settings.
- JDK 1.8+, I'm using JDK 19
- Gradle 6.0+ or Maven 3.0+, I'm using Gradle 8.44 and Maven 3.9.5
- RestAssured 4.3.3+, I'm using the latest version 5.3.2
REST Assured supports both Gradle and Maven build tools, you can choose one of them according to your preference. Below is a description of the initialization process for Gradle and Maven build tools.
This project is built using Gradle 8.44 and Maven 3.9.5, if you are using other versions, it may be different.
See the demo project at https://github.com/Automation-Test-Starter/RestAssured-gradle-demo.
mkdir RestAssured-gradle-demo
cd RestAssured-gradle-demo
gradle initThe demo project introduces the testNG testing framework. For reference only.
- Create a build.gradle file in the project root directory to configure the project.
- For reference, the following is a sample configuration
// plugins configuration
plugins {
    id 'java' // use java plugin
}

// repositories configuration
repositories {
  mavenCentral() // user maven central repository
}

// dependencies configuration
dependencies {
    testImplementation 'io.rest-assured:rest-assured:5.3.1' // add rest-assured dependency
    testImplementation 'org.testng:testng:7.8.0' // add testng testing framework dependency
    implementation 'org.uncommons:reportng:1.1.4' // add testng reportng dependency
    implementation 'org.slf4j:slf4j-api:2.0.9' // add slf4j dependency for test logging
    implementation 'org.slf4j:slf4j-simple:2.0.9' // add slf4j dependency for test logging
    implementation group: 'com.google.inject', name: 'guice', version: '7.0.0'
}

// test configuration
test {
    reports.html.required = false // set gradle html report to false
    reports.junitXml.required = false // set gradle junitXml report to false
    // use testng testing framework
    useTestNG() {
        useDefaultListeners = true
        suites 'src/test/resources/testng.xml' // set testng.xml file path
    }
    testLogging.showStandardStreams = true // output test log to console
    testLogging.events "passed", "skipped", "failed" // deny output test log to console
}
You can copy the contents of the build.gradle file in this project. For more configuration refer to Official Documentation
-
Create a resources directory under the src/test directory to store test configuration files.
-
Create a testng.xml file in the resources directory to configure the TestNG test framework.
-
For reference, the following is a sample configuration
<?xml version="1.0" encoding="UTF-8"?>
<!DOCTYPE suite SYSTEM "http:https://testng.org/testng-1.0.dtd">
<suite name="restAssured-gradleTestSuite">
<test thread-count="1" name="Demo">
    <classes>
        <class name="com.example.TestDemo"/> <!-- test case class-->
    </classes>
</test> <!-- Test -->
</suite> <!-- Suite -->- Open the Terminal window of the project with an editor and execute the following command to confirm that the project build was successful
gradle build- Initialization complete: After completing the wizard, Gradle will generate a basic Gradle project structure in the project directory
The directory structure can be found in >> Project structure
Create a new test class in the project's test source directory. By default, Gradle usually places the test source code in the src/test/java directory. You can create a package of test classes in that directory and create a new test class in the package
To create a test class for TestDemo, you can create files with the following structure
src
└── test
    └── java
        └── com
            └── example
                └── TestDemo.java
- HOST: https://jsonplaceholder.typicode.com
- API path: /posts/1
- Request method: GET
- Request Parameters: None
- Request header: "Content-Type": "application/json; charset=utf-8"
- Request Body: None
- Response status code: 200
- Response header: "Content-Type": "application/json; charset=utf-8"
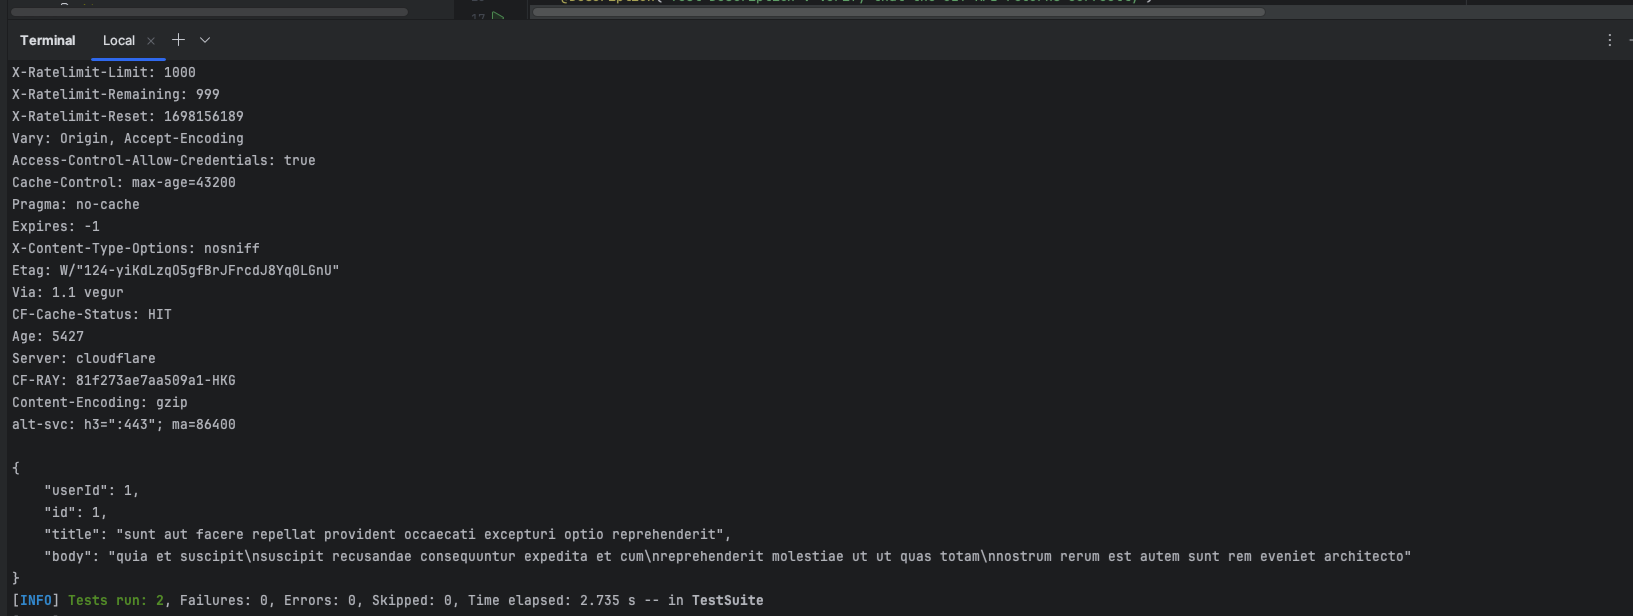
- Response body:
{
    "userId": 1,
    "id": 1,
    "title": "sunt aut facere repellat provident occaecati excepturi optio reprehenderit",
    "body": "quia et suscipit\nsuscipit recusandae consequuntur expedita et cum\nreprehenderit molestiae ut ut quas totam\nnostrum rerum est autem sunt rem eveniet architecto"
}- HOST: https://jsonplaceholder.typicode.com
- API path:/posts
- Request method: POST
- Request Parameters: None
- Request header:"Content-Type": "application/json; charset=utf-8"
- Request Body:raw json format
- Request Body:
{
    "title": "foo",
    "body": "bar",
    "userId": 1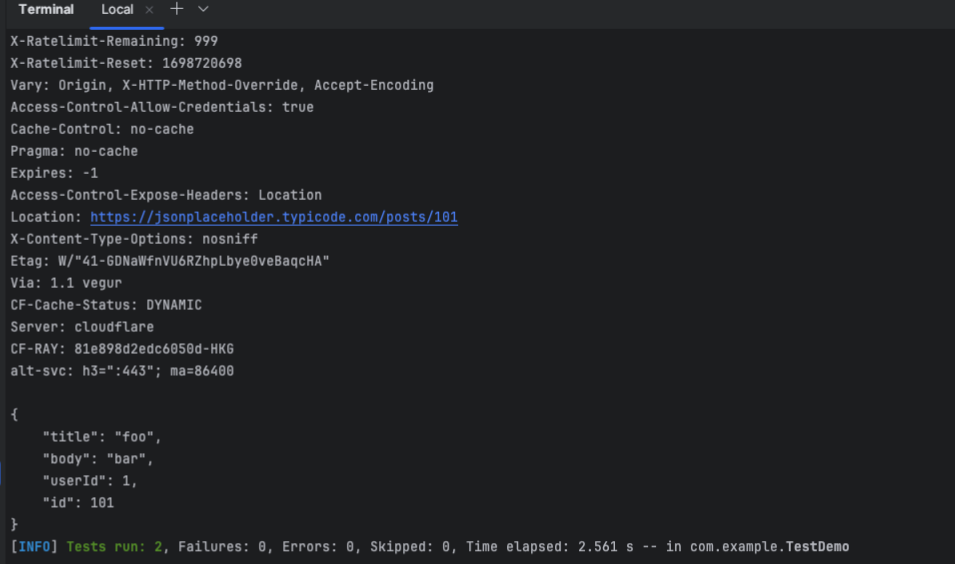
}- Response status code: 201
- Response header:"Content-Type": "application/json; charset=utf-8"
- Response body:
{
    "title": "foo",
    "body": "bar",
    "userId": 1,
    "id": 101
}-
Open the TestDemo.java file and start writing the test script.
-
The example script is as follows. For reference
package com.example;

import org.testng.annotations.Test;

import static io.restassured.RestAssured.given;
import static org.hamcrest.Matchers.equalTo;

public class TestDemo {

 @Test(description = "Verify that the Get Post API returns correctly")
 public void verifyGetAPI() {

  // Given
  given()
    .baseUri("https://jsonplaceholder.typicode.com")
             .header("Content-Type", "application/json")

  // When
  .when()
    .get("/posts/1")

  // Then
  .then()
    .statusCode(200)
    // To verify correct value
    .body("userId", equalTo(1))
    .body("id", equalTo(1))
    .body("title", equalTo("sunt aut facere repellat provident occaecati excepturi optio reprehenderit"))
    .body("body", equalTo("quia et suscipit\nsuscipit recusandae consequuntur expedita et cum\nreprehenderit molestiae ut ut quas totam\nnostrum rerum est autem sunt rem eveniet architecto"));
 }
 @Test(description = "Verify that the publish post API returns correctly")
 public void verifyPostAPI() {

  // Given
  given()
    .baseUri("https://jsonplaceholder.typicode.com")
    .header("Content-Type", "application/json")

    // When
    .when()
    .body("{\"title\": \"foo\", \"body\": \"bar\", \"userId\": 1\n}")
    .post("/posts")

    // Then
    .then()
    .statusCode(201)
    // To verify correct value
    .body("userId", equalTo(1))
    .body("id", equalTo(101))
    .body("title", equalTo("foo"))
    .body("body", equalTo("bar"));
 }
}- Open the Terminal window for this project and run the test script by executing the following command
gradle test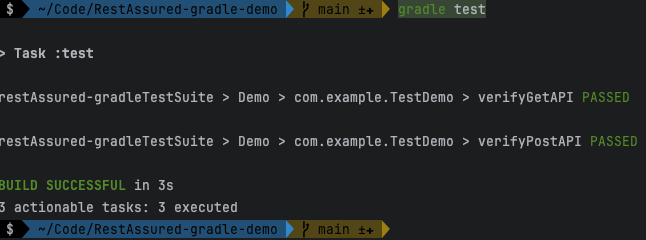
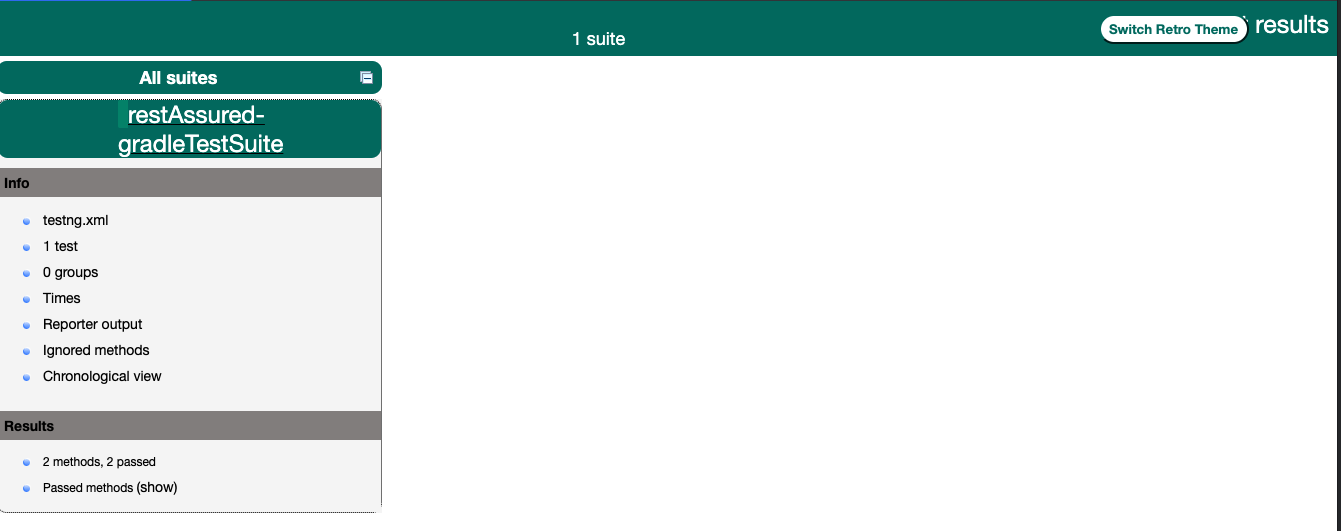
- Open the project build/reports/tests/test directory.
- Click on the index.html file to view the test report.
See the demo project at https://github.com/Automation-Test-Starter/RestAssured-maven-demo
mvn archetype:generate -DgroupId=com.example -DartifactId=RestAssured-maven-demo -DarchetypeArtifactId=maven-archetype-quickstart -DinteractiveMode=falseInitialization complete: After completing the wizard, Maven will create a new project directory and a basic Maven project structure
Add the following to the pom.xml file in your project
You can copy the contents of the pom.xml file in this project. For more information on configuration, please refer to the official documentation.
<!-- dependencies config -->
  <dependencies>
    <!-- https://mvnrepository.com/artifact/io.rest-assured/rest-assured -->
    <dependency>
      <groupId>io.rest-assured</groupId>
      <artifactId>rest-assured</artifactId>
      <version>5.3.1</version>
      <scope>test</scope>
    </dependency>
    <!-- https://mvnrepository.com/artifact/org.testng/testng -->
    <dependency>
      <groupId>org.testng</groupId>
      <artifactId>testng</artifactId>
      <version>7.8.0</version>
      <scope>test</scope>
    </dependency>
  </dependencies>
  <!-- plugin config -->
      <plugin>
        <groupId>org.apache.maven.plugins</groupId>
        <artifactId>maven-surefire-plugin</artifactId>
        <version>3.2.1</version>
        <configuration>
          <suiteXmlFiles>
            <suiteXmlFile>src/test/resources/testng.xml</suiteXmlFile>
          </suiteXmlFiles>
        </configuration>
</plugin>-
Create a resources directory under the src/test directory to store test configuration files.
-
Create a testng.xml file in the resources directory to configure the TestNG test framework.
-
For reference, the following is a sample configuration
<?xml version="1.0" encoding="UTF-8"?>
<!DOCTYPE suite SYSTEM "http:https://testng.org/testng-1.0.dtd">
<suite name="restAssured-gradleTestSuite">
<test thread-count="1" name="Demo">
    <classes>
        <class name="com.example.TestDemo"/> <!-- test case class-->
    </classes>
</test> <!-- Test -->
</suite> <!-- Suite -->The directory structure can be found in >> Project structure
Create a new test class in the project's test source directory. By default, Gradle usually places the test source code in the src/test/java directory. You can create a package of test classes in that directory and create a new test class in the package
To create a test class for TestDemo, you can create files with the following structure
src
└── test
    └── java
        └── com
            └── example
                └── TestDemo.java
referable to >> Introduction of demo test API
-
Open the TestDemo.java file and start writing the test script.
-
The example script is as follows. For reference
package com.example;

import org.testng.annotations.Test;

import static io.restassured.RestAssured.given;
import static org.hamcrest.Matchers.equalTo;

public class TestDemo {

 @Test(description = "Verify that the Get Post API returns correctly")
 public void verifyGetAPI() {

  // Given
  given()
    .baseUri("https://jsonplaceholder.typicode.com")
             .header("Content-Type", "application/json")

  // When
  .when()
    .get("/posts/1")

  // Then
  .then()
    .statusCode(200)
    // To verify correct value
    .body("userId", equalTo(1))
    .body("id", equalTo(1))
    .body("title", equalTo("sunt aut facere repellat provident occaecati excepturi optio reprehenderit"))
    .body("body", equalTo("quia et suscipit\nsuscipit recusandae consequuntur expedita et cum\nreprehenderit molestiae ut ut quas totam\nnostrum rerum est autem sunt rem eveniet architecto"));
 }
 @Test(description = "Verify that the publish post API returns correctly")
 public void verifyPostAPI() {

  // Given
  given()
    .baseUri("https://jsonplaceholder.typicode.com")
    .header("Content-Type", "application/json")

    // When
    .when()
    .body("{\"title\": \"foo\", \"body\": \"bar\", \"userId\": 1\n}")
    .post("/posts")

    // Then
    .then()
    .statusCode(201)
    // To verify correct value
    .body("userId", equalTo(1))
    .body("id", equalTo(101))
    .body("title", equalTo("foo"))
    .body("body", equalTo("bar"));
 }
}- Open the Terminal window for this project and run the test script by executing the following command
mvn test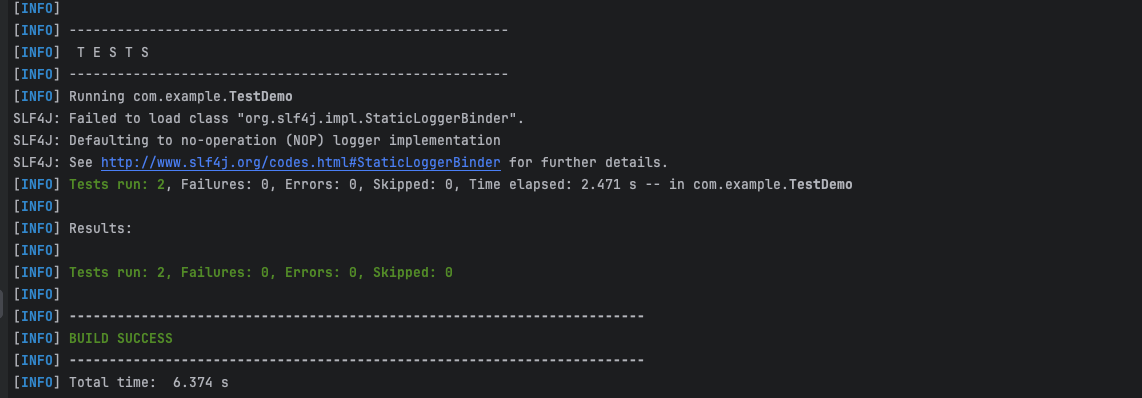
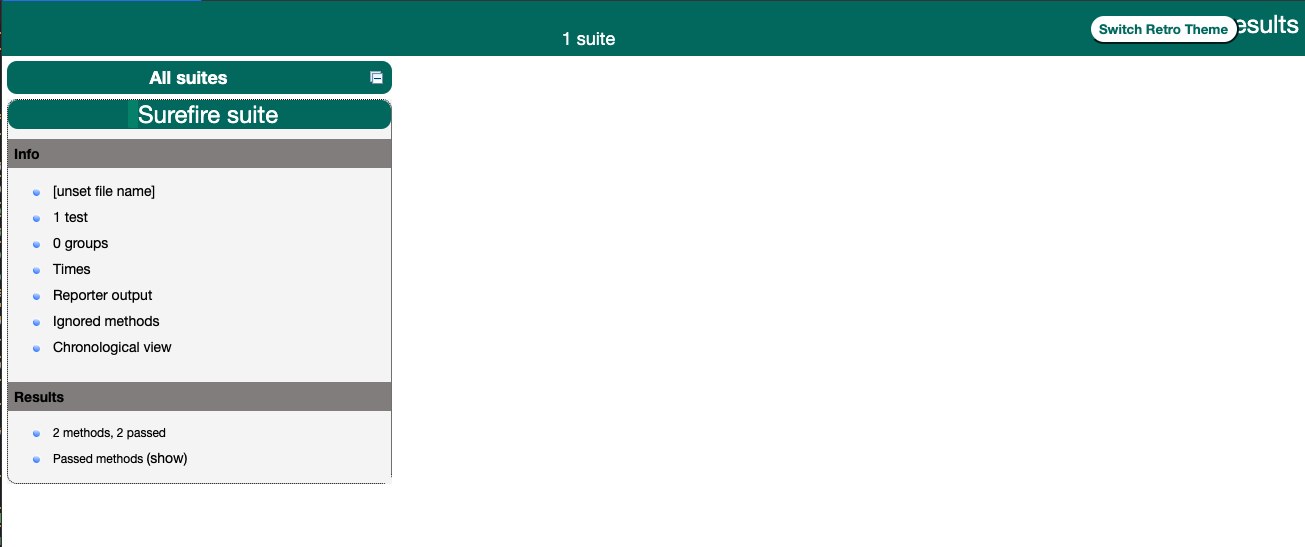
- Open the project target/surefire-reports directory.
- Click on the index.html file to view the test report.
You can verify Response status code, Response status line, Response cookies, Response headers, Response content type and Response body.
Assume that the GET request (to http:https://localhost:8080/lotto) returns JSON as:
{
"lotto":{
 "lottoId":5,
 "winning-numbers":[2,45,34,23,7,5,3],
 "winners":[{
   "winnerId":23,
   "numbers":[2,45,34,23,3,5]
 },{
   "winnerId":54,
   "numbers":[52,3,12,11,18,22]
 }]
}
}
REST assured makes it easy to make get requests and process response messages.
- Asserts whether the value of lottoId is equal to 5. For example:
get("/lotto").then().body("lotto.lottoId", equalTo(5));- Assertion The values for winnerId include 23 and 54. For example:
get("/lotto").then().body("lotto.winners.winnerId", hasItems(23, 54));Note:
equalToandhasItemsare Hamcrest matchers which you should statically import fromorg.hamcrest.Matchers.
XML can be verified in a similar way. Imagine that a POST request to http:https://localhost:8080/greetXML returns:
<greeting>
   <firstName>{params("firstName")}</firstName>
   <lastName>{params("lastName")}</lastName>
</greeting>- Asserts whether the firstName is returned correctly. For example:
given().
         parameters("firstName", "John", "lastName", "Doe").
when().
         post("/greetXML").
then().
body("greeting.firstName", equalTo("John")).- Assert that firstname and lastname are returned correctly. For example:
given().
         parameters("firstName", "John", "lastName", "Doe").
when().
         post("/greetXML").
then().
         body("greeting.firstName", equalTo("John")).
body("greeting.lastName", equalTo("Doe"));with().parameters("firstName", "John", "lastName", "Doe").when().post("/greetXML").then().body("greeting.firstName", equalTo("John"), "greeting.lastName", equalTo("Doe"));- Asserts whether the value of the cookie is equal to cookieValue. For example:
get("/x").then().assertThat().cookie("cookieName", "cookieValue")- Asserts whether the value of multiple cookies is equal to the cookieValue at the same time. For example:
get("/x").then().assertThat().cookies("cookieName1", "cookieValue1", "cookieName2", "cookieValue2")- Asserts whether the value of the cookie contains a cookieValue. For example:
get("/x").then().assertThat().cookies("cookieName1", "cookieValue1", "cookieName2", containsString("Value2"))- Assertion Whether the status code is equal to 200. For example:
get("/x").then().assertThat().statusCode(200)- Assertion Whether the status line is something. For example:
get("/x").then().assertThat().statusLine("something")- Assertion Whether the status line contains some. For example:
get("/x").then().assertThat().statusLine(containsString("some"))- Asserts whether the value of Header is equal to HeaderValue. For example:
get("/x").then().assertThat().header("headerName", "headerValue")- Asserts whether the value of multiple Headers is equal to HeaderValue at the same time. For example:
get("/x").then().assertThat().headers("headerName1", "headerValue1", "headerName2", "headerValue2")- Asserts whether the value of the Header contains a HeaderValue. For example:
get("/x").then().assertThat().headers("headerName1", "headerValue1", "headerName2", containsString("Value2"))- Assert that the "Content-Length" of the Header is less than 1000. For example:
The header can be first converted to int using the mapping function, and then asserted using the "integer" matcher before validation with Hamcrest:
get("/something").then().assertThat().header("Content-Length", Integer::parseInt, lessThan(1000));- Asserts whether the value of Content-Type is equal to application/json. For example:
get("/x").then().assertThat().contentType(ContentType.JSON)- Assertion Whether the response body is exactly equal to something. For example:
get("/x").then().assertThat().body(equalTo("something"))As of version 2.8.0 REST Assured has support measuring response time. For example:
long timeInMs = get("/lotto").time()or using a specific time unit:
long timeInSeconds = get("/lotto").timeIn(SECONDS);where 'SECONDS' is just a standard 'TimeUnit'. You can also validate it using the validation DSL:
when().
      get("/lotto").
then().
      time(lessThan(2000L)); // Milliseconds
or
when().
      get("/lotto").
then().
      time(lessThan(2L), SECONDS);
Note that you can only referentially correlate these measurements to server request processing times (as response times will include HTTP roundtrips, REST Assured processing times, etc., and cannot be very accurate).
Often we use the multipart form data technique when transferring large amounts of data to the server, such as files.
rest-assured provides a multiPart method to recognize whether this is a file, a binary sequence, an input stream, or uploaded text.
- Upload only one file in the form. For example:
given().
        multiPart(new File("/path/to/file")).
when().
post("/upload");- Uploading a file in the presence of a control name. For example:
given().
        multiPart("controlName", new File("/path/to/file")).
when().
post("/upload");- Multiple "multi-parts" entities in the same request. For example:
byte[] someData = ..
given().
        multiPart("controlName1", new File("/path/to/file")).
        multiPart("controlName2", "my_file_name.txt", someData).
        multiPart("controlName3", someJavaObject, "application/json").
when().
post("/upload");- MultiPartSpecBuilder use cases. For example:
For more usage referencesMultiPartSpecBuilder:
Greeting greeting = new Greeting();
greeting.setFirstName("John");
greeting.setLastName("Doe");

given().
        multiPart(new MultiPartSpecBuilder(greeting, ObjectMapperType.JACKSON_2)
                .fileName("greeting.json")
                .controlName("text")
                .mimeType("application/vnd.custom+json").build()).
when().
        post("/multipart/json").
then().
statusCode(200);- MultiPartConfig use cases. For example:
MultiPartConfigYou can specify the default control name and file name.
given().config(config().multiPartConfig(multiPartConfig().defaultControlName("something-else"))) By default, the control name is configured as "something-else" instead of "file". For more usage references blog introduction
When we are writing interface test scripts, we may need to print some logs during the test process so that we can view the request and response information of the interface and some other information during the test process.RestAssured provides some methods to print logs.
-
RestAssured provides a global logging configuration method that allows you to configure logging before the test starts and then print the logs during the test. This method is applicable to all test cases, but it can only print request and response information, not other information.
-
RestAssured also provides a localized log configuration method that prints logs during the test. This method prints request and response information as well as other information.
- Importing logging-related dependency classes
import io.restassured.config.LogConfig;
import io.restassured.filter.log.LogDetail;
import io.restassured.filter.log.RequestLoggingFilter;
import io.restassured.filter.log.ResponseLoggingFilter;- Adding logging configuration to the setup() method
Use LogConfig configuration to enable logging of requests and responses, as well as to enable nice output formatting. Enabled logging filters for requests and responses, which will log details of requests and responses.
// Setting the Global Request and Response Logging Configuration
        RestAssured.config = RestAssured.config()
                .logConfig(LogConfig.logConfig()
                        .enableLoggingOfRequestAndResponseIfValidationFails(LogDetail.ALL)
.enablePrettyPrinting(true));- Enabled global logging filters in the setup() method
// Enable global request and response logging filters
RestAssured.filters(new RequestLoggingFilter(), new ResponseLoggingFilter());package com.example;
import io.restassured.RestAssured;
// Importing logging-related dependency classes
import io.restassured.config.LogConfig;
import io.restassured.filter.log.LogDetail;
import io.restassured.filter.log.RequestLoggingFilter;
import io.restassured.filter.log.ResponseLoggingFilter;
import org.testng.annotations.BeforeClass;
import org.testng.annotations.Test;
import static io.restassured.RestAssured.given;
import static org.hamcrest.Matchers.equalTo;
public class TestDemo {
@BeforeClass
public void setup() {
// Setting the Global Request and Response Logging Configuration
RestAssured.config = RestAssured.config()
.logConfig(LogConfig.logConfig()
.enableLoggingOfRequestAndResponseIfValidationFails(LogDetail.ALL)
.enablePrettyPrinting(true));
// Enable global request and response logging filters
RestAssured.filters(new RequestLoggingFilter(), new ResponseLoggingFilter());
}
@Test(description = "Verify that the Get Post API returns correctly")
public void verifyGetAPI() {
// Test cases have been omitted, refer to the demo
}
@Test(description = "Verify that the publish post API returns correctly")
public void verifyPostAPI() {
// Test cases have been omitted, refer to the demo
}
}- Open the Terminal window for this project and run the test script by executing the following command
- Viewing Log Output
In RestAssured, you can make localized logging configurations to enable or disable logging for specific test methods or requests without affecting the global configuration.
- Add logging configuration is enabled in the test method for which you want to print logs
    @Test(description = "Verify that the Get Post API returns correctly")
    public void verifyGetAPI() {

        // Given
        given()
                .log().everything(true)  // Output request-related logs
                .baseUri("https://jsonplaceholder.typicode.com")
                .header("Content-Type", "application/json")

                // When
                .when()
                .get("/posts/1")

                // Then
                .then()
                .log().everything(true)  // Output response-related logs
                .statusCode(200)
}- Open the Terminal window for this project and run the test script by executing the following command
- Viewing Log Output
In Rest-Assured, you can use the LogConfig class to configure logging of requests and responses. The LogConfig allows you to define the level of logging detail, the output format, the location of the output, and so on. The following are some common LogConfig configuration examples:
-
Enable logging of requests and responses:
RestAssured.config = RestAssured.config()
    .logConfig(LogConfig.logConfig().enableLoggingOfRequestAndResponseIfValidationFails(LogDetail.ALL));;
This will enable logging of requests and responses only if validation fails.
-
Configure the output level:
RestAssured.config = RestAssured.config()
    .logConfig(LogConfig.logConfig().enableLoggingOfRequestAndResponseIfValidationFails(LogDetail.HEADERS));;
This will log only the request and response headers.
-
Configure the location of the output:
RestAssured.config = RestAssured.config()
    .logConfig(LogConfig.logConfig().enableLoggingOfRequestAndResponseIfValidationFails(LogDetail.ALL)
        .enablePrettyPrinting(true)
        .defaultStream(FileOutputStream("log.txt"))); ;enablePrettyPrinting(true).enablePrettyPrinting(true)
This outputs the log records to a file named "log.txt".
-
Configure the nice output format:
RestAssured.config = RestAssured.config()
    .logConfig(LogConfig.logConfig().enableLoggingOfRequestAndResponseIfValidationFails(LogDetail.ALL)
        .enablePrettyPrinting(true));
This will enable nice output formatting and make the logs easier to read.
You can combine these configuration options according to your specific needs and set it to RestAssured.config to configure global request and response logging. This will help log and review requests and responses in RestAssured for debugging and analyzing issues.
Starting with version 1.5, REST Assured supports logging request specifications before they are sent to the server using RequestLoggingFilter. Note that HTTP Builder and HTTP Client may add headers other than what is printed in the log. The filter will only log the details specified in the request specification. That is, you cannot consider the details logged by the RequestLoggingFilter to be the details actually sent to the server. In addition, subsequent filters may change the request after logging has occurred. If you need to log what is actually sent over the network, see the HTTP Client Logging documentation or use an external tool such as fiddler.
Examples:
given().log().all() // Log all request specification details including parameters, headers and body
given().log().params() // Log only the parameters of the request
given().log().body() // Log only the request body
given().log().headers()  // Log only the request headers
given().log().cookies()  // Log only the request cookies
given().log().method()  // Log only the request method
given().log().path() // Log only the request path- Wanting to print only the body of the response, regardless of the status code, you can do the following. , for example:
get("/x").then().log().body()- The response body will be printed whether or not an error occurs. If only interested in printing the response body when an error occurs, for example:
get("/x").then().log().ifError()- Record all details in the response, including status lines, headers, and cookies, for example:
get("/x").then().log().all() - Record only the status line, header, or cookie in the response, for example:
get("/x").then().log().statusLine()  // Only log the status line
get("/x").then().log().headers()  // Only log the response headers
get("/x").then().log().cookies() // Only log the response cookies- Configured to log a response only when the status code matches a value. for example:
get("/x").then().log().ifStatusCodeIsEqualTo(302)   // Only log if the status code is equal to 302
get("/x").then().log().ifStatusCodeMatches(matcher) // Only log if the status code matches the supplied Hamcrest matcher- Since REST Assured 2.3.1 you can log the request or response only if the validation fails. To log the request do. for example:
given().log().ifValidationFails()- To log the response. for example:
then().log().ifValidationFails()- It can be enabled for both requests and responses using LogConfig, for example:
given().config(RestAssured.config().logConfig(logConfig().enableLoggingOfRequestAndResponseIfValidationFails(HEADERS)))If authentication fails, the log only records the request header.
- Another shortcut to enable request and response logging for all requests if authentication fails, for example:
RestAssured.enableLoggingOfRequestAndResponseIfValidationFails();- Starting with version 4.5.0, you can also use specify the message that will be displayed if the onFailMessage test fails, for example:
when().
      get().
then().
      onFailMessage("Some specific message").
statusCode(200);Starting with REST Assured 4.2.0, it is possible to blacklist headers so that they do not show up in request or response logs. Instead, the header value will be replaced with [ BLACKLISTED ] . You can enable this feature on a per-header basis using LogConfig, for example:
given().config(config().logConfig(logConfig().blacklistHeader("Accept"))) In RestAssured, you can use filters to modify requests and responses. Filters allow you to modify requests and responses at different stages of the request and response process. For example, you can modify the request before the request or the response after the response. You can use filters to add request headers, request parameters, request bodies, response headers, response bodies, and so on.
Filters can be used to implement custom authentication schemes, session management, logging, and so on. To create a filter, you need to implement the io.restassured.filter.Filter interface. To use a filter, you can do the following:
given().filter(new MyFilter()) There are a couple of filters provided by REST-Assured that are ready to use:
io.restassured.filter.log.RequestLoggingFilter: A filter that'll print the request specification details.io.restassured.filter.log.ResponseLoggingFilter: A filter that'll print the response details if the response matches a given status code.io.restassured.filter.log.ErrorLoggingFilter: A filter that'll print the response body if an error occurred (status code is between 400 and 500).
As of REST Assured 3.0.2 you can implement the io.restassured.filter.OrderedFilter interface if you need to control the filter ordering. Here you implement the getOrder method to return an integer representing the precedence of the filter. A lower value gives higher precedence. The highest precedence you can define is Integer.MIN_VALUE and the lowest precedence is Integer.MAX_VALUE. Filters not implementing io.restassured.filter.OrderedFilter will have a default precedence of 1000.
If you need to change the Response from a filter you can use the ResponseBuilder to create a new Response based on the original response. For example if you want to change the body of the original response to something else you can do:
Response newResponse = new ResponseBuilder().clone(originalResponse).setBody("Something").build();Use github action as an example, and other CI tools similarly
See the demo at https://github.com/Automation-Test-Starter/RestAssured-gradle-demo
-
Create the .github/workflows directory: In your GitHub repository, create a directory called .github/workflows. This will be where the GitHub Actions workflow files will be stored.
-
Create a workflow file: Create a YAML-formatted workflow file, such as gradle.yml, in the .github/workflows directory.
-
Edit the gradle.yml file: Copy the following into the file
name: Gradle and REST Assured Tests

on:
  push:
    branches: [ "main" ]
  pull_request:
    branches: [ "main" ]

jobs:
  build:
    runs-on: ubuntu-latest

    steps:
      - name: Checkout code
        uses: actions/checkout@v3

      - name: Setup Java
        uses: actions/setup-java@v3
        with:
          java-version: '11'
          distribution: 'adopt'

      - name: Build and Run REST Assured Tests with Gradle
        uses: gradle/gradle-build-action@bd5760595778326ba7f1441bcf7e88b49de61a25 # v2.6.0
        with:
          arguments: build

      - name: Archive REST-Assured results
        uses: actions/upload-artifact@v2
        with:
          name: REST-Assured-results
          path: build/reports/tests/test

      - name: Upload REST-Assured results to GitHub
        uses: actions/upload-artifact@v2
        with:
          name: REST-Assured-results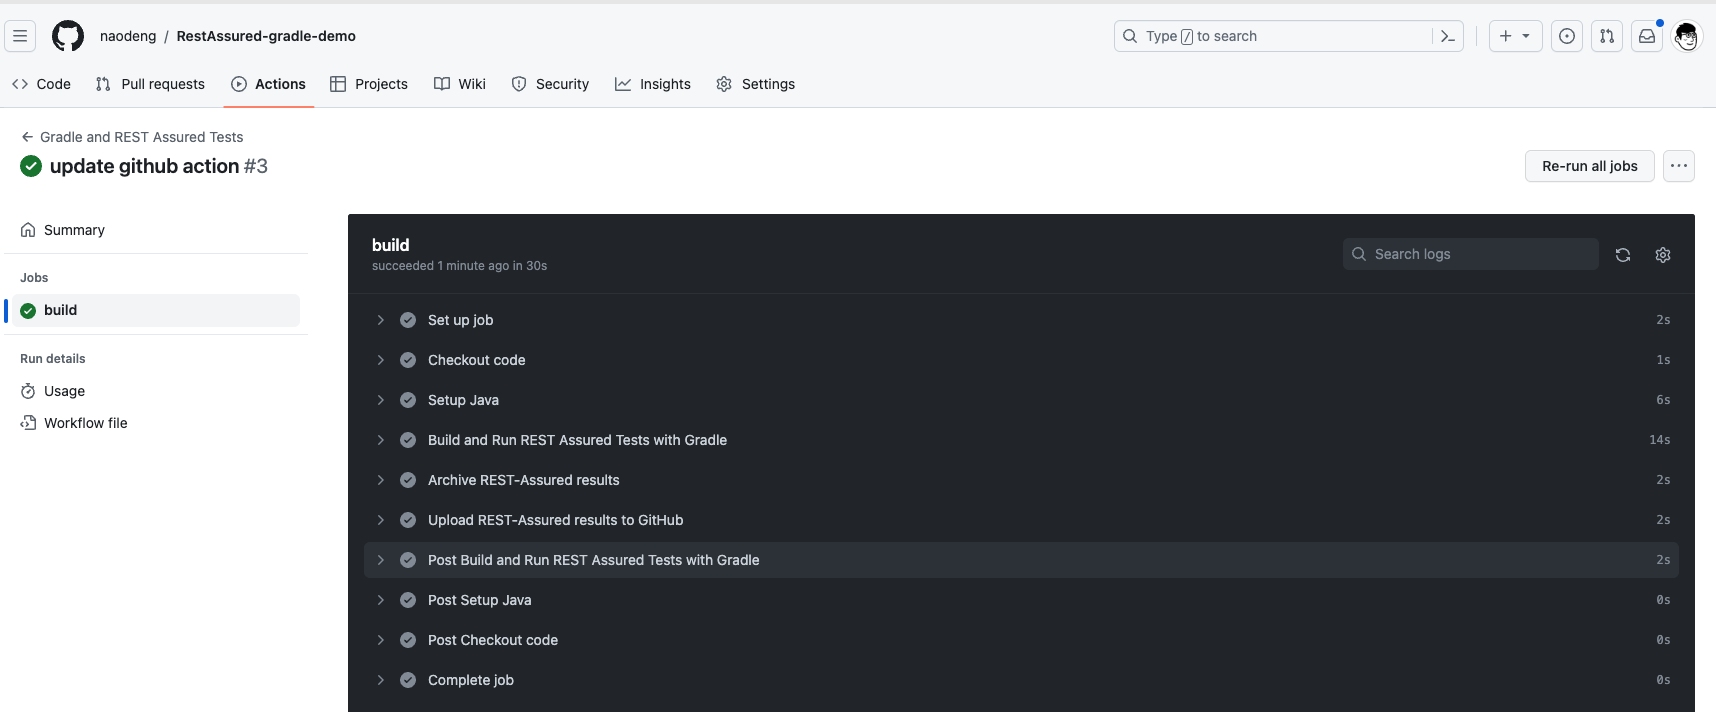
path: build/reports/tests/test- Commit the code: Add the gradle.yml file to your repository and commit.
- View test reports: In GitHub, navigate to your repository. Click the Actions tab at the top and then click the Gradle and REST Assured Tests workflow on the left. You should see the workflow running, wait for the execution to complete and you can view the results.
See the demo at https://github.com/Automation-Test-Starter/RestAssured-maven-demo
-
Create the .github/workflows directory: In your GitHub repository, create a directory called .github/workflows. This will be where the GitHub Actions workflow files will be stored.
-
Create a workflow file: Create a YAML-formatted workflow file, such as maven.yml, in the .github/workflows directory.
-
Edit the maven.yml file: Copy the following into the file
name: Maven and REST Assured Tests

on:
  push:
    branches: [ "main" ]
  pull_request:
    branches: [ "main" ]

jobs:
  Run-Rest-Assured-Tests:

    runs-on: ubuntu-latest

    steps:
    - uses: actions/checkout@v3
    - name: Set up JDK 17
      uses: actions/setup-java@v3
      with:
        java-version: '17'
        distribution: 'temurin'
        cache: maven

    - name: Build and Run REST Assured Tests with Maven
      run: mvn test

    - name: Archive REST-Assured results
      uses: actions/upload-artifact@v3
      with:
        name: REST-Assured-results
        path: target/surefire-reports

    - name: Upload REST-Assured results to GitHub
      uses: actions/upload-artifact@v3
      with:
        name: REST-Assured-results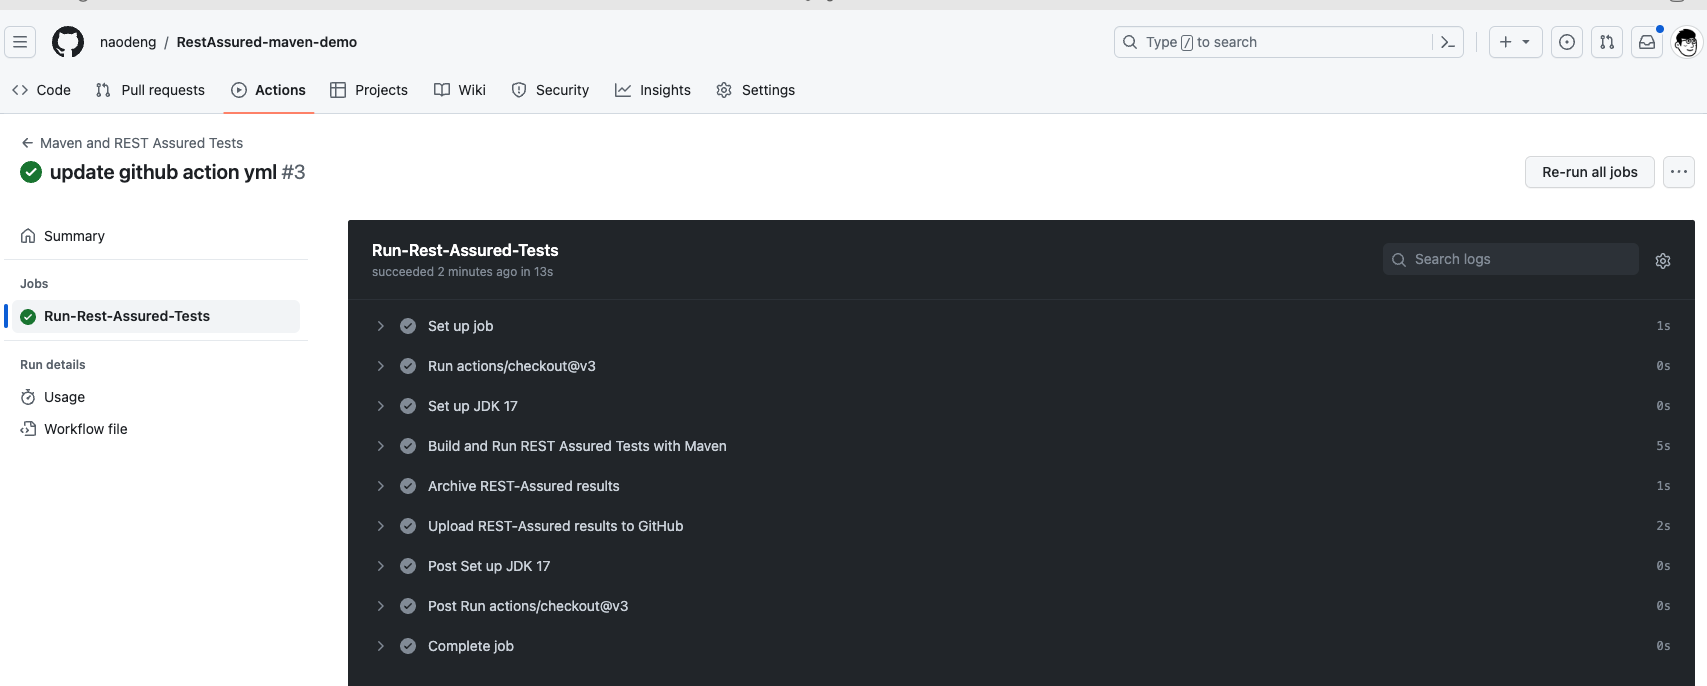
path: target/surefire-reports- Commit the code: Add the maven.yml file to the repository and commit.
- View test reports: In GitHub, navigate to your repository. Click the Actions tab at the top and then click the Maven and REST Assured Tests workflow on the left. You should see the workflow running, wait for the execution to complete and you can view the results.
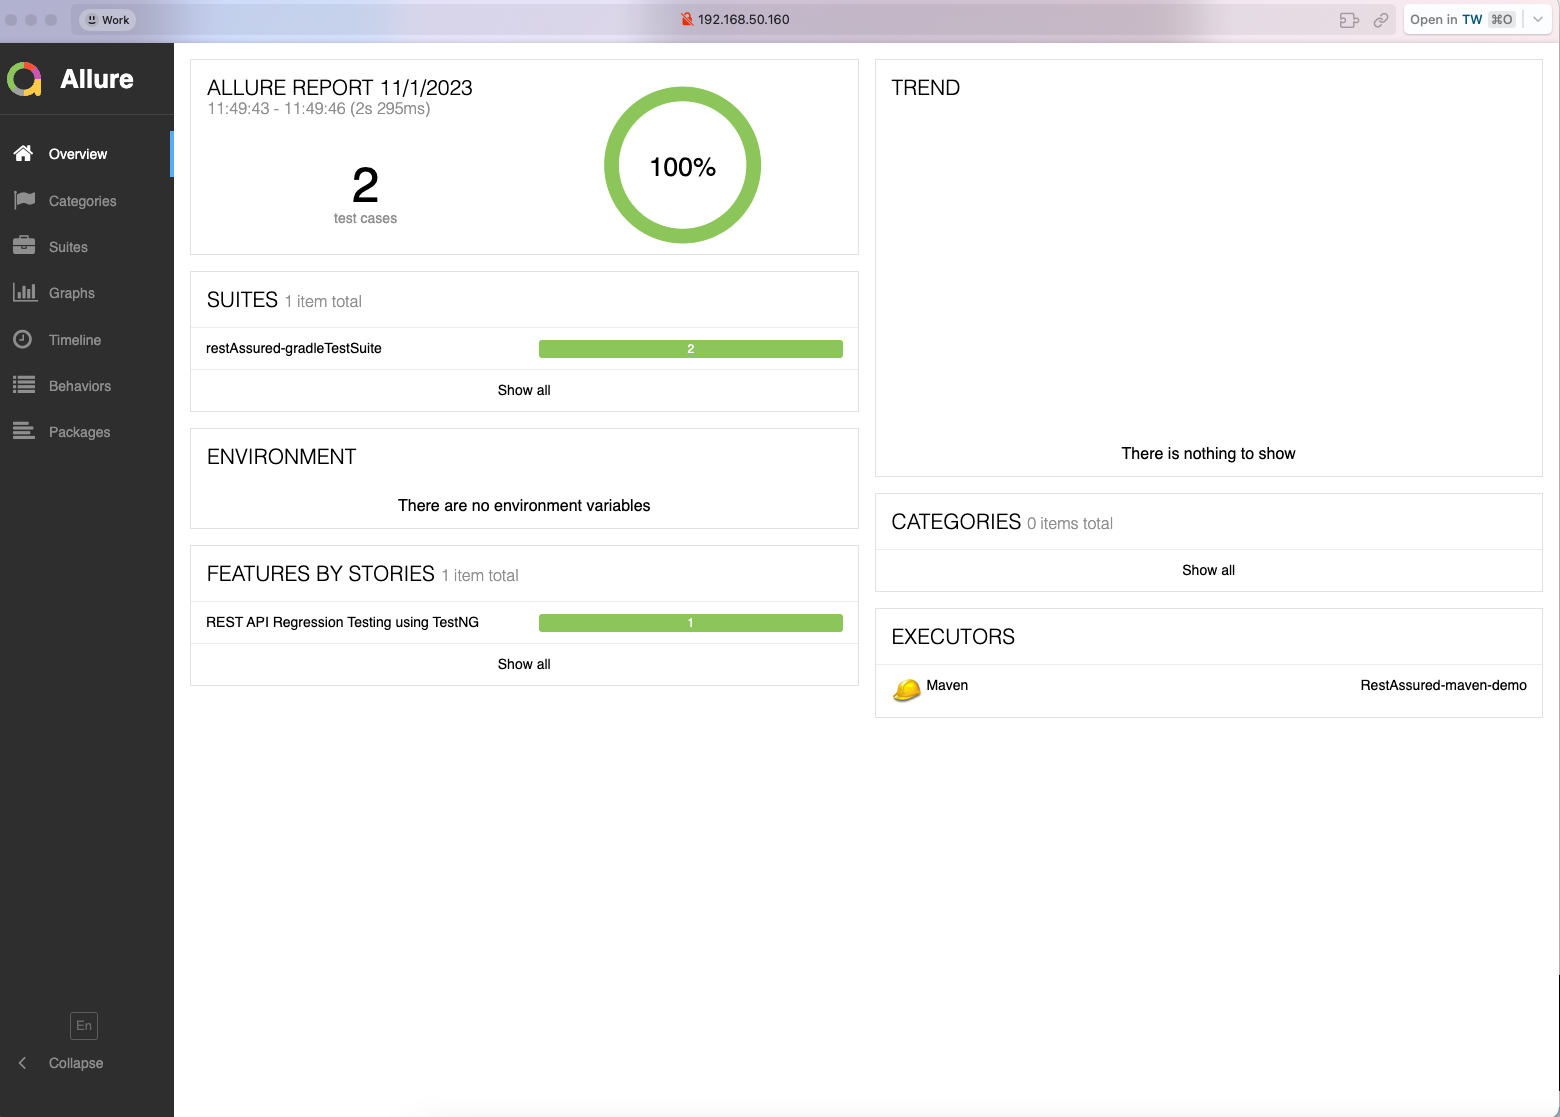
Allure is an open source testing framework for generating beautiful, interactive test reports. It can be used with a variety of testing frameworks (e.g. JUnit, TestNG, Cucumber, etc.) and a variety of programming languages (e.g. Java, Python, C#, etc.).
Allure test reports have the following features:
- Aesthetically pleasing and interactive: Allure test reports present test results in an aesthetically pleasing and interactive way, including graphs, charts and animations. This makes test reports easier to read and understand.
- Multi-language support: Allure supports multiple programming languages, so you can write tests in different languages and generate uniform test reports. Test case level details: Allure allows you to add detailed information to each test case, including descriptions, categories, labels, attachments, historical data, and more. This information helps provide a more complete picture of the test results.
- Historical Trend Analysis: Allure supports test historical trend analysis, which allows you to view the historical performance of test cases, identify issues and improve test quality.
- Categories and Tags: You can add categories and tags to test cases to better organize and categorize test cases. This makes reporting more readable.
- Attachments and Screenshots: Allure allows you to attach files, screenshots, and other attachments to better document information during testing.
- Integration: Allure seamlessly integrates with a variety of testing frameworks and build tools (e.g. Maven, Gradle), making it easy to generate reports.
- Open Source Community Support: Allure is an open source project with an active community that provides extensive documentation and support. This makes it the tool of choice for many automated testing teams.
The main goal of Allure test reports is to provide a clear, easy-to-read way to present test results to help development teams better understand the status and quality of their tests, quickly identify problems, and take the necessary action. Whether you are a developer, tester, or project manager, Allure test reports provide you with useful information to improve software quality and reliability.
Official Website: https://docs.qameta.io/allure/
- Add allure dependency in POM.xml
Copy the contents of the pom.xml file in this project
    <!-- https://mvnrepository.com/artifact/io.qameta.allure/allure-testng -->
    <dependency>
      <groupId>io.qameta.allure</groupId>
      <artifactId>allure-testng</artifactId>
      <version>2.24.0</version>
    </dependency>
    <!-- https://mvnrepository.com/artifact/io.qameta.allure/allure-rest-assured -->
    <dependency>
      <groupId>io.qameta.allure</groupId>
      <artifactId>allure-rest-assured</artifactId>
      <version>2.24.0</version>
</dependency>- Add allure plugin to POM.xml
      <plugin>
        <groupId>io.qameta.allure</groupId>
        <artifactId>allure-maven</artifactId>
        <version>2.12.0</version>
        <configuration>
          <resultsDirectory>../allure-results</resultsDirectory>
        </configuration>
</plugin>- Create test code for testing the REST API under src/test/java.
The following is an example of a demo, see the project for details: https://github.com/Automation-Test-Starter/RestAssured-maven-demo.
package com.example;
import io.qameta.allure.*;
import io.qameta.allure.restassured.AllureRestAssured;
import org.testng.annotations.Test;
import static io.restassured.RestAssured.given;
import static org.hamcrest.Matchers.equalTo;
@Epic("REST API Regression Testing using TestNG")
@Feature("Verify that the Get and POST API returns correctly")
public class TestDemo {
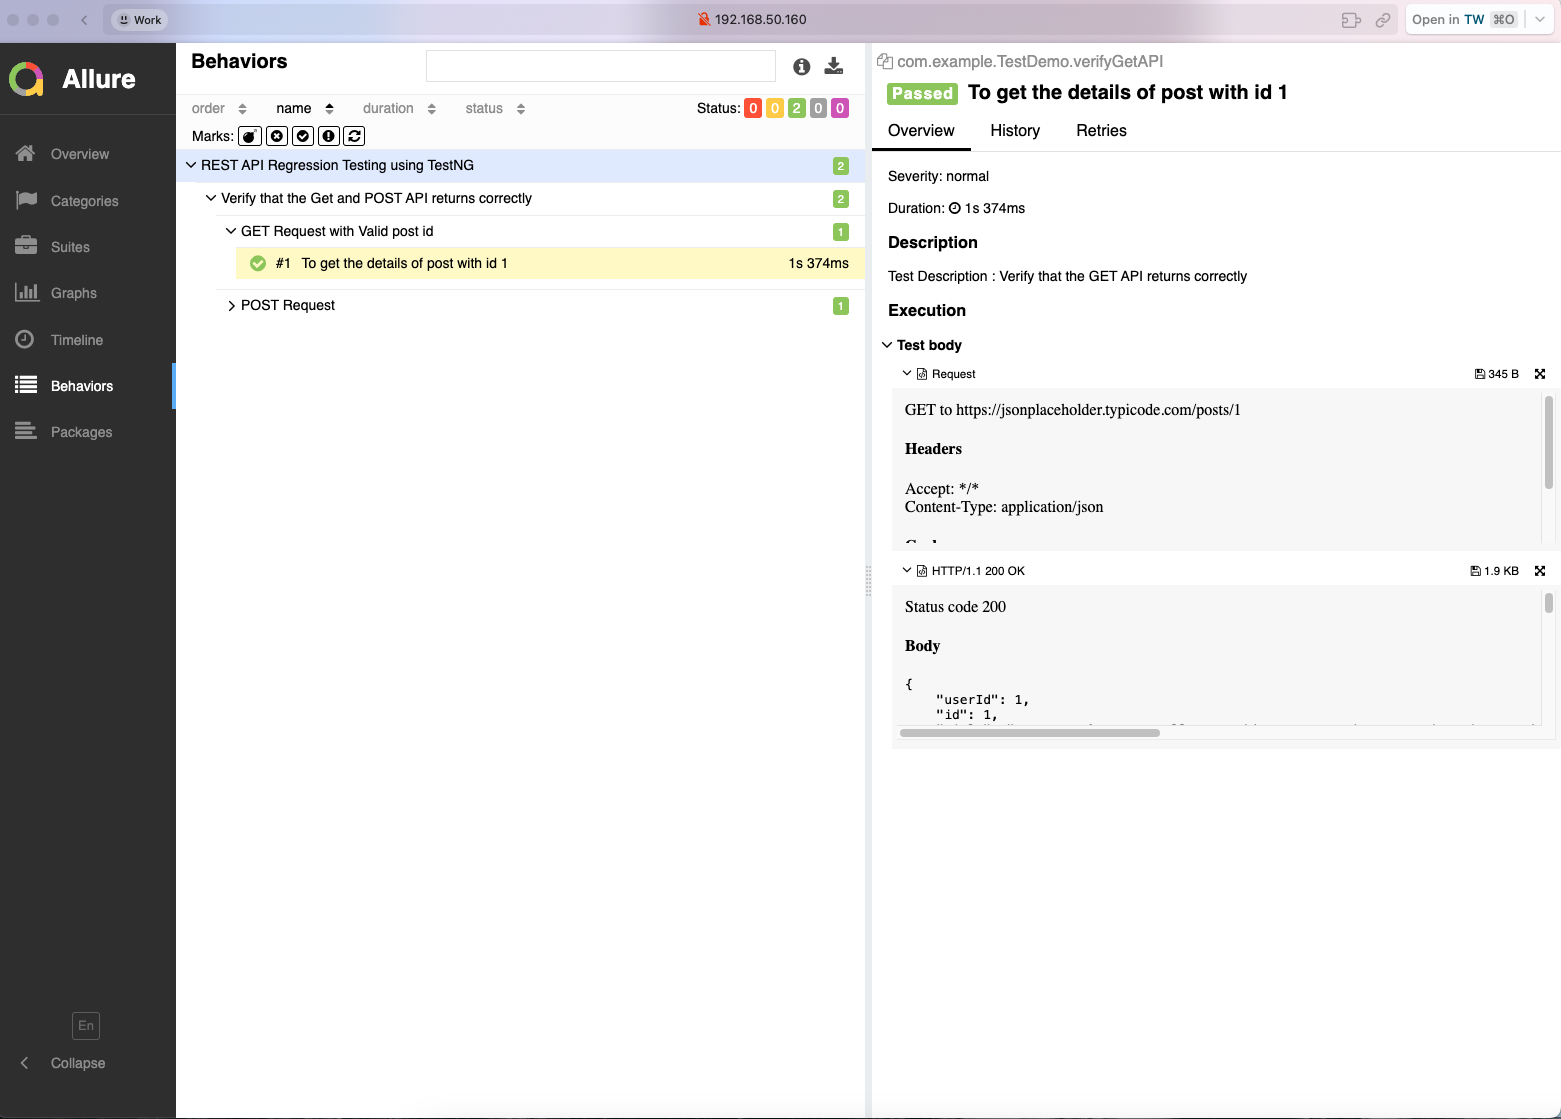
@Test(description = "To get the details of post with id 1", priority = 1)
@Story("GET Request with Valid post id")
@Severity(SeverityLevel.NORMAL)
@Description("Test Description : Verify that the GET API returns correctly")
public void verifyGetAPI() {
// Given
given()
.filter(new AllureRestAssured()) // Set up the AllureRestAssured filter to display request and response information in the test report
.baseUri("https://jsonplaceholder.typicode.com")
.header("Content-Type", "application/json")
// When
.when()
.get("/posts/1")
// Then
.then()
.statusCode(200)
// To verify correct value
.body("userId", equalTo(1))
.body("id", equalTo(1))
.body("title", equalTo("sunt aut facere repellat provident occaecati excepturi optio reprehenderit"))
.body("body", equalTo("quia et suscipit\nsuscipit recusandae consequuntur expedita et cum\nreprehenderit molestiae ut ut quas totam\nnostrum rerum est autem sunt rem eveniet architecto"));
}
@Test(description = "To create a new post", priority = 2)
@Story("POST Request")
@Severity(SeverityLevel.NORMAL)
@Description("Test Description : Verify that the post API returns correctly")
public void verifyPostAPI() { // Given
given()
.filter(new AllureRestAssured()) // Set up the AllureRestAssured filter to display request and response information in the test report
.baseUri("https://jsonplaceholder.typicode.com")
.header("Content-Type", "application/json")
// When
.when()
.body("{\"title\": \"foo\", \"body\": \"bar\", \"userId\": 1\n}")
.post("/posts")
// Then
.then()
.statusCode(201)
// To verify correct value
.body("userId", equalTo(1))
.body("id", equalTo(101))
.body("title", equalTo("foo"))
.body("body", equalTo("bar"));
}
}- Run tests and generate Allure reports
mvn clean testThe generated Allure report is in the allure-results file in the project root directory.
- Preview of the Allure Report
mvn allure:serveRunning the command automatically opens a browser to preview the Allure report.
- Add the allure plugin to your build.gradle.
Copy the contents of the build.gradle file in this project
id("io.qameta.allure") version "2.11.2"- Add allure dependency to build.gradle
Copy the contents of the build.gradle file in this project
    implementation 'io.qameta.allure:allure-testng:2.24.0' // Add allure report dependency
implementation 'io.qameta.allure:allure-rest-assured:2.24.0' // Add allure report dependency- Create test code for testing the REST API under src/test/java.
The following is an example of a demo, see the project for details: https://github.com/Automation-Test-Starter/RestAssured-gradle-demo.
package com.example;

import io.qameta.allure.*;
import io.qameta.allure.restassured.AllureRestAssured;
import org.testng.annotations.Test;
import static io.restassured.RestAssured.given;
import static org.hamcrest.Matchers.equalTo;

@Epic("REST API Regression Testing using TestNG")
@Feature("Verify that the Get and POST API returns correctly")
public class TestDemo {

    @Test(description = "To get the details of post with id 1", priority = 1)
    @Story("GET Request with Valid post id")
    @Severity(SeverityLevel.NORMAL)
    @Description("Test Description : Verify that the GET API returns correctly")
    public void verifyGetAPI() {

        // Given
        given()
                .filter(new AllureRestAssured()) // Set up the AllureRestAssured filter to display request and response information in the test report
                .baseUri("https://jsonplaceholder.typicode.com")
                .header("Content-Type", "application/json")

                // When
                .when()
                .get("/posts/1")

                // Then
                .then()
                .statusCode(200)
                // To verify correct value
                .body("userId", equalTo(1))
                .body("id", equalTo(1))
                .body("title", equalTo("sunt aut facere repellat provident occaecati excepturi optio reprehenderit"))
                .body("body", equalTo("quia et suscipit\nsuscipit recusandae consequuntur expedita et cum\nreprehenderit molestiae ut ut quas totam\nnostrum rerum est autem sunt rem eveniet architecto"));
    }

    @Test(description = "To create a new post", priority = 2)
    @Story("POST Request")
    @Severity(SeverityLevel.NORMAL)
    @Description("Test Description : Verify that the post API returns correctly")
    public void verifyPostAPI() {        // Given
        given()
                .filter(new AllureRestAssured())                 .filter(new AllureRestAssured()) // Set up the AllureRestAssured filter to display request and response information in the test report
                .baseUri("https://jsonplaceholder.typicode.com")
                .header("Content-Type", "application/json")

                // When
                .when()
                .body("{\"title\": \"foo\", \"body\": \"bar\", \"userId\": 1\n}")
                .post("/posts")

                // Then
                .then()
                .statusCode(201)
                // To verify correct value
                .body("userId", equalTo(1))
                .body("id", equalTo(101))
                .body("title", equalTo("foo"))
                .body("body", equalTo("bar"));
    }

}- Run the test and generate the Allure report
gradle clean test
``

> The generated Allure report is in the build/allure-results file in the project root directory.

- Preview the Allure report

```bash
gradle allureServe
Running the command automatically opens a browser to preview the Allure report.
-
Rest assured official documentation: https://rest-assured.io/
-
Rest assured official github:https://github.com/rest-assured/rest-assured
-
Rest assured official docs in Chinese: https://github.com/RookieTester/rest-assured-doc