Click to view.
- Clone the script files, and add them into your
$PATH. - Optionally edit
$CONF_DIRif for some reason you want your configuration files stored elsewhere than~/.secretary. - Set your chosen editor by running
secretary editor. - Setup a new secretary task file foo by running
secretary new. - Run your newly created task file by calling
secretary foo. - Verify your newly created proposed task operations script by viewing it in your specified editor (strongly recommended).
- Execute the task operations script by calling the script. Your files
will now be copied/moved as per your options. You can now manually
delete the operations script or call
secretary clean. To perform foo afresh at some later date, simply callsecretary fooagain.
This program allows you to define custom file operation patterns to automate repetitive file tasks, automatically sort and organise files, and extract useful files in an organised manner from various directories, repositories and devices.
This is more easily explained through the use of an example/use-case.
Suppose you wish to back up all your photos and other images from the
your Android phone, which you habitually connect to your computer. The
images are spread throughout several directories on your phone, and they
occur in multiple file formats (e.g. png, jpg, gif, etc.). Furthermore,
you want to retrieve them and keep them in some sort of order on your
file system for permanent archiving/storage. You are not interested in
having to manually start up some sort of graphical backup utility, nor
do you have the time to go through them all and put them into nicely
organised directories on your computer; you’re too busy, you want them
archived away and you’ll look through them properly when you have more time.
A sensible strategy, therefore, and one that can universally work well for storing all of your otherwise not easily classifiable files (that don’t relate to one specific project, where the obvious strategy is simply to keep them all in one project folder), is to simply store them via date order, in a hierarchical directory tree, e.g.:
2020/
2020/01-january/somefile.jpg
...
2020/06-june/someootherfile.jpg
202/06-june/anotherfile.org
Of course, individual projects can and should be stored in the relevant place within this filing strategy too:
2020/02-february/my-big-feb-work-project/somefile.odp
...
So storing under a date-tree strategy is an excellent long-term storage method; most people can normally identify roughly when you did activity xyz, or at the very least, can usually narrow it down to a particular year, and from there can find the relevant files. In any case, this is nice way of storing any type of file (photos, work files, programming projects).
And of course you can entirely separate and have several date-trees by general type, if you like e.g.
photos/2020/01-january
photos/2020/02-february
...
workfiles/2020/01-janauary
workfiles/2020/02-february
...
The overall notion for this strategy is courtesy of Mark Hurst’s excellent and concise book Bit Literacy.
Returning back to our example then, what we do is this:
- Connect the phone to the computer
- Issue one single command, whereupon:
- (a) All new image files of our specified type (png, jpg, gif, whatever)…
- (b) …In whichever search (source) directories…
- (c) …Are copied (or moved, or any file operation) to the computer…
- (d) …In the specified (desination) directory locations (could be one, could be many)…
- (e) …And are (optionally) further stored under a date-tree file structure
Backing up our photos to our computer is then just a case of one single command, as the program will automatically figure out which newer files need to be copied and where they are stored. We no longer need to fire up some graphical photo management app, or otherwise faff on figuring out what files to copy, we just issue a single command and a few seconds later it is all done and we can get on with what we were doing before.
This is just one example.
The point is, the program can operate upon any number of
source/destination directories in an operation script, and either copy
or move it as you wish (or indeed whatever commend you like that
operates on a <source> + <destination> pair and has a similar input format to
the standard cp and mv commands).
I currently use it on a regular basis for several standardised tasks:
- Copying/backing up photos from my phone (as per the example)
- Copying/backing up photos from my camera
- Copying/backing up
FITworkout files from my Garmin
I have also used it to mass-organise years worth of backed-up photos and other files, which were semi-organised but had various discrepancies/files in the wrong place (unsurprising after collecting/transferring files from computer to computer over 15+ years!). I ran the program, generated the operation script, spent a couple of minutes checking I was happy with the proposed script, then ran it. It took about five minutes to organise approximately 20,000 files.
Another example.
Suppose, for whatever reason, you want to extract all Python source
files, all README files, all jpg files, and all files of some
particular MIME type from some big project or recurrent source
destination. This is very easy to do with this program, and a lot more
convenient that having to manually type up a correct find command (and
especially so if this is something you’re going to do semi-regularly;
recurrent tasks lend themselves to this program).
Crucially, the program is also built around a safety-first principle: it
will generate an operation script, so you can look through this first
before executing it, ensuring that you’re not incorrectly
copying/clobbering files due to an error/typo on your part. (And
meanwhile, if you have known-good configurations that you want to
automate, use as cron jobs, etc., you can simply run the program with
the --auto option to entirely bypass this manual checking stage).
This program should work out of the box on any Linux system as it uses
standard utilities that every system should already have find, sort,
etc.
On first use, please run:
secretary editor
Then specify your chosen text editor. This can be anything you like in your
PATH, e.g. you can use kate or gedit if you prefer a graphical
editor rather than vim, nano or emacs. Just as long as the editor accepts
the first file argument as the file to automatically open (which should
be just about every decent editor on the planet).
The configuration file format is deliberately very simple. I recommend
you first familiarise yourself by experimenting with junk
files and copying them to /tmp or some other trash location. Since you
get a chance to look through any script before running it, you get ample
opportunity to avoid shooting yourself in the foot. Remember, this
program potentially allows you to mass file copy/move thousands of
files, so it pays to make certain you have entered the correct
information, and inspect the resultant script before running it.
You should *never* use the --auto option the first time you set up a new
task configuration. Only use this when you know everything is good and
it works as intended!
The configuration file consists of the following format:
<ext>|<mime>:<file extensions|mime types>:<source directory>:[DATE#]<destination
directory>:<file operation>#
Here, the | symbol indicates OR, and the square bracketed [DATE#]
indicates this is optional. Note that the line should be terminated with
a # symbol (and it is good practice the end the file with a # line
too).
An individual configuration file can have as many of these lines as you
like, so you can specify as many directory pairs as you need to
accomplish your task. End each line with the # symbol. End the file
with one additional line starting with #.
If you start with ext: then file extensions should follow. If you
start with mime: then a MIME globbing pattern should follow; but just use
the latter part returned after the colon from the file command.
e.g. to match bash shell scripts, you would use:
mime:Bourne:/foo:/bar:cp -nvp#
This line tells secretary that you want to copy all files that have MIME
type identification of bash shell scripts from /foo to /bar, and do so with
the command cp -nvp which tells Linux to (-n) avoid
clobbering/overwriting any destination file, (-v) be verbose about
each operation, and (-p) preserve all file ownership, permissions, and
timestamp information.
We know that we should use ‘Bourne’ here, since, for example:
$ file secretary.sh
secretary.sh: Bourne-Again shell script, ASCII text executable
(Using the glob ‘Bourne-Again’ (without the quotes) should also work.)
For binary files you would use ELF. Again, because:
$ file /bin/cp
/bin/cp: ELF 64-bit LSB shared object, x86-64, version 1 (SYSV), dynamically linked, interpreter /lib64/l, for GNU/Linux 3.2.0, BuildID[sha1]=9720743c3b9fbf61b6f38b7568c10a6dbed05a61, stripped
So you can always verify which glob pattern you should use by calling file on your
intended type of file you want to match by MIME type.
You can put as many different extensions/mime types in the second field as you want, separated with a single space. e.g.:
ext:txt jpg png gif nfo bin exe gz zip
Would match all files ending with the extension txt, png, gif,
nfo, bin, exe, gz and zip. Note that they are case
insensitive. So txt will match “TXT”, “txt”, or “tXt” perfectly fine.
Here is a real world example. This is the contents of my configuration
file that I use to effortlessly copy all of my latest photos (jpg
extension) and video files (mp4 extension) from my Android phone for
easy backup with one single command:
# Format:
#<File extension or MIME>:<file extensions or MIME types>:<Source directory>:<Destination directory>
ext:jpg mp4:/media/phone/Internal storage/Pictures/Telegram:DATE#/home/aren/Pictures:cp -nv --preserve=timestamps#
ext:jpg mp4:/media/phone/Internal storage/DCIM/Camera:DATE#/home/aren/Pictures:cp -nv --preserve=timestamps#
ext:png:/media/phone/Internal storage/Pictures/Screenshots:DATE#/home/aren/Pictures/screenshots:cp -nv --preserve=timestamps#
#
I execute this by simply typing secretary phone_photos.
This results in all of the photos or video files that have, for example, a July file timestamp being stored under
/home/aren/Pictures/2019/07-july
and likewise a screenshot taken in, say, November 2019 would end up under:
/home/aren/Pictures/screenshots/2019/11-november
This is because the <destination> path is prefixed with DATE#. Note
the lack of spaces. This instructs the program to create a date based
directory hierarchy of
<year>/<month>
under the destination directory. Simply omit DATE# if you simply want
the files stored in a flat structure under <directory>.
In this case, I preserve the timestamps (by using --preserve), but
choose not to preserve any ownership/permissions, as they I want them
created with my default umask settings when storing on my ext4 home
filesystem. cp -nv --preserve is therefore a good option to use when
backing up photos/media files and other things from your external camera, phone,
MP3 player, whatever.
As you can see, any line starting with a # is a comment as per
standard shell scripting convention.
Note also that you do not escape spaces in directory paths.
When the configuration is passed over to the program, it will
automatically ensure to call cp (or mv, depending) with the paths
inside quotation marks e.g.:
cp "/foo/bar/some directory with spaces/file.jpg" "/foo/bar/some directory with spaces/dest/" So just put your full path exactly how it already is.
Spaces should only occur in these places:
- Inside the file path, where appropriate (e.g. as in example above)
- As a separator between the different file extensions/mime types to
glob after either the
ext:ormime:prefix. - Within the file operation command(s) at the end of the line, e.g.
cp
-nv --preserve
.
The ext or mime is separated from first (source) path by a colon (:). The
destination path is separated from the source path by a colon (:).
DATE# is optional, and again should immediately prefix the destination
path without any spaces. Use this if you want to take advantage of
date-tree sub-directory organising. The file operation command is
separated from the destination path with a colon. The line should be
terminated with a final # immediately after the full command you wish
to execute (e.g. mv -bv#.
To create a new configuration file, simply run:
secretary new
Type 1 to create a new file, enter a filename without spaces or
extension (e.g. my-documents-sort)
Add your line(s), save and exit.
This will create my-documents-sort (or whatever) with the .secretary
extension inside $TASK_DIR (default: ~/.secretary/tasks).
You can of course manually use a text editor and save a file (no spaces
in filename) ending in the .secretary extension in the above directory
if you prefer.
Note that destination directories specified in the configuration file do not need to already exist. The program will create them as needed.
e.g.
ext:txt:/foo:/bar/some/really/long/path/dest:cp -nv --preserve=timestamps#
Will copy any *.txt files from /foo and put them in
/bar/some/really/long/path/dest
regardless of whether some or indeed any of those directories exist (assuming the program has the necessary access permissions to the destination, of course), since it will just create them as needed.
- Create at least one task configuration file as per above (i.e. use
secretary newafter callingsecretary editor, if first use). - Run your task file by calling
secretary <file>where <file> is the name of your task-file. Make sure to view it in an editor on first run to make everything is what you actually what to happen (the program will ask you whether you want to view it). - Assuming all is good, execute the operation script and your files will be copied/moved as per your options.
- If you cannot remember what files you have created/what they are
called, run
secretary lsto see a list of the currently stored task configuration files. - Run
secretary editto edit/modify an existing task script. - Your file operation scripts are stored under
$TASK_DIR(e.g. by default~/.secretary/fileops. You can always run them from this directory at a later time. Make sure you run your intended one. They are all time/date stamped in the filename. - Run
secretary cleanto delete all your existing file operations scripts (not your configuration files, don’t worry :-) ). Note that if you use--automode, the script is automatically deleted (since presumably you don’t want to run exactly the same file copying operation on exactly the same files all over again).
If you have a file in your current working directory with the extension
.secretary, you can also simply run it by calling secretary then
passing that filename as an argument. The program will always look in
the current directory first. E.g. if you have a task file called
copy-work-files.secretary in your current directory, you can simply
run secretary copy-work-files. It will work whether you explicitly
specify the .secretary file extension or not.
If it cannot find the specified file in the current directory, then it
looks into the stored $TASK_DIR, which by default is under
~/.secretary/tasks. Note that you can simply manually copy a task
configuration file into this directory if you create one elsewhere using
any text editor. Similarly, if you want to remove some task files from
the list, just delete/remove them from this directory.
After running your task file you will end up with a file stored under
your $FILE_OPS_DIR (by default, ~/.secretary/fileops) which you can
run. The script will tell you the exact command to type/copy paste to
run it. It will also ask you whether you want to view/edit the file
first. You should always do this on a first run to check everything
first before committing the script operations, which could be
potentially destructive if you have entered an incorrect path or chosen
some bad options (e.g. it is strongly recommend to use either -n or
-u options with the cp command to make sure you only either update
to a newer version or do not clobber/overwrite any existing files). Read
man cp and man mv and make sure you understand how to use these
commands properly first.
If you have task configuration files that are known-good and that you
regularly use, simply call them with --auto. e.g. I call my example
camera copying task file with:
secretary --auto camera_photos
And a few seconds later all the newest photos that don’t currently exist backed up on my computer have been copied. As mentioned before, you should not do this on first run as it doesn’t give you a chance to look through the proposed copying script first; it just creates and runs the operations script, and then deletes it after it is done.
Note that this is also the option you would use if you want to run secretary from within a cron job, as this runs it non-interactively.
Auto mode scripts will however generate a log file with all the results of the
file copying/moving/operations stored in a time-stamp named .log file
in $TASK_DIR which you can view if you wish to see the results of an
automatically run script.
Often, you only need to define a very simple configuration file in order for the program to be extremely useful. Although sometimes you may end up with say a dozen lines specifying many directory pairs, most likely you will have very simple definitions for routine use.
Below is the generated script from running the program on my connected camera. First, this is the saved configuration file; as you can see, it only actually contains one active line:
camera_photos.secretary:
# Format:
#<File extension or MIME>:<file extensions or MIME types>:<Source directory>:<Destination directory>
ext:jpg mp4:/media/camera/DCIM/102_PANA:DATE#/home/aren/Pictures:cp -nv --preserve=timestamps#
#
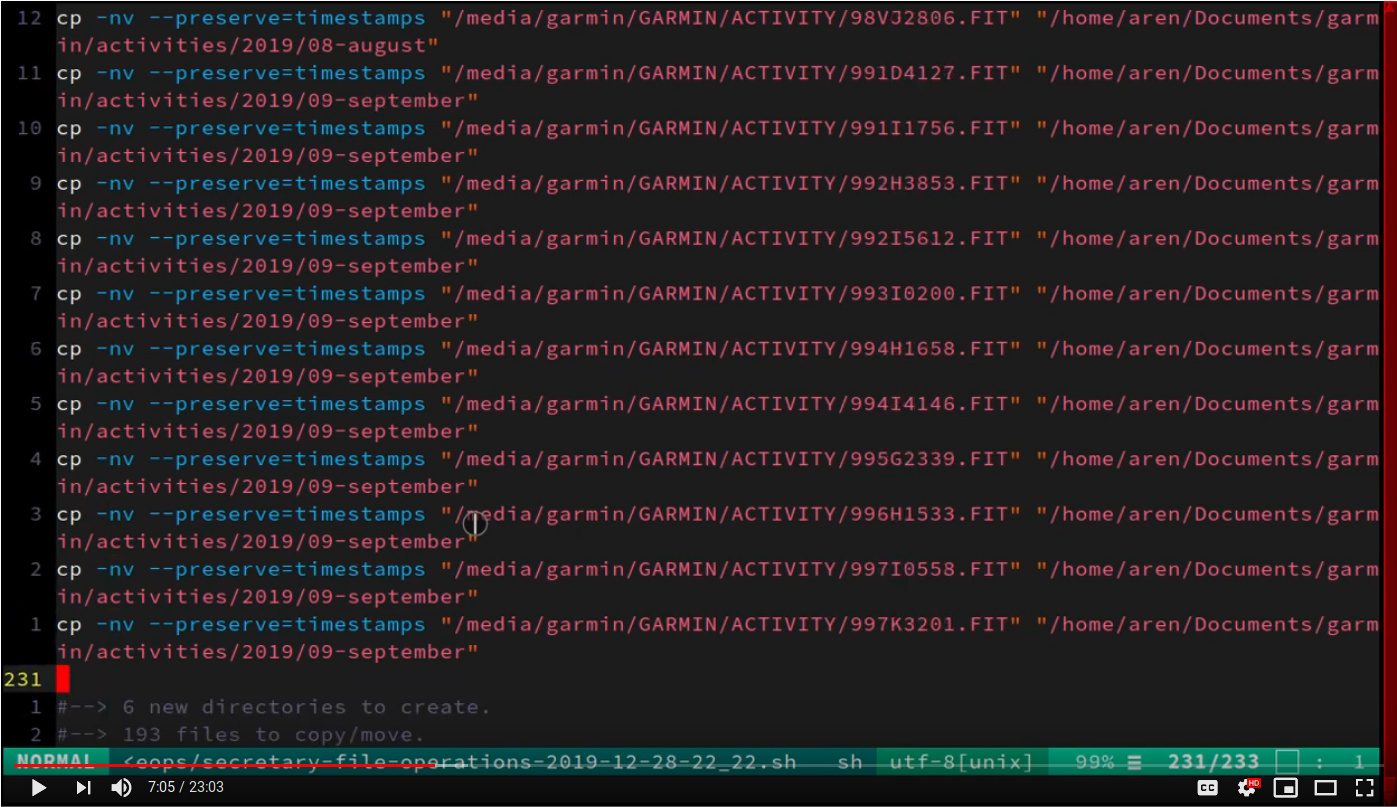
And after issuing secretary camera_photos, here is the resultant
executable script it generates for importing/backing-up the latest
tranche of photos from my camera:
secretary-file-operations-2019-11-03-16_23.sh:
#!/bin/bash
# ----------------------------------------------------------------------
# ----------------------------------------------------------------------
#
#           [ File operations list generated by secretary ]
#
# ======================================================================
# ======================================================================
#
# PLEASE look through this file carefully BEFORE running it
# to ensure that it will copy/move the correct files to
# your intended destination. Failure to do so may result in data
# loss if you have got your settings wrong in your config file...
#
# ------------------- YOU HAVE BEEN WARNED!!!!! ------------------------
#
# To execute this script, type:
#
# $ /home/aren/.secretary/fileops/secretary-file-operations-2019-11-03-16_23.sh
#
# If you select the "--auto" option you will bypass this step
# and have the operations script automatically performed. Use with care.
#
# ----------------------------------------------------------------------


# -> [ Create necessary directories for subsequent file copying/moving operations ]

mkdir -pv /home/aren/Pictures/2019/09-september
mkdir -pv /home/aren/Pictures/2019/11-november

# -> [ *.jpg files from /media/camera/DCIM/102_PANA to DATE directories ]

cp -nv --preserve=timestamps "/media/camera/DCIM/102_PANA/P1020390.JPG" "/home/aren/Pictures/2019/09-september"
cp -nv --preserve=timestamps "/media/camera/DCIM/102_PANA/P1020391.JPG" "/home/aren/Pictures/2019/11-november"
cp -nv --preserve=timestamps "/media/camera/DCIM/102_PANA/P1020392.JPG" "/home/aren/Pictures/2019/11-november"
cp -nv --preserve=timestamps "/media/camera/DCIM/102_PANA/P1020393.JPG" "/home/aren/Pictures/2019/11-november"
cp -nv --preserve=timestamps "/media/camera/DCIM/102_PANA/P1020394.JPG" "/home/aren/Pictures/2019/11-november"
cp -nv --preserve=timestamps "/media/camera/DCIM/102_PANA/P1020395.JPG" "/home/aren/Pictures/2019/11-november"
cp -nv --preserve=timestamps "/media/camera/DCIM/102_PANA/P1020396.JPG" "/home/aren/Pictures/2019/11-november"
cp -nv --preserve=timestamps "/media/camera/DCIM/102_PANA/P1020397.JPG" "/home/aren/Pictures/2019/11-november"
cp -nv --preserve=timestamps "/media/camera/DCIM/102_PANA/P1020398.JPG" "/home/aren/Pictures/2019/11-november"
cp -nv --preserve=timestamps "/media/camera/DCIM/102_PANA/P1020399.JPG" "/home/aren/Pictures/2019/11-november"
cp -nv --preserve=timestamps "/media/camera/DCIM/102_PANA/P1020400.JPG" "/home/aren/Pictures/2019/11-november"
cp -nv --preserve=timestamps "/media/camera/DCIM/102_PANA/P1020401.JPG" "/home/aren/Pictures/2019/11-november"
cp -nv --preserve=timestamps "/media/camera/DCIM/102_PANA/P1020402.JPG" "/home/aren/Pictures/2019/11-november"
cp -nv --preserve=timestamps "/media/camera/DCIM/102_PANA/P1020403.JPG" "/home/aren/Pictures/2019/11-november"
cp -nv --preserve=timestamps "/media/camera/DCIM/102_PANA/P1020406.JPG" "/home/aren/Pictures/2019/11-november"
cp -nv --preserve=timestamps "/media/camera/DCIM/102_PANA/P1020405.JPG" "/home/aren/Pictures/2019/11-november"
cp -nv --preserve=timestamps "/media/camera/DCIM/102_PANA/P1020407.JPG" "/home/aren/Pictures/2019/11-november"
cp -nv --preserve=timestamps "/media/camera/DCIM/102_PANA/P1020408.JPG" "/home/aren/Pictures/2019/11-november"
cp -nv --preserve=timestamps "/media/camera/DCIM/102_PANA/P1020409.JPG" "/home/aren/Pictures/2019/11-november"
cp -nv --preserve=timestamps "/media/camera/DCIM/102_PANA/P1020410.JPG" "/home/aren/Pictures/2019/11-november"
cp -nv --preserve=timestamps "/media/camera/DCIM/102_PANA/P1020411.JPG" "/home/aren/Pictures/2019/11-november"
cp -nv --preserve=timestamps "/media/camera/DCIM/102_PANA/P1020412.JPG" "/home/aren/Pictures/2019/11-november"
cp -nv --preserve=timestamps "/media/camera/DCIM/102_PANA/P1020413.JPG" "/home/aren/Pictures/2019/11-november"
cp -nv --preserve=timestamps "/media/camera/DCIM/102_PANA/P1020414.JPG" "/home/aren/Pictures/2019/11-november"
cp -nv --preserve=timestamps "/media/camera/DCIM/102_PANA/P1020415.JPG" "/home/aren/Pictures/2019/11-november"

# -> [ *.mp4 files from /media/camera/DCIM/102_PANA to DATE directories ]

cp -nv --preserve=timestamps "/media/camera/DCIM/102_PANA/P1020389.MP4" "/home/aren/Pictures/2019/09-september"

#--> 2 new directories to create.
#--> 26 files to copy/move.
You can see in this example the script was generated at 16:23 on the 3rd November, 2019.
Periodically, whenever I want to backup my photos from my camera, I
mount the camera then simply run secretary --auto camera_photos
and it will automatically generate and execute something similar to the
above, and the -n flag to cp ensures that only new files that are not
already present are copied. So all I need to do is run this one command
every so often, and my new photos are neatly copied and filed onto my
computer, all in a matter of seconds.
Call secretary lso to list all file operation scripts that secretary
has generated and saved under $FILE_OPS_DIR (default ~/.secretary/fileops).
You might find that over time your ~/.secretary/fileops directory is
getting filled up with old operations scripts (that you may have either
subsequently run, or perhaps you decided not to), and you want to get
rid of them. To save having to manually type rm -f
~/.secretary/fileops/*.secretary every time (and possibly risk a nasty
typo), just type secretary clean and it will do it for you.
It is strongly recommend you use either the -n or -u options with
cp or (particularly) mv, since that way you are not going to
accidentally trash something. You could also consider using -b for
(backup) if you are using mv with particularly important files, too.
(Though in most cases you are probably better of using cp, and
manually delete the source files if desired when dealing with really
critical stuff).
In fact I would strongly recommend familiarising yourself with the man
pages for both cp and mv if you do not already use their various
options on a regular basis. They have some surprisingly powerful options available.
I have tried to make protect the user from destructive accidental errors, which is why this program generates a script that you look through first, by default. That way you have only yourself to blame if you run it and something bad happens to your files - after all, you had a chance to look through everything in detail first before running it…
I keep repeating this because I do not want someone messaging me to
complain they have trashed their files. If that has happened, it is
because you have told the program that is what you want it to do. Inspect
the proposed script first. Do not run it if anything looks incorrect. Never use
--auto on a first-run scenario. Make sure it works reliably/as
intended first. If you’re copying 5000 files, then sure, you’ll have 5K
of lines to look through. Wouldn’t you rather spend a few minutes
browsing through first though? Those few minutes are going to be as
nothing compared to how long it would take you to manually sort this
number of files. Buyer beware, caveat emptor, don’t cry over spilt milk etc :-)
Only use --auto if you know what you’re doing. If you’re not sure
whether you do, then you probably don’t, and you probably shouldn’t…
This program in not intended as a substitute or replacement for a much
more robust and complex backup program like rsync. It serves a
different purpose. It is intended as a very handy
file copying/moving/processing automation tool for relatively
experienced/confident users who want a very convenient method of
handling file system operations on particular patterns of name files or
file types with an intended destination directory structure and/or date-tree
ordered directory hierarchy.
Obviously do not use this on some enterprise, production critical system without
extensively testing it first (and probably best not at all) :-). That said,
I have used it with great success to copy/reorganise approximately 20,000 files
all in one go on my home computer with my intended effect, but that is
still a very different matter compared to running it across a system
with say 1.5 million files in some arbitrarily complex manner. I use it
regularly and it works for me. Start small, experiment around with a few test
files first, then on files you’ve already safely backed up, then run the
scripts manually a couple of times, and only when all is still
good and you understand exactly what it is doing add any scripts as --auto
cron jobs or use them for huge file sets etc.
Q. “I don’t like the names of the directories generated by DATE#. I
want them to be 08-Aug or August etc.”
Then simply edit file-date-handler.sh. You will see the relevant
switch command there and it should be obvious which little bit of text
to edit.
Note, however, that it is recommended to keep the double digit numbered
prefix, as this ensures they appear in a nice order when you call ls
on a directory, e.g.:
$ ls -l
total 80
drwxrwxr-x 2 aren aren 20480 Oct 20 13:44 07-july
drwxrwxr-x 2 aren aren 20480 Oct 20 13:44 08-august
drwxrwxr-x 2 aren aren 20480 Oct 20 13:44 09-september
drwxrwxr-x 2 aren aren 12288 Dec 21 00:27 10-october
drwxrwxr-x 2 aren aren  4096 Dec 21 00:27 11-november
Without this, “august” would appear at the top, for example, and “november” would appear above “october”, etc. It is quite convenient having all of the directories appear in chronological order when listed in a file manager/at the command line.
secretary editor - specify your editor (default vi)
secretary new - create a new task configuration file
secretary ls - display existing task configuration file(s)
secretary lso - display existing generated file operation scripts
secretary clean - delete generated file operation scripts
secretary edit - edit any existing task configuration file(s)
secretary foo - run the task configuration file called foo
secretary --auto foo - automatically run foo non-interactively (for
cron and regular scripts etc.)
GPL license. Do what you want with it. If you extend it any cool way, e-mail me :-)
Add a collection of useful pre-defined templates for a variety of use cases/scenarios, to speed up the inputting of valid configurations.
I would also like to get round to adding either a GTK or QT front-end to it at some point to make it a bit more user friendly for novice/less experienced users.