Django is a high-level python web framework which encourages rapid development with clean and pragmatic
design. Its main motto says it all: "The Web Framework For The Perfectionists With Deadlines". Django follows
the MVT(model-view-template) architectural pattern. Like it is said on the Django website :
Ridiculously fast:
Django was designed to help developers take applications from concept to completion as quickly as possible.
Reassuringly secure:
Django takes security seriously and helps developers avoid many common security mistakes.
Exceedingly scalable:
Some of the busiest sites on the Web leverage Django’s ability to quickly and flexibly scale.
- Go to your command prompt, for windows: cmd
- pip install django (assuming you are a pythonista and you know how to use pip. If not,GOOGLE)
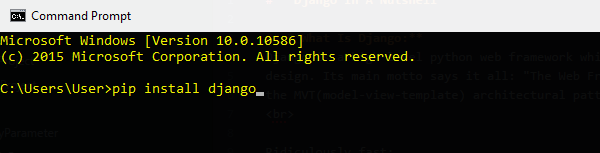
- Thats it!!

Here we will begin with the HelloProject project as our example.
type django-admin startproject HelloProject from cmd

This should create the HelloProject folder on your directory with the following structure:
[HelloProject]/
├── [HelloProject]/
│ ├── init.py
│ ├── settings.py
│ ├── urls.py
│ └── wsgi.py
└── manage.py
This is the basic django project skeleton. Here:
- init.py: this is the file that makes this folder a module(classic python!!)
- settings.py: like the name says this file has got the settings for your project
- urls.py: this file will contain all the mapping between the urls and the views.
- wsgi.py: this file is if you want to deploy the project over WSGI
A django project is nothing without its apps. Projects are basically the summation of
some apps which are again reusable in other projects. So lets create our HelloWorldApp:
type cd HelloProject to get inside the project. Here we will have the access to
manage.py. The manage.py is the local "django-admin" of the project or like its name
implies, is the manager of the project.
Type python manage.py startapp HelloWorldApp in the cmd

This should create a HelloWorldApp folder within our root project folder. Its skeleton should be like:
HelloWorldApp/
init.py
admin.py
models.py
tests.py
views.py
- init.py: you know what that is!
- admin.py: to register our models as the admin
- models.py: to create our models which are classes to be mapped with databases. Oh yea, django supports ORM(object-relation-mapping)
- tests.py: to test our application
- views.py: to create magic. I mean, to create the views which performs all the main application functions required for the website
Each app we create or add inside a project, we need to install it or make the app(s) the part
of the current project. To do so, go to the project folder HelloProject inside the root folder(from
now on it will we assumed that we are inside the root project folder) and open settings.py. Now all
we need to do is this:

Insert the app we want to add in the Installed_Apps list. Now we are ready to code.
For me the most important part of django is the view. Basically the view determines the behavior of the
web application. So inside the app folder HelloWorldApp the views.py can be found. We are going to write each
and every view in this file. Our first view(and only for this project) should look like this:

As you have guessed the views are basically functions or classes which takes in a request as parameter from the client-side
and formulates a response and sends that response back to the server, to the url address it is mapped with. The class HttpResponse
takes a response as a parameter. The function render is used to send templates and its contents, we will see that later(maybe).
So now that we have our required view, lets map it with a URL.
When we type a url in our browser django will find the matching view with it and that view is going to handle the request
and send a response. Inside our project folder we have seen the urls.py folder. We are going to need it now:

import the view you have created into the urls.py file and then inside the urlpatterns list insert our
first url as shown in the picture. Actually it is the second one as the first one is automated and for the admin interface(laters!).
The url function takes a regular expression as the first argument and the name of the view
as the second argument. We can name our url anything we want but the regex must be mainteined.
Alright we are ready to launch!!
Django comes with a built-in development server to be used during the development period of the web application.
We are going to need the help of our manager(manage.py) now. So go to the command prompt and do this:

The output should be like:

The migrations which the server just warned us about is related to models, we will get there later(maybe!).
Now go to your browser and hit localhost:8000/hello. You should get this:

Though this should run smoothly but then again if you get any errors, it might be cause of the port. The development server
of django uses 8000 as its default port. But you can always mention your own port number when the runserver command is applied.
All we need to do is do this:

or any other port you may prefer and hit it. Things should run smoothly.
- Before you can use the django-admin command like i have used, first you need to include it in the environmental variable. It should be located in whereeveryouhaveinstalledpython/python27/scripts
- If you are having trouble installing it by pip, try downloading it from the website