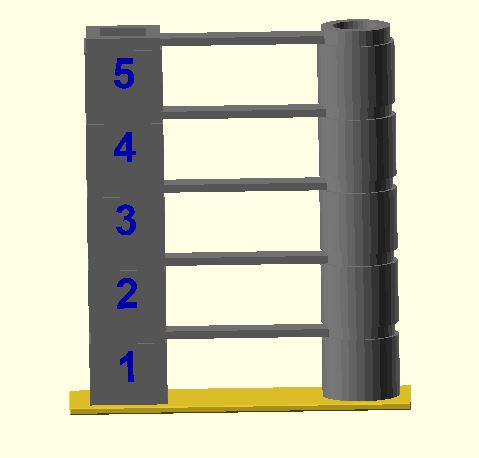
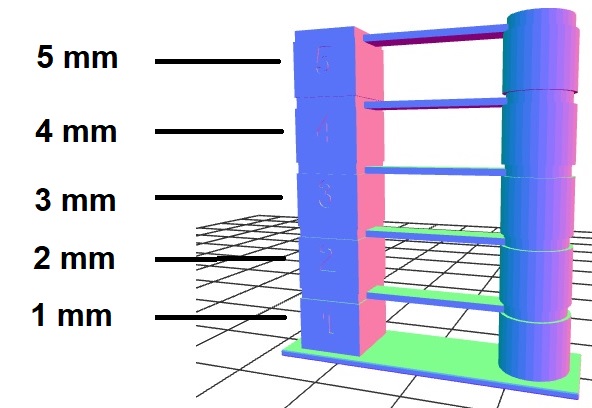
Retract Tower
Sample part to properly calibrate the retraction. It’s important to do this step after calibrating the filament temperature to ensure consistent results. The retraction values can change according to temperature so it’s better to do this at the end. To set the retract calibration you can use the associated Postprocessing script.
You need to calibrate first the speed extruder retraction. For the distance you can start from a medium value adapted to your extruder type :
- Bowden technology : Distance 1 - 5 mm, Speed 10-50 mm/s
- Direct drive : Distance 0.25 - 1 mm, Speed 5-25 mm/s
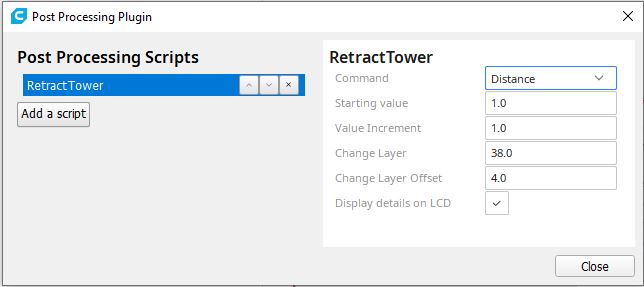
Then you can tune the retract distance.
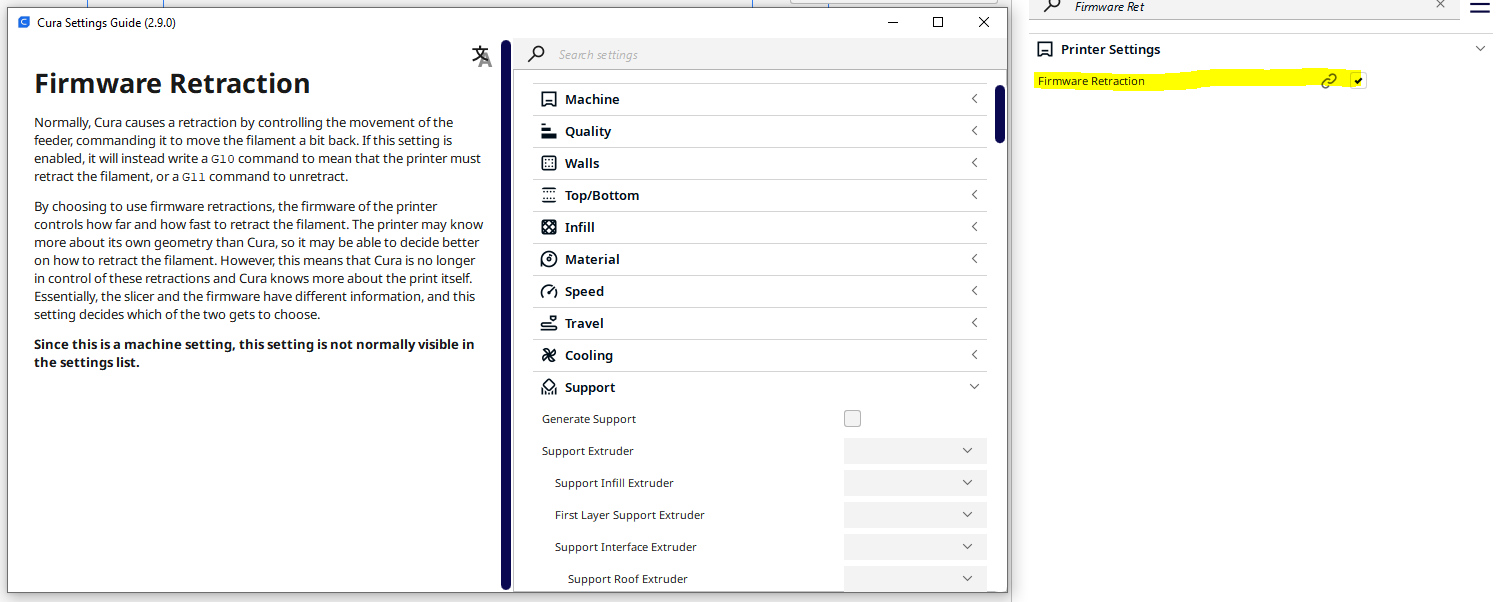
Take Care ! On some machines like for example the Ultimaker 2 the control of the Retraction is done with the codes G10 and G11 with the use of the parameters of the Firmware Retraction. In this case the script for setting the Retraction does not work because it is not possible to set the parameters from the GCode. If you want to use this test you have to disable the option to control the Retraction from the GCode.
Example of Gcode with G10/G11 control
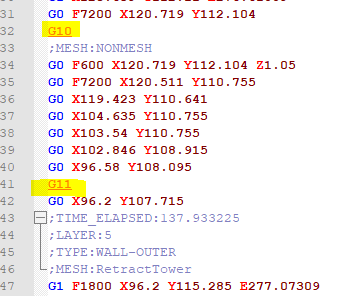
This problem may affect machines that have the Flavor GCode set to RepRap (Volumetric) or UltiGCode (Ultimaker2) or Bites from Bytes
Settings in the script for a Layer Height : 0.2
- Change Layer Offset : 4
- Change Layer : 38
- Display Details on LCD : True (Will add some M117 instructions to display the current modified value)
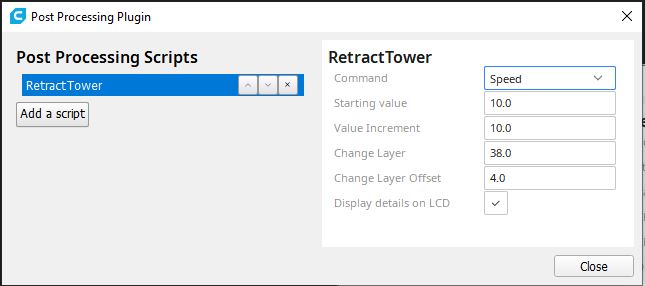
If your material is viscous, increasing the retraction speed will generally reduce the stringiness for short displacement by exerting a vacuum on the nozzle chamber. This reduced pressure keeps the material being drawn in, so it does not ooze out.
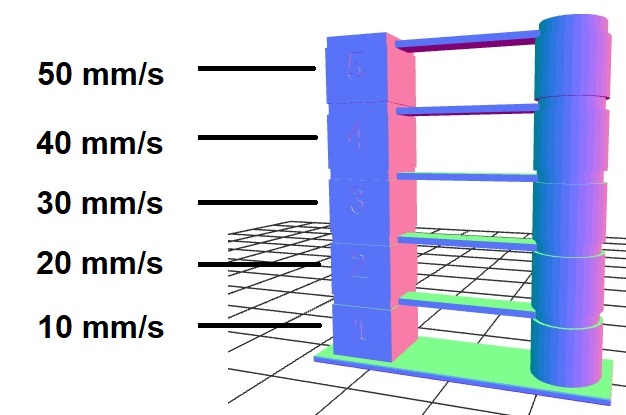
- Starting Value : 10 mm/s
- Value Increment : 10 mm/s
- Starting Value : 5 mm/s
- Value Increment : 5 mm/s
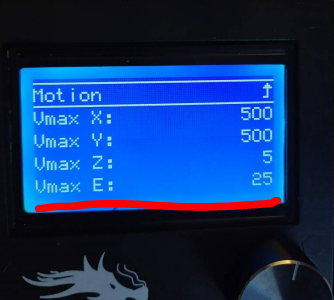
Be careful, the increase in speed must be consistent with the settings in the firmware of your printer. For example, on a machine such as the Ender3, the default value for the maximum speed of the extruder is set at 25mm/s (Vmax E Figure below). In these conditions it is useless to set the speed in Cura to 45mm/s. Change the maximum speed limit on the machine by setting a maximum value of about 50mm/s.
For long travels, increasing the Retraction distance keeps the material in a cooler place during travel, reducing material oozing from the nozzle. Be careful not to increase either the speed or distance values too much. If you increase the speed too much you risk wearing out your wire more during the retraction phases and by increasing the distance too much the hot wire will go up in your heating system at the risk of clogging your nozzle. Generally, values of 6 mm and 60 mm/s are extreme values of adjustment for a Bowden type extruder.
- Starting Value : 1 mm
- Value Increment : 1 mm
- Starting Value : 0.25 mm
- Value Increment : 0.25 mm
After the use of the Postprocessing Script, don't forget to remove it for your next project !
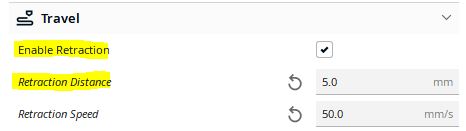
- Enable Retractions : True
- Retraction distance : ! Must be different from 0
- Nozzle Size : 0.4
- Layer Height : 0.2
- Initial Layer Height : 0.2
- Line Width : 0.4
- Wall Line Count : 3
- Top/Bottom Thickness : 0.8 mm
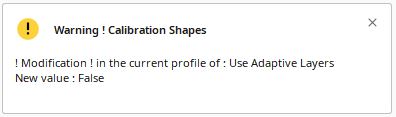
- Use Adaptive Layers : False
Printing Time = 50mn
To work the script must be able to modify the values of the retraction defined by Cura. So, you must therefore enable the Retractions in the Cura project and have set a Retraction distance greater than 0 mm.
After the use of the Postprocessing Script, don't forget to remove it for your next project !
Check that the option Use Adaptive Layer is not active. Since release 1.2.4 when a Tower Model is used, the plugin checks if this parameter is not set. If the parameter is set to true then the value is changed and a message is displayed :
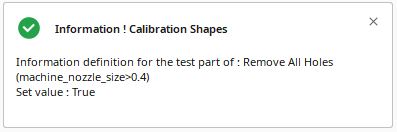
This model has been designed to be print with a 0.4 Nozzle. If you want to use the same model, with a bigger nozzle you can do it by activating the option "Remove all holes" in the Mesh Fixes section. As many users are opening an issue for that, since release 1.2.5 this parameter is automaticaly activated for this model if your nozzle size is bigger than 0.4mm . In this case an error message is displayed in Cura :
Once you have tested and found the right settings you can test your profile using the test part included in this plugin.